
Things to Consider Before Upgrading Your SSD
Upgrading the SSD (Solid State Drive) on your laptop can significantly improve its performance and storage capacity. However, before you dive into the process, there are a few things you need to consider to ensure a smooth and successful upgrade. Here are some important factors to keep in mind:
1. Compatibility: Not all laptops are designed to accommodate SSD upgrades. Before proceeding, check the specifications of your laptop model to determine if it supports SSD installation. Additionally, make sure to verify the form factor and interface (such as SATA or NVMe) supported by your laptop, as this will determine the type of SSD you can purchase.
2. Storage Needs: Assess your storage requirements to determine the appropriate capacity for your new SSD. Consider the files, documents, and applications you regularly use, as well as any future storage needs. It’s advisable to choose an SSD with a higher capacity than your current one to accommodate potential future needs.
3. Budget: Upgrading your SSD may require a financial investment. Consider your budget and search for SSD options that provide the best balance between cost and performance. Research reputable brands and read customer reviews to ensure you’re making a wise investment that aligns with your budget.
4. Data Backup: Before you begin the upgrade process, it’s crucial to back up all your data. This ensures that you won’t lose any important files during the installation. Backup options include cloud storage, external hard drives, or utilizing built-in backup software on your laptop.
5. Operating System Reinstallation: Upgrading your SSD might require reinstalling the operating system. Check if your laptop comes with a recovery partition or operating system installation files. If not, you may need to create a bootable USB drive with the operating system to facilitate the reinstallation process.
6. Technical Expertise: SSD upgrades typically require opening up your laptop and handling delicate components. If you’re not confident in your technical skills, it’s advisable to seek assistance from a professional. Inappropriate handling can lead to hardware damage or void the warranty on your laptop.
By considering these factors before upgrading your SSD, you can make informed decisions and ensure a successful upgrade process. Take the time to research and prepare adequately, and enjoy the improved speed, performance, and storage that an upgraded SSD can provide.
Tools You Will Need
Before you embark on upgrading your laptop’s SSD, it’s important to gather the necessary tools to ensure a smooth and efficient process. Here are the essential tools you will need:
1. Screwdriver: A Phillips or Torx screwdriver is typically required to remove the screws that secure the laptop’s back cover or SSD enclosure. Check your laptop’s user manual or search online for the specific screwdriver type needed for your laptop model.
2. Anti-static Wrist Strap: To prevent static electricity from damaging your laptop’s delicate components, it’s recommended to wear an anti-static wrist strap during the upgrade process. This strap helps dissipate static charges and protects the internal circuitry of your laptop.
3. External Hard Drive or USB Drive: Before upgrading your SSD, you should back up all your important data to an external hard drive or a USB drive. This ensures that your files are safe during the upgrade process and can be easily restored later.
4. Cleaning Supplies: It’s a good idea to have some cleaning supplies on hand to remove dust and debris from your laptop’s internals. A can of compressed air can be used to blow away dust from the components, while a soft microfiber cloth can help clean the laptop’s exterior.
5. SSD External Enclosure (Optional): If you want to transfer your data from the old SSD to the new one without the need for a separate backup device, an SSD external enclosure can be useful. This enclosure allows you to connect the old SSD externally and transfer the data to the new SSD using your laptop’s USB port.
6. Thermal Compound (Optional): If you’re familiar with laptop hardware and plan to replace the thermal compound that sits between the CPU and the heatsink, you’ll need thermal compound and an applicator tool. However, this step is not always necessary for a standard SSD upgrade.
Having these tools readily available will ensure that you’re well-equipped to handle the SSD upgrade process efficiently. Before starting, make sure you have all the necessary tools and follow proper safety precautions to protect your laptop and yourself from any potential harm.
Step 1: Backup Your Data
Before you begin the process of upgrading your laptop’s SSD, it is essential to back up all your data to ensure that no files or documents are lost during the upgrade process. Here are the steps to back up your data:
1. Determine your backup method: There are several options available for backing up your data. You can use cloud storage services like Google Drive, Dropbox, or Microsoft OneDrive. Alternatively, you can utilize an external hard drive or a USB drive. Choose the method that best suits your needs and preferences.
2. Organize and prioritize your files: Take some time to go through your files and determine which ones are essential and need to be backed up. This will help you prioritize and ensure that you have enough storage space for all the important files.
3. Sync your files to the cloud: If you prefer using cloud storage, install and set up the cloud storage service of your choice on your laptop. Then, sync your important files and folders to the cloud. This will ensure that your files are securely stored and accessible from any device.
4. Copy files to an external hard drive or USB drive: If you prefer using an external storage device, connect the device to your laptop. Then, manually copy and paste or drag and drop your important files and folders to the external storage device. Make sure to organize the files in a way that makes them easy to locate later.
5. Verify the backup: Once the backup process is complete, double-check that all your important files have been successfully backed up. Open a few files from the backup location to ensure that they are intact and can be accessed without any issues.
6. Update your backup regularly: It is good practice to regularly update your backup to ensure that you have the latest versions of your files. Set a reminder to schedule periodic backups or enable automatic backup features offered by cloud storage services.
By following these steps and backing up your data before proceeding with the SSD upgrade, you can have peace of mind knowing that your important files are secure. It’s always better to be safe than sorry, so take the extra time to protect your data before embarking on the upgrade process.
Step 2: Determine the SSD Type and Compatibility
Before purchasing a new SSD for your laptop upgrade, it is crucial to determine the type of SSD that is compatible with your laptop’s hardware. This step will help ensure a seamless installation process. Here are the steps to determine the SSD type and compatibility:
1. Check your laptop’s specifications: Review your laptop’s user manual or visit the manufacturer’s website to find information about the type of SSD supported by your laptop model. Look for details regarding the form factor, such as 2.5-inch or M.2, as well as the interface, such as SATA or NVMe.
2. Consider the form factor: The form factor refers to the physical size and shape of the SSD. Common form factors for laptops include 2.5-inch and M.2. Measure the space available in your laptop’s storage bay to determine the appropriate form factor for your new SSD.
3. Determine the interface: The interface determines how the SSD connects to the laptop’s motherboard. The most common interfaces for SSDs are SATA and NVMe. Verify which interface your laptop supports, as it will affect the speed and performance of the SSD.
4. Research compatible SSD options: Once you have gathered information on the form factor and interface, research different SSD options that are compatible with your laptop. Look for reputable brands and read customer reviews to find SSD models that offer a good balance between performance and price.
5. Consider the storage capacity: Determine the storage capacity you require for your new SSD. Consider the amount of data, files, and applications you use regularly, as well as any anticipated future storage needs. It’s generally recommended to choose an SSD with higher capacity than your current one to accommodate future requirements.
6. Check for additional factors: Take note of any additional factors that may affect compatibility, such as maximum supported SSD capacity, power requirements, and any specific installation procedures. Ensure you have all the necessary information before making a purchase.
7. Consult with experts if unsure: If you’re unsure about the compatibility of SSD options for your laptop or have specific requirements, consider consulting with experts or reaching out to the manufacturer’s customer support for guidance. They can provide you with precise information tailored to your laptop model.
By following these steps to determine the SSD type and compatibility with your laptop, you can choose the right SSD that fits seamlessly into your laptop’s hardware. Take your time to gather the necessary information and make an informed decision to ensure a successful SSD upgrade.
Step 3: Prepare the New SSD
Before installing the new SSD into your laptop, it’s important to properly prepare it to ensure a smooth and successful upgrade. Here are the steps to prepare the new SSD:
1. Remove packaging and handle with care: Begin by carefully removing the new SSD from its packaging. Avoid touching the connectors or exposing the SSD to static electricity. Handle the SSD by its edges to prevent any potential damage.
2. Review manufacturer’s instructions: Read the manufacturer’s instructions or user manual that accompanies the SSD. Familiarize yourself with any specific guidelines or precautions provided by the manufacturer to ensure proper handling and installation.
3. Check for firmware updates: Visit the manufacturer’s website to check for any available firmware updates for your new SSD. Updates can enhance performance, stability, and compatibility. Follow the instructions provided by the manufacturer to download and install any necessary updates onto the SSD.
4. Format the new SSD (if required): In some cases, new SSDs come unformatted and need to be initialized. Connect the SSD to your laptop via an external enclosure or USB adapter and use disk management tools or third-party software to format the SSD to your desired file system (such as NTFS or exFAT).
5. Set up partition(s) and allocate drive space: Once the SSD is formatted, you can create partitions and allocate drive space according to your preferences. You can choose to have a single partition or multiple partitions depending on your needs. This step can be performed during the installation process as well.
6. Label the SSD: To avoid confusion or mix-ups, label the SSD with a clear and identifiable name. This will make it easier to distinguish between multiple drives if you have more than one connected to your laptop.
7. Keep the SSD in a safe and static-free location: While you complete the remaining steps of the SSD upgrade process, keep the prepared SSD in a safe and static-free location. Protect it from any potential damage or exposure to static electricity, dust, or moisture.
By following these steps to prepare the new SSD, you’ll ensure that it is ready for installation without any complications. Taking the time to properly handle and set up the new SSD will contribute to a successful and seamless upgrade process for your laptop.
Step 4: Remove the Old SSD
In order to install the new SSD, you’ll need to remove the old SSD from your laptop. Follow these steps to safely remove the old SSD:
1. Power off your laptop: Shut down your laptop completely and disconnect it from any power source. This will ensure that you’re working with a safe and powered-off device during the SSD removal.
2. Locate the old SSD: Depending on your laptop model, the SSD may be located underneath the back cover or in a designated compartment. Consult your laptop’s user manual or manufacturer’s website to find the precise location of the SSD.
3. Remove the back cover or access panel: Use a screwdriver to remove the screws that secure the laptop’s back cover or access panel. Carefully place the screws in a safe location for reassembly later. Gently lift off the cover or panel to expose the internal components.
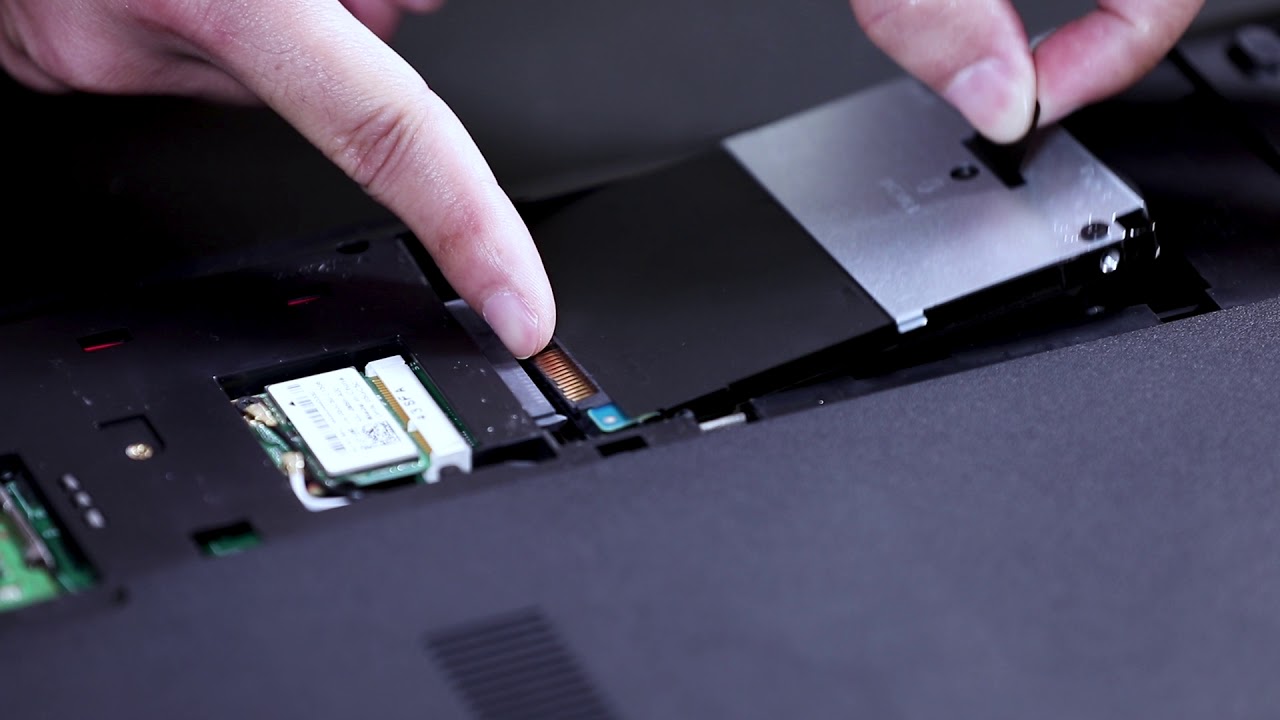
4. Locate the old SSD: Once the internal components are exposed, locate the old SSD. It will be connected to the motherboard via a cable or a socket depending on the laptop model.
5. Disconnect the cables: If the old SSD is connected through a cable, locate the cable and carefully detach it from the SSD. Take note of its connection type for reinstallation later. If the SSD is connected through a socket, gently push the release latch or unscrew the mounting bracket, then lift the SSD out of the socket.
6. Handle the old SSD with care: Just as you did during the preparation of the new SSD, handle the old SSD with care. Avoid touching the connectors and store it in an anti-static bag or in a safe location.
7. Clean the surrounding area (optional): While the old SSD is removed, take the opportunity to clean the area surrounding the storage bay. Use a can of compressed air to remove any dust or debris that may have accumulated. This will help keep the internal components clean and prevent potential issues in the future.
8. Replace the back cover or access panel: Once the old SSD is safely removed and the area is clean, carefully place the back cover or access panel back in its original position. Use the screws that were previously removed to secure it in place, ensuring a snug fit.
By following these steps, you’ll be able to remove the old SSD from your laptop and prepare it for the installation of the new SSD. Handle the components gently and store the old SSD in a safe location until you are ready to dispose of it properly or repurpose it for another use.
Step 5: Install the New SSD
With the old SSD safely removed, it’s time to install the new SSD into your laptop. Follow these steps to install the new SSD:
1. Power off your laptop: Before proceeding, ensure that your laptop is powered off and disconnected from any power source. This will prevent any potential damage to the laptop and the new SSD during the installation process.
2. Locate the SSD slot: Refer to your laptop’s user manual or manufacturer’s website to find the exact location of the SSD slot. Depending on your laptop model, the slot may be located on the motherboard or in a designated compartment.
3. Align the new SSD: Take the new SSD and align it properly with the slot or socket. Ensure that the connectors on the SSD match the corresponding connectors in the slot. Handle the SSD by its edges to prevent any damage to the components.
4. Insert and secure the new SSD: Gently push the new SSD into the slot until it is fully seated. If the SSD uses a socket, carefully push it in until the release latch engages or use the mounting bracket to secure it in place.
5. Connect the cables (if applicable): If the new SSD requires a cable connection, carefully attach the cable to the SSD. Make sure it is securely connected and aligned with the proper orientation, using gentle pressure to ensure a snug fit. Consult the user manual or manufacturer’s instructions for more specific guidance on cable connections.
6. Replace the back cover/access panel: If you had to remove the laptop’s back cover or access panel in the previous steps, now is the time to securely reattach it. Use the previously removed screws to fasten the cover or panel, ensuring it is snug and properly aligned.
7. Power on your laptop and BIOS configuration (if required): Once the new SSD is installed, power on your laptop. Depending on your laptop model, you may need to access the BIOS settings to ensure that the new SSD is properly recognized. Consult your laptop’s user manual or manufacturer’s website for specific instructions on configuring the BIOS settings if necessary.
8. Verify SSD detection: After your laptop has booted up, navigate to the operating system’s storage settings or disk management utility to verify that the new SSD is detected. Ensure that the storage capacity and other details match the specifications of the new SSD.
By following these steps, you’ll successfully install the new SSD into your laptop. Take your time during the installation process, handle the components gently, and ensure that all connections are secure. With the new SSD installed, you can now move on to the next step of restoring your data onto the upgraded storage device.
Step 6: Restore Your Data
After successfully installing the new SSD, it’s time to restore your data onto the upgraded storage device. Follow these steps to restore your data:
1. Connect your backup device: If you backed up your data to an external hard drive or USB drive, connect the device to your laptop. Ensure that the backup device is recognized by your operating system.
2. Choose your preferred data restoration method: Depending on your backup method, you have a few options for restoring your data:
- Cloud Storage: If you used cloud storage services like Google Drive or Dropbox, sign in to your account from your laptop and sync the files and folders you want to restore. Once synced, the files will be downloaded and restored onto your new SSD.
- External Hard Drive or USB Drive: If you backed up your data to an external storage device, use the file explorer on your laptop to locate the backup files and folders. Copy and paste or drag and drop the data to the appropriate locations on the new SSD.
- System Image: If you created a system image backup, you can use recovery software or built-in recovery tools to restore the entire system image onto the new SSD. This will replicate your previous setup, including the operating system, software, and files.
3. Restore your personal files: Depending on your specific needs, you may want to prioritize certain files or folders for restoration. Take the time to organize and restore your personal files, such as documents, photos, videos, and music, to their respective locations on the new SSD.
4. Reinstall applications and software: If you opted for a fresh installation of the operating system, you’ll need to reinstall your applications and software onto the new SSD. Use the original installation files or download the latest versions from official sources. Make sure to have any necessary license keys or activation codes handy.
5. Verify data integrity: After restoring your data, double-check the files and folders on the new SSD to ensure data integrity. Open a few files from different locations to confirm that they open without any issues or corruption. This step will help ensure that your data has been successfully restored.
6. Install necessary updates and drivers: After restoring your data, check for any available updates for your operating system, applications, and drivers. Download and install these updates to ensure that your system is up to date and functioning optimally with the new SSD.
By following these steps, you’ll be able to restore your data onto the new SSD, bringing back all your important files, applications, and settings. Take the time to organize and verify your restored data to ensure a smooth transition to the upgraded storage device.
Step 7: Configure the New SSD
Once you have restored your data onto the new SSD, it’s important to configure it for optimal performance and efficiency. Follow these steps to configure the new SSD:
1. Check the SSD’s recognized capacity: Open the operating system’s storage settings or disk management utility to verify that the new SSD is recognized and displaying the correct capacity. Ensure that the SSD is detected as the primary storage device.
2. Partition the new SSD (if required): If you didn’t partition the new SSD during the installation process or if you prefer a different partition setup, you can partition the SSD now. Use the operating system’s disk management utility or a third-party partitioning tool to create the desired partition scheme.
3. Format the partitions: Once the partitions are created, format them to your desired file system (such as NTFS or exFAT). If the partitions were automatically formatted during the restoration process, verify that they are correctly formatted and adjust if necessary.
4. Optimize SSD settings: Modern operating systems have specific settings designed to optimize SSD performance. Enable or verify that these settings are enabled on your system. These settings may include TRIM support, AHCI mode, and disabling disk defragmentation.
5. Adjust power settings: By default, power settings on laptops may be optimized for energy conservation rather than performance. Adjust the power settings to optimize the SSD performance by ensuring that the system isn’t putting it into a low-power state frequently.
6. Enable hardware encryption (if supported): If your new SSD supports hardware encryption, consider enabling it for enhanced data security. Check the manufacturer’s documentation or utility software to enable this feature, and follow the recommended procedures to set up and manage the encryption keys.
7. Set up automatic backups: Implement a regular backup schedule for your new SSD. Use built-in backup features or third-party backup software to automatically back up your data to an external storage device or cloud storage. This way, you can safeguard your important files and be prepared for unexpected data loss situations.
8. Test the new SSD’s performance: Once you have configured the new SSD, run benchmark tests or utilize diagnostic tools to verify its performance. This will help ensure that the SSD is operating optimally and provides the expected speed and efficiency improvements.
By following these steps to configure the new SSD, you’ll make the most out of its capabilities and enjoy improved performance and efficiency. Take the time to optimize settings and perform necessary adjustments to ensure a smooth and efficient experience with your upgraded storage device.
Step 8: Test and Verify the SSD Upgrade
After completing the installation and configuration process, it’s essential to test and verify the SSD upgrade to ensure that it is functioning properly. Follow these steps to test and verify the SSD upgrade:
1. Check the boot time: Restart your laptop and observe the boot time. A significant improvement in boot speed compared to the previous SSD or hard drive indicates a successful upgrade. Take note of the time it takes for your laptop to boot up.
2. Open applications and files: Launch various applications, such as web browsers, productivity software, and media players, to test their responsiveness. Open several files simultaneously to ensure the SSD handles multitasking efficiently. Check for any delays or lag in opening or accessing files.
3. Run a speed test: Utilize benchmarking software to test the read and write speeds of your new SSD. Compare the results with the manufacturer’s stated performance specifications to ensure that the SSD is performing as expected. Higher speeds indicate a successful upgrade.
4. Transfer large files: Copy large files or folders from one location to another on your SSD to test the transfer speed. Monitor the transfer progress and note any significant improvements in speed compared to the previous storage device.
5. Monitor temperature and noise: Keep an eye on the temperature and noise levels of your laptop during normal usage. SSDs generally produce less heat and operate silently compared to traditional hard drives. If you notice any excessive heat or noise, investigate further to ensure the SSD is functioning correctly.
6. Check for system stability: Ensure system stability by running stress tests or performance-intensive tasks for an extended period. Monitor for any crashes, system freezes, or unexpected errors. A stable system indicates that the SSD is compatible and working well with your laptop.
7. Verify data integrity: Double-check that all your data remains intact and accessible. Open various files of different file types and sizes to verify that they haven’t been corrupted during the upgrade process. Pay special attention to critical files, such as documents, photos, and videos.
8. Fine-tune settings (if necessary): If you encounter any issues or inconsistencies, review the settings and configurations of your laptop and the new SSD. Double-check that all the necessary optimizations and firmware updates are in place. Make adjustments as needed to ensure optimal performance and stability.
By following these steps to test and verify the SSD upgrade, you will be able to ensure that your laptop is running smoothly and that the new SSD is performing as expected. Conducting these tests and checks will give you confidence in the successful completion of the upgrade process and allow you to reap the benefits of improved speed, responsiveness, and storage capacity.
Troubleshooting Tips
While upgrading your SSD can result in improved performance and storage capacity, you may encounter some challenges along the way. Here are some troubleshooting tips to help you overcome common issues that may arise during the process:
1. Ensure proper connections: If your laptop fails to recognize the new SSD, double-check all cable connections and ensure they are securely plugged in. Consider reconnecting the cables or trying different SATA ports if applicable.
2. Check BIOS settings: Verify that the BIOS recognizes the new SSD as the primary storage device. Access the BIOS settings and ensure that the drive is properly detected and set as the boot device. Make any necessary changes to ensure the SSD is configured correctly.
3. Verify power supply: Inadequate power supply may cause issues with the SSD’s performance. Ensure that your laptop’s power supply is providing sufficient power to the new SSD. Consider using a higher output power adapter if necessary.
4. Update firmware: If you encounter compatibility or performance issues, check for firmware updates specific to your SSD model. Visit the manufacturer’s website and follow their instructions to download and install the latest firmware. Firmware updates often address performance improvements and bug fixes.
5. Check for driver updates: Ensure that you have the latest drivers for the SSD. Visit the manufacturer’s website or use the included software to check for any available driver updates. Updating drivers can resolve compatibility issues and optimize the performance of the SSD.
6. Verify TRIM support: TRIM is a command that helps optimize SSD performance and maintain its longevity. Ensure that TRIM is enabled on your operating system. If it’s disabled, follow the instructions provided by your operating system or SSD manufacturer to enable it.
7. Remove conflicting software: Conflicts with existing software or antivirus programs may cause issues with your new SSD. Temporarily disable antivirus software during the installation process or add appropriate exclusions for the SSD and related software. Uninstall any unnecessary software that may interfere with the SSD’s functionality.
8. Seek professional assistance: If you encounter persistent issues or are unsure about how to resolve them, consider seeking professional assistance. Consulting a specialist or contacting the SSD manufacturer’s customer support can provide you with expert guidance to troubleshoot and resolve complex issues.
By following these troubleshooting tips, you can address common challenges that may arise during the SSD upgrade process. Remember to remain patient and methodical when troubleshooting, and seek assistance when needed. With the right approach, you’ll ensure the successful installation and optimal performance of your new SSD.