Things to Consider Before Upgrading Your Laptop CPU
Upgrading your laptop’s CPU can significantly improve its performance and allow you to run more demanding applications. However, before delving into the process, there are several important factors to consider. Taking these into account will ensure a smooth and successful upgrade. Let’s explore these considerations in detail:
1. Compatibility and Requirements: Check your laptop’s specifications and determine the compatibility of the new CPU. Consider factors such as socket type, power requirements, and the motherboard’s support for the processor. Ensure that the new CPU is compatible with your laptop model.
2. Performance Gain: Evaluate the performance gain you can expect from the CPU upgrade. Research the benchmark scores and user reviews of the new processor to determine if it justifies the cost and effort involved.
3. Cooling System: Upgrading to a more powerful CPU may put additional strain on your laptop’s cooling system. Ensure that your laptop’s cooling system can handle the increased heat generated by the new processor. Consider upgrading the cooling system if necessary.
4. BIOS Compatibility: Check if your laptop’s BIOS supports the new CPU. Some older models may require a BIOS update to work with newer processors. Research your laptop manufacturer’s website or contact their support for information on BIOS compatibility.
5. Warranty Void: Upgrading your laptop’s CPU may void the warranty provided by the manufacturer. Consider the implications and decide if the potential performance gain outweighs the loss of warranty coverage. Proceed with caution if your laptop is still under warranty.
6. Price and Budget: Set a budget for the CPU upgrade. Compare prices from different sources and consider the cost-effectiveness of the upgrade. Factor in the cost of any additional tools or accessories that may be required.
7. Technical Expertise: Changing a laptop’s CPU requires technical knowledge and skills. If you are unfamiliar with hardware upgrades, consider seeking professional assistance. Improper installation can lead to damage and void warranties.
8. Research and Preparation: Before proceeding with the upgrade, conduct thorough research. Read guides, watch tutorials, and familiarize yourself with the specific steps involved in your laptop model. Prepare all the necessary tools and equipment for the upgrade process.
9. Time and Patience: Upgrading your laptop’s CPU is a time-consuming process. Set aside sufficient time to complete the upgrade without rushing. Exercise patience and follow the instructions carefully to avoid any mistakes or accidents.
10. Backup Your Data: Before starting the upgrade, backup all your important data. While the upgrade process itself does not typically affect data, accidents can happen. It’s better to be safe than sorry, so make sure you have a recent backup of your files.
By considering these factors, you will be better prepared to upgrade your laptop’s CPU. Now that you have a clear understanding of what to consider, let’s proceed to the step-by-step process of upgrading your laptop’s CPU.
Step 1: Check Compatibility and Requirements
Before you embark on upgrading your laptop’s CPU, it is crucial to ensure compatibility between the new processor and your laptop. Here are the essential steps to follow:
1. Identify Your Laptop’s Specifications: Start by gathering information about your laptop’s model, make, and motherboard. Look for the specific socket type and chipset that your laptop supports. This information will guide you in selecting a compatible CPU.
2. Research Compatible Processors: With the knowledge of your laptop’s specifications, research the range of CPUs that are compatible with your laptop. Check the manufacturer’s website or online resources to find a list of supported processors. Pay attention to the socket type and power requirements.
3. Consider Your Performance Needs: Assess your performance needs and objectives. Determine if the processor you are considering will meet your requirements. Check benchmark scores and user reviews to gauge the performance gains you can expect from upgrading to different CPUs.
4. Power and Thermal Considerations: Keep in mind that a more powerful CPU may require more power and generate more heat. Verify that your laptop’s power supply can handle the increased load and that the cooling system is sufficient to dissipate the additional heat. Upgrading the cooling system may be necessary in some cases.
5. BIOS Compatibility: Confirm if your laptop’s BIOS supports the new processor. Sometimes, a BIOS update may be required to enable compatibility with newer CPUs. Consult the laptop manufacturer’s website or support documentation for information on BIOS updates and compatibility.
6. Budget and Cost: Consider your budget for the CPU upgrade. Research the prices of the compatible processors and evaluate their cost-effectiveness. Take into account any additional tools or accessories that may be required for the upgrade process.
7. Warranty Implications: Understand that upgrading your laptop’s CPU may void the manufacturer’s warranty. Evaluate the potential performance gains against the loss of warranty coverage. If your laptop is still under warranty, consider if the upgrade is worth the risk.
By carefully checking compatibility and requirements, you will ensure a smooth and successful CPU upgrade for your laptop. Once you have confirmed compatibility, you can proceed to gather the necessary tools for the upgrade. Remember to exercise caution and follow proper procedures throughout the process to avoid any damage to your laptop.
Step 2: Gather Necessary Tools
Before you can begin upgrading your laptop’s CPU, it is essential to gather all the necessary tools and equipment. Having the right tools on hand will make the process smoother and ensure that you can perform the upgrade correctly. Here is a list of tools you will need:
1. Screwdriver: A small Phillips-head screwdriver is typically required to remove the screws that secure the laptop’s casing and hold the CPU heatsink in place. Ensure that the screwdriver is the appropriate size for your laptop’s screws.
2. Thermal Paste and Isopropyl Alcohol: You will need thermal paste to apply onto the new CPU to facilitate proper heat transfer. Isopropyl alcohol is necessary for cleaning the CPU and heatsink surfaces before applying the thermal paste.
3. Antistatic Wrist Strap: An antistatic wrist strap is essential to prevent the buildup and discharge of static electricity, which can damage sensitive electronic components. Use the wrist strap to ground yourself before handling any internal components.
4. Cotton Swabs or Microfiber Cloth: These are necessary for cleaning the CPU and heatsink surfaces. Ensure they are lint-free and won’t leave any residue behind.
5. Thermal Paste Spreader or Plastic Card: A thermal paste spreader or a plastic card can help evenly spread the thermal paste on the CPU surface. This ensures optimal heat transfer between the CPU and the heatsink.
6. Tweezers or Precision Pliers: Tweezers or precision pliers may be required to handle small screws or delicate connectors during the disassembly and reassembly process.
7. Cooling Pad or Stand: Using a cooling pad or stand can help improve airflow and dissipate heat more efficiently during the upgrade process. It is especially useful if you anticipate the laptop to run at higher temperatures during the CPU installation.
8. Laptop Service Manual: It is recommended to have the service manual or user guide for your laptop model on hand. This will provide detailed instructions specific to your laptop and guide you through the disassembly and reassembly process.
9. Container or Organizer: Use a container or organizer to keep track of all screws and smaller components you remove during the upgrade process. This helps prevent losing or mixing up parts, ensuring an organized and successful upgrade.
10. Workspace and Lighting: Set up a clean and well-lit workspace to comfortably perform the upgrade. A clutter-free environment minimizes the risk of misplacing or losing small components, while good lighting ensures you can see clearly during the process.
By gathering these tools and preparing your workspace, you will be well-prepared to embark on the laptop CPU upgrade process. Make sure you have all the necessary tools easily accessible before proceeding to disassemble your laptop and remove the old CPU.
Step 3: Prepare Your Workspace
Before diving into the laptop CPU upgrade process, it is crucial to prepare your workspace to ensure a smooth and organized experience. By setting up an optimal workspace, you can minimize the risk of damaging components and streamline the upgrade process. Here are the key steps to follow:
1. Find a Clean and Well-lit Area: Choose a clean and well-lit area to work on your laptop upgrade. A clutter-free and well-illuminated workspace will make it easier to see small components, avoid accidents, and maintain focus throughout the process.
2. Use a Static-free Surface: Opt for a static-free surface, such as an antistatic mat or a non-static table cover. These surfaces help prevent the buildup and discharge of static electricity, which can damage sensitive electronic components.
3. Ground Yourself: To prevent static electricity discharge, wear an antistatic wrist strap and attach it to a grounded metal object. This ensures that any static charge is safely discharged, protecting your laptop’s internal components from potential damage.
4. Organize Your Tools and Components: Before starting the upgrade, arrange all your tools, components, and screws in an organized manner. Use containers or small trays to keep them separated and avoid misplacing or losing any critical components during the process.
5. Have the Laptop Service Manual: Consult the laptop service manual or user guide specific to your laptop model. It provides detailed instructions on disassembly and reassembly, ensuring that you follow the correct steps and avoid any unnecessary complications.
6. Keep a Notepad or Device for Note-taking: Have a notepad or device handy for taking notes during the process. Jotting down the steps you take and any important details can be valuable for reference if you encounter any issues or need to backtrack during the upgrade.
7. Take Precautions for Personal Safety: Ensure your personal safety during the laptop upgrade by avoiding loose clothing, wearing safety glasses, and keeping long hair tied back. Taking these precautions will help prevent accidents or potential injury during the process.
8. Disconnect the Power and Remove the Battery: To avoid any potential electrical hazards or accidental startup during the upgrade process, make sure to disconnect the power cord and remove the laptop’s battery before you begin.
9. Keep Your Workspace Tidy: As you progress through the upgrade process, keep your workspace organized and tidy. Dispose of any packaging materials or unwanted components immediately to avoid confusion and maintain a clear workspace.
By following these steps to prepare your workspace, you can approach the laptop CPU upgrade process with confidence and efficiency. Once your workspace is organized and ready, you can move on to the next step of backing up your data before starting the disassembly process.
Step 4: Back Up Your Data
Before you proceed with the laptop CPU upgrade, it is essential to back up all your important data. While the upgrade process itself generally does not affect data, accidents can happen, and it’s better to be safe than sorry. Follow these steps to ensure your data is protected:
1. Identify and Prioritize Important Data: Take the time to identify the critical data on your laptop. This may include documents, photos, videos, music, and any other files that you cannot afford to lose. Prioritize backing up these files first.
2. Choose a Backup Method: Determine the most suitable backup method for your needs. You can opt for cloud storage services, external hard drives, USB flash drives, or even network-attached storage (NAS) devices. Choose a method that is convenient and ensures sufficient storage capacity.
3. Perform a Full System Backup (Optional): If you want to be extra cautious, consider performing a full system backup. This includes creating an image or clone of your entire hard drive or SSD. This way, you can easily restore your laptop to its previous state, including the operating system and installed applications.
4. Use Backup Software: Utilize backup software for a more streamlined and automated process. There are several reliable backup software options available that can help you schedule regular backups and ensure that your important data is consistently protected.
5. Transfer or Sync Files: Depending on the backup method you choose, transfer or sync your important files to the designated backup storage. Follow the instructions provided with the backup tool or service you are using to ensure a seamless and accurate transfer of your data.
6. Verify the Backup: After the backup process is complete, take the time to verify that your data has been successfully backed up. Open a sample of the backed-up files to ensure they are accessible and intact. This step provides peace of mind and confirmation that your data is indeed protected.
7. Store the Backup Safely: Properly store your backup storage device in a safe and secure location. Consider keeping the backup device separate from your laptop to protect it from potential physical damage or theft. Additionally, you may want to consider encrypting your backup files for added security.
8. Schedule Regular Backups: To maintain continuity and ensure that your data remains protected, establish a regular backup schedule. Set reminders or use backup software to automate the process and ensure that your important files are consistently backed up.
By backing up your data prior to the laptop CPU upgrade, you safeguard against potential data loss and ensure that your important files are easily recoverable. With your data securely backed up, you can proceed to the next step of disassembling your laptop in preparation for the CPU upgrade.
Step 5: Disassemble Your Laptop
Disassembling your laptop is a critical step in the CPU upgrade process. Carefully follow these steps to ensure a successful disassembly:
1. Refer to the Service Manual: Consult your laptop’s service manual or user guide for specific instructions on how to disassemble your model. Each laptop may have different disassembly steps, so it is important to follow the manufacturer’s recommended procedure.
2. Power Off and Disconnect: Turn off your laptop and disconnect it from any power sources. This includes unplugging the power cord, removing the battery, and disconnecting any external devices.
3. Ground Yourself: Wear an antistatic wrist strap and attach it to a grounded metal object to prevent the discharge of static electricity. This will help protect the internal components of your laptop from potential damage.
4. Remove the Bottom Panel or Access Cover: Locate and remove the screws securing the bottom panel or access cover of your laptop. Keep track of the screws and place them in a container for safekeeping.
5. Disconnect Peripherals: Carefully disconnect any peripheral devices connected to your laptop, including USB cables, audio cables, and any other external connections.
6. Remove Other Components: Follow the service manual instructions to remove any necessary components such as the RAM, hard drive, or optical drive. Take note of their positions and connection methods for later reassembly.
7. Remove the CPU Heatsink: Locate the CPU heatsink, which is typically attached to the motherboard. Remove the screws or clips holding the heatsink in place. Gently twist the CPU heatsink to detach it from the CPU.
8. Unlock and Remove the Old CPU: Locate the CPU socket and carefully unlock it using the latch or lever. Lift the CPU out of the socket, ensuring not to touch the delicate pins on the underside. Place the old CPU in an antistatic bag for safekeeping or proper disposal.
9. Clean the CPU Socket and Heatsink: Use a cotton swab or microfiber cloth dipped in isopropyl alcohol to clean the CPU socket and the bottom of the heatsink. Ensure they are free from any dust, debris, or old thermal paste residue.
10. Follow Reverse Steps for Reassembly: To complete the disassembly process, follow the reverse steps outlined in your laptop’s service manual. Reattach the heatsink, reinstall any removed components, and secure the bottom panel or access cover.
It is important to approach the disassembly process with caution and take note of the disassembly order to ensure a smooth reassembly. Following these steps will help you safely disassemble your laptop and access the CPU for the upgrade process. With the disassembly complete, you can now move on to removing the old CPU and installing the new one.
Step 6: Remove Old CPU
Removing the old CPU is a crucial step in the laptop CPU upgrade process. Follow these steps carefully to safely remove the old processor:
1. Ensure Proper Disassembly: Make sure you have successfully completed the previous step of disassembling your laptop before proceeding to remove the old CPU. Refer to the service manual for any specific instructions related to CPU removal.
2. Identify the CPU Socket: Locate the CPU socket on the motherboard. It is usually a square or rectangular-shaped socket with numerous small pins or contacts.
3. Unlock the CPU Socket: Look for the locking mechanism on the CPU socket. It is typically a lever or latch that secures the CPU in place. Gently push or lift the lever/latch to a released position. This unlocks the CPU socket and allows for the removal of the old CPU.
4. Remove the CPU: Hold the old CPU by its sides, avoiding contact with the gold contact pins on the underside. Carefully lift the CPU straight up out of the socket. Do not twist or apply excessive force during this process to avoid damaging the CPU or the socket.
5. Check for Bent Pins: Inspect the CPU socket for any bent or damaged pins. If any pins appear bent, carefully straighten them using a fine pair of tweezers or a mechanical pencil. Be gentle and make sure each pin is aligned properly.
6. Place the Old CPU in an Antistatic Bag: Once you have removed the old CPU, place it in an antistatic bag for safe storage. This is important if you need to return the CPU or keep it as a backup.
7. Clean the CPU Socket: Use a can of compressed air or a soft brush to clean the CPU socket. Remove any dust or debris that may have accumulated in the socket during the removal process.
8. Handle the CPU with Care: When handling the old CPU or installing the new one, always hold it by the edges and avoid touching the gold contact pins or the delicate top surface. This prevents damage from static electricity or oils from your fingers.
9. Verify Compatibility: Take a moment to double-check the compatibility of the new CPU with your laptop. Ensure that it matches the socket type and is supported by your laptop’s motherboard.
10. Store Old CPU Safely: If you do not plan to use the old CPU again, store it in a safe place away from moisture, dust, and extreme temperatures. This ensures it remains in good condition should you ever need to return or sell it.
By following these steps, you can safely and effectively remove the old CPU from your laptop. Keep the CPU and the socket clean and free from damage during the removal process. With the old CPU removed, you are ready to move on to the next step of installing the new CPU during the upgrade process.
Step 7: Install New CPU
Installing the new CPU is a crucial step in upgrading your laptop’s performance. Follow these steps carefully to ensure a successful installation:
1. Verify Compatibility: Double-check that the new CPU is compatible with your laptop. Ensure it matches the socket type and is supported by your laptop’s motherboard. Confirm this information by referring to the manufacturer’s specifications or your laptop’s service manual.
2. Handle the New CPU with Care: When handling the new CPU, hold it by the edges and avoid touching the gold contact pins or the delicate top surface. Static electricity or oils from your fingers can damage the CPU.
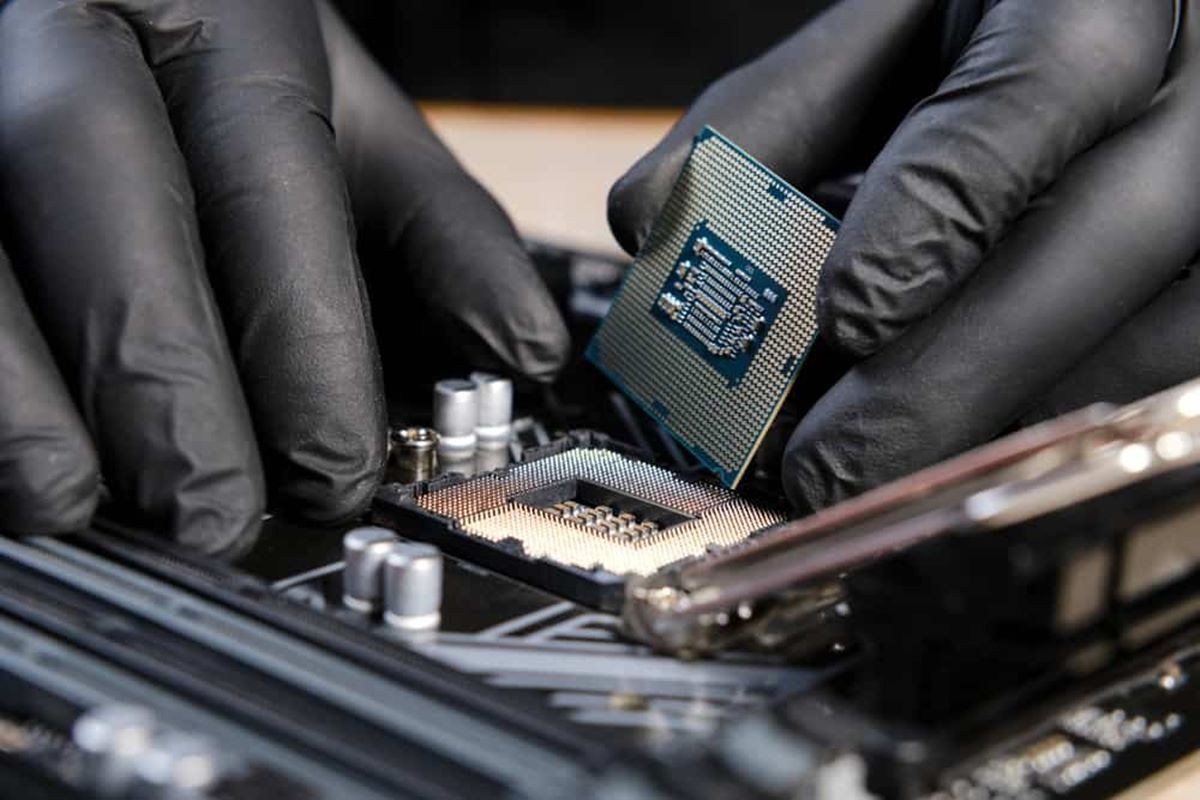
3. Align and Insert the New CPU: Orient the new CPU correctly by aligning the notches or markings on the CPU with those on the CPU socket. Gently lower the CPU into the socket, taking care not to force it. It should fit snugly without any resistance.
4. Lock the CPU in Place: Once the CPU is in the correct position, lock it in place using the lever or latch on the CPU socket. Press down firmly and secure the lever to prevent any movement or dislodgement of the CPU.
5. Inspect for Proper Installation: Take a moment to visually inspect the CPU installation. Ensure that the CPU is fully seated in the socket with the lever or latch securely in place. Double-check that the CPU is aligned correctly with the notches or markings on the socket.
6. Apply Thermal Paste: Apply a small, pea-sized amount of thermal paste onto the center of the CPU. Use a thermal paste spreader or a plastic card to evenly distribute the paste in a thin layer, covering the entire surface of the CPU.
7. Attach the Heatsink: Reattach the CPU heatsink by aligning it with the mounting holes on the motherboard. Secure it in place using the screws or clips provided. Follow the manufacturer’s instructions to ensure proper attachment and sufficient pressure for thermal efficiency.
8. Connect the Power and Cables: Reconnect any power connectors or cables that were disconnected during the disassembly process. Ensure that all connections are secure and properly seated, including the power socket, hard drive, and any peripheral devices.
9. Reinstall Removed Components: Refer to the service manual and reinstall any components that were removed during the disassembly process, such as the RAM, hard drive, or optical drive. Make sure the components are properly seated and securely connected.
10. Double-check Everything: Before proceeding to reassemble the laptop, double-check that all connections, components, and the new CPU are correctly installed. Take your time to ensure everything is in its proper place.
By following these steps and taking the necessary precautions, you can successfully install the new CPU into your laptop. The proper installation of the CPU is crucial for optimal performance and stability. Once the new CPU is securely in place, you can move on to applying thermal paste in the next step of the upgrade process.
Step 8: Apply Thermal Paste
Applying thermal paste is a crucial step in the laptop CPU upgrade process as it ensures efficient heat transfer between the CPU and the heatsink. Follow these steps to properly apply thermal paste:
1. Prepare the CPU and Heatsink: Before applying thermal paste, ensure that both the CPU and the heatsink surfaces are clean and free from dust, debris, or old thermal paste residue. Use a cotton swab or microfiber cloth dipped in isopropyl alcohol to gently clean the surfaces.
2. Apply a Small Amount of Thermal Paste: Squeeze a small, pea-sized amount of thermal paste onto the center of the CPU surface. Avoid applying too much paste as it can lead to excessive heat buildup or uneven distribution.
3. Spread the Thermal Paste: Use a thermal paste spreader or a plastic card to spread the paste evenly across the entire surface of the CPU. Apply gentle pressure and ensure that the paste covers the entire surface without any gaps or excess thickness.
4. Ensure Proper Coverage: Aim for a thin, even layer of thermal paste. It should be thick enough to fill microscopic gaps between the CPU and heatsink but not too thick as to impede heat transfer. Avoid spreading the paste onto other components on the motherboard.
5. Check Alignment: Double-check the alignment of the CPU and heatsink before reattaching the heatsink. Ensure that the mounting holes and screws on the heatsink align properly with those on the motherboard for a secure and tight fit.
6. Reattach the Heatsink: Carefully lower the heatsink onto the CPU, aligning the mounting holes with the screws or clips on the motherboard. Apply even pressure while securing the heatsink in place, ensuring that it sits flat and makes good contact with the CPU.
7. Tighten the Screws or Clips: Begin tightening the screws or clips in a diagonal pattern to ensure even pressure distribution. Gradually tighten each screw or clip until they are securely fastened, but avoid over-tightening, as it may damage the CPU or motherboard.
8. Clean Excess Thermal Paste: Use a clean cotton swab or a lint-free cloth to wipe away any excess thermal paste that may have seeped out from the sides of the CPU and heatsink. This prevents any potential interference or mess during reassembly.
9. Check for Proper Installation: Inspect the CPU and heatsink to make sure the thermal paste is evenly spread and covers the entire CPU surface. Ensure that there are no air bubbles or gaps between the CPU and heatsink.
10. Proceed with Reassembly: With the thermal paste applied correctly, you can proceed with reassembling your laptop. Follow the reverse steps outlined in your laptop’s service manual or user guide to put everything back in place.
By carefully applying thermal paste, you ensure that heat is effectively transferred from the CPU to the heatsink, preventing overheating and maintaining optimal performance. With the thermal paste in place, you can continue with the reassembly process and prepare to test your upgraded laptop.
Step 9: Reassemble Your Laptop
Reassembling your laptop is the next step after the CPU upgrade and ensures that all components are properly reinstalled for the system to function correctly. Follow these steps to reassemble your laptop:
1. Refer to the Service Manual: Consult your laptop’s service manual or user guide for specific instructions on how to reassemble your model. It will provide step-by-step guidance to ensure a successful reassembly process.
2. Start with the Base or Bottom Cover: Begin by reattaching the base or bottom cover of your laptop. Align it with the screw holes and gently press it into place. Use the appropriate screws to secure the cover, following the correct order and tightening them gradually in a diagonal pattern.
3. Reinstall Removed Components: Follow the sequence outlined in the manual to reinstall any components that were removed during the disassembly process. This may include the RAM, hard drive, optical drive, and any other cards or modules. Ensure they are correctly seated and properly connected.
4. Connect Cables and Wires: Reconnect any cables or wires that were disconnected during disassembly. This includes power cables, data cables, audio cables, and any other peripheral connections. Double-check that all connections are secure and properly seated.
5. Install the Battery: If you removed the battery earlier, now is the time to reinstall it. Make sure it is properly aligned with the battery compartment and securely locked into place.
6. Secure the Keyboard and Touchpad: Carefully align and attach the keyboard and touchpad components. Be gentle to avoid damaging the delicate connectors or ribbon cables. Follow the manual for any specific instructions on securing these components.
7. Install the Display Assembly: If you removed the display assembly during disassembly, carefully align it with the laptop body and reconnect any necessary cables. Secure the assembly using the appropriate screws, following the manual’s instructions.
8. Test Connections: Before fully closing the laptop, test the connections and functionality of various components. Power on the laptop and ensure that the display, keyboard, touchpad, and other essential features are working properly.
9. Replace Screws and Covers: Once you have confirmed everything is functioning correctly, replace any remaining screws or covers according to the manual’s instructions. Be mindful of their proper locations and tightening sequences.
10. Clean the Exterior: Take a moment to wipe the exterior of your laptop with a cloth to remove any fingerprints or smudges. This will ensure a clean and polished appearance after the reassembly process.
By carefully following these steps and referring to the service manual, you can successfully reassemble your laptop. Take your time to ensure that all components and connections are secure and properly aligned. With the reassembly complete, you can proceed to the next step of testing and troubleshooting your newly upgraded laptop.
Step 10: Test and Troubleshoot
After reassembling your laptop following the CPU upgrade, it is crucial to thoroughly test the system to ensure everything is functioning correctly. Follow these steps to test and troubleshoot your upgraded laptop:
1. Power On the Laptop: Connect the power cord and turn on your laptop. Listen for any unusual noises or beeps during startup, which could indicate hardware issues.
2. Check Display and Functionality: Verify that the display is working correctly and showing the appropriate content. Test the functionality of the keyboard, touchpad, and any other peripherals, ensuring they respond effectively.
3. Monitor Temperature and Performance: Observe the temperature and performance of your laptop. Use monitoring software to check CPU temperature and ensure it remains within safe limits. Monitor overall performance, including speed and responsiveness, to validate the successful CPU upgrade.
4. Run Diagnostic Tests: Utilize diagnostic software or built-in diagnostic tools provided by your laptop manufacturer to perform comprehensive system tests. This helps identify potential hardware or compatibility issues that could affect performance.
5. Stress Test the System: Run stress tests or benchmarking tools to push the laptop’s performance to its limits. Monitor the CPU temperature and ensure it remains stable, without excessive overheating or throttling. Assess the overall system stability during extended periods of high usage.
6. Check BIOS and Drivers: Update the BIOS to the latest version provided by the laptop manufacturer if necessary. Additionally, ensure that all drivers, including those related to the CPU and motherboard, are up to date. This helps optimize system performance and resolve any compatibility issues.
7. Troubleshoot Any Issues: If you encounter any issues during testing, refer to the laptop’s user guide or online resources to troubleshoot the specific problem. Check forums or contact technical support for assistance if needed.
8. Repeat Testing and Validation: Perform multiple rounds of testing to ensure consistent results. Repeatedly verify the stability, temperature, performance, and functionality of the laptop to ensure a successful CPU upgrade.
9. Make System Adjustments: If necessary, make adjustments to the system settings, such as power management, thermal profiles, or fan control, to optimize performance and temperature management. Consult your laptop’s user guide or online resources for guidance on making these adjustments.
10. Enjoy Your Upgraded Laptop: Once you have verified that everything is working as expected, you can enjoy your newly upgraded laptop with improved CPU performance. Experience the benefits of faster processing, enhanced multitasking, and the ability to handle more demanding tasks.
By thoroughly testing and troubleshooting your upgraded laptop, you can ensure that the CPU upgrade was successful and that your system is functioning optimally. Address any issues that arise during testing promptly to resolve them and maximize the benefits of the CPU upgrade.
Step 11: Finalize the Upgrade Process
After testing and troubleshooting your upgraded laptop, it’s time to finalize the upgrade process. Follow these steps to ensure everything is in order:
1. Update Software and Operating System: Check for any available software updates, including drivers and firmware, for your laptop’s components. Also, make sure your operating system is up to date to ensure compatibility and security.
2. Install Necessary Software and Applications: Install any software or applications that you need for your work or personal use. This includes productivity tools, media players, web browsers, and any other programs you regularly utilize.
3. Configure BIOS Settings (if applicable): Access the BIOS settings of your laptop and configure any necessary options. This may include adjusting boot sequence, enabling specific features, or optimizing power management settings. Refer to the laptop’s user guide for guidance on accessing and configuring the BIOS.
4. Optimize Power and Thermal Management: Take advantage of any power and thermal management features available in your laptop’s system settings. Adjust power profiles, fan speeds, and other settings to balance performance, temperature, and battery life according to your needs and preferences.
5. Set Up Backup and Recovery: Configure automatic backup solutions to regularly protect your data. Set up a recovery or restore point so that you can easily revert back to a previous state if needed.
6. Organize and Clean Your Files: Take the time to organize your files and folders on your laptop. Remove any unnecessary or duplicate files to free up disk space and improve overall system performance.
7. Protect Your Laptop: Ensure your laptop is protected by installing reliable antivirus software and enabling a firewall. Regularly update and run scans to safeguard against malware and other potential threats.
8. Create a System Recovery Backup: Before making any significant changes or modifications to your laptop, create a system recovery backup. This allows you to easily restore your laptop to a previous working state in case of any unforeseen issues or errors.
9. Keep Your Laptop Maintained: Periodically clean the laptop’s internal and external components to prevent dust accumulation and maintain optimal airflow. Use compressed air to clear out any debris from the keyboard, vents, and fans.
10. Enjoy Your Upgraded Laptop: With the upgrade process complete, take the time to enjoy and appreciate the improved performance and capabilities of your upgraded laptop. Whether it’s faster processing speeds, smoother multitasking, or the ability to handle demanding tasks, make the most of your upgraded machine.
By following these final steps, you can ensure that your upgraded laptop is fully optimized, secure, and ready for use. Enjoy the enhanced performance and functionality that the CPU upgrade provides, and continue to maintain and care for your laptop to maximize its lifespan and performance in the long run.