
Accessing the “My games & apps” menu
If you’re looking to uninstall a game on your Xbox One, accessing the “My games & apps” menu is the first step. This menu acts as a hub for all the games, applications, and other content on your console. To access it, simply follow the steps below:
- Turn on your Xbox One and sign in to your account.
- Navigate to the home screen by pressing the Xbox button on your controller.
- Using the joystick or D-pad, scroll left or right until you reach the “My games & apps” tab.
- Click on the “My games & apps” tab to enter the menu.
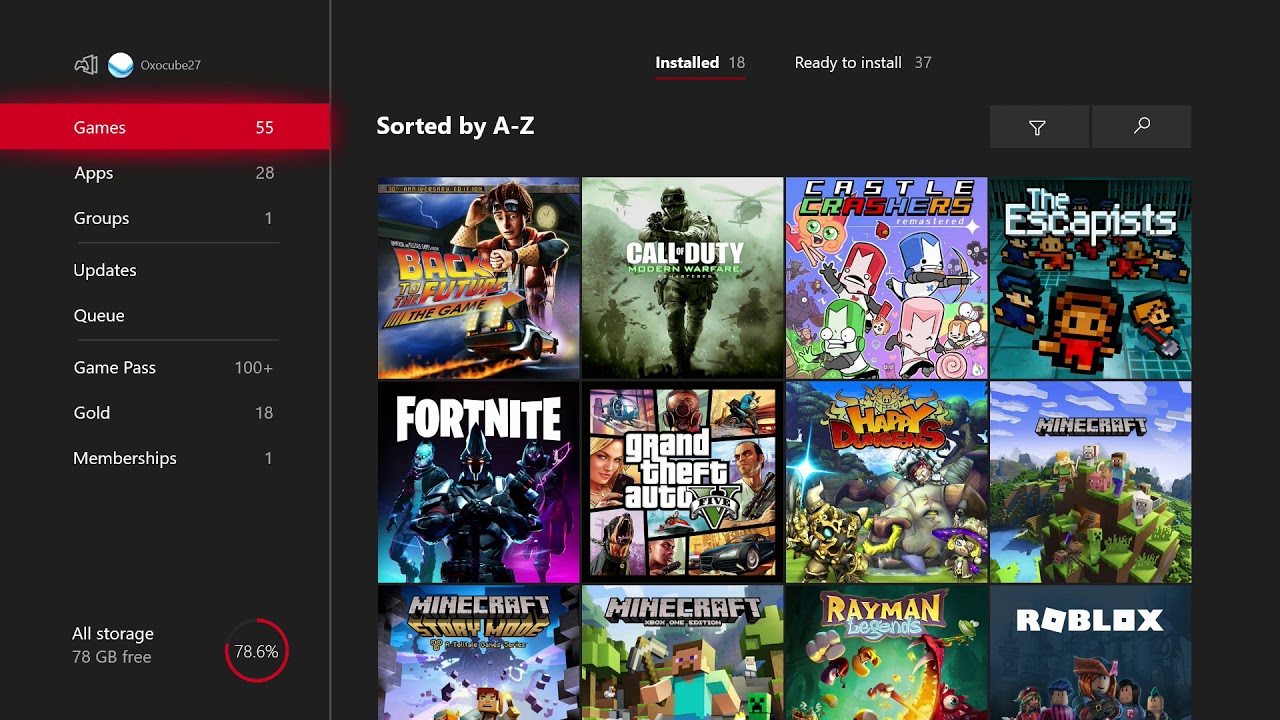
Once you’re in the “My games & apps” menu, you’ll see a list of all your installed games and applications. This menu is organized into different sections, making it easy to find the specific game you want to uninstall.
If you have a large number of games installed, you might need to navigate to the “Games” section by using the joystick or D-pad and selecting the “Games” option. This will display only your installed games, making it easier to locate the game you want to uninstall.
It’s important to note that you can also use the search function in the “My games & apps” menu to quickly find a specific game. Simply press the “Y” button on your controller to bring up the search bar, then enter the name of the game you want to uninstall.
Once you have successfully accessed the “My games & apps” menu and located the game you wish to uninstall, you can proceed to the next steps to remove it from your Xbox One.
Selecting the game you want to uninstall
After accessing the “My games & apps” menu on your Xbox One, the next step in uninstalling a game is to select the specific game you wish to remove. Follow the instructions below to easily navigate to the game you want to uninstall:
- Scroll through the list of installed games in the “My games & apps” menu. You can use the joystick or D-pad to move up and down the list.
- As you scroll, the selected game will be highlighted. Make sure to take your time and find the game you want to uninstall.
- If you have a large number of games installed, it might be more convenient to switch to the “Games” section. Use the joystick or D-pad to select the “Games” option, which will filter the list to display only your installed games.
- Alternatively, you can make use of the search function in the “My games & apps” menu. Press the “Y” button on your controller to open the search bar, and then enter the name of the game you want to uninstall.
- Continue scrolling or using the search function until you find the game you wish to remove from your Xbox One.
- Once you have located the game, make sure it is highlighted on the screen. This will indicate that the game is selected.
Take your time during this step to ensure that you select the correct game for uninstallation. Double-check the game title and any associated information on the screen to avoid accidentally uninstalling the wrong game.
Once you have successfully selected the game you want to uninstall, you can proceed to the next steps to remove it from your Xbox One.
Opening the game options menu
Once you have selected the game you want to uninstall from the “My games & apps” menu on your Xbox One, the next step is to open the game options menu. This menu allows you to access various options and settings for the selected game, including the option to uninstall it. Here’s how you can open the game options menu:
- With the game selected in the “My games & apps” menu, press the menu button on your controller. This is the button with three horizontal lines, also known as the start button.
- By pressing the menu button, the game options menu will open, providing you with a range of options and settings for the selected game.
- Take a moment to familiarize yourself with the available options in the menu. You may find additional settings or features specific to the game you have selected.
The game options menu is a centralized location where you can access various functions related to the selected game. In addition to the uninstall option, you may be able to adjust audio or visual settings, access downloadable content (DLC), or manage game saves.
It’s worth noting that the layout and available options in the game options menu may vary depending on the game you have selected. Some games may have additional options or settings, while others may have a more streamlined menu.
Once you have successfully opened the game options menu, you can proceed to the next step to uninstall the selected game from your Xbox One.
Choosing the “Uninstall” option
After opening the game options menu for the selected game on your Xbox One, the next step in uninstalling the game is to choose the “Uninstall” option. This action will initiate the removal process and permanently delete the game from your console. Here’s how to proceed:
- While in the game options menu, use the joystick or D-pad to navigate through the available options.
- Look for the option labeled “Uninstall” or a similar term indicating the removal of the game. This option is usually located towards the bottom of the menu.
- Once you have located the “Uninstall” option, highlight it on the screen by moving the cursor or selector to that option.
- Press the appropriate button on your controller to select the “Uninstall” option. This is typically the “A” button, but it may vary based on your controller configuration.
After selecting the “Uninstall” option, a confirmation message or prompt may appear on the screen. This message typically confirms that the game will be permanently removed from your console and prompts you to confirm the action.
It’s important to note that once you uninstall a game from your Xbox One, all associated game data, including saved progress and any installed DLC or add-ons, will also be deleted. Make sure to consider this before proceeding with the uninstallation process.
Once you have chosen the “Uninstall” option and confirmed the prompt, the game removal process will begin. Be patient as the Xbox One completes the uninstallation, which may take some time depending on the size of the game and your console’s performance.
With the game successfully uninstalled from your Xbox One, you can now proceed to the next steps if you have any additional DLC or add-ons associated with the game that you also want to remove.
Confirming the uninstallation prompt
After selecting the “Uninstall” option for the game you wish to remove from your Xbox One, a confirmation prompt will likely appear on the screen. This prompt serves as a final confirmation before permanently deleting the game from your console. Here’s what you need to do to proceed:
- Once you have chosen the “Uninstall” option from the game options menu, carefully read the prompt that appears on the screen.
- The prompt will typically provide information about the game that is about to be uninstalled and warn you that all associated game data, including saved progress and installed DLC, will be permanently deleted.
- If you are certain that you want to proceed with the uninstallation, press the appropriate button on your controller to confirm the action.
- Typically, confirming the uninstallation involves selecting the “Yes” or “OK” option on the prompt. Use the joystick, D-pad, or cursor to highlight the confirmation option, and press the corresponding button to proceed.
It’s important to note that once you confirm the uninstallation prompt, there is no way to recover the game and its associated data. Any progress you have made in the game will be lost, and you will need to reinstall the game if you wish to play it again in the future.
Take a moment to double-check your decision before confirming the prompt. Ensure that you have backed up any important game saves or DLC content if you wish to preserve them before uninstalling the game.
Once you have successfully confirmed the uninstallation prompt, the Xbox One will begin the process of permanently removing the game from your console. Depending on the size of the game and the performance of your console, this process may take some time.
With the game successfully uninstalled, you can now proceed to the next steps if you have any additional DLC or add-ons associated with the game that you also want to remove.
Waiting for the game to uninstall
Once you have confirmed the uninstallation prompt for the game on your Xbox One, you will need to wait for the game to be completely uninstalled from your console. The time it takes to uninstall a game will depend on its size and your console’s performance. Here’s what you need to do during this waiting period:
- After confirming the uninstallation prompt, the Xbox One will initiate the process of removing the game from your console.
- During this time, it is important to be patient and avoid interrupting the uninstallation process. Let the console complete the uninstallation on its own.
- While the game is being uninstalled, you can monitor the progress by viewing the notifications on your Xbox One’s dashboard. Look for a notification that indicates the game is being uninstalled.
- A progress bar may also appear on the screen, showing you the percentage of completion for the uninstallation process.
It’s crucial to avoid turning off or unplugging your Xbox One while a game is being uninstalled. Doing so can disrupt the process and potentially cause issues with your console and game data.
During the waiting period, you can utilize this time to organize your game collection, explore other games, or catch up on other activities while your Xbox One completes the uninstallation process.
Once the game is successfully uninstalled from your console, you will no longer see it in the “My games & apps” menu. The associated game data, including saved progress and DLC, will also be removed.
With the game uninstalled, you can now proceed to the next steps if you have any additional DLC or add-ons associated with the game that you also want to remove.
Removing any associated DLC or add-ons
After uninstalling the main game from your Xbox One, you may still have additional downloadable content (DLC) or add-ons associated with the game that you want to remove. These can include expansion packs, extra levels, skins, or other enhancements. Here’s how you can remove any associated DLC or add-ons:
- Access the “My games & apps” menu on your Xbox One using the steps mentioned earlier.
- Scroll through the list of installed games until you find the main game from which you uninstalled.
- With the main game selected, press the menu button on your controller to open the game options menu.
- Navigate through the options to find the “Manage game” or a similar option associated with the specific game.
- Select the “Manage game” option, and a new menu will open with all the DLC and add-ons related to the game.
- Scroll through the list of DLC and add-ons and select the ones you want to remove.
- Choose the “Uninstall” option for each DLC or add-on you wish to remove.
- Confirm any prompts or notifications that appear to proceed with the uninstallation of the selected DLC or add-ons.
During the uninstallation process, it is important to be patient and allow the Xbox One to complete the removal of the DLC and add-ons. The time it takes will depend on the size and number of items you are removing.
Removing the associated DLC and add-ons ensures that all components of the game are fully uninstalled from your console, freeing up storage space and removing any remaining traces of the game.
Once you have successfully uninstalled all the associated DLC and add-ons, your Xbox One will be free of any remnants of the game. You can now proceed to the final steps to clear up storage space on your console.
Clearing up storage space after uninstallation
After uninstalling a game and its associated DLC or add-ons from your Xbox One, you may want to clear up storage space on your console. This can help optimize the performance of your Xbox One and make room for new games or content. Here are some steps you can take to clear up storage space:
- Access the “Settings” menu on your Xbox One by navigating to the home screen and pressing the Xbox button on your controller.
- Scroll right and select the “System” tab in the sidebar.
- In the “System” menu, select “Storage” to view the storage options on your console.
- You will see a breakdown of the storage usage, including the amount of space used by games, apps, and other media.
- Select the “Games & Apps” section to view a list of installed games and apps on your console.
- Scroll through the list and look for any games or apps that you no longer need or use.
- Select the game or app you want to remove and choose the “Uninstall” option.
- Confirm the uninstallation prompt to remove the selected game or app from your console.
By uninstalling games and apps that you don’t use, you can free up valuable storage space on your Xbox One. This can help optimize the console’s performance and ensure smooth gameplay.
Additionally, you can consider using external storage devices, such as USB drives, to expand your console’s storage capacity. This allows you to store games and content on the external device, freeing up space on your console’s internal storage.
Regularly managing your storage space and uninstalling games and apps that you no longer need can help keep your Xbox One organized, efficient, and ready for new gaming experiences.
With the storage space cleared and optimized, you are now ready to make new installations or reinstall games if desired.
Reinstalling the game, if desired
If you have uninstalled a game from your Xbox One and later decide that you want to play it again, you have the option to reinstall the game. Reinstalling a previously uninstalled game is a straightforward process. Here’s how you can do it:
- Access the “My games & apps” menu on your Xbox One by either scrolling to the tab on your home screen or pressing the Xbox button and selecting the tab.
- Navigate to the “Ready to install” section. You can find this section within the “My games & apps” menu.
- In the “Ready to install” section, you will find a list of all the games you have previously uninstalled but are still associated with your Xbox account.
- Scroll through the list of games and locate the one you want to reinstall.
- Select the game and choose the “Install” option.
- Confirm any prompts or notifications that appear to initiate the reinstallation process.
- Depending on the size of the game and your internet connection speed, the reinstallation process may take some time.
- Once the game is successfully reinstalled, you can launch it from the “My games & apps” menu and resume playing.
Reinstalling a game allows you to regain access to your saved progress and any associated DLC or add-ons that you previously had installed. This can be particularly useful if you want to revisit a game or continue playing where you left off.
Remember that when reinstalling a game, your previous saved progress should be intact if it was saved on the cloud or if you didn’t delete the saved data during the initial uninstallation. However, if the saved progress was stored locally and you deleted it during the uninstallation process, you may need to start fresh or retrieve the saved progress from a separate backup.
With the game successfully reinstalled, you can enjoy playing it again on your Xbox One. Remember to manage your console’s storage wisely to ensure you have enough space for all your favorite games and content.