
Check ink levels
One of the first steps in troubleshooting a clogged printer is to check the ink levels. Low ink levels can contribute to poor print quality and potential clogs. Here’s how you can check the ink levels:
1.1. Printer Display: Some printers have a built-in display that shows the ink levels for each cartridge. Access the printer’s settings or maintenance menu to find this information. If any cartridge is low or empty, replace it with a new one.
1.2. Printer Software: If your printer doesn’t have a built-in display, you can check the ink levels using the printer software installed on your computer. Open the printer software and navigate to the ink or maintenance section. Look for an option to view the ink levels. If any cartridge is running low, consider replacing it.
1.3. Test Print: Another way to check the ink levels is by printing a test page. Most printers have a test page function that allows you to print a sample page using all the available colors. If the test page appears faded or incomplete, it’s a sign that one or more cartridges may be low on ink.
Regularly monitoring the ink levels can help prevent clogs caused by running out of ink. If the ink levels are low or empty, refill or replace the cartridges as needed. However, if the ink levels are sufficient and the print quality is still poor, proceed to the next troubleshooting steps.
Run the printer’s cleaning cycle
If you’re experiencing clogged printer ink, running the printer’s cleaning cycle can often help resolve the issue. The cleaning cycle is a built-in function that purges any dried ink or debris from the print head and nozzles. Here’s how you can run the cleaning cycle:
2.1. Access the printer settings: Open the printer software on your computer or navigate to the printer’s control panel menu. Look for an option that allows you to access the printer settings or maintenance menu.
2.2. Find the cleaning cycle option: Within the printer settings or maintenance menu, locate the cleaning cycle option. It may be labeled as “Clean Print Heads,” “Maintenance,” or something similar.
2.3. Initiate the cleaning cycle: Select the cleaning cycle option and follow the on-screen prompts to initiate the process. The printer will automatically perform a series of cleaning cycles and nozzle checks to remove any clogs or blockages.
2.4. Test print: After the cleaning cycle is complete, print a test page to check if the print quality has improved. This will help verify if the clog has been cleared and the ink is flowing smoothly.
2.5. Repeat if necessary: If the print quality hasn’t improved or if you notice any remaining clogs, you can try running the cleaning cycle again. Some printers offer multiple cleaning levels, allowing you to perform a deeper cleaning cycle if needed.
Running the printer’s cleaning cycle is a simple yet effective method to clear minor clogs and improve print quality. However, if the issue persists or if you have already run the cleaning cycle multiple times without any improvement, it’s time to explore other troubleshooting options.
Use the printer’s utility software
When dealing with printer ink clogs, utilizing the printer’s utility software can often be an effective solution. This software provides advanced tools and features specifically designed to diagnose and resolve print quality issues. Here’s how you can use the printer’s utility software:
3.1. Install the software: Ensure that you have the latest version of the printer’s utility software installed on your computer. If you do not have it installed, visit the manufacturer’s website and download the software specific to your printer model.
3.2. Open the utility software: Launch the printer’s utility software from your computer. Typically, you can find it in the printer folder or by clicking on the printer icon in the system tray.
3.3. Run diagnostic tests: The utility software often provides diagnostic tests to identify and resolve common print issues. Look for options such as “Nozzle Check” or “Print Quality Diagnostic” and follow the instructions to perform the tests.
3.4. Use the cleaning and maintenance features: The utility software may include cleaning and maintenance features specific to your printer model. These features can help purge ink clogs and improve print quality. Explore the software to find options such as “Clean Print Heads” or “Ink System Maintenance.”
3.5. Follow the software recommendations: After running the diagnostic tests and utilizing the cleaning and maintenance features, the software may provide specific recommendations to resolve any detected issues. Follow the software’s instructions to address the clog and improve print quality.
The printer’s utility software is designed to provide advanced tools and features that can effectively troubleshoot ink clogs and enhance print quality. If using the software does not resolve the issue, it may be necessary to move on to more manual methods of unclogging the printer.
Manually clean the ink cartridge
If the previous methods haven’t resolved the printer ink clog, you can try manually cleaning the ink cartridge. This method involves removing the cartridge from the printer and gently cleaning it to remove any dried ink or debris. Here’s how you can manually clean the ink cartridge:
4.1. Turn off the printer: Before removing the ink cartridge, make sure to turn off the printer and unplug it from the power source. This will prevent any accidents or injuries during the cleaning process.
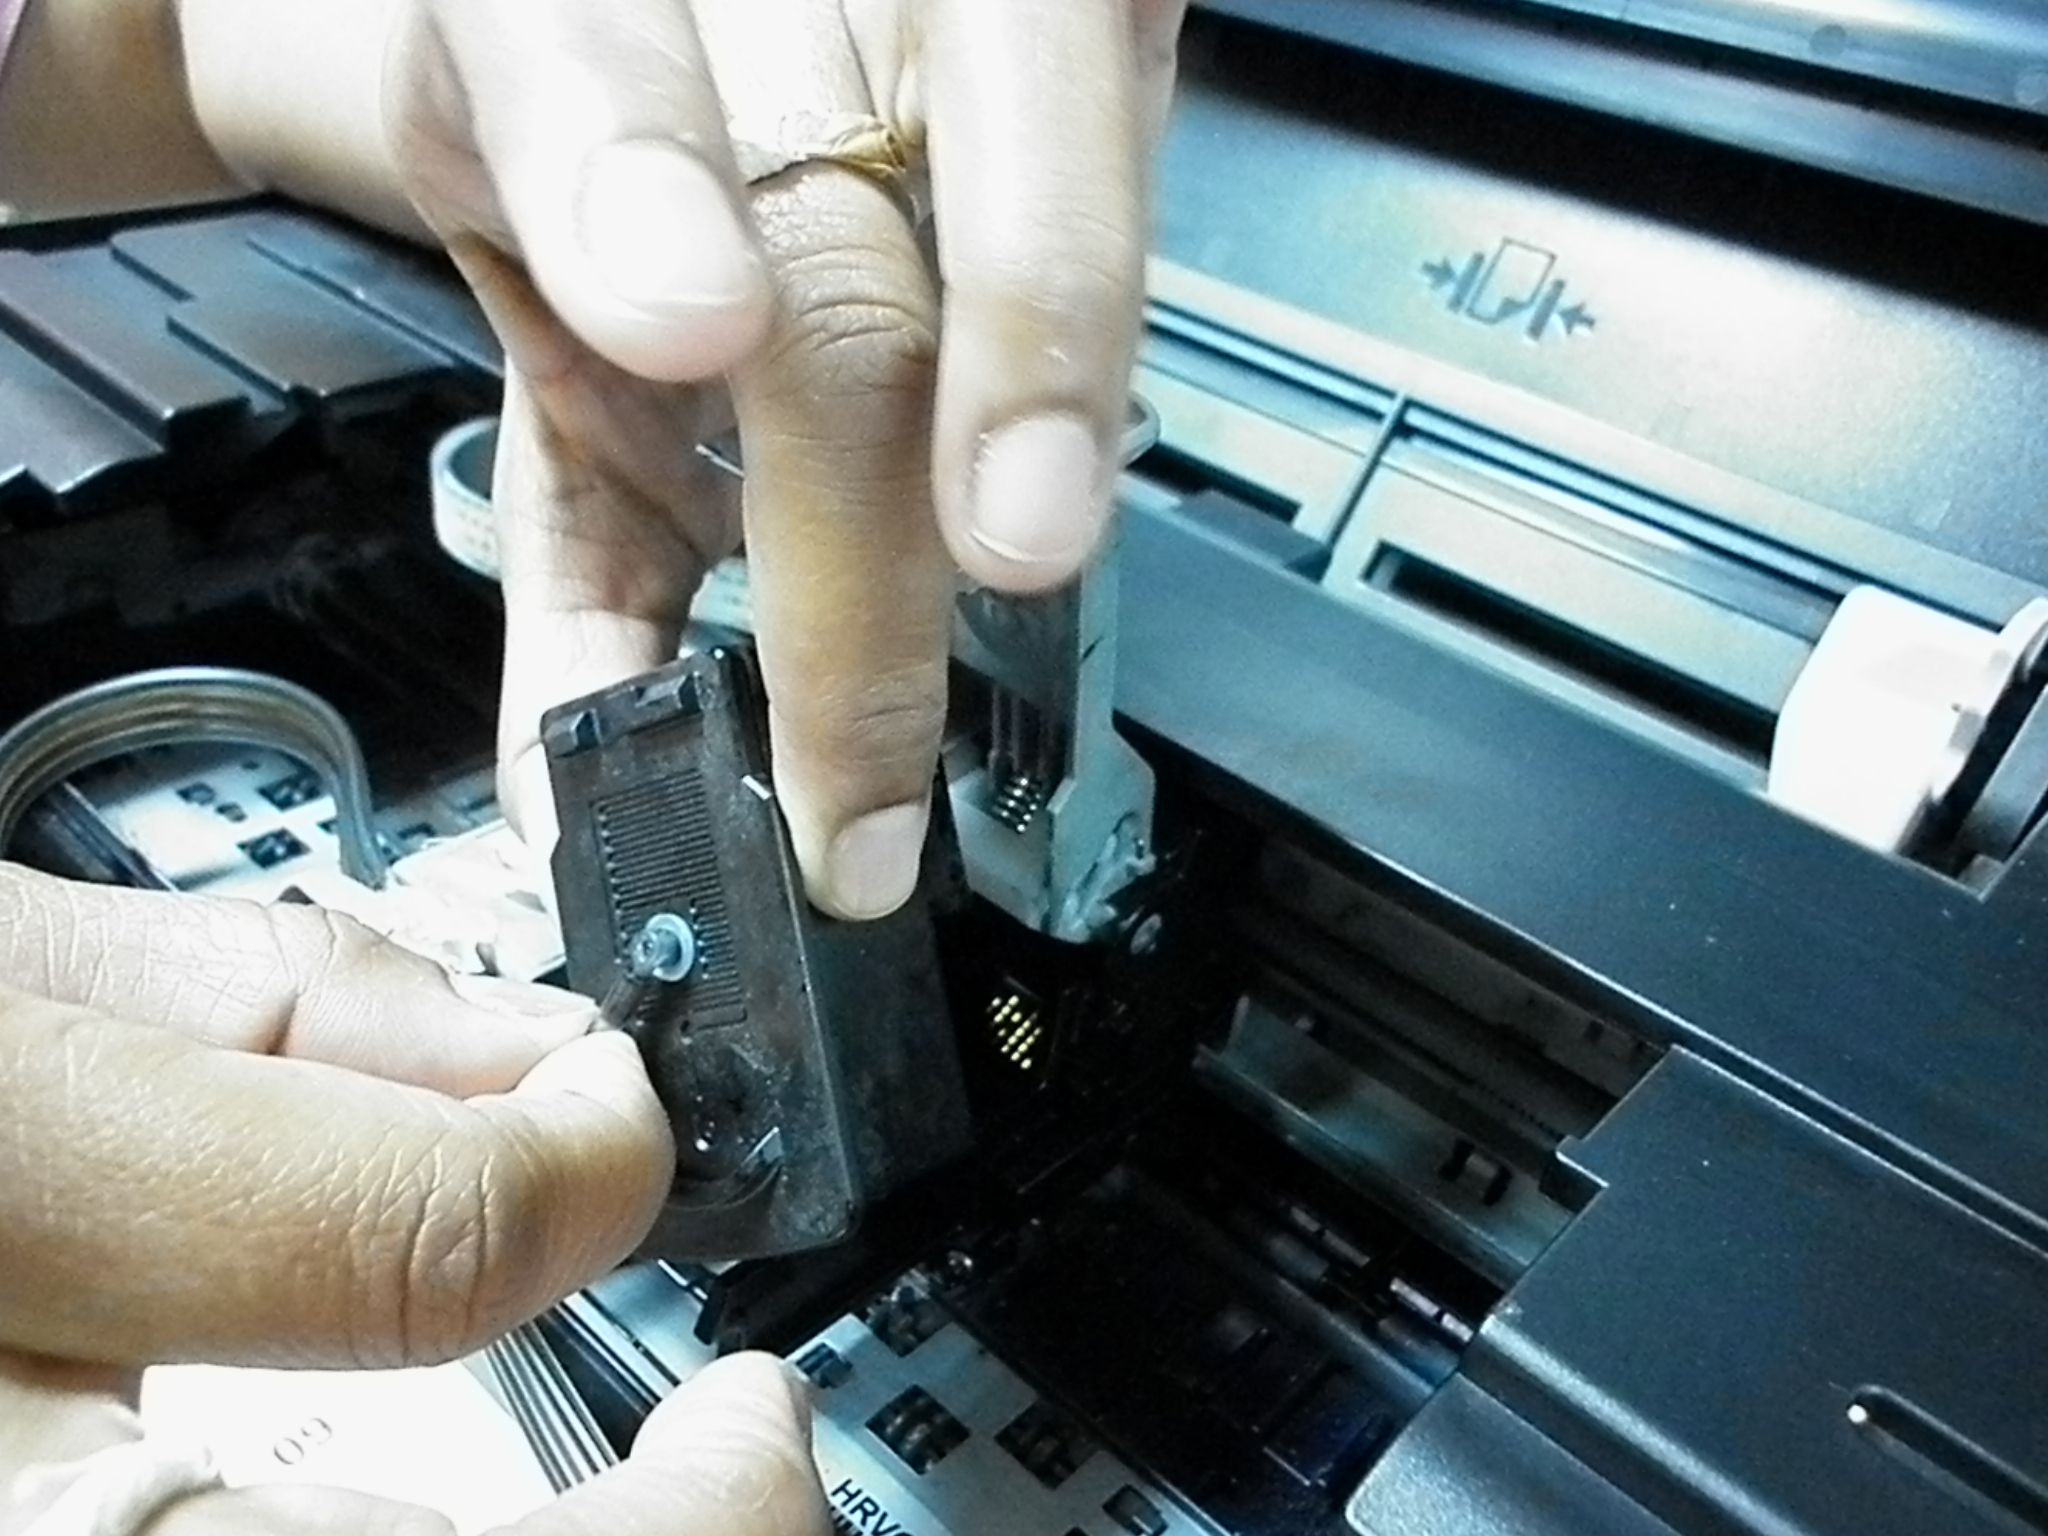
4.2. Remove the ink cartridge: Open the printer cover or access panel to gain access to the ink cartridges. Carefully remove the clogged cartridge from its slot. Refer to the printer’s user manual for specific instructions on removing the ink cartridges for your printer model.
4.3. Inspect the cartridge: Take a close look at the ink cartridge. Check for any signs of dried ink or debris on the printhead or nozzles. These are often the main culprits behind printer ink clogs.
4.4. Clean the cartridge contacts: Using a lint-free cloth or cotton swab, lightly moistened with distilled water, gently clean the contacts on the ink cartridge. Be careful not to touch the nozzles or scrub too hard, as this can cause damage to the cartridge.
4.5. Clean the printhead: If the ink cartridge has a built-in printhead, use a clean, lint-free cloth or cotton swab to remove any dried ink or debris from the printhead. Again, be gentle and avoid touching the nozzles.
4.6. Reinstall the ink cartridge: Once the ink cartridge is clean, carefully reinstall it back into the printer. Ensure that it is securely placed in the correct slot and properly aligned.
4.7. Run a test print: After reinserting the ink cartridge, run a test print to check if the clog has been cleared and the print quality has improved. If necessary, you may need to perform a cleaning cycle or diagnostic test to further optimize the print quality.
Manually cleaning the ink cartridge can be a bit time-consuming, but it’s a method that can effectively remove stubborn clogs caused by dried ink or debris. If this method doesn’t yield the desired results, there are more advanced techniques that you can try to unclog the printer.
Soak the ink cartridge in warm water
If you’re still facing printer ink clogs, soaking the ink cartridge in warm water can help dissolve any stubborn dried ink and clear the clog. Here’s how you can do it:
5.1. Remove the ink cartridge: Turn off the printer and unplug it from the power source. Open the printer cover or access panel and carefully remove the ink cartridge that is causing the clog. Refer to the printer’s user manual for specific instructions on removing the ink cartridges.
5.2. Prepare warm water: Fill a container or bowl with warm water. The water should be warm, not hot, to avoid damaging the ink cartridge. Ideally, the water temperature should be around 40-50 degrees Celsius (104-122 degrees Fahrenheit).
5.3. Submerge the ink cartridge: Place the ink cartridge in the warm water, making sure that it is completely submerged. Allow it to soak for about 10-15 minutes. This will soften any dried ink inside the cartridge and help dissolve the clog.
5.4. Gently clean the cartridge: After soaking, remove the ink cartridge from the water and gently clean it with a lint-free cloth or cotton swab. Be careful not to touch the nozzles or scrub too hard, as this can cause damage to the cartridge.
5.5. Let the cartridge dry: Place the ink cartridge on a clean, lint-free cloth or paper towel and allow it to air dry completely. This may take some time, so be patient and avoid rushing the drying process.
5.6. Reinstall and test: Once the ink cartridge is completely dry, carefully reinstall it back into the printer. Ensure that it is securely placed in the correct slot and properly aligned. Run a test print to check if the clog has been cleared and the print quality has improved.
Soaking the ink cartridge in warm water can be an effective method to dissolve stubborn ink clogs. However, exercise caution and only try this method if other troubleshooting steps have not yielded the desired results. If the issue persists, there are further steps you can take to unclog the printer.
Unclog the print head using alcohol solution
If previous methods haven’t cleared the printer ink clog, you can try using an alcohol solution to unclog the print head. Alcohol helps dissolve dried ink and debris that may be causing the clog. Here’s how you can do it:
6.1. Gather the necessary supplies: You’ll need rubbing alcohol (isopropyl alcohol) with a concentration of at least 90% or higher, cotton swabs, and a clean, lint-free cloth.
6.2. Remove the ink cartridges: Before working on unclogging the print head, turn off the printer and unplug it from the power source. Open the printer cover or access panel and remove all ink cartridges from the printer.
6.3. Dampen a cotton swab: Moisten a cotton swab with the rubbing alcohol. Be sure to wring out any excess alcohol to prevent dripping.
6.4. Clean the print head: Gently rub the moistened cotton swab on the print head assembly, which is the area that makes contact with the ink cartridges. Move the swab in a gentle back-and-forth motion, being careful not to apply too much pressure or push the swab beyond the edge of the print head.
6.5. Wipe off excess ink: Use a clean, lint-free cloth to wipe away any excess ink or debris that may have been loosened by the alcohol. Be thorough but gentle to avoid damaging the print head or other printer components.
6.6. Reinstall the ink cartridges: Once the print head is clean and dry, carefully reinstall the ink cartridges back into their respective slots. Ensure they are correctly aligned and securely inserted.
6.7. Run a test print: After reinserting the ink cartridges, run a test print to check if the unclogging process has been successful. If necessary, you may need to perform additional cleaning cycles or maintenance tasks to restore optimal print quality.
Using an alcohol solution to unclog the print head can be an effective method for stubborn ink clogs. However, exercise caution and follow the manufacturer’s guidelines, as excessive or improper use of alcohol can damage the printer. If the issue persists, it may be necessary to seek further assistance or consider professional maintenance for your printer.
Try using a different ink cartridge
If you’re still experiencing printer ink clogs and poor print quality, it may be worth trying a different ink cartridge. Over time, ink cartridges can become prone to clogging or drying out, especially if they are older or have been sitting unused for an extended period. Here’s what you can do:
7.1. Identify the problematic cartridge: Determine which ink cartridge is causing the issue. If you notice that the print quality issue is specific to one color or cartridge, it’s likely that particular cartridge is clogged or needs replacement.
7.2. Obtain a new ink cartridge: Purchase a new ink cartridge that is compatible with your printer model. Ensure that it matches the color and type (e.g., black, cyan, magenta, yellow, etc.) of the problematic cartridge.
7.3. Remove the old cartridge: Turn off the printer and unplug it from the power source. Open the printer cover or access panel and carefully remove the clogged cartridge from its slot. Follow the printer’s user manual instructions for safe removal.
7.4. Install the new cartridge: Take the new ink cartridge out of its packaging. Remove any protective tapes or covers. Align the new cartridge with the designated slot, then firmly insert it into the printer until it clicks into place.
7.5. Run a test print: Once the new ink cartridge is installed, run a test print to check if the clog has been resolved and if the print quality has improved. This will help verify if the previous cartridge was indeed the cause of the clogging issues.
If the new ink cartridge produces clean and high-quality prints, then it’s clear that the previous cartridge was the culprit. However, if the print quality issue persists even with the new cartridge, it’s possible that there is an underlying problem with the printer itself that may require further troubleshooting or professional assistance.
Consult the printer’s user manual
If you’re still facing printer ink clogs and struggling to resolve the issue, consulting the printer’s user manual can provide valuable guidance and specific troubleshooting steps. Here’s why it’s important to refer to the user manual:
8.1. Manufacturer’s recommendations: The user manual contains essential information provided by the printer’s manufacturer. It outlines recommended practices for maintaining and troubleshooting the printer, including specific instructions for addressing ink clogs.
8.2. Proper handling and maintenance: The user manual provides instructions on how to properly handle, install, and maintain the ink cartridges. Following these instructions can help minimize the risk of clogs or other printing issues.
8.3. Troubleshooting techniques: The user manual typically includes a troubleshooting section that covers various print quality problems, including ink clogs. It provides step-by-step instructions to address common issues and provides specific guidance for your printer model.
8.4. Printer-specific solutions: Each printer model may have different mechanisms and features. The user manual provides insights into the unique functions and options available for your printer. These specifics can be crucial for effectively resolving ink clogs.
8.5. Contact information: If the troubleshooting steps in the user manual don’t resolve the issue, it often includes contact information for customer support or technical assistance. You can reach out to the manufacturer for further guidance or seek professional assistance.
By referring to the printer’s user manual, you can access valuable information tailored to your specific printer model. It can help you troubleshoot ink clogs and other printing issues effectively. Take the time to read through the manual and follow the recommended steps to ensure the best possible print quality.
Contact the manufacturer or a professional technician
If all previous attempts to unclog the printer ink have been unsuccessful, it may be time to seek help from the printer’s manufacturer or a professional technician. Here’s why contacting them can be beneficial:
9.1. Expert assistance: Manufacturers often have dedicated customer support or technical teams who specialize in troubleshooting printer issues. They can provide expert guidance tailored to your specific printer model.
9.2. Warranty considerations: If your printer is still within its warranty period, reaching out to the manufacturer is vital. They can guide you through the warranty process and offer solutions to resolve the ink clog issue without incurring additional costs.
9.3. Advanced techniques: Manufacturers or professional technicians have advanced tools and techniques specifically designed to handle stubborn ink clogs. They can perform more intricate cleaning procedures or suggest other solutions you may not have access to.
9.4. Preventing further damage: Attempting to resolve stubborn ink clogs without proper knowledge or tools can potentially damage the printer further. By contacting experts, you can avoid unintentionally causing additional issues and ensure that the printer is handled with care.
9.5. Professional maintenance: If the ink clogs persist despite your best efforts, a professional technician can assess the printer thoroughly and perform maintenance tasks that go beyond simple troubleshooting. They can identify underlying issues and implement appropriate solutions.
Don’t hesitate to reach out to the manufacturer’s customer support or a reputable professional technician for help. They can provide valuable assistance and advice to resolve the ink clog issue and restore your printer’s optimal performance.