
Why You Need to Clean Your Printer’s Printheads
Printheads are an essential component of any printer, responsible for transferring ink onto the paper during the printing process. Over time, these printheads can become clogged with dried ink, dust, and debris, leading to poor print quality and even malfunctioning of the printer. Regularly cleaning your printer’s printheads not only ensures optimal print performance but also prolongs the lifespan of your printer.
One of the primary reasons to clean your printer’s printheads is to maintain the quality of your printed documents. Clogged printheads can result in streaky, smudgy, or faded prints, making your documents appear unprofessional and difficult to read. By cleaning the printheads, you can restore crisp and vibrant colors, sharp text, and clear images, ensuring that your prints always make a positive impression.
In addition to print quality, cleaning your printheads can also help prevent malfunctions and keep your printer running smoothly. When printheads are clogged, they may struggle to distribute ink properly, leading to blotchy or incomplete prints. This can waste valuable ink and paper, costing you time and money. Regular maintenance and cleaning of the printheads can alleviate these issues, reducing the likelihood of printer jams, misalignment, and other operational problems.
Furthermore, neglecting printhead maintenance can result in permanent damage to your printer. A severely clogged printhead can cause ink buildup in critical printer components, leading to corrosion and malfunctioning. Repairing or replacing damaged printheads can be costly, and in some cases, it may be more cost-effective to purchase a new printer altogether. By regularly cleaning your printheads, you can prevent such damage and extend the lifespan of your printer.
Lastly, cleaning your printer’s printheads is an integral part of proper printer maintenance. Just as you would clean the exterior of your printer to remove dust and debris, cleaning the printheads is necessary for optimal performance. By taking the time to clean your printheads regularly, you can ensure that your printer operates efficiently and delivers high-quality prints every time.
Signs That Your Printheads Need Cleaning
Regularly checking for signs that your printer’s printheads need cleaning is essential to maintain optimal print performance. Here are some common indications that your printheads may require cleaning:
- Streaky or Faded Prints: If you notice streaks or faded areas on your printed documents, it is a clear sign that your printheads are clogged. The buildup of dried ink or debris obstructs the smooth flow of ink onto the paper, resulting in uneven print quality.
- Incomplete Prints: When your printheads are clogged, they may struggle to distribute ink evenly across the paper. This can lead to gaps or missing sections in your prints, making them appear incomplete or distorted.
- Blotchy or Smudged Prints: If your prints come out with random blotches or smudges, it indicates that the printheads are not functioning properly. Ink may not be dispensed evenly, resulting in unsightly marks on your documents.
- Misaligned or Skewed Prints: Clogged or dirty printheads can cause alignment issues during printing. You may notice that the text or images on your prints are misaligned or skewed, making them difficult to read or understand.
- Printhead Error Messages: Some printers are equipped with systems that detect printhead issues and display error messages. If you see error messages regarding printhead problems on your printer’s screen, it is a clear indication that your printheads require cleaning.
By paying attention to these signs, you can address printhead issues promptly and prevent further deterioration in print quality. Regular maintenance and cleaning of the printheads will help ensure that your printer continues to produce sharp, vibrant prints without any glitches.
Tools and Materials You Will Need
Before you start cleaning your printer’s printheads, it’s important to gather the necessary tools and materials to ensure a successful cleaning process. Here’s a list of items you will need:
- Clean, lint-free cloth or cotton swabs: These will be used to gently clean the printheads and remove any visible dirt or debris. Make sure to choose a cloth or swab that won’t leave behind any fibers or lint.
- Isopropyl alcohol or printhead cleaning solution: This cleaning solution is specifically designed to break down dried ink and unclog printheads. You can find printhead cleaning solutions available in the market, or you can use isopropyl alcohol as an alternative. Ensure that the alcohol concentration is at least 90% for optimal cleaning.
- Distilled water: Distilled water is preferred for rinsing the printheads after cleaning. It is free from impurities that can potentially harm the printheads or leave residue behind.
- Gloves: Wearing gloves will protect your hands from coming into direct contact with the cleaning solution and prevent any potential irritation.
- Container or bowl: You will need a container or bowl to soak the printheads in the cleaning solution. Ensure that it is deep enough to submerge the printheads completely.
- Soft brush: A soft-bristled brush can be useful for gently removing any stubborn dirt or dried ink that may be stuck on the printheads.
- Lint-free cloth or paper towels: These will be used to dry the printheads after rinsing them with distilled water. Again, make sure they are lint-free to avoid leaving any residue.
By having these materials ready, you’ll be well-equipped to clean your printer’s printheads effectively and efficiently. Proper tools and materials will ensure that the cleaning process is thorough yet gentle, helping you restore print quality without causing any damage to the printheads or the printer itself.
Step 1: Turn Off and Disassemble Your Printer
Before you begin the cleaning process, it is crucial to turn off your printer and disconnect it from the power source. This ensures your safety and prevents any accidental damage while working on the printheads. Once the printer is turned off, follow these steps to disassemble it:
- Open the printer cover: Most printers have a cover that can be lifted or opened to access the internal components. Consult the user manual specific to your printer model for instructions on how to open the cover.
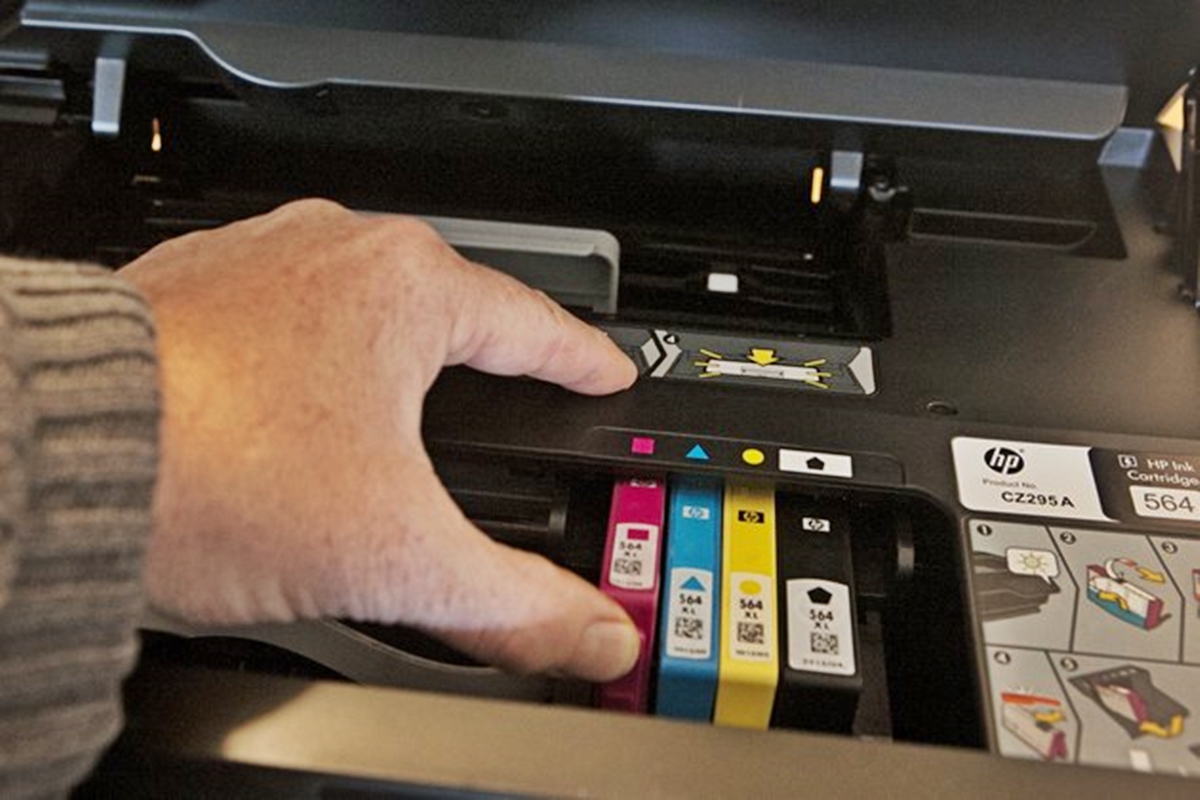
- Remove the ink cartridges: Carefully remove the ink cartridges from the printer. Set them aside in a clean, dry place away from direct sunlight. Some printers may require you to lift a latch or push a button to release the cartridges.
- Locate the printheads: Printheads are usually located underneath the ink cartridge cradle. Look for a small compartment or assembly that houses the printheads. Refer to your printer’s user manual for the exact location and instructions.
- Remove the printheads: Once you have located the printheads, gently remove them from the printer. Be careful not to apply excessive force or touch the delicate nozzles on the bottom of the printhead. Place the printheads on a clean surface or in a container for further cleaning.
By turning off and disassembling your printer properly, you create a safe and accessible workspace for cleaning the printheads. Remember to handle the components with care to avoid any damage. Proper disassembly sets the stage for the subsequent steps in the printhead cleaning process.
Step 2: Remove and Inspect the Printheads
Now that you have disassembled your printer, it’s time to remove and inspect the printheads. Follow these steps to ensure a thorough cleaning process:
- Handle the printheads with care: Printheads are delicate components, so it’s important to handle them gently to avoid any damage. Avoid touching the nozzles or contacts on the bottom of the printheads, as this can disrupt their functionality.
- Inspect the printheads for clogs: Take a close look at the printheads to check for any visible clogs or blockages. Clogs can appear as dried ink or debris, obstructing the smooth flow of ink onto the paper. Use a flashlight or magnifying glass if necessary to get a clear view of the printheads.
- Identify color-specific printheads: If your printer uses separate printheads for different ink colors, make note of each color’s respective printhead. This will ensure that you clean them individually and avoid mixing the cleaning solution or causing cross-contamination.
- Inspect the printhead contacts: Look at the contacts or electrical connectors on the printheads. Ensure that they are clean and free from any dirt or corrosion. If you notice any buildup, use a soft cloth or cotton swab lightly dampened with isopropyl alcohol to gently clean them.
By removing and inspecting the printheads, you can assess the extent of the clogs and ensure that all necessary areas are cleaned. Taking the time to inspect the printheads ensures that you address any visible issues and prepares you for the subsequent steps in the cleaning process.
Step 3: Prepare the Cleaning Solution
Now that you have removed and inspected the printheads, it’s time to prepare the cleaning solution. The cleaning solution effectively breaks down dried ink and debris, allowing you to restore the optimal functioning of the printheads. Follow these steps to prepare the cleaning solution:
- Choose the appropriate cleaning solution: Depending on your printer model and manufacturer recommendations, you can either use a printhead cleaning solution specifically designed for your printer or isopropyl alcohol. Ensure that the alcohol concentration is at least 90% to effectively dissolve dried ink.
- Mix the cleaning solution: If you are using a specific printhead cleaning solution, follow the instructions provided on the packaging to mix it with distilled water if necessary. If you are using isopropyl alcohol, pour a small amount into a container and dilute it with an equal amount of distilled water.
- Do not use tap water: It is important to use distilled water rather than tap water. Tap water may contain minerals or impurities that can leave residue on the printheads and potentially cause damage.
- Ensure proper dilution: Be careful not to use a cleaning solution that is too concentrated, as it may be too harsh and can damage the printheads. Similarly, avoid using a solution that is too diluted, as it may be less effective in removing clogs.
- Prepare enough solution: Depending on the number of printheads you need to clean, prepare enough cleaning solution to fully submerge them. Make sure the container or bowl you are using is deep enough to accommodate the printheads comfortably.
By properly preparing the cleaning solution, you ensure that it is appropriate for your printer and that it will effectively dissolve any clogs. Taking the time to mix the solution with distilled water and ensuring the right concentration sets the stage for a successful printhead cleaning process.
Step 4: Soak the Printheads in the Cleaning Solution
With the cleaning solution prepared, it’s time to proceed to the next step: soaking the printheads. This process allows the solution to penetrate and dissolve any clogs or dried ink that may be obstructing the printheads’ functionality. Follow these steps to soak the printheads in the cleaning solution:
- Place the printheads in the cleaning solution: Submerge the printheads fully into the container or bowl containing the cleaning solution. Ensure that the solution completely covers the printheads.
- Let the printheads soak: Allow the printheads to soak in the cleaning solution for a sufficient amount of time. The duration can vary depending on the level of clogs and the specific instructions provided by your printer manufacturer or cleaning solution provider. Typically, a soaking time of 15 to 30 minutes is recommended.
- Avoid excessive soaking time: While it’s important to give the cleaning solution enough time to work its magic, it’s equally crucial to avoid excessive soaking. Prolonged exposure to the solution can potentially damage the printheads, so be mindful of the recommended soaking duration.
- Ensure proper ventilation: While the printheads are soaking, make sure the area is well-ventilated to avoid inhaling any fumes from the cleaning solution. If necessary, open windows or work in a well-ventilated room.
- Avoid agitating the solution: During the soaking process, refrain from stirring or agitating the cleaning solution. Let the solution work on its own to dissolve the clogs and debris.
By following these steps and allowing the printheads to soak in the cleaning solution, you give the solution ample time to break down the clogs. This step is crucial in restoring the optimal functionality of the printheads and ensuring that they can dispense ink smoothly during the printing process.
Step 5: Clean the Printheads Using a Soft Cloth or Cotton Swab
After soaking the printheads in the cleaning solution, it’s time to clean them using a soft cloth or cotton swab. This step helps remove any remaining residue or stubborn clogs from the printheads. Follow these steps to clean the printheads effectively:
- Gently remove the printheads from the cleaning solution: Take the printheads out of the container or bowl containing the cleaning solution. Be cautious not to touch the nozzles or contacts on the bottom of the printheads.
- Prepare a clean, lint-free cloth or cotton swabs: Use a cloth or swab that is specifically designed for delicate surfaces and won’t leave behind any fibers or lint. Make sure it is clean and dry before proceeding.
- Gently wipe the printheads: Use the soft cloth or cotton swab to gently wipe the surface of the printheads. Apply light pressure and make small, circular motions to dislodge any remaining debris or residue. Be careful not to apply excessive force, as it may damage the printheads.
- Pay attention to the nozzles: Pay special attention to the nozzles on the bottom of the printheads. These are critical for ink distribution. Wipe them gently to ensure they are clean and free from obstructions.
- Repeat the process if necessary: If the cloth or swab becomes dirty or saturated with ink or residue, switch to a clean one. Continue wiping the printheads until no more dirt or debris is visible.
By cleaning the printheads with a soft cloth or cotton swab, you can effectively remove any remaining clogs or residue. Take your time and be gentle during this step to prevent any damage to the delicate printhead components. Proper cleaning ensures that the printheads are free from obstructions and can deliver optimal print quality.
Step 6: Rinse and Dry the Printheads
After cleaning the printheads, it’s important to rinse them and ensure they are completely dry before reassembling your printer. This step helps remove any residual cleaning solution and prepares the printheads for optimal performance. Follow these steps to rinse and dry the printheads:
- Prepare distilled water: Fill a container or bowl with distilled water. Ensure that there is enough water to fully submerge the printheads.
- Submerge the printheads in distilled water: Place the cleaned printheads into the container or bowl filled with distilled water. Allow the printheads to soak for a few minutes to rinse away any remaining cleaning solution.
- Gently agitate the water: While the printheads are submerged, gently swirl or agitate the water. This helps dislodge any residual cleaning solution from the nozzles and other small crevices on the printheads.
- Remove the printheads from the water: Carefully take out the printheads from the container or bowl, ensuring not to touch the nozzles or contacts.
- Dry the printheads: Use a clean, lint-free cloth or paper towels to gently blot and dry the printheads. Ensure that there is no excess water remaining on the printheads.
- Allow the printheads to air dry: After blotting the printheads, place them on a clean and dry surface, allowing them to air dry completely. Make sure the printheads are completely dry before reassembling your printer.
By rinsing and drying the printheads, you remove any residual cleaning solution and eliminate the risk of it causing damage or interfering with the ink flow. Proper rinsing and thorough drying ensure that the printheads are ready for reassembly and can deliver optimal print quality.
Step 7: Reassemble and Turn on Your Printer
Now that you have completed the cleaning and drying process for the printheads, it’s time to reassemble your printer and get ready to resume printing. Follow these steps to reassemble your printer:
- Ensure the printheads are completely dry: Before reassembling your printer, double-check that the printheads are thoroughly dry. Any residual moisture can impact the performance of the printheads and potentially cause issues.
- Place the printheads back in their respective slots: Carefully insert each printhead back into its designated slot in the printer. Make sure they are correctly aligned and properly seated in the slots.
- Reinstall the ink cartridges: Place the ink cartridges back into their corresponding slots, ensuring they click securely into place. Follow any specific instructions provided by your printer manufacturer on installing or replacing ink cartridges.
- Close the printer cover: Once the printheads and ink cartridges are reinstalled, close the printer cover properly. Ensure that it is securely closed to avoid any potential issues during printing.
- Connect the printer to the power source: Plug in the power cable to the printer and connect it to a power source. Ensure that the printer is properly connected and ready for operation.
- Turn on the printer: Press the power button or switch to turn on your printer. Give it a moment to initialize and calibrate the printheads.
- Run a test print: Once the printer has powered on, it’s a good idea to run a test print to ensure that the printheads are functioning properly and producing high-quality prints. Use a sample document or test page to perform the test print.
By carefully reassembling and turning on your printer, you can verify that the cleaning process was successful and that the printheads are ready for action. Performing a test print allows you to confirm that the printheads are dispensing ink correctly and that the print quality has been restored.
Tips to Maintain Clean Printheads in the Future
After going through the process of cleaning your printer’s printheads, it’s important to take proactive measures to maintain their cleanliness and prolong their lifespan. Here are some tips to help you keep your printheads clean in the future:
- Print regularly: Regular use of your printer helps prevent ink from drying out in the printheads. If you have long periods of printer inactivity, consider printing a test page or nozzle check periodically to keep the ink flowing.
- Use high-quality ink: Opt for high-quality ink cartridges that are compatible with your printer model. Poor quality or counterfeit ink can result in more frequent clogs and printhead issues.
- Avoid touching the printheads: Touching the printheads with your fingers can transfer oils and dirt, leading to clogs. It’s important to handle the printheads only by their edges to maintain their cleanliness.
- Keep the printer clean: Regularly clean the exterior of your printer to remove dust and debris that can find their way into the printheads. Use a soft, lint-free cloth to wipe down the printer surfaces gently.
- Perform regular maintenance: Follow the maintenance guidelines provided by your printer manufacturer. This may include running printhead cleaning cycles or using the printer’s built-in maintenance tools to keep the printheads in optimal condition.
- Store ink cartridges properly: If you need to remove ink cartridges from your printer for any reason, store them upright in a cool and dry place. This helps prevent the ink from drying out and clogging the printheads.
- Use the printer’s recommended settings: Set your printer to the recommended print quality and paper settings to ensure optimal printhead performance. Using the wrong settings can affect the ink flow and lead to clogs.
- Perform periodic printhead cleanings: Even if your printer is printing well, consider performing a routine printhead cleaning every few months to remove any buildup that may occur over time.
By following these tips, you can maintain clean printheads and enjoy consistent print quality. Regular maintenance and proper printer care will prolong the life of your printheads, prevent costly repairs, and ensure smooth and professional printing for years to come.