
Prerequisites for Transferring XRP to Ledger Nano X
Before you can transfer XRP to your Ledger Nano X, there are a few prerequisites that you need to fulfill. Ensure that you have the following:
- A Ledger Nano X hardware wallet
- The latest firmware version installed on your Ledger Nano X
- The Ledger Live app installed on your computer or smartphone
- Access to a computer or smartphone with an internet connection
- An exchange platform account that supports XRP
- XRP funds available in your exchange account
It’s crucial to have a Ledger Nano X device as it provides the highest level of security for storing your XRP tokens. The device keeps your private keys offline, ensuring that they are never exposed to potential online threats.
Before proceeding with the transfer, make sure that your Ledger Nano X has the latest firmware installed. This can be done by connecting your device to your computer or smartphone and launching the Ledger Live app. If an update is available, follow the prompts to install it.
Additionally, you will need to set up an account on an exchange platform that supports XRP. Popular choices include Binance, Coinbase, and Kraken. Ensure that you have XRP funds available in your exchange account that you want to transfer to your Ledger Nano X.
Having the necessary prerequisites in place will ensure a smooth and secure transfer of your XRP tokens to your Ledger Nano X.
Step 1: Setting up your Ledger Nano X
Before transferring XRP to your Ledger Nano X, you need to set up the device properly. Follow these steps to get started:
- Unbox your Ledger Nano X and connect it to your computer or smartphone using the provided USB cable.
- On the device screen, choose a PIN code. Make sure it is a unique combination and not easily guessable.
- Next, the device will generate a Recovery Phrase. This phrase is essential for recovering your XRP wallet in case your device gets lost or damaged. Write down the phrase on the provided recovery sheet and store it in a safe place. Do not take a screenshot or store it digitally, as it could be vulnerable to hacking.
- Once you have safely recorded your Recovery Phrase, confirm it on the device by entering the words in the correct order.
- Choose a password for your Ledger Live app, which will be used to access and manage your XRP wallet on your computer or smartphone.
- Install the Ledger Live app on your computer or smartphone by visiting the official Ledger website and following the download instructions for your operating system.
- Launch the Ledger Live app and connect your Ledger Nano X to your computer or smartphone using the USB cable.
- Follow the on-screen instructions in the Ledger Live app to set up your device. This includes installing the necessary firmware updates and choosing the XRP app to install on your Ledger Nano X.
Once you have successfully set up your Ledger Nano X, you are ready to proceed with transferring XRP to your device. It is important to complete this step carefully to ensure the security and integrity of your XRP holdings.
Step 2: Installing the XRP app on your Ledger Nano X
After setting up your Ledger Nano X, the next step is to install the XRP app on your device. This app will allow you to manage your XRP tokens securely. Follow these instructions to install the XRP app:
- Ensure that your Ledger Nano X is connected to your computer or smartphone and that the Ledger Live app is open.
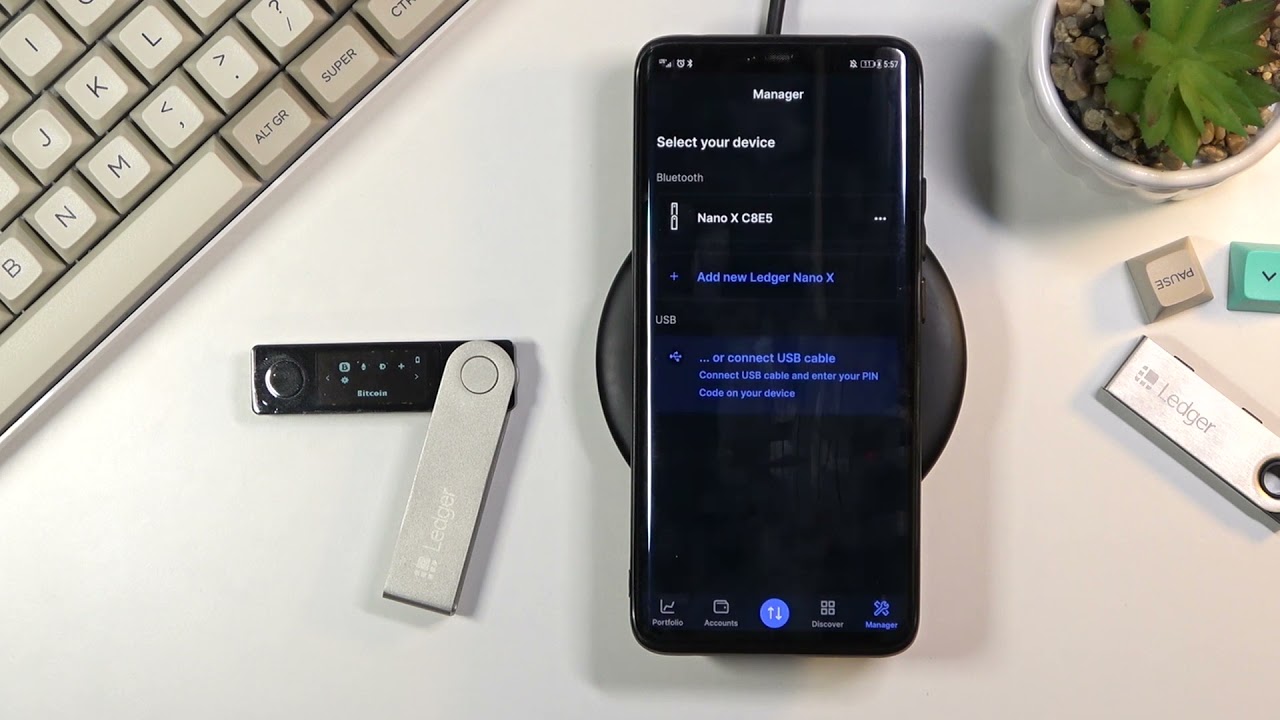
- In the Ledger Live app, navigate to the Manager tab. Here, you will find a list of all available apps for installation on your device.
- Search for “XRP” in the app catalogue and locate the XRP app.
- Click on the “Install” button next to the XRP app.
- Follow the on-screen prompts to confirm the installation. You may need to enter your PIN code on the Ledger Nano X device to authorize the installation.
- Once the installation is complete, the XRP app will appear on your Ledger Nano X’s home screen.
Installing the XRP app on your Ledger Nano X is essential for managing your XRP tokens securely. It enables you to view your XRP balance, send and receive XRP, and access other features specific to XRP on your device.
After successfully installing the XRP app, you are now ready to create an XRP wallet on your Ledger Nano X.
Step 3: Creating an XRP wallet on your Ledger Nano X
To transfer XRP to your Ledger Nano X, you need to create a dedicated XRP wallet on the device. Follow these steps to create an XRP wallet:
- Connect your Ledger Nano X to your computer or smartphone and open the Ledger Live app.
- In the Ledger Live app, navigate to the Accounts tab.
- Click on the “Add account” button.
- Select the “Ledger Nano X” option as the account type.
- Scroll down to find and select the XRP app that you previously installed.
- On your Ledger Nano X device, choose the XRP app from the app menu.
- Follow the on-screen instructions in the Ledger Live app and on your device to complete the account creation process.
Once you have successfully created an XRP wallet on your Ledger Nano X, it will be listed under the Accounts tab in the Ledger Live app. You can now view your XRP balance and manage your XRP holdings securely.
Creating an XRP wallet on your Ledger Nano X ensures that your XRP tokens are stored using the device’s offline security features. This offers enhanced protection against potential hacking or unauthorized access.
After creating your XRP wallet, it’s time to obtain the XRP address from your Ledger Nano X for the transfer.
Step 4: Obtaining the XRP address from your Ledger Nano X
Before you can transfer XRP to your Ledger Nano X, you need to obtain the XRP address associated with your device. Follow these steps to obtain the XRP address:
- Connect your Ledger Nano X to your computer or smartphone and open the Ledger Live app.
- In the Ledger Live app, navigate to the Accounts tab.
- Locate and select your XRP account from the list of accounts.
- Your XRP address will be displayed on the screen. It is a combination of letters and numbers, typically starting with the letter “r”.
- You can choose to copy the XRP address to your clipboard by clicking on the copy icon next to the address.
The XRP address obtained from your Ledger Nano X is unique to your device and serves as the destination for the XRP transfer. It is important to double-check the address to ensure accuracy, as any mistakes can result in the loss of your XRP tokens.
Keep in mind that the XRP address generated by your Ledger Nano X remains the same for future transfers. You can use this address multiple times to receive XRP into your wallet.
With the XRP address in hand, you are now ready to set up the XRP transfer on your exchange platform.
Step 5: Setting up the XRP transfer on your exchange platform
To transfer XRP from your exchange account to your Ledger Nano X, you need to set up the transfer on your exchange platform. Follow these steps to initiate the transfer:
- Log into your exchange platform account that holds your XRP balance.
- Navigate to the “Withdraw” or “Send” section, which allows you to transfer funds from your exchange account.
- Select XRP as the cryptocurrency you want to transfer.
- Paste the XRP address obtained from your Ledger Nano X into the designated recipient address field.
- Enter the amount of XRP you want to transfer. Ensure that you have enough balance available in your exchange account.
- Double-check all the details, including the XRP address and transfer amount, to ensure accuracy.
- Review any transaction fees associated with the transfer.
- Click on the “Send” or “Withdraw” button to initiate the transfer.
- Depending on the exchange platform, you may need to authenticate the transfer using a verification method, such as entering an authentication code or confirming the transaction via email.
It’s important to note that the specific steps and interface may vary slightly depending on the exchange platform you are using. Refer to the platform’s user guide or support documentation for detailed instructions relevant to your chosen exchange.
Once you have successfully set up the XRP transfer on your exchange platform, the exchange will initiate the transaction to send the XRP to your designated Ledger Nano X address.
Now that the transfer is in progress, we can move on to verifying the XRP transfer on your Ledger Nano X in the next step.
Step 6: Initiating the XRP transfer to your Ledger Nano X
After setting up the XRP transfer on your exchange platform, it’s time to initiate the actual transfer to your Ledger Nano X. Follow these steps to complete the transfer:
- Disconnect your Ledger Nano X from your computer or smartphone if it is still connected.
- Connect your Ledger Nano X to your computer or smartphone using the provided USB cable.
- On your Ledger Nano X device, unlock it by entering your PIN code.
- Navigate to the XRP app on your Ledger Nano X and open it.
- On your computer or smartphone, open the Ledger Live app and select your XRP account.
- Click on the “Receive” or “Receive Funds” button in the Ledger Live app.
- Verify that the address displayed on the Ledger Live app matches the XRP address you previously obtained from your Ledger Nano X device.
- If the address matches, click on the “Copy” button to copy the XRP address to your clipboard.
- Go back to the exchange platform where you initially set up the transfer.
- Paste the XRP address from your clipboard into the recipient address field of the exchange platform.
- Confirm the transfer details, including the XRP address and amount, to ensure accuracy.
- Review any transaction fees associated with the transfer.
- When you are satisfied with the details, click on the “Confirm” or “Send” button to initiate the XRP transfer.
Once the transfer is initiated, you may need to wait for a confirmation on the exchange platform. XRP transactions generally require multiple confirmations on the XRP network before they are considered fully completed.
During this time, it is important to keep your Ledger Nano X connected and accessible. Do not disconnect or turn off your device until the XRP transfer is confirmed on both the exchange platform and the Ledger Live app.
Now that the transfer is initiated, you can move on to the next step to verify the XRP transfer on your Ledger Nano X.
Step 7: Verifying the XRP transfer on your Ledger Nano X
After initiating the XRP transfer to your Ledger Nano X, it is important to verify that the transfer has been successfully completed. Follow these steps to verify the XRP transfer:
- Keep your Ledger Nano X connected to your computer or smartphone via the USB cable.
- On your Ledger Nano X device, navigate to the XRP app and open it.
- In the Ledger Live app on your computer or smartphone, select your XRP account.
- Verify that the XRP balance displayed in the Ledger Live app has been updated to reflect the transferred amount.
- Check the transaction history in the Ledger Live app to ensure that the XRP transfer is listed.
- If the transferred amount is correct and the transaction appears in the history, the XRP transfer has been successfully completed.
Verifying the XRP transfer on your Ledger Nano X ensures that the funds have been securely received and are now under your control. By checking the XRP balance and transaction history in the Ledger Live app, you can have peace of mind that the transfer was executed as intended.
If you encounter any discrepancies or do not see the XRP transfer reflected in your Ledger Live app, double-check the XRP address used for the transfer and compare it with the transaction details on the exchange platform. If necessary, reach out to the exchange platform’s support for further assistance.
Now that you have verified the XRP transfer, it is important to safely store your Ledger Nano X to protect your XRP holdings.
Step 8: Safely storing your Ledger Nano X after the transfer
Once you have successfully transferred XRP to your Ledger Nano X, it is crucial to properly store your device to ensure the security of your XRP holdings. Follow these steps to safely store your Ledger Nano X:
- Keep your Ledger Nano X in a secure and physically safe location, such as a locked drawer or a safe.
- Ensure that the USB cable and other accessories are stored separately from the device to prevent any accidental damage.
- Consider using a protective case or cover for your Ledger Nano X to protect it from scratches or other physical damage.
- Create a backup copy of your Recovery Phrase by writing it down on a separate sheet of paper. Store this backup in a different secure location, preferably outside your home or office.
- Avoid sharing your Recovery Phrase, PIN code, or any sensitive information related to your Ledger Nano X with anyone.
- Regularly check for firmware updates for your Ledger Nano X by connecting it to the Ledger Live app on your computer or smartphone. Install any available updates to ensure the latest security features and bug fixes.
- If you plan to store a significant amount of XRP, consider investing in additional security measures such as a hardware security module (HSM) or a safety deposit box.
- Stay vigilant against phishing attempts or scams that may try to trick you into revealing your Ledger Nano X’s security information. Always verify the authenticity of any communication or website before entering sensitive information.
By following these steps, you can enhance the security and protection of your Ledger Nano X and ensure the safety of your XRP holdings. Remember to regularly review and update your security practices to stay ahead of any potential threats or vulnerabilities.
Congratulations! You have successfully transferred XRP to your Ledger Nano X and completed the necessary steps to safeguard your device and funds.
Troubleshooting Tips for XRP to Ledger Nano X Transfer
While transferring XRP to your Ledger Nano X is usually a smooth process, you may encounter some common issues. Here are some troubleshooting tips to help you resolve any potential problems:
- Incorrect XRP address: Double-check that the XRP address you provided for the transfer is correct. Even a small mistake can result in the loss of your funds. Compare the address on your Ledger Nano X with the address used on the exchange platform.
- Slow transaction confirmation: XRP transactions require multiple confirmations on the XRP network before they are considered final. If the transaction is not confirming after a reasonable period, check the XRP network for any known congestion or delays.
- Insufficient XRP balance: Ensure that you have sufficient XRP balance in your exchange account to cover the transfer amount, as well as any associated transaction fees. Insufficient balance may result in a failed or partial transfer.
- Outdated Ledger Nano X firmware: Check if your Ledger Nano X has the latest firmware version installed. Firmware updates often include bug fixes and security enhancements. Connect your device to the Ledger Live app to check for and install any available updates.
- Incorrect app installation: Ensure that the XRP app on your Ledger Nano X is installed correctly. If you encounter any issues with the app, try uninstalling and reinstalling it through the Ledger Live Manager.
- Connection issues: If you are experiencing difficulties connecting your Ledger Nano X to your computer or smartphone, try using a different USB cable or port. Ensure that your device is powered on and unlocked when connecting.
- Ledger Live synchronization: If your XRP balance or transaction history is not updating in the Ledger Live app, try refreshing the app or clearing the cache. If the issue persists, check the Ledger Support website for any known synchronization issues or contact their support team.
- Phishing attempts: Be cautious of phishing attempts or fake websites that may impersonate Ledger. Only enter your sensitive information or Recovery Phrase on the official Ledger Live app or Ledger’s official website. Always verify the authenticity of any communication or website before providing any sensitive information.
If you encounter any other issues or are unable to resolve your problem, reach out to Ledger’s support team for further assistance. They are dedicated to helping users solve any technical difficulties and ensuring the security of your XRP holdings.
By following these troubleshooting tips and seeking appropriate support when needed, you can overcome common challenges and successfully complete the XRP transfer to your Ledger Nano X.