
What is Ledger Nano S?
The Ledger Nano S is a hardware wallet designed to securely store and manage cryptocurrencies. It is a compact and portable device that provides an extra layer of protection for your digital assets by keeping your private keys offline and away from potential online threats. Developed by Ledger, a leading provider of cryptocurrency wallets, the Ledger Nano S has gained popularity among crypto enthusiasts for its advanced security features and user-friendly interface.
Unlike software wallets or online exchanges, which are vulnerable to hacking and malicious attacks, a hardware wallet like the Ledger Nano S provides a physical barrier to protect your cryptocurrencies. It operates offline, meaning that even if your computer or smartphone is compromised, your assets remain safe.
The Ledger Nano S supports a wide range of cryptocurrencies, including Bitcoin, Ethereum, Ripple, Litecoin, and many more. Its versatility and compatibility with multiple currencies make it a popular choice for individuals who hold various digital assets.
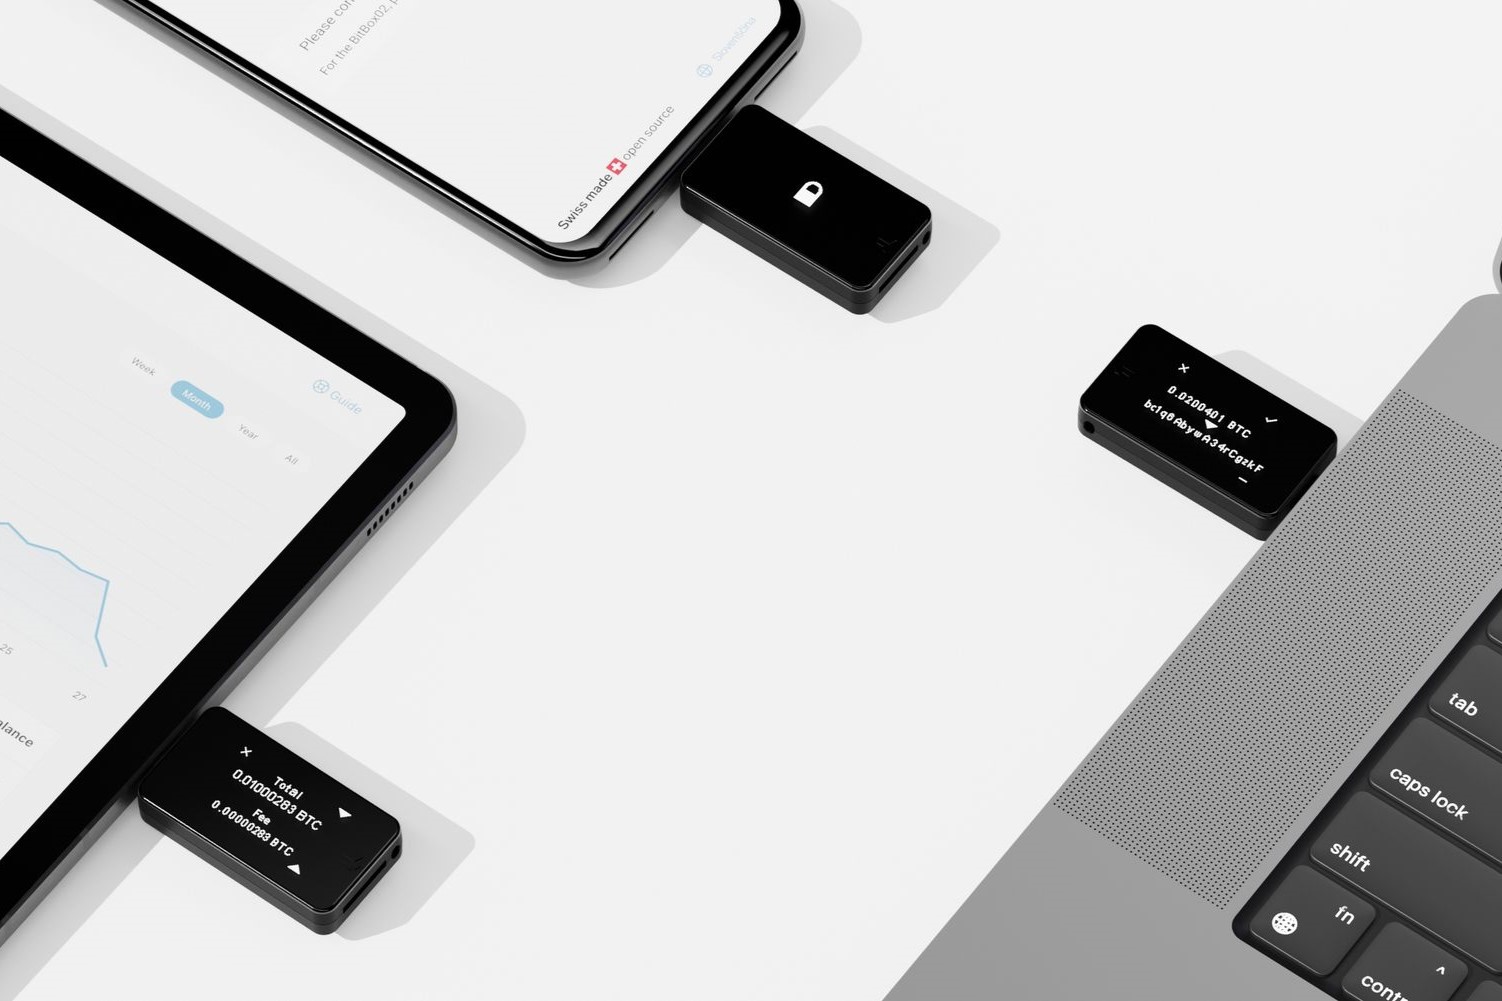
This hardware wallet comes with a built-in display that allows you to verify and confirm transactions. This feature ensures that you have full control over your funds and can securely approve any transaction before it is executed. The device also requires a PIN code to access the wallet, providing an extra layer of security against unauthorized access.
In addition to storing cryptocurrencies, the Ledger Nano S also offers features such as secure backup and restoration, multi-currency compatibility, and the ability to manage multiple accounts within a single device. It is compatible with Windows, Mac, Linux, and even supports mobile devices via the Ledger Live app.
Overall, the Ledger Nano S is a reliable and user-friendly hardware wallet that offers enhanced security and convenience for cryptocurrency enthusiasts. Whether you are a long-term investor or an active trader, the Ledger Nano S provides peace of mind knowing that your digital assets are protected against potential cyber threats.
Why use the Ledger Nano S?
The Ledger Nano S is a popular choice among cryptocurrency users for several compelling reasons:
1. Enhanced security: One of the primary reasons to use the Ledger Nano S is its robust security features. By keeping your private keys offline and storing them within a tamper-resistant hardware device, it significantly reduces the risk of hacking and unauthorized access. The device requires physical confirmation for transaction approvals, providing an extra layer of protection against potential threats.
2. Offline storage: Unlike software wallets or online exchanges, the Ledger Nano S operates offline. This means that your cryptocurrencies are not exposed to the internet, reducing the chances of being compromised by malware or hackers. With offline storage, your digital assets are kept securely within the hardware wallet, ensuring peace of mind.
3. Multi-currency support: The Ledger Nano S supports a wide range of cryptocurrencies, including Bitcoin, Ethereum, Ripple, Litecoin, and many others. This makes it a versatile solution for individuals who hold multiple digital assets. Having all your cryptocurrencies stored in one device simplifies management and ensures easy access to your funds whenever needed.
4. User-friendly interface: Despite its advanced security features, the Ledger Nano S is designed with user convenience in mind. The device features a straightforward interface, making it easy for both beginners and experienced cryptocurrency users to navigate and manage their funds. With a built-in display, you can easily verify and confirm transactions directly on the device.
5. Backup and restoration: The Ledger Nano S offers a secure backup and restoration process, allowing you to recover your funds in the event of loss, theft, or damage to the device. By implementing a robust backup system, you can have peace of mind knowing that your cryptocurrencies are protected and can be recovered if necessary.
6. Compatibility and portability: The Ledger Nano S is compatible with various operating systems, including Windows, Mac, and Linux. It also provides mobile support through the Ledger Live app, allowing you to manage your cryptocurrencies on the go. Its small and portable design makes it easy to carry your hardware wallet anywhere, ensuring access to your funds whenever and wherever you need them.
In summary, the Ledger Nano S offers enhanced security, offline storage, multi-currency support, a user-friendly interface, backup and restoration options, and compatibility with different devices. By choosing the Ledger Nano S, you can securely store and manage your digital assets, providing peace of mind and convenience for your cryptocurrency journey.
Choosing the right cryptocurrency wallet
When it comes to safely storing and managing your cryptocurrencies, choosing the right wallet is crucial. Here are some factors to consider when selecting a cryptocurrency wallet:
1. Security: Security should be your top priority when choosing a cryptocurrency wallet. Look for wallets that offer robust security features, such as encryption, two-factor authentication, and offline storage of private keys. Hardware wallets like the Ledger Nano S are often regarded as the most secure option due to their physical isolation from the internet.
2. Compatibility: Ensure that the wallet you choose supports the specific cryptocurrencies you plan to hold or trade. Different wallets support different cryptocurrencies, so check that your chosen wallet is compatible with the digital assets you own or plan to acquire.
3. User-friendliness: Consider the user interface and ease of use of the wallet. A user-friendly wallet simplifies the process of sending, receiving, and managing your cryptocurrencies, especially for beginners. Look for a wallet that has a clear and intuitive interface, making it easy to navigate and access your funds.
4. Backup and recovery: Protecting your funds from loss or theft is essential. Choose a wallet that provides options for securely backing up and restoring your wallet in case of device failure, loss, or theft. Backup features such as mnemonic phrases or seed phrases are common in many wallets and ensure you can recover your funds.
5. Community support and reputation: Research the wallet’s reputation and consider the community support it has. Look for wallets that have been around for a while and have positive reviews. Checking online forums, social media platforms, and community discussions can provide valuable insights into the wallet’s reliability and customer support.
6. Additional features: Some wallets offer additional features such as integration with decentralized applications (DApps) or the ability to stake certain cryptocurrencies. Consider if these additional features align with your needs and preferences.
7. Updates and ongoing development: Regular updates and ongoing development by the wallet’s developers are important. This ensures that security vulnerabilities are addressed promptly and that the wallet remains compatible with evolving cryptocurrency protocols and technologies.
By considering these factors, you can make an informed decision and choose a cryptocurrency wallet that best suits your needs. Remember, the security of your digital assets should always be a top priority, so take the time to research and select a reliable and reputable wallet that you feel confident using.
Setting up your Ledger Nano S
The process of setting up your Ledger Nano S is straightforward and can be completed in a few simple steps:
1. Unboxing the device: Start by unboxing your Ledger Nano S and familiarize yourself with its components. Ensure that you have the device, USB cable, and recovery sheet, which will be used later for backup purposes.
2. Downloading Ledger Live: Ledger Live is the official desktop application provided by Ledger to manage your cryptocurrencies on the Ledger Nano S. Visit the Ledger Live website and download the application suitable for your operating system.
3. Installing Ledger Live: Once downloaded, install Ledger Live on your computer and follow the on-screen instructions for the installation process. Make sure to choose the correct options based on your preferences and operating system.
4. Initializing the Ledger Nano S: Connect your Ledger Nano S to your computer using the provided USB cable. After connecting, the device will display “Use wallet to view accounts.” Press the right button on the device to continue.
5. Choosing a PIN code: Next, you will be prompted to set up a PIN code for your Ledger Nano S. Use the device’s buttons to navigate and confirm your selection. Choose a PIN code that is secure and easy for you to remember, but not easily guessable by others.
6. Writing down the recovery seed: The Ledger Nano S will generate a recovery seed, which is a list of words that can be used to restore your wallet in case of damage or loss of the device. Write down the recovery seed on the provided recovery sheet and keep it in a safe place. Be sure to store it offline and away from prying eyes.
7. Confirming the seed phrases: Once you have written down the recovery seed, the device will prompt you to confirm some of the words from the list. Use the device’s buttons to navigate through the list and confirm the selected words.
8. Installing required applications: After confirming the seed phrases, Ledger Live will guide you through the process of installing the necessary applications for the cryptocurrencies you wish to manage on your Ledger Nano S. Follow the on-screen instructions to install the desired applications.
9. Completing the setup: Once the required applications are installed, you have successfully set up your Ledger Nano S. You can now use Ledger Live to manage your cryptocurrencies, send or receive funds, and view your account balances.
It is important to note that during the setup process, it is recommended to double-check the official Ledger website to ensure that you are downloading legitimate software and firmware updates. This helps to prevent any potential security risks and ensures that you have the most up-to-date version of the Ledger Nano S firmware.
By following these steps, you can set up your Ledger Nano S and start securely managing your cryptocurrencies with peace of mind knowing that your assets are protected.
Transferring cryptocurrency to your Ledger Nano S
Once you have set up your Ledger Nano S, you can start transferring your cryptocurrencies to the wallet for secure storage. Here are the general steps to transfer cryptocurrency to your Ledger Nano S:
Step 1: Launch Ledger Live
Open the Ledger Live application on your computer and enter your PIN code to access your device.
Step 2: Connect your Ledger Nano S
Connect your Ledger Nano S to your computer using the USB cable and follow the instructions on Ledger Live to ensure proper connection.
Step 3: Select the cryptocurrency
In Ledger Live, select the specific cryptocurrency you want to transfer to your Ledger Nano S from the list of supported cryptocurrencies. For example, if you want to transfer Bitcoin, choose the Bitcoin option.
Step 4: Verify the destination address
On your Ledger Nano S device, navigate to the corresponding cryptocurrency application and ensure that the address displayed on the device matches the address shown in Ledger Live. This step ensures that you are sending the cryptocurrency to the correct address.
Step 5: Copy the recipient address
In Ledger Live, copy the recipient address to which you want to send the cryptocurrency. Double-check the address to ensure accuracy and prevent any errors during the transfer.
Step 6: Initiate the transaction
In Ledger Live, specify the amount of cryptocurrency you want to transfer and confirm the transaction. Follow any additional prompts or authentication steps required by Ledger Live to proceed with the transfer.
Step 7: Confirm the transaction on your Ledger Nano S
On your Ledger Nano S, carefully review the transaction details shown on the device’s screen. Verify that the recipient address and amount are correct. If everything looks accurate, confirm the transaction on the device by pressing the appropriate button(s).
Step 8: Wait for confirmation
Once the transaction is confirmed and sent, you will need to wait for the cryptocurrency network to process and confirm the transaction. The time required for confirmation can vary depending on the specific cryptocurrency being transferred and network congestion.
Step 9: Check transaction status
In Ledger Live, you can monitor the status of your transaction by navigating to the “Transactions” section of the respective cryptocurrency. This allows you to track the progress and ensure the successful completion of the transfer.
Remember to exercise caution and ensure the accuracy of each step when transferring cryptocurrency to your Ledger Nano S. Double-check addresses, amounts, and transaction details to prevent any potential errors or loss. Always verify transaction details directly from the Ledger Nano S device’s screen for added security.
It is worth noting that the process of transferring cryptocurrency may vary slightly depending on the specific cryptocurrency and the wallet or exchange from which you are sending the funds. Make sure to familiarize yourself with the specific instructions for each cryptocurrency to ensure a smooth and successful transfer.
Step-by-step guide to transferring Bitcoin to Ledger Nano S
Transferring Bitcoin to your Ledger Nano S is a straightforward process. Follow these step-by-step instructions to securely send your Bitcoin to your hardware wallet:
Step 1: Launch Ledger Live
Open the Ledger Live application on your computer and enter your PIN code to access your device.
Step 2: Connect your Ledger Nano S
Connect your Ledger Nano S to your computer using the USB cable and follow the instructions on Ledger Live to ensure proper connection.
Step 3: Navigate to the Bitcoin app
On your Ledger Nano S device, scroll through the available applications and select the Bitcoin app to open it.
Step 4: Verify the address on your device
In the Bitcoin app on your Ledger Nano S, navigate to the “Receive” section. Verify the Bitcoin address displayed on your device’s screen to ensure that it matches the address shown in Ledger Live.
Step 5: Copy the Bitcoin address
In Ledger Live, click on the “Receive” tab within the Bitcoin section. Copy the Bitcoin address provided. Double-check the address to ensure accuracy.
Step 6: Initiate the Bitcoin transfer
In your Bitcoin wallet or exchange account, select the option to send or withdraw Bitcoin. Paste the Bitcoin address you copied from Ledger Live as the recipient address.
Step 7: Specify the transfer amount
Enter the amount of Bitcoin you want to transfer to your Ledger Nano S. Confirm the transaction details, including the recipient address and transfer amount, to ensure accuracy.
Step 8: Confirm the transaction on Ledger Live
In Ledger Live, review the transaction details and ensure everything is correct. Follow any prompts or authentication steps required by Ledger Live to confirm and send the Bitcoin transaction.
Step 9: Confirm the transaction on your Ledger Nano S
On your Ledger Nano S, carefully review the transaction details shown on the device’s screen. Verify that the recipient address and amount are correct. If everything looks accurate, confirm the transaction on the device by pressing the appropriate button(s).
Step 10: Wait for transaction confirmation
Once the transaction is sent, you will need to wait for the Bitcoin network to confirm the transaction. Confirmation time can vary depending on network congestion.
Step 11: Verify transaction status
In Ledger Live, you can monitor the status of your Bitcoin transaction by navigating to the “Transactions” section within the Bitcoin tab. This allows you to track the progress and ensure the successful transfer of your Bitcoin to your Ledger Nano S.
By following these steps, you can securely transfer your Bitcoin to your Ledger Nano S hardware wallet. Remember to always double-check the accuracy of addresses and transaction details to prevent any potential errors or loss of funds. With the Bitcoin now stored on your Ledger Nano S, you have enhanced security and control over your digital assets.
Step-by-step guide to transferring Ethereum to Ledger Nano S
If you want to transfer Ethereum to your Ledger Nano S for secure storage, follow these step-by-step instructions:
Step 1: Launch Ledger Live
Open the Ledger Live application on your computer and enter your PIN code to access your device.
Step 2: Connect your Ledger Nano S
Connect your Ledger Nano S to your computer using the USB cable and follow the instructions on Ledger Live to ensure proper connection.
Step 3: Navigate to the Ethereum app
On your Ledger Nano S device, scroll through the available applications and select the Ethereum app to open it.
Step 4: Verify the address on your device
In the Ethereum app on your Ledger Nano S, navigate to the “Receive” section. Verify the Ethereum address displayed on your device’s screen to ensure that it matches the address shown in Ledger Live.
Step 5: Copy the Ethereum address
In Ledger Live, click on the “Receive” tab within the Ethereum section. Copy the Ethereum address provided. Double-check the address to ensure accuracy.
Step 6: Initiate the Ethereum transfer
Open your Ethereum wallet or exchange account and select the option to send or withdraw Ethereum. Paste the Ethereum address you copied from Ledger Live as the recipient address.
Step 7: Specify the transfer amount and gas fee
Enter the amount of Ethereum you want to transfer to your Ledger Nano S. Additionally, set the appropriate gas fee for the transaction to ensure it is processed in a timely manner. Note that higher gas fees may result in faster confirmation times.
Step 8: Confirm the transaction on Ledger Live
In Ledger Live, review the transaction details and ensure everything is correct. Follow any prompts or authentication steps required by Ledger Live to confirm and send the Ethereum transaction.
Step 9: Confirm the transaction on your Ledger Nano S
On your Ledger Nano S, carefully review the transaction details shown on the device’s screen. Verify that the recipient address and amount are correct. If everything looks accurate, confirm the transaction on the device by pressing the appropriate button(s).
Step 10: Wait for transaction confirmation
After sending the Ethereum transaction, you will need to wait for the network to confirm the transaction. Confirmation time can vary, depending on network congestion and the gas fee used.
Step 11: Verify transaction status
In Ledger Live, you can monitor the status of your Ethereum transaction by navigating to the “Transactions” section within the Ethereum tab. This allows you to track the progress and ensure the successful transfer of your Ethereum to your Ledger Nano S.
By following these steps, you can securely transfer your Ethereum to your Ledger Nano S hardware wallet. Always double-check the accuracy of addresses and transaction details to prevent any potential errors or loss of funds. With your Ethereum safely stored on your Ledger Nano S, you have enhanced security and control over your digital assets.
Step-by-step guide to transferring Ripple to Ledger Nano S
If you are looking to transfer Ripple to your Ledger Nano S for secure storage, you can follow these step-by-step instructions:
Step 1: Launch Ledger Live
Open the Ledger Live application on your computer and enter your PIN code to access your device.
Step 2: Connect your Ledger Nano S
Connect your Ledger Nano S to your computer using the USB cable and follow the instructions on Ledger Live to ensure proper connection.
Step 3: Navigate to the Ripple app
On your Ledger Nano S device, scroll through the available applications and select the Ripple app to open it.
Step 4: Verify the Ripple address on your device
In the Ripple app on your Ledger Nano S, navigate to the “Receive” section. Verify the Ripple address displayed on your device’s screen to ensure that it matches the address shown in Ledger Live.
Step 5: Copy the Ripple address
In Ledger Live, click on the “Receive” tab within the Ripple section. Copy the Ripple address provided. Double-check the address to ensure accuracy.
Step 6: Initiate the Ripple transfer
Open your Ripple wallet or exchange account and select the option to send or withdraw Ripple. Paste the Ripple address you copied from Ledger Live as the recipient address.
Step 7: Specify the transfer amount and destination tag (if required)
Enter the amount of Ripple you want to transfer to your Ledger Nano S. Additionally, some exchanges or wallets may require a destination tag. Ensure that you provide the correct destination tag, if necessary, to avoid any issues with the transfer.
Step 8: Confirm the transaction on Ledger Live
In Ledger Live, review the transaction details and ensure everything is correct. Follow any prompts or authentication steps required by Ledger Live to confirm and send the Ripple transaction.
Step 9: Confirm the transaction on your Ledger Nano S
On your Ledger Nano S, carefully review the transaction details shown on the device’s screen. Verify the recipient address, amount, and destination tag, if necessary. If everything looks accurate, confirm the transaction on the device by pressing the appropriate button(s).
Step 10: Wait for transaction confirmation
After initiating the Ripple transaction, you will need to wait for the network to verify and confirm the transaction. Ripple transactions usually confirm quickly compared to other cryptocurrencies, but the confirmation time may vary depending on network congestion.
Step 11: Verify transaction status
In Ledger Live, you can monitor the status of your Ripple transaction by navigating to the “Transactions” section within the Ripple tab. This allows you to track the progress and ensure the successful transfer of your Ripple to your Ledger Nano S.
By following these steps, you can securely transfer your Ripple to your Ledger Nano S hardware wallet. Always double-check the accuracy of addresses, amounts, and destination tags (if required) to prevent any potential errors or loss of funds. With your Ripple safely stored on your Ledger Nano S, you have enhanced security and control over your digital assets.
Step-by-step guide to transferring Litecoin to Ledger Nano S
If you want to transfer Litecoin to your Ledger Nano S for secure storage, you can follow these step-by-step instructions:
Step 1: Launch Ledger Live
Open the Ledger Live application on your computer and enter your PIN code to access your device.
Step 2: Connect your Ledger Nano S
Connect your Ledger Nano S to your computer using the USB cable and follow the instructions on Ledger Live to ensure proper connection.
Step 3: Navigate to the Litecoin app
On your Ledger Nano S device, scroll through the available applications and select the Litecoin app to open it.
Step 4: Verify the address on your device
In the Litecoin app on your Ledger Nano S, navigate to the “Receive” section. Verify the Litecoin address displayed on your device’s screen to ensure that it matches the address shown in Ledger Live.
Step 5: Copy the Litecoin address
In Ledger Live, click on the “Receive” tab within the Litecoin section. Copy the Litecoin address provided. Double-check the address to ensure accuracy.
Step 6: Initiate the Litecoin transfer
Open your Litecoin wallet or exchange account and select the option to send or withdraw Litecoin. Paste the Litecoin address you copied from Ledger Live as the recipient address.
Step 7: Specify the transfer amount and transaction fee
Enter the amount of Litecoin you want to transfer to your Ledger Nano S. Additionally, set the appropriate transaction fee for the transfer. Higher transaction fees can result in faster confirmation times, but the choice is yours based on your preferences and urgency.
Step 8: Confirm the transaction on Ledger Live
In Ledger Live, review the transaction details and ensure everything is correct. Follow any prompts or authentication steps required by Ledger Live to confirm and send the Litecoin transaction.
Step 9: Confirm the transaction on your Ledger Nano S
On your Ledger Nano S, carefully review the transaction details shown on the device’s screen. Verify that the recipient address and amount are correct. If everything looks accurate, confirm the transaction on the device by pressing the appropriate button(s).
Step 10: Wait for transaction confirmation
After sending the Litecoin transaction, you will need to wait for the Litecoin network to confirm the transaction. The confirmation time can vary, but Litecoin transactions typically confirm relatively quickly compared to other cryptocurrencies.
Step 11: Verify transaction status
In Ledger Live, you can monitor the status of your Litecoin transaction by navigating to the “Transactions” section within the Litecoin tab. This allows you to track the progress and ensure the successful transfer of your Litecoin to your Ledger Nano S.
By following these steps, you can securely transfer your Litecoin to your Ledger Nano S hardware wallet. Always double-check the accuracy of addresses, amounts, and transaction fees to prevent any potential errors or loss of funds. With your Litecoin safely stored on your Ledger Nano S, you have enhanced security and control over your digital assets.
Step-by-step guide to transferring other cryptocurrencies to Ledger Nano S
Transferring cryptocurrencies other than Bitcoin, Ethereum, Ripple, and Litecoin to your Ledger Nano S follows a similar process. Here is a general step-by-step guide to help you transfer other cryptocurrencies to your Ledger Nano S:
Step 1: Launch Ledger Live
Open the Ledger Live application on your computer and enter your PIN code to access your device.
Step 2: Connect your Ledger Nano S
Connect your Ledger Nano S to your computer using the USB cable and follow the instructions on Ledger Live to ensure proper connection.
Step 3: Install the corresponding Ledger app
Visit Ledger Live’s Manager section and install the app specific to the cryptocurrency you wish to transfer. For example, if you want to transfer XYZ Coin, install the XYZ Coin app on your Ledger Nano S through Ledger Live.
Step 4: Launch the corresponding app on Ledger Nano S
On your Ledger Nano S, navigate through the available applications and select the app corresponding to the cryptocurrency you want to transfer. Open the app to generate a wallet for that specific cryptocurrency.
Step 5: Copy the wallet address from Ledger Live
In Ledger Live, access the specific cryptocurrency wallet you are transferring. Click on the “Receive” tab to generate a wallet address for that cryptocurrency. Copy the address provided.
Step 6: Initiate the transfer from your current wallet or exchange
Open your existing wallet or exchange account where the cryptocurrency is currently stored. Find the option to send or withdraw the specific cryptocurrency and paste the wallet address you copied from Ledger Live as the recipient address.
Step 7: Specify the transfer amount
Enter the amount of the cryptocurrency you want to transfer to your Ledger Nano S. Double-check the amount to ensure accuracy.
Step 8: Confirm the transaction on Ledger Live
In Ledger Live, review the transaction details and ensure everything is correct. Follow any prompts or authentication steps required by Ledger Live to confirm and send the transaction.
Step 9: Confirm the transaction on your Ledger Nano S
On your Ledger Nano S, verify the transaction details shown on the device’s screen. Check that the recipient address and amount match what you intended. If accurate, confirm the transaction on the device by pressing the appropriate buttons.
Step 10: Wait for transaction confirmation
After initiating the transfer, you will need to wait for the network to confirm the transaction. The time it takes for confirmation can vary depending on the specific cryptocurrency and network congestion.
Step 11: Verify transaction status
In Ledger Live, you can monitor the status of your transaction by navigating to the “Transactions” section within the specific cryptocurrency tab. This allows you to track the progress and ensure the successful transfer of your cryptocurrency to your Ledger Nano S.
By following these steps, you can securely transfer other cryptocurrencies to your Ledger Nano S. Keep in mind that specific cryptocurrencies may have different wallet apps and unique steps for the transfer process. Always double-check addresses, amounts, and transaction details to prevent any potential errors or loss of funds. With your cryptocurrencies safely stored on your Ledger Nano S, you have enhanced security and control over your digital assets.
Tips for a successful transfer
To ensure a successful transfer of your cryptocurrency to your Ledger Nano S, consider the following tips:
1. Double-check addresses: Before initiating any transfer, carefully check the recipient address to ensure accuracy. Even a small mistake can result in funds being sent to the wrong address, which may be irreversible.
2. Test with a small amount: If you are transferring a significant amount of cryptocurrency for the first time, it is advisable to start with a smaller test transaction. This allows you to verify that the process works correctly and that you have correctly set up your Ledger Nano S.
3. Verify transaction details: Before confirming any transaction, review all details, including the recipient address and transfer amount. Ensure that everything is accurate and matches your intentions.
4. Set appropriate fees: For faster confirmation times, select an appropriate transaction fee. Keep in mind that higher fees may result in quicker confirmation, but be cautious not to overpay for transaction fees.
5. Stay updated: Keep your Ledger Nano S firmware and related software, such as Ledger Live, up to date. Regularly check for new updates or security patches and install them promptly. This ensures that you have the latest security features and compatibility with supported cryptocurrencies.
6. Safeguard your recovery phrase: During the initial setup of your Ledger Nano S, you will receive a recovery phrase. Write it down and keep it in a safe and secure location. This recovery phrase is crucial for restoring access to your funds in case your Ledger Nano S is lost, damaged, or stolen.
7. Verify sources: Only download software and apps, including Ledger Live updates and firmware, from official sources. Be cautious of phishing attempts and always verify the legitimacy of any download or updates to avoid potential security risks.
8. Backup your wallet regularly: Create periodic backups of your Ledger Nano S to prevent possible losses due to accidental damage or loss of the device. Ledger Live offers options to securely back up your wallet, including the recovery phrase.
9. Be mindful of network congestion: During periods of high network congestion, cryptocurrency transfers may take longer to confirm. Keep this in mind when planning urgent transactions and be patient while waiting for the confirmation of your transfer.
10. Seek support when needed: If you encounter any issues or have questions about the transfer process, don’t hesitate to seek support from official Ledger resources. The Ledger website, support center, and community forums can provide valuable assistance.
By following these tips, you can increase the likelihood of a successful and secure transfer of your cryptocurrency to your Ledger Nano S. Keeping careful attention to details, maintaining security measures, and staying informed will contribute to a smooth transfer process. With your cryptocurrencies stored on your Ledger Nano S, you can have peace of mind knowing your digital assets are secure and under your control.
Frequently Asked Questions about Transferring Cryptocurrency to Ledger Nano S
Here are answers to some common questions regarding the process of transferring cryptocurrency to the Ledger Nano S:
Q: Can I transfer multiple cryptocurrencies to my Ledger Nano S?
A: Yes, the Ledger Nano S supports a wide range of cryptocurrencies. You can transfer multiple cryptocurrencies to your device, such as Bitcoin, Ethereum, Ripple, Litecoin, and more. Simply install the corresponding app for each cryptocurrency through Ledger Live.
Q: Do I need to transfer my entire cryptocurrency balance to the Ledger Nano S?
A: No, you can transfer any portion of your cryptocurrency balance to your Ledger Nano S. You have full control and flexibility to transfer the amount you desire, whether it’s the full balance or a specific portion.
Q: What happens if I send the wrong cryptocurrency to my Ledger Nano S?
A: The Ledger Nano S is designed to handle specific cryptocurrencies. If you accidentally send the wrong cryptocurrency to your Ledger Nano S, the transaction may not be recognized or the funds may be permanently lost. It’s crucial to double-check the compatibility of the cryptocurrency you are transferring.
Q: How long does it take for a cryptocurrency transfer to be confirmed?
A: The confirmation time varies depending on the specific cryptocurrency and the network congestion. Each cryptocurrency network has its own block time and confirmation requirements. Bitcoin, for example, typically takes around 10 minutes for the first confirmation, while other cryptocurrencies may have shorter or longer confirmation times.
Q: Can I cancel or reverse a cryptocurrency transfer once it has been initiated?
A: Once a cryptocurrency transfer has been initiated, it is generally not possible to cancel or reverse the transaction. Blockchain transactions are designed to be irreversible, providing a secure and tamper-proof system for transferring value.
Q: Do I need to keep the Ledger Nano S connected to my computer for the transfer to be confirmed?
A: No, once you have initiated the transfer and confirmed it on both Ledger Live and your Ledger Nano S, the transaction will be broadcasted to the blockchain network. The confirmation process takes place on the network itself, so you can safely disconnect your Ledger Nano S from the computer during this time.
Q: Can I transfer cryptocurrency from an exchange directly to my Ledger Nano S?
A: Yes, you can transfer cryptocurrency from a supported exchange platform directly to your Ledger Nano S. However, it’s important to ensure that you are providing the correct recipient address from your Ledger Nano S to the exchange to avoid any potential loss of funds.
Q: What happens if I lose or damage my Ledger Nano S after transferring cryptocurrency?
A: In the event that your Ledger Nano S is lost or damaged, you can use the recovery phrase that you generated during the initial setup to restore access to your funds. With your recovery phrase, you can set up a new Ledger Nano S and restore your wallet and balances.
Q: Can I transfer cryptocurrency back from my Ledger Nano S to an exchange or software wallet?
A: Yes, you can transfer cryptocurrency from your Ledger Nano S back to an exchange or software wallet. The process involves initiating a transfer in Ledger Live, specifying the recipient address (such as the exchange or software wallet address), and confirming the transaction on both Ledger Live and your Ledger Nano S.
Q: Is it possible to transfer cryptocurrency to a Ledger Nano S without using Ledger Live?
A: While using Ledger Live simplifies the process, it is possible to transfer cryptocurrency to your Ledger Nano S using alternative methods or wallet software. However, it is essential to ensure that you are following the appropriate steps and providing the correct recipient address specific to your Ledger Nano S.
By understanding these frequently asked questions about transferring cryptocurrency to the Ledger Nano S, you can confidently navigate the transfer process and securely store your digital assets on your hardware wallet. Remember to double-check addresses, follow best security practices, and refer to official Ledger resources for any specific questions or concerns.