
Checking the Authentication Card
When setting up your Trezor device, one of the crucial steps is to verify the authenticity of the supplied authentication card. This small card plays a vital role in ensuring the security of your device and protecting your funds against potential attacks.
The authentication card serves as a physical verification method to confirm that the device you received is genuine and has not been tampered with. It contains a unique holographic image that is difficult to replicate, making it an essential part of the authentication process.
To properly check the authenticity of the card, follow these steps:
- Inspect the holographic image: Carefully examine the hologram on the authentication card. It should be of high quality and have intricate details that are challenging to reproduce. Look for any signs of tampering or irregularities in the hologram.
- Check for a unique serial number: The authentication card should have a unique serial number printed on it. Ensure that the serial number matches the one specified on the packaging or documentation provided with the device. Any discrepancy may indicate a counterfeit or compromised device.
- Confirm the Trezor logo: The card should feature the official Trezor logo, which is a recognizable symbol of authenticity. Verify that the logo is accurate in terms of color, size, and placement. Any variation may suggest a potential forgery.
- Verify the QR code: The authentication card typically includes a QR code that can be scanned to verify its authenticity. Use a reliable QR code scanner app to scan the code and ensure that it corresponds to the expected result provided by Trezor.
By carefully examining the authentication card and ensuring its legitimacy, you can significantly reduce the risk of using a counterfeit or compromised Trezor device. This verification process provides an added layer of trust and confidence in the security of your cryptocurrency funds.
Next, we will move on to another critical step in ensuring the authenticity of your Trezor device: checking the hologram seal.
Checking the Hologram Seal
After verifying the authenticity of the authentication card, the next step in ensuring the security of your Trezor device is to check the hologram seal. The hologram seal is a tamper-evident feature that provides an additional layer of protection against unauthorized access or tampering.
Follow these steps to examine the hologram seal on your Trezor device:
- Inspect the hologram: Take a close look at the hologram seal affixed to your Trezor device. It should have a multi-dimensional appearance and exhibit intricate details that are difficult to reproduce.
- Check for authenticity features: Look for specific authenticity features such as embedded security patterns or hidden images within the hologram seal. These features are designed to be virtually impossible to duplicate, providing assurance of the seal’s legitimacy.
- Verify the label and text: The hologram seal should have a label with the Trezor logo and text that aligns with the official branding. Pay attention to the font, spacing, and size of the text. Any discrepancies or inconsistencies may indicate a counterfeit seal.
- Look for signs of tampering: Examine the hologram seal for any signs of tampering or damage. A genuine seal should be intact and free from scratches, tears, or punctures. If you notice any irregularities, it could suggest that the device has been compromised.
- Authenticate the hologram using the Trezor wallet application: To further confirm the authenticity of the hologram seal, you can use the official Trezor wallet application. Connect your device and launch the application, then select the option to verify the hologram seal. Follow the instructions provided to complete the verification process.
By carefully inspecting the hologram seal and ensuring its authenticity, you can have peace of mind knowing that your Trezor device has not been tampered with. This step contributes to the overall security and integrity of your cryptocurrency storage.
In the next section, we will discuss how to check the seal on the Trezor device’s box, another important aspect of verifying its authenticity.
Checking the Box Seal
When receiving a Trezor device, it’s essential to examine the seal on the box to ensure its authenticity and integrity. The box seal serves as an external indicator that the contents have not been tampered with or altered in any way.
Here are the steps to follow when checking the seal on your Trezor device’s box:
- Inspect the seal: Carefully examine the seal on the outer packaging of the Trezor box. It should be intact and show no signs of tampering, such as cuts, tears, or resealing attempts.
- Check for the Trezor logo: Look for the official Trezor logo prominently displayed on the seal. It should be aligned with the branding guidelines and accurately represent the company’s logo.
- Verify the text: The seal may contain text indicating that it is an authentic seal provided by Trezor. Check that the text is clear, legible, and matches the official branding of the company.
- Verify the color and quality: The seal should have consistent color throughout and be free from any printing errors or smudges. Any irregularities in color or quality may be an indication of a counterfeit seal.
- Look for security features: Some Trezor box seals may incorporate additional security features, such as holographic elements or unique identifiers. These features are designed to prevent counterfeiting and ensure the authenticity of the seal.
By thoroughly examining the seal on the Trezor box, you can confirm that your device has been securely packaged and has not been compromised during transit. This step contributes to the overall security of your Trezor device and helps protect your cryptocurrency assets.
Now that you have verified the authentication card, hologram seal, and box seal, you are ready to proceed with the setup and testing of your Trezor device. In the following sections, we will guide you through the necessary steps to ensure a secure and successful setup process.
Gathering Necessary Tools
Before you begin setting up and testing your Trezor device, it’s important to gather the necessary tools to ensure a smooth and hassle-free process. By having all the required tools at hand, you can proceed with confidence and minimize any potential disruptions.
Here are the essential tools you will need:
- Trezor Device: Ensure you have your Trezor device itself. This hardware wallet is the central component for storing and securing your cryptocurrency funds.
- Computer or Mobile Device: You will need a computer or mobile device to connect to the Trezor device. Make sure it is fully functional and has a compatible operating system.
- USB Cable: The Trezor device connects to your computer or mobile device using a USB cable. Ensure you have a reliable and compatible USB cable readily available.
- Internet Connection: A stable internet connection is necessary to download the required software updates and access the Trezor wallet application.
- Trezor Wallet Software: Download and install the official Trezor wallet software for your respective operating system. This software will allow you to manage your cryptocurrency assets and perform various operations with your Trezor device.
- Pen and Paper: Keep a pen and paper handy to write down your recovery seed and other important information during the setup process. Remember to use a high-quality pen and acid-free paper to prevent ink fading.
- Safe and Secure Workspace: Find a quiet and private location where you can set up and test your Trezor device without any distractions or prying eyes. Ensure that your workspace is free from potential hazards and provides a comfortable environment for the setup process.
By gathering these necessary tools before starting the setup process, you can save time and ensure that you have everything you need to successfully set up and test your Trezor device. Taking these proactive steps will help you maintain the security and integrity of your cryptocurrency assets.
In the next section, we will discuss how to prepare your Trezor device for the setup process.
Preparing the Trezor Device
Before you begin setting up your Trezor device, it’s important to ensure that it is ready for the setup process. Taking the time to properly prepare your device will help ensure a smooth and secure setup experience.
Follow these steps to prepare your Trezor device:
- Inspect the device: Carefully examine your Trezor device for any visible physical damage or defects. Check for any loose components, scratches, or signs of tampering. If you notice any issues, contact the manufacturer for support or consider getting a replacement device.
- Charge the device: If your Trezor device has a built-in battery, make sure it is charged before starting the setup process. Connect it to a power source using the provided USB cable and allow it to charge until it indicates a full charge.
- Verify the device firmware: Visit the official Trezor website and check for any available firmware updates for your device. It’s crucial to have the latest firmware installed, as it often includes important security enhancements and bug fixes.
- Perform a factory reset (if necessary): If you are setting up a previously used or reset Trezor device, perform a factory reset to ensure it is in a pristine state. Follow the instructions provided by Trezor on how to perform a factory reset.
- Prepare the recovery seed card: Familiarize yourself with the recovery seed card that came with your Trezor device. This card contains a series of words that will serve as a backup for your wallet. Keep the recovery seed card in a safe and secure location, separate from your Trezor device.
By carefully preparing your Trezor device before starting the setup process, you can minimize any potential issues and ensure a secure and successful setup experience. It’s crucial to follow these steps to maintain the integrity and security of your device and cryptocurrency assets.
In the next section, we will discuss the importance of disconnecting your computer from the internet during the setup process for added security.
Disconnecting the Computer from the Internet
During the setup process of your Trezor device, one crucial step to ensure maximum security is to disconnect your computer from the internet. This precautionary measure helps to minimize the risk of potential online threats and ensure that your private information remains protected.
Here’s why it’s important to disconnect your computer from the internet:
- Prevents remote attacks: By disconnecting from the internet, you eliminate the possibility of remote attackers gaining unauthorized access to your computer and potentially compromising your Trezor device or sensitive information.
- Protects against malware and viruses: The internet is rife with malicious software and viruses that can pose a threat to your computer’s security. Disconnecting from the internet prevents your computer from inadvertently downloading malware or becoming infected with malicious programs that could compromise your Trezor device.
- Reduces phishing risks: Phishing attacks use deceptive tactics to trick users into revealing their sensitive information. By disconnecting from the internet, you minimize the risk of falling victim to phishing attempts and inadvertently providing hackers with access to your Trezor device or recovery seeds.
- Ensures data privacy: Disconnecting from the internet ensures that any data transmitted during the setup process remains private and does not get intercepted by potential eavesdroppers or hackers.
- Improves focus and concentration: Disconnecting from the online world allows you to focus solely on setting up your Trezor device without distractions. This ensures that you can carefully follow the instructions and proceed with the setup process smoothly.
Remember, after disconnecting from the internet, it’s crucial to keep your computer offline until the setup process is complete. Once you have finished setting up your Trezor device, you can reconnect to the internet to update firmware or access the Trezor wallet application.
By disconnecting your computer from the internet during the Trezor setup process, you take an important step towards safeguarding your funds and ensuring the highest level of security for your cryptocurrency assets.
In the next section, we will discuss the step-by-step process for starting the recovery process on your Trezor device.
Starting the Recovery Process
Once you have prepared your Trezor device and disconnected your computer from the internet, you are ready to start the recovery process. This process allows you to restore your wallet and access your cryptocurrency funds using the recovery seed.
Follow these steps to begin the recovery process on your Trezor device:
- Connect the Trezor device: Plug in your Trezor device to your computer using the USB cable.
- Launch the Trezor wallet software: Open the official Trezor wallet software on your computer. If you haven’t installed it yet, download and install the latest version from the official Trezor website.
- Select the ‘Recover Wallet’ option: In the Trezor wallet software, select the ‘Recover Wallet’ option to start the recovery process with the connected device.
- Enter the device PIN: On the Trezor device, you will be prompted to enter your PIN using the device’s physical buttons. Enter the correct PIN to unlock the device and proceed with the recovery process.
- Enter the recovery seed: The Trezor wallet software will prompt you to enter the recovery seed words. Refer to your recovery seed card and carefully enter each word in the correct sequence. Take your time and ensure accuracy as any mistake could result in the loss of your funds.
- Confirm the recovery seed: Once you have entered the recovery seed, the software will ask you to confirm the words by selecting them in the correct order. This is another layer of verification to ensure the accuracy of the recovery seed.
- Complete the recovery process: After confirming the recovery seed, the Trezor wallet software will process the recovery and display your wallet balance and transaction history. This indicates that the recovery process was successful.
By following these steps, you can initiate the recovery process on your Trezor device and regain access to your cryptocurrency funds. It’s essential to double-check the entered recovery seed and confirm the words to ensure the accuracy of the recovery.
Once the recovery process is complete, you can proceed with additional steps to verify the device update, check the recovery seed on the device screen, and perform a test recovery to ensure the correct restoration of your wallet.
In the next sections, we will cover these steps in detail to ensure the security and integrity of your Trezor device and cryptocurrency assets.
Entering the Recovery Phrase
Entering the recovery phrase is a crucial step in the setup process of your Trezor device. The recovery phrase, also known as the seed phrase or mnemonic phrase, is a sequence of words that serves as a backup for your wallet. This phrase is used to restore your wallet and access your cryptocurrency funds in case of device loss, damage, or other unforeseen circumstances.
Follow these steps to enter the recovery phrase on your Trezor device:
- Connect the Trezor device: Plug in your Trezor device to your computer using the provided USB cable.
- Launch the Trezor wallet software: Open the official Trezor wallet software on your computer. Ensure that you have the latest version installed.
- Select the ‘Recover Wallet’ option: In the Trezor wallet software, choose the ‘Recover Wallet’ option to initiate the recovery process.
- Enter the device PIN: On your Trezor device, you will be prompted to enter your PIN using the device’s physical buttons. Enter the correct PIN to unlock the device and proceed.
- Enter the recovery phrase: The wallet software will now ask you to enter your recovery phrase word by word. Refer to your recovery seed card or backup record and carefully enter each word in the correct order. Take your time and ensure accuracy.
- Confirm the recovery phrase: After entering the recovery phrase, the Trezor device will ask you to confirm the words by selecting them in the correct order. This verification step ensures that you have entered the recovery seed correctly.
It is crucial to handle the recovery phrase with extreme care. Treat it as you would treat your private keys or passwords, as anyone who gains access to your recovery phrase can gain control over your funds. Keep the recovery phrase in a secure and offline location, away from prying eyes and potential threats.
By carefully entering and confirming the recovery phrase, you can ensure that your Trezor device is properly set up and ready to securely store and manage your cryptocurrency funds.
In the next steps, we will cover additional checks and verifications to ensure the security and integrity of the recovery seed and the Trezor device as a whole.
Confirming the Recovery Phrase
After entering the recovery phrase on your Trezor device, it’s of utmost importance to confirm the accuracy of the entered words. Confirming the recovery phrase ensures that you have correctly recorded and entered the seed, minimizing the risk of errors that could lead to the loss of your cryptocurrency funds.
Follow these steps to confirm the recovery phrase on your Trezor device:
- Check the device display: On the Trezor device screen, you will see a list of words randomly generated from the BIP39 word list. Ensure that the displayed words match the order of the words in your recovery phrase.
- Verify the words: Carefully compare each word displayed on the device screen with the corresponding word in your recovery phrase. Take your time to ensure that every word matches exactly as you entered them during the recovery process.
- Confirm on the device: Once you have verified that the displayed words match your recovery phrase, use the physical buttons on the Trezor device to navigate to and confirm each word. This step double-checks the accuracy of the recovery phrase.
- Ensure the display matches the phrase: After confirming each word on the device, verify that the device screen shows the same recovery phrase as you recorded. Any discrepancies may indicate an error in the recovery phrase entry.
By carefully confirming the recovery phrase on the Trezor device, you can be confident that you have accurately recorded and entered the seed. This step is crucial in ensuring the security and integrity of your cryptocurrency funds.
After confirming the recovery phrase, you can proceed with connecting the Trezor device back to the computer to perform additional checks and verifications to ensure the security and authenticity of the device.
In the next section, we will cover the process of connecting the device back to the computer and verifying the authenticity of the device update.
Connecting the Device Back to the Computer
Once you have confirmed the recovery phrase on your Trezor device, you can safely connect it back to your computer to perform further verifications and ensure the security of the device. Connecting the device to the computer allows you to check for any available firmware updates and verify the authenticity of the device update.
Follow these steps to connect the Trezor device back to your computer:
- Ensure the computer is still disconnected from the internet: Before connecting the Trezor device, make sure that your computer is still offline and disconnected from the internet. This helps maintain the security of your private information and prevents potential attacks.
- Connect the Trezor device: Plug the Trezor device back into your computer using the provided USB cable. Ensure it is securely connected and recognized by your computer.
- Launch the Trezor wallet software: Open the official Trezor wallet software on your computer. It should automatically detect and connect to your Trezor device.
- Check for firmware updates: In the Trezor wallet software, navigate to the device settings and look for any available firmware updates. If updates are available, follow the prompts to download and install the latest firmware version.
- Verify the device update: After the firmware update, verify that the device screen displays the expected version. This ensures that the update was successfully installed and the device is running the latest secure firmware.
- Proceed with caution: Once you have completed these steps, you can proceed with using your Trezor device for secure cryptocurrency transactions. Remember to always follow best security practices and exercise caution when entering sensitive information.
By connecting the Trezor device back to the computer and checking for firmware updates, you can ensure that your device is running the latest secure software. Regularly updating the firmware helps protect against potential vulnerabilities and ensures the optimal security of your cryptocurrency funds.
In the next section, we will discuss how to check and verify the recovery seed displayed on the device screen, further ensuring the authenticity and security of your Trezor device.
Verifying the Device Update
After connecting your Trezor device back to the computer and updating the firmware, it is essential to verify that the device update has been successfully installed. Verifying the device update ensures that you are running the latest version of the firmware, which includes important security enhancements and bug fixes.
Follow these steps to verify the device update on your Trezor device:
- Observe the device screen: After the firmware update, carefully observe the Trezor device screen. It should display the updated firmware version information.
- Compare with expected version: Compare the firmware version displayed on the device screen with the expected version you anticipated or the latest version available on the Trezor website. Ensure that the versions match.
- Note any discrepancies: If there are any discrepancies between the displayed firmware version and the expected version, it could indicate a potential issue. In such cases, refer to the official Trezor documentation or contact customer support for guidance.
- Confirm improved features, if applicable: Depending on the firmware update, there may be additional features or improvements. Verify if any expected changes or enhancements are present on the device screen.
- Ensure the device is functioning correctly: Confirm that the Trezor device is functioning correctly after the update. Test its basic functions, such as navigating menus and validating transactions, to ensure smooth operation.
By verifying the device update, you can ensure that your Trezor device is running the latest firmware version, providing you with the most advanced security measures available. Keeping your device updated is crucial for maintaining the highest level of security for your cryptocurrency funds.
In the following steps, we will discuss how to check the recovery seed displayed on the device screen and perform a test recovery to ensure the accuracy and integrity of your backup.
Checking the Recovery Seed on the Device Screen
After updating the firmware of your Trezor device, it is essential to verify the recovery seed displayed on the device screen. The recovery seed is a series of words that acts as a backup for your wallet and allows you to restore your cryptocurrency funds in case of device loss or failure.
Follow these steps to check the recovery seed on the device screen:
- Ensure the Trezor device is connected: Ensure that your Trezor device is securely connected to your computer via the USB cable.
- Launch the Trezor wallet software: Open the official Trezor wallet software on your computer.
- Enter the device PIN: On the Trezor device screen, you will be prompted to enter your PIN using the physical buttons. Enter the correct PIN to unlock the device.
- Navigate to recovery seed display: In the Trezor wallet software, navigate to the recovery seed section and select the option to display the recovery seed on the device screen.
- Verify the recovery seed: Carefully observe the words displayed on the Trezor device screen. Compare them with the recovery seed you previously recorded. Ensure that each word matches exactly.
- Check the order: Confirm that the words are displayed in the correct order, matching the sequence of your recorded recovery seed. Any discrepancies should be addressed immediately, as they could indicate an error in seed storage or entry.
- Confirm accuracy and record securely: Once you have verified the recovery seed, ensure that it is recorded securely in a separate location from your Trezor device. Use a pen and paper or a reliable offline tool for recording the seed.
Checking the recovery seed on the device screen is a critical step to validate that it matches the seed you have recorded. This verification process ensures that you have a valid backup of your wallet and can restore your cryptocurrency funds if needed.
In the following steps, we will discuss how to perform a test recovery to ensure the successful restoration of your wallet using the recovery seed.
Powering Off the Device
After checking the recovery seed on the device screen and confirming its accuracy, it is important to safely power off your Trezor device. By properly shutting down the device, you ensure its security and protect your cryptocurrency funds from unauthorized access.
Follow these steps to power off your Trezor device:
- Disconnect the device: Ensure that your Trezor device is disconnected from the computer and any other external devices.
- Navigate to the power-off option: On the Trezor device screen, locate the power-off option in the device menu.
- Select the power-off option: Use the physical buttons on the device to navigate to the power-off option and select it.
- Confirm power-off: The device will display a prompt asking for confirmation to power off. Verify that you have completed all necessary tasks and select “Yes” to power off the device.
- Wait for the device to turn off: Allow the device a few moments to complete the power-off process. The screen will turn blank, indicating that the device is powered off.
Powering off your Trezor device properly ensures that it is not susceptible to any potential attacks or unauthorized access while not in use. It helps maintain the security and integrity of your cryptocurrency funds stored on the device.
Remember to store your Trezor device and recovery seed securely in separate locations, and avoid sharing sensitive information about your device or recovery phrase with anyone.
Next, we will discuss the necessary measures to take in order to verify the restored wallet after completing the recovery process.
Verifying the Recovery Seed Words
After completing the recovery process on your Trezor device, it is crucial to verify the accuracy of the recovery seed words. Verifying the recovery seed ensures that you have correctly recorded and entered the seed, minimizing the risk of errors that could result in the loss of your cryptocurrency funds.
Follow these steps to verify the recovery seed words:
- Prepare a secure environment: Find a quiet and distraction-free location where you can focus on verifying the recovery seed words without interruptions.
- Gather your recovery seed: Retrieve the recovery seed that you recorded during the setup process. Ensure that you have it in a secure and easily accessible location.
- Start the verification process: Using your recovery seed, go through each word one by one. Compare the recorded words with the ones displayed on the Trezor device screen.
- Check for accuracy: Pay close attention to the spelling and order of the words. Verify that they match exactly with your recorded recovery seed. Any discrepancies should be addressed immediately.
- Double-check the sequence: Confirm that the order of the words you recorded matches the order displayed on the Trezor device screen. The sequence must be correct for successful wallet restoration.
- Repeat the process if necessary: If any discrepancies or errors are detected during the verification, repeat the process to ensure the accuracy of the recovery seed. Do not proceed unless the recovery seed matches perfectly.
Verifying the recovery seed words is a critical step to ensure the security and integrity of your cryptocurrency funds. Any errors or discrepancies could result in the inability to restore your wallet or access your funds in the future.
Once you have verified the recovery seed words and ensured their accuracy, you can proceed with confidence, knowing that your Trezor device is securely storing and protecting your digital assets.
In the next section, we will discuss additional security measures to consider, including checking for potential cloning attempts and securely storing the recovery seed.
Checking for Potential Cloning Attempts
As a responsible user of the Trezor device, it is important to be vigilant and protect yourself against potential cloning attempts. Cloning refers to the unauthorized replication or copying of a hardware wallet device to gain access to sensitive information, such as your recovery seed or private keys.
Here are some steps you can take to check for potential cloning attempts:
- Verify the authenticity of the device’s packaging: Examine the packaging of your Trezor device for any signs of tampering or suspicious labels. Look for any discrepancies in logos, barcodes, or serial numbers, as these might indicate a cloned or counterfeit device.
- Check for unexpected behavior: Pay attention to any unusual behavior from your Trezor device. If it becomes unresponsive, shows inconsistent prompts, or requests additional or unusual information, it might be a sign of a cloned or compromised device.
- Inspect the physical device: Carefully examine your Trezor device for any signs of tampering, such as mismatched screws, scratches, or irregularities in the finish. Original devices undergo rigorous quality control, so any physical deviations could indicate a cloned device.
- Verify firmware integrity: Use the official Trezor website or wallet software to check the integrity of your device’s firmware. If there are any inconsistencies or unexpected updates, it could be an indication of unauthorized modifications to your device.
- Beware of phishing attempts: Stay vigilant against phishing attacks that aim to trick you into providing sensitive information. Never share your recovery seed, private keys, or device passphrase with anyone or on any unauthorized websites.
- Stay up-to-date with official communications: Regularly check the official Trezor website and official communication channels for security alerts or updates. Trezor will notify users of any potential security risks or cloning attempts.
By being proactive and performing these checks, you can mitigate the risk of falling victim to cloning attempts and ensure the security of your Trezor device and cryptocurrency funds.
Remember, it is crucial to only purchase your Trezor device through reliable sources and official channels. Avoid buying from unofficial resellers or third-party platforms to minimize the risk of receiving a cloned or compromised device.
In the next section, we will discuss the importance of securely storing the recovery seed to safeguard your funds.
Ensuring the Recovery Seed is Stored Securely
The recovery seed is a vital component of your Trezor device, serving as a backup to recover your cryptocurrency funds in case of loss or device failure. It is of utmost importance to ensure that the recovery seed is stored securely to prevent unauthorized access and protect your digital assets.
Here are some essential measures to follow for secure storage of your recovery seed:
- Use offline storage: Keep your recovery seed in an offline format, away from any internet-connected devices. Avoid storing it on cloud storage, email, or digital platforms that can be vulnerable to hacking or accidental exposure.
- Choose a secure physical location: Select a secure physical location to store your recovery seed. Consider options like a fireproof and waterproof safe, a safety deposit box, or a personal vault. Make sure the location is protected from theft, fire, and other potential hazards.
- Write it down manually: Use a pen and write your recovery seed manually on a durable and high-quality paper. Avoid printing or photocopying, as these methods can be susceptible to fading, damage, or loss of data over time.
- Store multiple copies: Create multiple copies of the recovery seed and store them in separate secure locations. This helps prevent complete loss in case of damage or loss of one copy.
- Keep it confidential: Share the knowledge of the recovery seed only with trusted individuals who need to know. Keep it confidential and refrain from discussing it openly or sharing it electronically.
- Avoid digital storage methods: Do not store the recovery seed on your computer, mobile devices, or any digital format. Digital storage can be vulnerable to hacking, malware, or data breaches.
- Consider additional encryption: If you have concerns about the physical security of your recovery seed, you can opt for additional layers of encryption. Use a secure password manager or encryption software to store an encrypted version of your recovery seed.
By following these security practices, you can significantly reduce the risk of unauthorized access to your recovery seed. Safeguarding your recovery seed is crucial to maintaining control over your cryptocurrency funds and preventing potential loss or theft.
In the next section, we will discuss the importance of performing a test recovery to ensure the successful restoration of your wallet.
Performing a Test Recovery
Performing a test recovery is an important step to ensure the successful restoration of your wallet using the recovery seed. By testing the recovery process, you can verify that your recovery seed is accurate and your funds can be restored without any issues.
Here’s how you can perform a test recovery on your Trezor device:
- Ensure a secure environment: Find a quiet and distraction-free location where you can focus on the test recovery process without interruptions.
- Disconnect your Trezor device: Remove the Trezor device from your computer and disconnect it from any external devices.
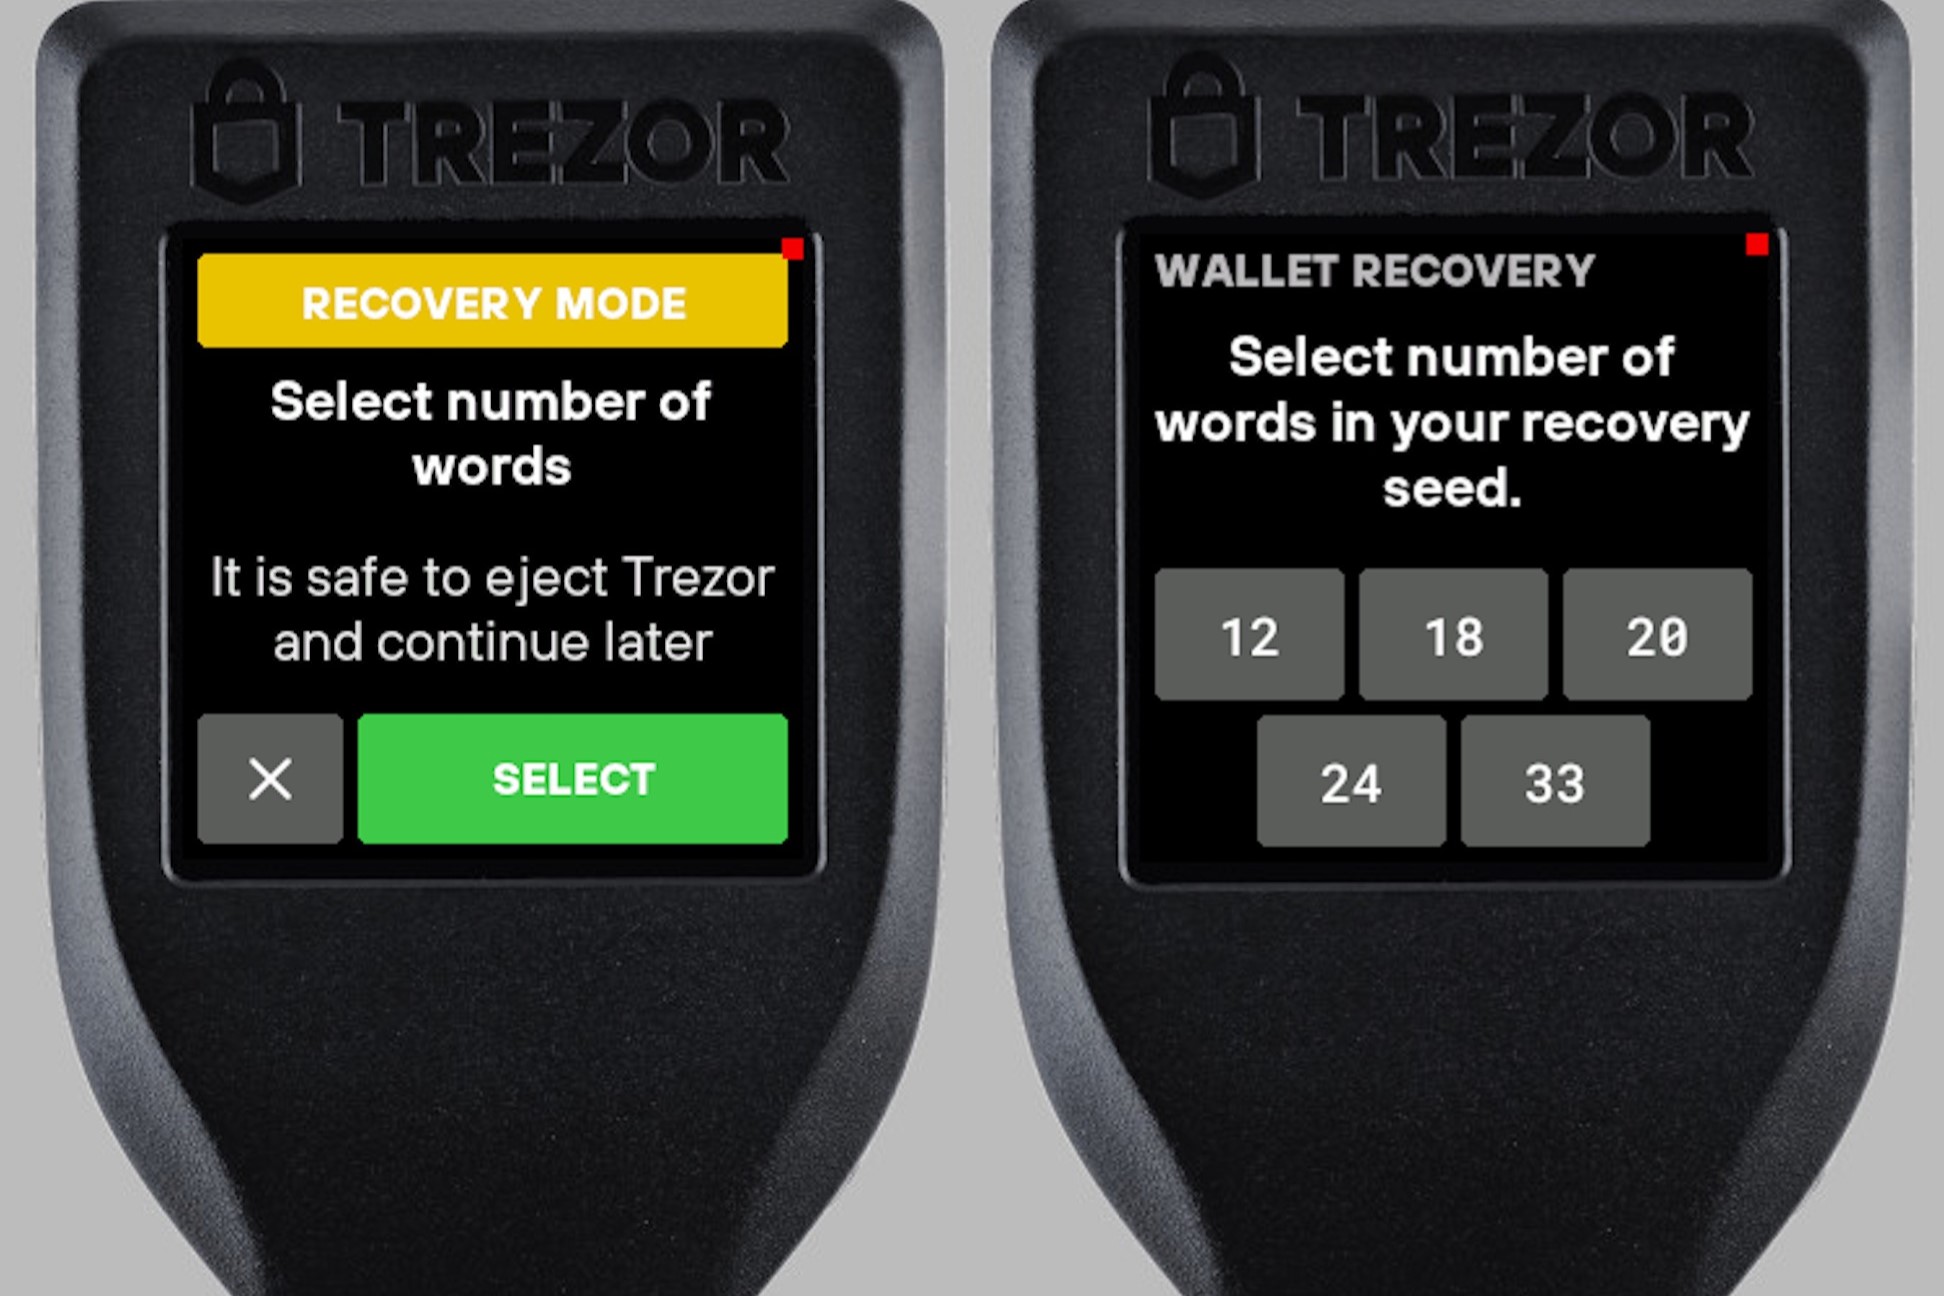
- Choose the option for recovery mode: On the Trezor device screen, select the option for recovery mode or initializing the device.
- Enter your recovery seed: Follow the prompts on the device screen to enter your recovery seed word by word. Take your time and ensure accuracy.
- Confirm the recovery seed: Once you have entered the recovery seed, the device will ask you to confirm the words by selecting them in the correct order. Verify that the displayed words match the expected sequence.
- Complete the recovery process: After confirming the recovery seed, the device will proceed with the restoration process. Allow the device to complete the restoration and ensure that it displays the correct wallet balance and transaction history.
- Verify wallet functionality: Check that you can successfully access your funds, send and receive transactions, and perform any other required wallet operations.
- Perform additional checks: To further validate the test recovery, you can send a small amount of cryptocurrency to your wallet and ensure that the transaction is processed accurately.
Performing a test recovery allows you to gain confidence in the integrity of your recovery seed and the ability to restore your wallet if needed. If any discrepancies or issues arise during the test recovery, consult the official Trezor documentation or contact customer support for assistance.
Remember to reset your device and restore your wallet using your actual recovery seed only when necessary, as excessive restoration attempts can increase the risk of exposure to potential threats.
In the next section, we will discuss the importance of creating a new wallet as a backup for your Trezor device.
Verifying the Restored Wallet
After performing a successful recovery and restoring your wallet on your Trezor device, it is crucial to verify that the restored wallet is functioning correctly. Verifying the restored wallet ensures that your cryptocurrency funds are accessible and that all essential wallet functions are working as expected.
Follow these steps to verify the restored wallet on your Trezor device:
- Connect your Trezor device: Plug in your Trezor device to your computer using the provided USB cable.
- Launch the Trezor wallet software: Open the official Trezor wallet software on your computer. Ensure that you have the latest version installed.
- Enter the device PIN: On the Trezor device screen, you will be prompted to enter your PIN using the physical buttons. Enter the correct PIN to unlock the device.
- Access your wallet: In the Trezor wallet software, select the option to access your wallet using the connected Trezor device. Allow the software a moment to establish a connection.
- Check wallet balance: Verify that the wallet software displays the correct balance of your cryptocurrency funds. Ensure that it matches your expectations and reflects the total amount you previously had.
- Verify transaction history: Review the transaction history displayed in the wallet software. Confirm that all previous transactions are listed accurately and reflect your transaction history.
- Test a transaction: To further verify the functionality of the restored wallet, you can initiate a small test transaction. Send a small amount of cryptocurrency to another wallet address and ensure that the transaction is processed accurately.
- Perform additional wallet operations: Test other essential wallet functions such as receiving funds, generating new addresses, or interacting with any supported cryptocurrencies specific to your Trezor device.
- Ensure the wallet remains secure: Double-check that all security features, including passphrase encryption, are properly configured and enabled to enhance the security of your restored wallet.
By verifying the restored wallet and conducting test transactions, you can have confidence in the functionality and security of your Trezor device. If you encounter any issues or notice any discrepancies during the verification process, refer to the official Trezor documentation or seek assistance from their customer support.
After confirming the successful restoration of your wallet, it is important to create a new wallet as a backup solution to provide an additional layer of security for your cryptocurrency funds.
In the next section, we will discuss the steps to create a new wallet as a backup for your Trezor device.
Creating a New Wallet as a Backup
Creating a new wallet as a backup for your Trezor device is an excellent practice to ensure the security and accessibility of your cryptocurrency funds. A backup wallet provides an additional layer of protection in case of any unforeseen circumstances or issues with your primary wallet or Trezor device.
Follow these steps to create a new wallet as a backup for your Trezor device:
- Ensure a secure environment: Set up a secure and distraction-free workspace to create the backup wallet. Choose a location where you can safely handle sensitive information without the risk of exposure.
- Install the Trezor wallet software: If you haven’t already done so, download and install the official Trezor wallet software on your computer. Ensure that you have the latest version installed for optimal security.
- Connect your Trezor device: Plug in your Trezor device to your computer using the provided USB cable. Make sure the device is recognized by the Trezor wallet software.
- Create a new wallet: In the Trezor wallet software, select the option to create a new wallet. Follow the on-screen prompts and provide any required information to set up the new wallet.
- Set a new device and recovery seed: During the setup process, you will be guided to set up a new device name and create a new recovery seed. Follow the instructions carefully and ensure that you store the new recovery seed securely.
- Verify the backup wallet functionality: Once the backup wallet is set up, perform verification checks similar to those done on the primary wallet. Confirm the wallet balance, transaction history, and the ability to send and receive funds.
- Store backup wallet recovery seed separately: Just like the recovery seed of your primary wallet, store the backup wallet recovery seed securely in an offline and separate location. Keep it confidential and inaccessible to unauthorized individuals.
- Regularly update and test your backup wallet: Keep the backup wallet software and firmware up to date. Periodically test the backup wallet by verifying its functionality and performing transactions to ensure that it is ready to serve as a reliable backup.
By creating a new wallet as a backup for your Trezor device, you add an extra layer of security and ensure that you have alternative access to your funds in case of any unforeseen issues with the primary wallet or Trezor device.
Remember to keep both your primary and backup wallets up to date and securely stored. Regularly review and update your security practices to stay ahead of potential threats and protect your cryptocurrency assets.
In the next section, we will discuss the importance of securely storing the new recovery seed for your backup wallet.
Safely Storing the New Recovery Seed
Once you have created a new backup wallet for your Trezor device, it is crucial to take appropriate measures to securely store the new recovery seed. The recovery seed serves as a backup for your wallet and is essential for restoring access to your cryptocurrency funds in case of loss or device failure.
Here are some key steps to safely store the new recovery seed:
- Write down the recovery seed: Use a pen and paper to manually write down the new recovery seed provided during the setup of your backup wallet. Ensure that you write each word accurately and legibly.
- Make multiple copies: Create multiple copies of the recovery seed and store them in separate secure locations. This ensures redundancy in case one copy is lost or damaged.
- Use durable materials: Use high-quality acid-free paper or other durable materials to write down the recovery seed. This helps prevent degradation or fading over time, ensuring the longevity of the seed.
- Keep it offline: Store the recovery seed in an offline location, away from any internet-connected devices. Avoid digital storage methods such as cloud storage or email, as they can be vulnerable to hacking or accidental exposure.
- Select a secure physical location: Choose a secure physical location to store the recovery seed, such as a fireproof and waterproof safe, a safety deposit box, or a personal vault. Make sure the location provides protection against theft, fire, and other potential hazards.
- Share with trusted individuals only: Share the knowledge of the recovery seed only with trusted individuals who need to know. Keep it confidential and refrain from discussing it openly or sharing it electronically.
- Regularly check for tampering: Periodically inspect the physical copies of the recovery seed for signs of tampering or damage. If any irregularities are detected, immediately transfer the seed to a new secure location and consider creating a new backup wallet.
- Update your secure storage plan: Regularly evaluate your secure storage plan for the recovery seed and make updates as needed. This includes considering changes in physical storage locations or implementing additional security measures.
By following these practices, you can ensure the long-term security and accessibility of your recovery seed. Safely storing the new recovery seed for your backup wallet is crucial to maintaining control over your cryptocurrency funds and protecting them from unauthorized access.
Remember, the recovery seed is the key to your wallet, so treat it with the utmost care and responsibility. Keep both your primary and backup recovery seeds in separate secure locations and avoid any situations that may compromise their confidentiality.
In the next section, we will provide some final thoughts and recommendations to help you maximize the security and usability of your Trezor device and cryptocurrency funds.
Final Thoughts and Recommendations
Securing your Trezor device and protecting your cryptocurrency funds is of utmost importance. By following the proper setup procedures and implementing best practices, you can maximize the security and usability of your Trezor device. Here are some final thoughts and recommendations to consider:
- Stay informed: Regularly stay updated with the latest security information and firmware updates provided by Trezor. This helps you stay ahead of potential threats and ensures that you have the latest security enhancements.
- Enable additional security features: Take advantage of the additional security features provided by Trezor, such as passphrase encryption. Enable these features to add extra layers of protection to your wallet and funds.
- Periodically perform security checks: Monitor your Trezor device for any signs of physical tampering or irregularities. Additionally, periodically review the security settings and configurations of your wallet to ensure they align with your desired level of protection.
- Implement strong passwords: Use strong, unique passwords for your Trezor wallet software and any associated accounts. Avoid reusing passwords and consider using a reliable password manager to securely store your passwords.
- Be cautious of phishing attempts: Exercise caution when receiving emails or messages regarding your Trezor device or wallet. Avoid clicking on suspicious links or sharing sensitive information. Trezor will never ask for your recovery seed or private keys.
- Backup regularly: Regularly perform backups of your wallet and update your recovery seed copies. This ensures that you can recover your funds in case of unexpected events or hardware failures.
- Maintain physical security: Keep your Trezor device and recovery seed in secure and controlled environments. Protect them from theft, damage, and unauthorized access. Minimize exposure to potential risks.
- Keep firmware and software up to date: Regularly check for firmware and software updates provided by Trezor and install them promptly. These updates often include critical security patches and feature enhancements.
- Keep learning: Continuously educate yourself about cryptocurrency security and best practices. Stay informed about the evolving landscape of threats and security measures to ensure the ongoing protection of your funds.
By following these final thoughts and recommendations, you can enhance the security and peace of mind associated with your Trezor device and cryptocurrency funds. It is the collective effort of proactive security measures, regular maintenance, and informed decision-making that will ultimately safeguard your assets.
Remember, security is an ongoing process, and it is essential to adapt and evolve your security practices as needed. Stay proactive and prioritize the protection of your Trezor device and cryptocurrency investments to maximize the safety and accessibility of your funds.