
Checking the battery icon
One of the simplest ways to determine if your Fitbit device is charged is by checking the battery icon displayed on the screen. When the battery is full or close to full, you will typically see a full battery icon. If the battery is low, it will display a partially-filled battery icon. Here’s how to check the battery icon on different Fitbit devices:
- Fitbit Charge 4: On the main screen, swipe up to access the quick settings menu. Look for the battery icon in the top right corner.
- Fitbit Inspire 2: Tap the screen to wake up the device. The battery icon will appear in the top right corner.
- Fitbit Versa 3 or Fitbit Sense: On the clock face, swipe left to access the quick settings panel. Look for the battery icon in the top right corner.
If you don’t see a battery icon or the battery icon is not displaying any status, there could be an issue with your Fitbit device. In such cases, it is recommended to try the following troubleshooting methods to rule out any potential issues.
1. Restart your Fitbit: Sometimes, a simple restart can resolve minor software glitches. To restart your Fitbit device, go to the settings menu or consult the Fitbit user manual for specific instructions.
2. Ensure proper charging: Make sure your Fitbit device is securely connected to the charging cable. Also, check the USB connector and ensure it is plugged into a power source. Try using a different USB port or charging adapter to eliminate any issues with the charging source.
3. Clean the charging contacts: Over time, dirt and debris can accumulate on the charging contacts of your Fitbit device, affecting the charging efficiency. Use a soft, dry cloth or a cotton swab to gently clean the contacts, ensuring there is no residue or buildup.
4. Contact Fitbit support: If you have tried the above steps and your Fitbit device still does not show the battery icon or charge properly, it may require further assistance. Reach out to Fitbit support for guidance and troubleshooting steps specific to your device.
By following these tips, you can easily check the battery status of your Fitbit device and take the necessary steps to ensure it remains charged and functional.
Using the charging cable
If you want to reliably ensure that your Fitbit device is charged, using the provided charging cable is a foolproof method. Follow these steps to properly charge your Fitbit device:
- Locate the charging port: Each Fitbit device has a specific charging port where you need to connect the charging cable. Refer to your device’s user manual to find the exact location of the charging port.
- Connect the charging cable: Once you have located the charging port, plug one end of the charging cable securely into it.
- Connect the other end of the charging cable: Depending on your device, the other end of the charging cable can either be a USB connector or a small charging dock. Connect it to a power source such as a computer USB port, a wall charger, or a portable power bank.
- Ensure a firm connection: Make sure both ends of the charging cable are securely connected. Check if the charging cable is properly aligned with the charging port and there are no loose connections.
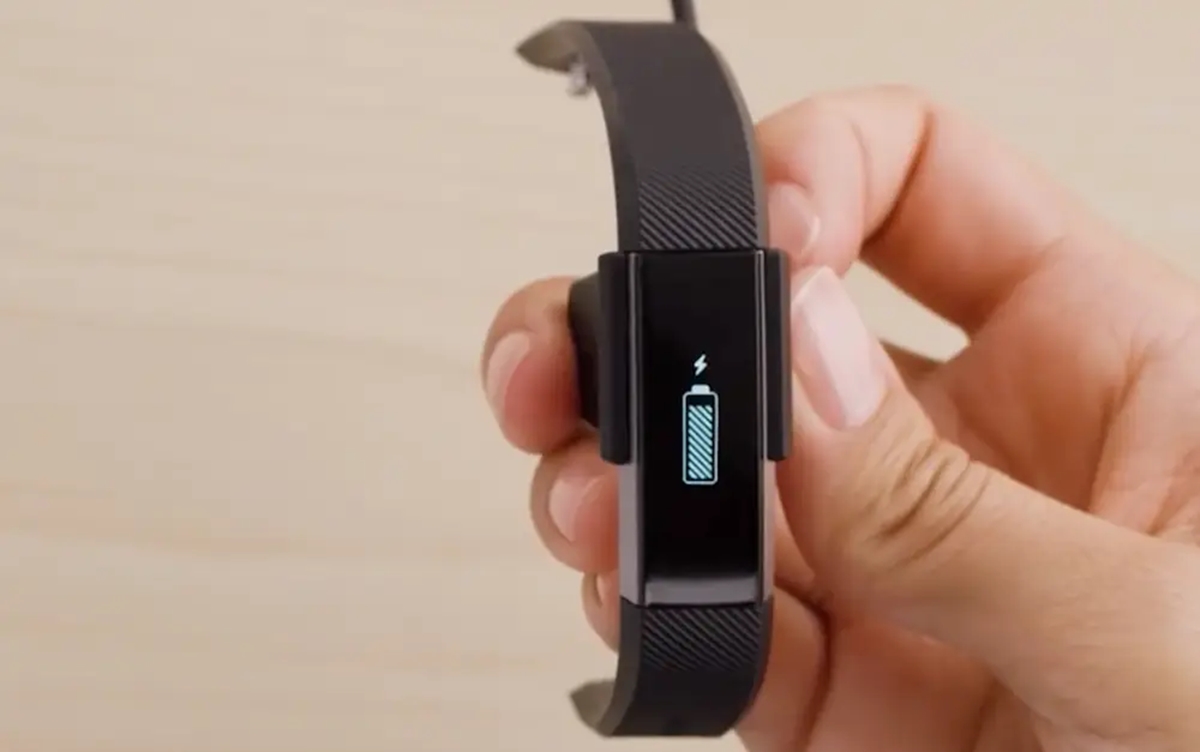
- Wait for the charging indicator: Once the Fitbit device is connected to the charging cable, it should display a charging indicator on the screen. This indicator may vary depending on the device, but it often manifests as a battery icon or a charging symbol.
- Leave it to charge: Allow your Fitbit device to charge undisturbed for a sufficient amount of time. The time required for a full charge can vary depending on the device and its current battery level. Refer to the user manual for estimated charging times.
- Check the charging status: Periodically check the device’s screen to see if the charging indicator has changed to indicate a full or near-full battery. This way, you can ensure that the charging process is progressing as expected.
- Disconnect the charging cable: Once your Fitbit device is fully charged, safely disconnect the charging cable from both the device and the power source.
Using the charging cable provided with your Fitbit device is a straightforward and reliable method to ensure its battery is adequately charged. By following these steps, you can confidently charge your Fitbit device and enjoy extended usage without worrying about battery life.
Checking the battery percentage in the app
Another convenient way to check the battery level of your Fitbit device is by using the Fitbit app on your smartphone. The app provides you with detailed information about your device’s battery percentage, allowing you to monitor its charge remotely. Follow these steps to check the battery percentage in the Fitbit app:
- Open the Fitbit app: Launch the Fitbit app on your smartphone. Make sure you are logged in with the same account associated with your Fitbit device.
- Navigate to the device screen: Tap on the “Today” tab or the icon representing your Fitbit device to access the device screen.
- View battery percentage: On the device screen, you should be able to see the battery percentage displayed prominently. This will give you an instant idea of how much charge is left in your Fitbit device.
- Additional battery details: In addition to the battery percentage, you might find additional information regarding your device’s battery status. This can include estimated time until the next recharge or a notification indicating low battery.
By checking the battery percentage in the Fitbit app, you can easily keep track of your device’s battery level without needing to look at the device itself. This feature is particularly helpful when you’re away from your Fitbit or cannot access it immediately. However, it is important to ensure that your smartphone has a stable internet connection and that the Fitbit app is synced with your device for accurate battery information.
If you notice that the battery percentage is significantly low or decreasing quickly, it might be time to charge your Fitbit device. Refer to the previous sections for tips on how to charge your device effectively.
The Fitbit app not only allows you to stay updated on your device’s battery status but also provides you with valuable insights into your fitness and health goals. Take advantage of this handy feature to effortlessly monitor your Fitbit device’s battery percentage and stay on top of your fitness journey.
Monitoring the charging progress
When you’re charging your Fitbit device, it’s helpful to monitor the charging progress to ensure that it’s successfully receiving power. Here are some methods you can use to keep an eye on the charging status:
- Check the battery icon: Keep an eye on the battery icon displayed on your Fitbit device’s screen. As it charges, you should see the battery icon filling up, indicating the progress of the charging process.
- Use the Fitbit app: Open the Fitbit app on your smartphone and navigate to the device screen. Here, you should be able to see the battery percentage, which will increase as your device charges.
- Enable notifications: Some Fitbit devices provide notifications to your smartphone to update you on the charging progress. If available, make sure to enable these notifications in the Fitbit app settings to receive real-time updates on your device’s charging status.
- Check the charging indicator light: Some Fitbit devices have a charging indicator light, typically located near the charging port. This light may change color or blink to indicate whether the device is charging or has reached a full charge. Refer to your device’s user manual for specific details on the charging indicator light.
- Observe the device’s screen: In some Fitbit models, you can access a dedicated charging screen that provides more detailed information about the charging progress, such as the estimated time until a full charge.
By monitoring the charging progress, you can ensure that your Fitbit device is receiving the power it needs and estimate how much longer it will take to reach a full charge. If you notice that the charging progress is slower than usual or the battery indicator is not increasing, try the troubleshooting tips mentioned earlier in this article to resolve any potential issues.
Remember, it’s important to allow your Fitbit device sufficient time to charge fully. The time required for a full charge can vary depending on your device model and its current battery level. Refer to your device’s user manual for more accurate estimates of the charging time.
Keeping an eye on the charging progress gives you peace of mind, knowing that your Fitbit device will be ready for use when you need it. So, whether you rely on the battery icon, the Fitbit app, notifications, the charging indicator light, or the device’s screen, choose the method that works best for you to stay informed about the charging progress of your Fitbit device.
Looking for the charging indicator light
Many Fitbit devices are equipped with a charging indicator light, which can be a helpful visual cue to determine the charging status. The charging indicator light is usually located near the charging port and provides information about the charging progress. Here’s how to interpret the charging indicator light on your Fitbit device:
1. Solid light: When connected to the charging cable, a solid light indicates that your Fitbit device is actively charging. The color of the light may vary depending on the device model, but it is commonly green or white. This means that the device is correctly connected, and power is flowing to the battery.
2. Blinking light: Some Fitbit devices have a blinking charging indicator light, which typically indicates that the battery is critically low. This blinking pattern is usually accompanied by a low battery notification on your Fitbit device’s screen or in the Fitbit app. It’s a signal that the charging process has just started, and the battery needs to be replenished.
3. Solid or blinking light with a different color: Certain Fitbit models may use different colored lights to indicate specific charging statuses. Refer to your device’s user manual to determine the exact meaning of the different colors. For example, a red light might indicate that the battery is almost fully charged, or a blue light might signify a fully charged battery.
If your Fitbit device doesn’t have a charging indicator light, don’t worry. You can rely on other methods, such as the battery icon on the device’s screen or the battery percentage in the Fitbit app, to monitor the charging progress.
Keep in mind that the charging indicator light is just one aspect of checking your Fitbit device’s charging status. It’s still important to use other methods, such as observing the battery icon, using the Fitbit app, or checking the device’s screen, to ensure that your device is charging properly and reaching a full charge.
If you notice any inconsistencies with the charging indicator light or the device’s charging behavior, try the troubleshooting tips discussed earlier in this article. This can include checking the charging cable connection, cleaning the charging contacts, or trying a different charging source.
By paying attention to the charging indicator light, you can easily determine the charging status of your Fitbit device and ensure a successful charging experience. So, keep an eye out for that indicator light to stay informed about the battery’s progress and enjoy uninterrupted usage of your Fitbit device.
Checking the battery life on the device screen
If you want to quickly check the battery life of your Fitbit device without using any external devices or apps, you can do so directly on the device’s screen. Fitbit devices typically have a dedicated screen that displays useful information, including the battery status. Here’s how you can check the battery life on your Fitbit device:
- Wake up your device: Tap or press the screen or the device’s side button to wake it up from sleep mode. The screen should light up, displaying the clock face or home screen.
- Navigate to the battery screen: Depending on your Fitbit device, you may need to swipe left or right, or navigate through the device’s menu to find the battery screen. Look for a battery icon or a battery percentage indicator.
- Check the battery status: On the battery screen, you should see the current battery level displayed either as a percentage or as a graphical representation like a battery icon that is partially filled. This will give you an immediate visual indication of how much charge is remaining in your Fitbit device.
- Additional battery information: Some Fitbit models provide additional information on the battery screen, such as the estimated time remaining until the next recharge or a notification indicating low battery. This can help you plan your usage or remind you to charge your device when needed.
By checking the battery life on the device screen, you can easily determine whether your Fitbit device needs to be charged or if it has sufficient battery life to last through your activities. This method eliminates the need to rely on external devices or apps, providing you with a quick and convenient way to monitor the battery status.
If you find that the battery level is significantly low or decreasing quickly, it may be time to charge your Fitbit device. Refer to the earlier sections for tips on using the charging cable, monitoring the charging progress, and checking the charging indicator light to ensure effective and efficient charging.
Remember to periodically check the battery life on your device screen to stay informed about its charge level and proactively manage its battery needs. This will help you avoid unexpected battery drain and ensure that your Fitbit device is always ready for use.
Verifying the battery level via notifications on your smartphone
In addition to checking the battery status directly on your Fitbit device, you can also receive notifications on your smartphone that provide updates on the device’s battery level. This feature allows you to conveniently monitor your Fitbit’s battery life even when you’re not actively using or wearing the device. Here’s how you can verify the battery level via notifications on your smartphone:
- Ensure Bluetooth and notifications are enabled: Open the settings menu on your smartphone and make sure that Bluetooth is turned on. Additionally, ensure that notifications are enabled for the Fitbit app.
- Pair your Fitbit device: If you haven’t already done so, pair your Fitbit device with your smartphone. Follow the instructions provided in the Fitbit app to establish a connection between the two devices.
- Wait for battery notifications: Once your Fitbit device is paired and synced with your smartphone, you will start receiving battery notifications. These notifications are typically triggered when the battery level is low or when the device is fully charged.
- Tap the notification: When you receive a battery notification, tap on it to open the Fitbit app. The app will display the current battery level, allowing you to quickly assess how much charge is remaining in your Fitbit device.
- Additional battery details: In addition to the battery percentage, the Fitbit app may provide additional information about your device’s battery status, such as estimated time until the next recharge.
Verifying the battery level via notifications on your smartphone offers a convenient way to stay updated on the battery status of your Fitbit device, even if you’re not wearing or actively using it. This feature is especially useful when you’re away from your device or unable to check it directly.
It’s important to note that in order to receive battery notifications, your Fitbit device needs to be within range of your smartphone and connected via Bluetooth. Additionally, ensure that you have granted the necessary permissions to the Fitbit app to deliver notifications.
If you’re not receiving battery notifications on your smartphone, make sure that your smartphone’s settings and the Fitbit app settings are properly configured. You may also need to update the Fitbit app to the latest version to access the latest features and improvements.
By verifying the battery level via notifications on your smartphone, you can effortlessly keep track of your Fitbit device’s battery life and ensure that it’s ready for use whenever you need it. It’s a convenient and reliable way to stay informed about your device’s charging needs.
Trying a different charging source
If you’re having trouble charging your Fitbit device or if it’s not charging properly, one solution you can try is to use a different charging source. Sometimes, the issue may lie with the power source you’re using rather than the device itself. Here’s how you can try a different charging source for your Fitbit device:
- Check the charging cable: Before switching to a different charging source, ensure that the charging cable is in good condition. Look for any signs of damage, fraying, or loose connections. If there are any visible issues with the cable, consider using a different charging cable altogether.
- USB charging ports: If you’re currently using a USB port on your computer or laptop to charge your Fitbit device, try using a different USB port. Sometimes, a particular USB port may not provide sufficient power or have a stable connection, leading to charging issues.
- Wall charger: Consider using a wall charger instead of charging your device via a computer or laptop. A wall charger can provide a more stable and consistent power supply, which may help resolve any charging problems.
- Portable power bank: If you’re on the go and don’t have access to a computer or wall charger, try using a portable power bank. These battery-powered devices can provide a reliable power source for charging your Fitbit device when you’re away from traditional power outlets.
By switching to a different charging source, you can determine whether the charging issues are due to a faulty power source or an inherent problem with your Fitbit device. It’s important to remember that not all charging sources provide the same power output, so using a different source can help troubleshoot and identify the root cause.
If you find that your Fitbit device charges successfully with a different charging source, it indicates that the original source was the problem. However, if the device still doesn’t charge properly, there may be other underlying issues that need to be addressed. Refer to the previous sections for additional troubleshooting tips.
It’s worth noting that using a high-quality charging cable and a reliable charging source is essential for the longevity and performance of your Fitbit device. Consider investing in certified cables and chargers to ensure a safe and effective charging experience.
By trying a different charging source, you can troubleshoot charging issues and potentially resolve them without resorting to complex solutions. Remember to use reputable and reliable charging accessories to maintain the integrity of your Fitbit device’s battery and ensure optimal charging performance.
Cleaning the charging contacts
If you’re experiencing charging issues with your Fitbit device, it’s possible that dirt, debris, or residue has accumulated on the charging contacts, preventing a proper connection between the device and the charging cable. Cleaning the charging contacts can help restore the connection and improve the charging efficiency. Here’s how you can clean the charging contacts on your Fitbit device:
- Power off the device: Before cleaning the charging contacts, ensure that your Fitbit device is powered off. This will minimize the risk of electrical damage and ensure your safety during the cleaning process.
- Inspect the charging contacts: Examine the charging contacts on both your Fitbit device and the charging cable. Look for any visible dirt, grime, or tarnish that may be interfering with the connection.
- Use a soft cloth or cotton swab: Take a soft, lint-free cloth or a cotton swab and gently wipe the charging contacts on the device and the charging cable. Be careful not to apply excessive pressure or use any abrasive materials that could damage the contacts.
- Dampen the cloth or swab if necessary: If the dirt or residue on the charging contacts is stubborn, lightly dampen the cloth or swab with water. Be sure to wring out any excess moisture before cleaning to avoid introducing liquid into the device.
- Gently dry the contacts: Once you’ve cleaned the charging contacts, use a dry cloth or allow the contacts to air dry completely before attempting to charge your Fitbit device.
By cleaning the charging contacts, you can remove any obstacles that may hinder a proper connection and prevent your device from charging effectively. This simple maintenance step can help restore the charging functionality of your Fitbit device and ensure a reliable charging experience.
It’s important to note that different Fitbit devices may have varying types of charging contacts. Some devices may have exposed metal prongs, while others may have magnetic connectors or pins. Refer to your device’s user manual for specific instructions on cleaning the charging contacts to ensure you follow the correct procedure.
Regularly cleaning the charging contacts can also prevent long-term buildup and corrosion, which can worsen charging issues in the future. Aim to include this maintenance step in your charging routine to maintain optimal charging performance for your Fitbit device.
If cleaning the charging contacts doesn’t resolve the charging problems, refer to the earlier sections for additional troubleshooting steps or consider reaching out to Fitbit support for further assistance.
By taking the time to clean the charging contacts, you can potentially resolve charging issues and ensure that your Fitbit device charges properly, allowing you to stay connected and track your fitness goals effectively.
Contacting Fitbit support for further assistance
If you’ve tried troubleshooting methods and your Fitbit device still doesn’t charge or function properly, it’s advisable to reach out to Fitbit support for further assistance. Fitbit’s support team is dedicated to resolving issues and providing guidance to ensure the best experience with your device. Here’s how you can contact Fitbit support:
1. Visit the Fitbit website: Start by visiting the official Fitbit website. Browse through the support section for troubleshooting guides, FAQs, and other helpful resources. You may find answers to common issues or step-by-step instructions to resolve your specific problem.
2. Contact Fitbit via email or chat: If you have additional questions or need further assistance, you can reach out to Fitbit support via email or chat. Look for the “Contact” or “Support” section on the website and follow the prompts to initiate a conversation with a support representative. Provide them with detailed information about your device and the specific issue you’re experiencing for a more accurate diagnosis.
3. Utilize the Fitbit Community: Joining the Fitbit Community can be a great way to connect with other users and seek advice. You can browse through existing threads or start a new one to ask questions and share your concerns. Fitbit Community members and experts often offer helpful suggestions and insights based on their own experiences.
4. Social media channels: Fitbit maintains a presence on various social media platforms. You can reach out to them through their official social media accounts, such as Twitter or Facebook. Direct messaging or mentioning Fitbit in a post can help draw attention to your issue and receive a prompt response from their support team.
5. Warranty and repair options: If your Fitbit device is still under warranty and the support team determines that it needs further repairs or replacement, they will guide you through the warranty claim process. Follow their instructions and provide any necessary documentation to facilitate a smooth resolution.
When contacting Fitbit support, be sure to provide as much detail as possible about your device and the issue you’re facing. This will enable their support team to diagnose the problem accurately and offer the most effective solutions or next steps. Patience and collaboration with the support team are key factors in finding a resolution.
Fitbit support is committed to helping you get the most out of your device and ensuring your satisfaction as a Fitbit user. Reach out to them for expert guidance, personalized assistance, or warranty-related concerns, and they will work with you to resolve any issues you encounter.
Remember to check your device’s warranty status and any coverage limitations before seeking support. Keep any purchase receipts or proof of purchase handy, as these may be required for warranty claims or repairs.
By reaching out to Fitbit support, you can receive specialized assistance and ensure that your Fitbit device is functioning optimally, allowing you to focus on your health and fitness goals without interruptions.