
What you’ll need
Before you start syncing your Fitbit Charge HR to your phone, make sure you have the following:
- A Fitbit Charge HR tracker
- A compatible smartphone
- The Fitbit app installed on your smartphone
- A Fitbit account
- A charger for your Fitbit Charge HR
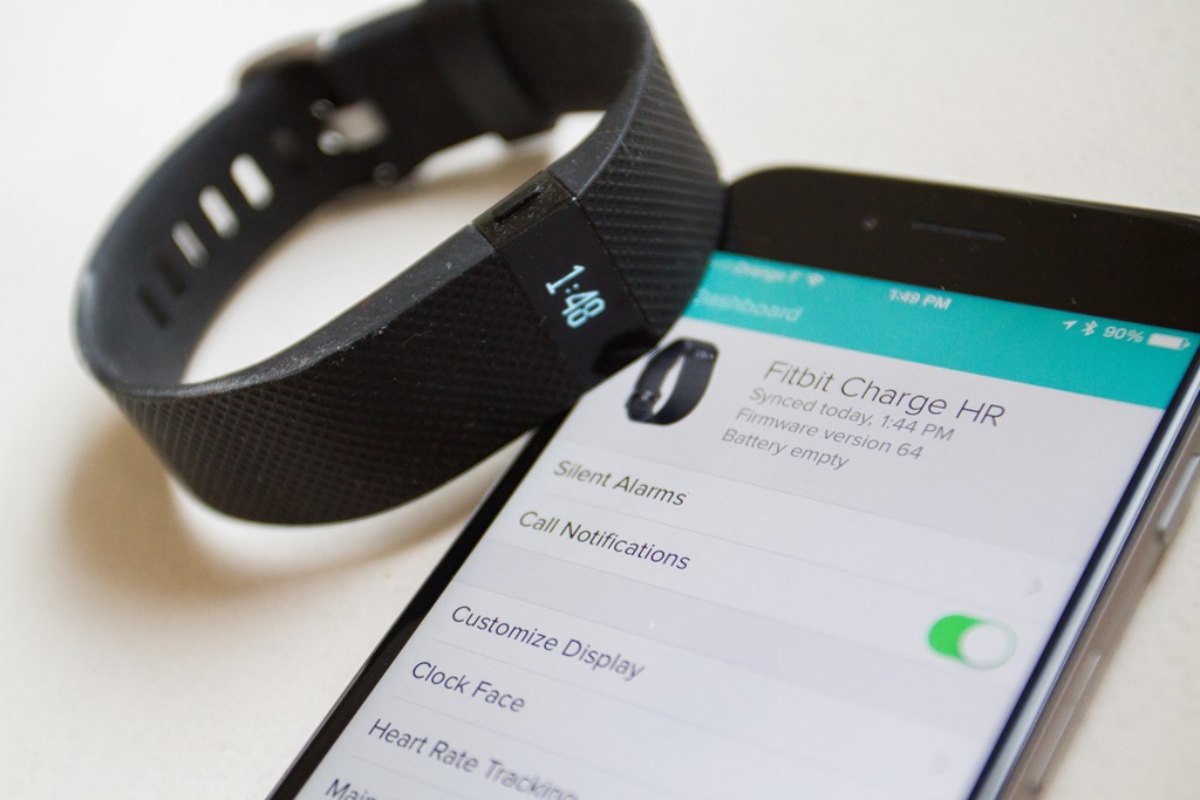
The Fitbit Charge HR is a popular fitness tracker that allows you to monitor your heart rate, track your workouts, and receive notifications from your phone. To fully enjoy all the features of the Fitbit Charge HR, you’ll need to sync it to your smartphone using the Fitbit app.
The Fitbit app is available for both iOS and Android devices and can be downloaded for free from the App Store or Google Play Store. Once you have the app installed on your smartphone, you’ll need to create a Fitbit account if you don’t already have one. This will allow you to sync your Fitbit data and track your progress over time.
Ensure that your Fitbit Charge HR is fully charged before attempting to sync it to your phone. This will ensure a smooth syncing process and prevent any interruptions while setting up your device.
Lastly, make sure that your smartphone has Bluetooth capability and that it is enabled. Syncing your Fitbit Charge HR to your phone requires Bluetooth technology to establish a connection between the two devices.
Now that you have everything you need, you’re ready to start syncing your Fitbit Charge HR to your phone. Follow the steps below to get started!
Step 1: Install the Fitbit app
The first step in syncing your Fitbit Charge HR to your phone is to install the Fitbit app. The Fitbit app is available for both iOS and Android devices and can be downloaded for free from the App Store or Google Play Store.
To install the Fitbit app, follow these simple steps:
- Open the App Store or Google Play Store on your smartphone.
- Search for “Fitbit” in the search bar.
- Tap on the Fitbit app from the search results.
- Click on the “Install” or “Get” button to start the installation process.
- Wait for the app to download and install on your smartphone.
Once the Fitbit app is successfully installed on your phone, you’re one step closer to syncing your Fitbit Charge HR. Now, it’s time to create a Fitbit account.
Having the Fitbit app on your smartphone is essential as it acts as your central hub for all your Fitbit data. It allows you to track your activity, set goals, view your progress, and connect with other Fitbit users. Additionally, the app provides access to the Fitbit dashboard, where you can analyze and gain insights into your fitness journey.
The Fitbit app is designed with a user-friendly interface, making it easy to navigate and personalize your Fitbit experience. It also offers a range of features and settings that can be customized according to your preferences.
Now that you have the Fitbit app installed on your smartphone, you’re ready to create a Fitbit account and proceed with the syncing process. Follow the next step to set up your Fitbit account.
Step 2: Create a Fitbit account
Creating a Fitbit account is necessary to sync and store your Fitbit Charge HR data. With a Fitbit account, you can track your progress, set goals, and participate in challenges with other Fitbit users. Follow these steps to create your Fitbit account:
- Open the Fitbit app on your smartphone.
- Tap on the “Join Fitbit” or “Sign Up” button on the login screen.
- Enter your personal information, including your name, email address, and password.
- Agree to the Fitbit Terms of Service and Privacy Policy.
- Tap on the “Create Account” or “Sign Up” button to complete the registration process.
Upon successful registration, you’ll have access to a personalized Fitbit dashboard where you can view and analyze your fitness data. Your Fitbit account acts as a central hub for all your Fitbit devices, including the Fitbit Charge HR.
Having a Fitbit account allows you to sync your Fitbit Charge HR to your phone and receive real-time updates and notifications. You can also share your achievements with friends and family and join Fitbit communities to stay motivated.
When creating your Fitbit account, it’s important to choose a strong password to ensure the security of your data. You can also enable additional security features, such as two-step verification, to further protect your Fitbit account.
Now that you have successfully created a Fitbit account, it’s time to move on to the next step and ensure your Fitbit Charge HR is charged and ready for syncing.
Step 3: Charge your Fitbit Charge HR
Before syncing your Fitbit Charge HR to your phone, it’s important to ensure that it is fully charged. Follow these steps to charge your Fitbit Charge HR:
- Locate the charging port on the back of your Fitbit Charge HR.
- Plug one end of the charging cable into the port, ensuring a secure connection.
- Connect the other end of the charging cable to a USB port on your computer or a USB wall adapter.
- Leave your Fitbit Charge HR connected to the charger until it is fully charged.
- While charging, you may see a battery icon or a progress indicator on the display, indicating the charging status.
- Once your Fitbit Charge HR is fully charged, disconnect it from the charger.
It’s important to charge your Fitbit Charge HR fully before syncing it to your phone to avoid any interruptions during the setup process. A fully charged device ensures a smooth syncing experience and allows you to enjoy all the features of your Fitbit tracker.
It’s recommended to charge your Fitbit Charge HR overnight or whenever it’s convenient for you. The battery life of the Fitbit Charge HR can vary depending on usage, but on average, it can last up to 5 days before needing a recharge.
Once your Fitbit Charge HR is charged and ready, you can proceed to the next step, which involves enabling Bluetooth on your phone.
Step 4: Enable Bluetooth on your phone
To sync your Fitbit Charge HR with your phone, you need to ensure that Bluetooth is enabled on your device. Bluetooth allows your Fitbit tracker to establish a connection with your phone and transfer data seamlessly. Follow these steps to enable Bluetooth on your phone:
- Open the settings app on your phone.
- Scroll down and look for the “Bluetooth” option.
- Tap on “Bluetooth” to access the Bluetooth settings.
- Toggle the switch to turn Bluetooth on.
- Wait for your phone to scan and detect available Bluetooth devices.
Once Bluetooth is enabled on your phone, your Fitbit Charge HR should appear on the list of available devices. The Fitbit app will establish a Bluetooth connection with your tracker to sync data and send notifications.
It’s important to note that the steps to enable Bluetooth may vary depending on the operating system and device model. However, most smartphones have a similar process in their settings menu.
If your Fitbit Charge HR does not appear on the list of available devices, make sure it is within range of your phone and that Bluetooth is enabled on both devices. Additionally, ensure that your Fitbit Charge HR is in pairing mode by following the instructions provided with the device.
Now that Bluetooth is enabled on your phone, it’s time to open the Fitbit app and start the syncing process. The next step will guide you through the setup of your Fitbit device.
Step 5: Open the Fitbit app
Now that you have enabled Bluetooth on your phone, it’s time to open the Fitbit app. The Fitbit app is where you will complete the setup process for your Fitbit Charge HR and sync it to your phone. Here’s how to open the Fitbit app:
- Locate the Fitbit app on your phone’s home screen or app drawer.
- Tap on the Fitbit app icon to launch it.
Upon opening the Fitbit app, you may be prompted to sign in with your Fitbit account details. If so, enter your username and password to log in. If you’re using the app for the first time, you’ll need to create a Fitbit account. Refer to the previous step for instructions on how to create a Fitbit account if you haven’t already.
Once you have logged into the Fitbit app, you’ll be greeted with the Fitbit dashboard. The dashboard provides an overview of your tracked activities, goals, and other fitness-related information.
From the Fitbit app, you can track your steps, distance, calories burned, and sleep patterns. You can also set goals, track your progress, and participate in challenges to stay motivated on your fitness journey.
Now that you have opened the Fitbit app, it’s time to proceed with the setup process for your Fitbit Charge HR. The next step will guide you through the steps required to set up your Fitbit device.
Step 6: Set up your Fitbit device
After opening the Fitbit app, it’s time to set up your Fitbit Charge HR. In this step, you will pair your Fitbit device with your phone and customize your settings. Follow these steps to set up your Fitbit device:
- Tap on the Account icon or your profile picture in the top left corner of the Fitbit app.
- Select “Set Up a Device” from the menu.
- Choose “Wristband” as the type of Fitbit device you want to set up.
- Follow the on-screen instructions to complete the setup process.
- Make sure your Fitbit Charge HR is within range and fully charged.
- Wait for the Fitbit app to find your Fitbit Charge HR.
- Once your Fitbit Charge HR is detected, tap on it to begin the pairing process.
- Follow the prompts to pair your Fitbit Charge HR with your phone.
During the setup process, you may be prompted to enter additional information such as your height, weight, and activity level. This data helps Fitbit provide more accurate insights about your fitness progress.
After successfully setting up your Fitbit device, you can customize various settings such as clock faces, notifications, and activity goals. With the Fitbit app, you can personalize your Fitbit experience to match your preferences and fitness goals.
Once the setup is complete, your Fitbit Charge HR will automatically sync with your phone whenever it is in range and Bluetooth is enabled. You can also manually sync your Fitbit device by opening the Fitbit app and pulling down on the screen to refresh the data.
Congratulations! You have now set up your Fitbit device and it’s ready to use. The next step will guide you through the final instructions to complete the syncing process.
Step 7: Follow the on-screen instructions
Now that you have successfully set up your Fitbit device, it’s time to follow the on-screen instructions to complete the syncing process. The on-screen instructions will guide you through the final steps to ensure that your Fitbit Charge HR is properly synced with your phone. Here’s what you need to do:
- After pairing your Fitbit Charge HR with your phone, the Fitbit app may prompt you to update the firmware on your device. It’s important to follow these instructions to ensure that your device is running the latest software version.
- Once the firmware update is complete, the Fitbit app will provide you with a brief tutorial on how to navigate and use your Fitbit Charge HR. Pay close attention to these instructions and familiarize yourself with the device’s features and functions.
- The app may also ask you to customize your settings, such as choosing your dominant hand, setting up notifications, and enabling features like Reminders to Move.
- Take your time to go through each step and make the necessary adjustments according to your preferences.
- After following the on-screen instructions and customizing your settings, your Fitbit Charge HR is now fully synced with your phone.
- You can now start tracking your activity, monitoring your heart rate, and utilizing the various features and functions of your Fitbit Charge HR.
Remember to keep your Fitbit Charge HR and phone within Bluetooth range to ensure a continuous syncing process. Regularly check the Fitbit app to view your activity data, track your progress, and stay motivated on your fitness journey.
If you encounter any issues or have difficulties with the syncing process, you can refer to the Fitbit support website or contact their customer support for assistance. They provide detailed troubleshooting guides and resources to help you resolve any syncing or connectivity problems.
With your Fitbit Charge HR properly synced and set up, you’re now ready to enjoy the benefits of tracking your fitness and achieving your health goals. Keep wearing your Fitbit device and make the most out of its features to stay active and live a healthier lifestyle!
Troubleshooting tips for syncing issues
While syncing your Fitbit Charge HR to your phone is usually a seamless process, there may be times when you encounter syncing issues. If you’re facing difficulties in syncing your device, try these troubleshooting tips to resolve the problem:
- Ensure that Bluetooth is enabled on both your Fitbit Charge HR and your phone. Sometimes, syncing issues can be caused by a temporary Bluetooth connectivity problem.
- Make sure your Fitbit Charge HR and your phone are within close range. Keeping them too far apart may affect the Bluetooth connection and lead to syncing problems.
- Restart your Fitbit Charge HR by following the instructions provided by Fitbit. Rebooting the device can help resolve minor syncing issues.
- Force quit the Fitbit app on your phone and relaunch it. Sometimes, closing and reopening the app can fix any temporary glitches that may be preventing syncing.
- Check for updates to the Fitbit app and your phone’s software. Installing the latest updates can provide bug fixes and improvements that may address syncing issues.
- Remove your Fitbit Charge HR from the Bluetooth settings on your phone and then reconnect it. This can help establish a fresh Bluetooth connection between your devices.
- Reset your Fitbit Charge HR as a last resort. Refer to the Fitbit website or contact their customer support for instructions on how to reset your device.
- If none of these troubleshooting tips work, contact Fitbit customer support for further assistance. They have dedicated support staff available to help you resolve any syncing issues you may be experiencing.
Remember, syncing issues can be frustrating, but they are often temporary and easily fixable. By following these troubleshooting tips, you can get your Fitbit Charge HR back in sync with your phone and continue tracking your fitness journey without interruption.
Keep in mind that regular syncing is essential to ensure that your Fitbit data is accurately recorded and up to date. Syncing allows you to view your progress, analyze your activity data, and make adjustments to your fitness goals accordingly.
Now that you have the necessary troubleshooting tips, you can confidently tackle any syncing issues that may arise and get back on track with achieving your health and fitness goals with your Fitbit Charge HR.