Importance of Swimming in Animal Crossing: New Horizons
Swimming is an exciting new feature introduced in the Animal Crossing: New Horizons game. It allows players to explore the vast ocean surrounding their island, discover new sea creatures, and add them to their collection. The addition of swimming brings a whole new dimension to the gameplay experience and offers various benefits to players.
Firstly, swimming provides a unique opportunity to interact with the marine ecosystem in the game. By diving into the water, players can explore the depths and encounter a wide variety of sea creatures. From colorful fish to fascinating marine life, the sea holds a treasure trove of discoveries waiting to be made. Swimming allows players to immerse themselves in the rich underwater world and learn more about the diverse species that inhabit it.
In addition to the joy of exploration, swimming also offers practical advantages. Many of the sea creatures that can be found while swimming can be sold for a decent amount of bells, the game’s currency. This provides players with a new avenue for earning income and expanding their financial resources. By catching and selling rare or valuable sea creatures, players can fund various island upgrades, purchase new furniture, or indulge in the other activities the game has to offer.
Besides financial benefits, swimming also contributes to the completion of players’ Critterpedia, a book that records the various insects, fish, and now sea creatures the player has encountered. Adding new sea creatures to the Critterpedia not only brings a sense of achievement but also increases the player’s overall completion percentage. Collecting and cataloging all the available sea creatures becomes a satisfying goal in itself, adding long-term replay value to the game.
Moreover, swimming opens up opportunities for social interactions. Players can invite their friends to visit their islands and explore the ocean together. This cooperative activity allows players to bond over their shared love for the game and collaborate in discovering new sea creatures. Swimming becomes a shared experience, fostering a sense of community and camaraderie among players.
Unlocking the Ability to Swim
To unlock the ability to swim in Animal Crossing: New Horizons, players must first update their game to the latest version. Swimming was introduced in the “Summer Update Wave 1,” so ensure that your game is up to date before diving into the ocean.
Once you have updated your game, you’ll need to have the Resident Services building upgraded on your island. The Resident Services building serves as the main hub for island management and activities. If you haven’t upgraded it yet, speak with Tom Nook to initiate the process. After the building upgrade is complete, the swimming feature will be available to you.
Additionally, you must have a Nintendo Switch Online subscription to access the full functionality of swimming. Nintendo Switch Online allows you to connect with other players around the world, visit their islands, and collaborate on various activities, including swimming. If you don’t already have a subscription, you can purchase one from the Nintendo eShop.
It is important to note that swimming is only available to players after the in-game character, Nook, announces it through the morning announcements. This typically occurs a day after the Resident Services building upgrade is complete. Pay attention to the announcements to ensure you don’t miss out on the exciting new feature.
Remember, swimming is a seasonal activity in Animal Crossing: New Horizons and is available between the months of June and September in the northern hemisphere and December and March in the southern hemisphere. So make sure to take full advantage of swimming during these designated periods to maximize your exploration and sea creature collection.
Now that we have covered the process of unlocking the swimming ability, it is time to dive into the next step: obtaining a wetsuit.
Obtaining a Wetsuit
Once the swimming feature is unlocked in Animal Crossing: New Horizons, the next step is to obtain a wetsuit. A wetsuit is necessary to venture into the water and explore the ocean surrounding your island.
To get a wetsuit, you have a few options. One way is to purchase it from the Nook’s Cranny shop. The wetsuit will be available for a limited time in the cabinet near the back of the store. Simply check the cabinet each day until you find the wetsuit in stock. The price may vary, so make sure to have enough bells to purchase it.
Alternatively, you can also obtain a wetsuit by redeeming Nook Miles at the Nook Stop terminal in the Resident Services building. Select the “Redeem Nook Miles” option and browse through the available items. Look for the wetsuit among the seasonal items or the “Everything is fun!” section. Spend the required Nook Miles to acquire the wetsuit and add it to your collection.
If you’re feeling lucky, keep an eye out for special events or promotions. Nintendo occasionally releases limited-edition wetsuits through the Nook Shopping app. Check the app daily to see if there are any new wetsuits available for purchase. These special wetsuits often come in unique designs or patterns, adding a touch of style to your swimming adventures.
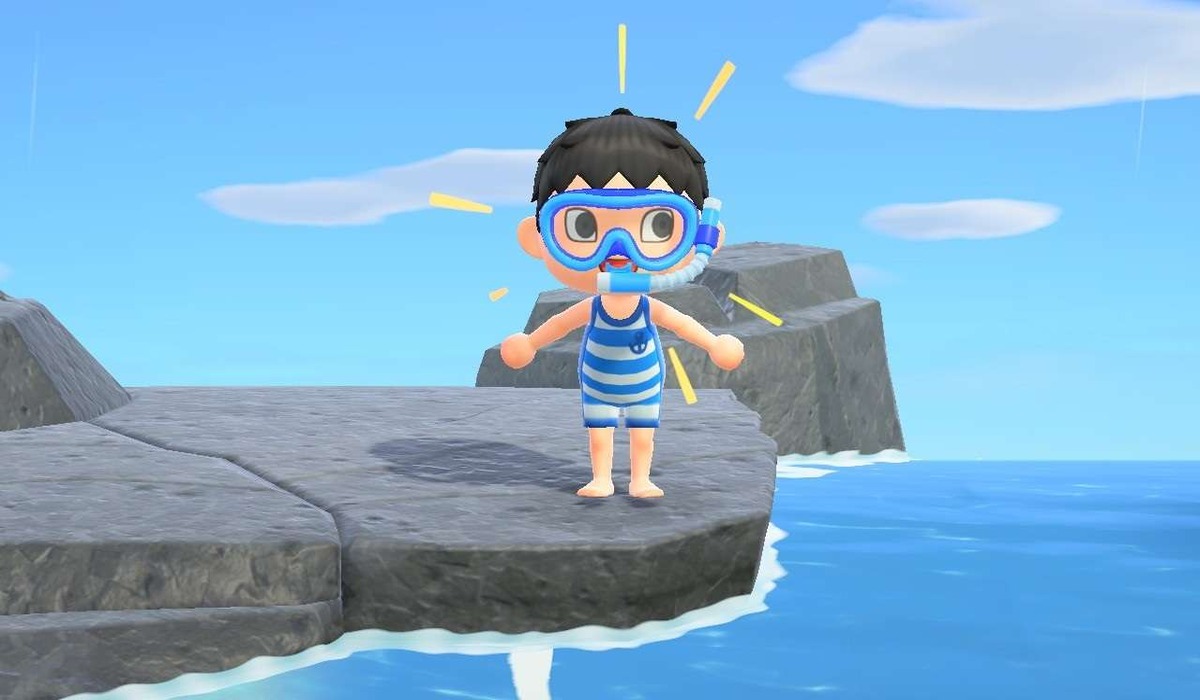
Once you have obtained a wetsuit, it will automatically appear in your inventory. Remember to equip the wetsuit before heading out for a swim. You cannot enter the water without wearing it, so make sure to have it equipped to fully enjoy the swimming experience.
With your wetsuit in hand, you are now ready to jump into the waves and begin your aquatic exploration. But before you dive in, let’s go over how to equip the wetsuit properly.
Equipping the Wetsuit
Equipping the wetsuit in Animal Crossing: New Horizons is essential to be able to swim and explore the ocean. Once you have obtained a wetsuit, follow these simple steps to equip it:
- Open your inventory by pressing the X button on your Nintendo Switch.
- Navigate to the “Clothing” tab.
- Select the wetsuit from your inventory.
- Choose the “Wear” option to equip the wetsuit.
After equipping the wetsuit, your character will be dressed and ready for a swimming adventure. You will notice your character has a new outfit, perfect for getting wet and exploring the ocean.
It’s important to note that once the wetsuit is equipped, it will stay on your character until you decide to change your outfit or remove it. Unlike other clothing items in Animal Crossing: New Horizons, the wetsuit does not take up any inventory space while you are wearing it.
Make sure to have the wetsuit on whenever you want to jump into the water and swim. Without the wetsuit, you won’t be able to enter the ocean and explore the underwater world.
Now that your character is dressed and ready to swim, let’s dive into the next section to learn how to enter the water and start your swimming adventure.
Entering the Water
Once you have equipped your wetsuit in Animal Crossing: New Horizons, it’s time to take the plunge and enter the water. Here’s how you can dive into the ocean and begin your swimming adventure:
- Locate a beach or coastline on your island where you can access the water. It can be any part of the shoreline.
- Walk up to the water’s edge until your character is standing at the water’s edge.
- Press the A button on your Nintendo Switch to jump into the water.
After pressing the A button, your character will gracefully dive into the ocean, ready to explore the underwater world. You can now freely swim around your island and beyond, discovering the treasures that lie beneath the surface.
Make sure to explore different areas of your island’s coastline to find new and interesting places to swim. You may discover hidden coves, rocky formations, or even unique sea creatures lurking in specific spots. Don’t be afraid to dive deep and venture far from the shore to uncover new surprises.
While swimming, your character will be able to move around using the control stick on your Nintendo Switch. You can also use the camera controls to change your view and get a better look at the underwater environment.
Remember, the swimming feature is seasonal in Animal Crossing: New Horizons and is available between specific months depending on your hemisphere. Take advantage of this limited-time activity and make the most of your time exploring the ocean.
Now that you’re in the water and ready to explore, let’s move on to the next section to learn about the controls for swimming.
Swimming Controls
Swimming in Animal Crossing: New Horizons involves simple and intuitive controls that allow you to navigate through the water with ease. Once you’ve entered the water, use the following controls to swim:
- Move: Use the control stick on your Nintendo Switch to steer your character in any direction. You can swim forward, backward, left, and right by adjusting the control stick accordingly. Explore the vast ocean surrounding your island and discover new areas to explore.
- Dive: To dive underwater, simply press the Y button on your Nintendo Switch. Your character will dive beneath the surface, allowing you to explore the depths and search for hidden sea creatures.
- Surface: If you wish to resurface and return to the water’s surface, press the Y button again. Your character will swim back up, allowing you to catch your breath and plan your next underwater expedition.
- Camera Controls: Use the right control stick on your Nintendo Switch to adjust the camera angle and get a better view of your surroundings. This can be particularly helpful when searching for sea creatures or exploring underwater caves.
- Swim Speed: Your character will swim at a default speed, but you can increase your swimming speed by repeatedly tapping the A button. This can be useful for covering larger distances quickly or chasing after fast-moving sea creatures.
By mastering these swimming controls, you’ll be able to navigate the ocean with ease and fully enjoy the underwater wonders that Animal Crossing: New Horizons has to offer.
Now that you know how to control your character while swimming, let’s move on to the next section to learn about the exciting sea creatures you can discover beneath the waves.
Finding New Sea Creatures
One of the thrilling aspects of swimming in Animal Crossing: New Horizons is the opportunity to discover and collect a wide variety of sea creatures. These unique underwater creatures can be found in the ocean surrounding your island. Here are some tips to help you find and catch new sea creatures:
- Explore different areas: To maximize your chances of finding new sea creatures, explore various parts of your island’s coastline. Different areas may yield different types of sea creatures, so be sure to swim around the entire perimeter of your island.
- Dive underwater: Use the dive function by pressing the Y button to submerge yourself below the water’s surface. This will allow you to explore the depths and encounter sea creatures that dwell in the lower levels. Keep an eye out for shadows or movements in the water, as they usually indicate the presence of a sea creature.
- Time of day matters: Just like with other critters in the game, certain sea creatures are more active during specific times of the day. Some may only appear during the daytime, while others are night owls. Experiment and observe to figure out the best times to swim and discover new sea creatures.
- Seasonal availability: Some sea creatures are only available during specific months, depending on your hemisphere. Make sure to check your critterpedia or search online to find out which sea creatures are currently in season. This will help you target your swimming efforts and focus on collecting the creatures available during the current month.
- Use your ears: While swimming, listen carefully for the sound of bubbles rising to the surface. This indicates the presence of a hidden sea creature nearby. Follow the sound and dive down to catch the creature before it gets away.
- Try different weather conditions: Weather conditions, such as rain or snow, can affect the appearance rates of certain sea creatures. Experiment with swimming during different weather patterns to see if it increases your chances of discovering rare or elusive specimens.
By using these tips and paying attention to your surroundings, you’ll be able to find an abundance of new sea creatures to add to your collection. Keep an open mind, dive deep, and enjoy the wonders that await you beneath the waves.
Now let’s dive into the next section to learn about the exciting experience of diving underwater and encountering sea creatures up close.
Diving Underwater
Once you’ve found a sea creature while swimming in Animal Crossing: New Horizons, it’s time to dive underwater and get up close and personal with your newfound discovery. Diving underwater allows you to closely observe and catch the sea creatures you encounter. Here’s what you need to know about diving in the game:
- Spotting sea creatures: Keep an eye out for shadows or movements in the water as you swim. These visual cues indicate the presence of a sea creature. Once you’ve spotted one, position yourself above it and press the Y button to dive underwater and get closer.
- Approaching sea creatures: As you descend, approach the sea creature slowly and carefully. Some sea creatures may be easily startled and will quickly swim away if you get too close or approach too quickly. Move slowly and try to anticipate their movements.
- Catching sea creatures: To catch a sea creature, position your character close to it and press the A button at the right moment. Timing is crucial, as you want to capture the sea creature before it swims away. Practice your timing and aim to improve your success rate.
- Using your net: Some fast-swimming sea creatures may require the use of a net to catch them. When equipped with a net, press the A button while underwater to swing your net and capture the elusive sea creature. This adds an extra layer of excitement and challenge to your underwater expeditions.
- Sea creature behavior: Each sea creature in the game has its own unique behavior and movement patterns. Some may hide in the sand or bury themselves, while others may dart away swiftly. Pay attention to their movements and learn their behavior to increase your chances of successfully catching them.
- Learning about sea creatures: After catching a sea creature, you can inspect it in your inventory or critterpedia to learn more about it. The critterpedia provides fascinating information about each sea creature, including its name, size, and habitat. Take the time to read about the sea creatures you encounter to enhance your knowledge of the marine world.
By mastering the art of diving and catching sea creatures, you’ll be able to create an impressive collection and further immerse yourself in the underwater world of Animal Crossing: New Horizons.
Now that you know how to dive and catch sea creatures, let’s move on to the next section to learn how to donate them to the museum.
Catching Sea Creatures
Catching sea creatures in Animal Crossing: New Horizons is a thrilling and rewarding activity that allows you to expand your collection and contribute to the Critterpedia. Each sea creature you catch adds to your knowledge of the marine world and can provide a valuable source of income. Here are some tips for successfully catching sea creatures:
- Approach cautiously: When you spot a sea creature while swimming, approach it slowly and carefully. Sudden movements or loud noises may startle the creature and cause it to swim away. Take your time and try to get as close as possible before making your move.
- Timing is key: Patience and timing are crucial for successfully catching sea creatures. Wait for the right moment when the creature is within reach and press the A button to capture it. It may take a few tries, especially for fast-swimming creatures, but with practice, you’ll improve your timing.
- Use your net: Fast-swimming and elusive sea creatures often require the use of a net to capture them. When equipped with a net, press the A button while underwater to swing it and catch the creature. Make sure to position yourself properly to avoid missing your target.
- Consider the creature’s behavior: Each sea creature in the game has its own unique behavior and movement patterns. Some creatures may move in a predictable manner, while others may be more erratic. Observing and understanding their behavior will increase your chances of successfully catching them.
- Upgrade your tools: As you progress in the game, consider upgrading your tools, including your net. Upgraded tools often have a wider reach or improved performance, making it easier to catch sea creatures. Visit Nook’s Cranny or the upgraded Resident Services building to purchase upgraded tools.
- Take advantage of diving: While swimming, don’t forget to dive underwater to search for hidden sea creatures. Some creatures may be hiding in the sand or disguising themselves, so exploring the depths is essential for finding a diverse range of species.
- Keep an eye out for rare creatures: Certain sea creatures are considered rare and can fetch a higher price when sold. Look for unique markings, vibrant colors, or creatures that appear less frequently to increase your chances of finding a rare catch.
Catching sea creatures is not only an exciting activity but also a great way to earn Bells and expand your museum’s collection. So, grab your net, dive into the ocean, and embark on an underwater adventure to discover the wonders of the marine world.
Now that you know how to catch sea creatures, let’s explore the next step: donating them to the museum.
Donating Sea Creatures to the Museum
Once you’ve caught a sea creature in Animal Crossing: New Horizons, you have the option to donate it to the museum. Donating sea creatures is a great way to contribute to the museum’s collection and showcase the diverse marine life found in your island’s waters. Here’s how you can donate your sea creatures:
- Locate the museum on your island. If the museum has not been built yet, talk to Blathers, the owl who will be in charge of the museum. He will give you instructions on gathering donations and help you with the building process. Once the museum is ready, proceed to the next step.
- Enter the museum and make your way to the gallery or the appropriate section where sea creatures are displayed. Look for an empty tank or display area specifically meant for sea creatures.
- Open your inventory and select the sea creature you want to donate. Choose the “Donate” option to hand over the creature to Blathers.
- Blathers will provide an informative speech about the donated sea creature, its habitat, and its characteristics. Listen attentively as he shares fascinating details about the newly donated creature.
- After the donation process is complete, the sea creature will be displayed in the museum for all visitors to admire and learn about. The Critterpedia will also update with the new addition to your collection.
- Repeat the process for any additional sea creatures you wish to donate. Remember, each sea creature you contribute adds to the museum’s knowledge and provides an educational experience for visitors.
Donating sea creatures to the museum not only benefits the museum and its collection but also gives you a sense of accomplishment and contributes to completing your Critterpedia. Seeing your discovered sea creatures displayed in the museum can be a rewarding experience and a testament to your dedication as an underwater explorer.
Now that you know how to donate sea creatures to the museum, let’s move on to the next section to explore the different options for selling and trading your sea creatures.
Selling and Trading Sea Creatures
In Animal Crossing: New Horizons, sea creatures provide a valuable source of income and can be sold to various vendors or traded with other players. Whether you’re looking to make some extra Bells or complete your collection, here are the different options for selling and trading your sea creatures:
Selling to Nook’s Cranny: One of the most straightforward ways to sell your sea creatures is by visiting Nook’s Cranny, the island’s resident shop. Talk to Timmy or Tommy and select the “I want to sell!” option. They will assess your sea creatures and offer you a price. Consider the selling price carefully, as some sea creatures may fetch higher prices than others. Once you’re satisfied with the amount, confirm the sale and earn Bells for your catch.
Trading with C.J.: C.J., the beaver character, occasionally visits your island to buy fish and sea creatures at an increased price. Look out for his arrival and engage in a trading frenzy. Selling your sea creatures to C.J. during his visit means you’ll receive a higher selling price than at Nook’s Cranny. Take advantage of this opportunity to maximize your profits.
Trading with other players: If you have friends who also play Animal Crossing: New Horizons, you can arrange trades with them. Exchange your sea creatures for ones that they have caught but are missing from your collection. This collaborative trading allows you to complete your Critterpedia faster and adds a social aspect to the game. Connect with other players online or locally to expand your sea creature collection.
Selling online or at player-run markets: Another option for selling your sea creatures is through online platforms or player-run markets. There are various websites and forums where players can buy and sell items, including sea creatures. Participating in these online trading communities can be a great way to earn Bells and discover rare or unique sea creatures from other players.
Remember, the availability and selling prices of sea creatures may vary depending on factors like the season and the vendor’s presence. Stay updated with in-game announcements and take advantage of special events or visitors to maximize your selling opportunities.
Whether you choose to sell your sea creatures for Bells or trade them with fellow players, seizing the opportunity to profit from your underwater discoveries is a rewarding part of the game. Explore your options, make smart choices, and enjoy the benefits of your hard work as an underwater collector.
Now that you know the various ways to sell and trade sea creatures, let’s dive into the next section to discover the magical world of Mermaid Furniture DIY Recipes.
Mermaid Furniture DIY Recipes
Alongside the excitement of swimming and collecting sea creatures in Animal Crossing: New Horizons, players also have the opportunity to craft enchanting Mermaid Furniture. These whimsical pieces of furniture are inspired by the sea and can be a delightful addition to your island’s decor. Here’s what you need to know about Mermaid Furniture DIY Recipes:
Obtaining DIY Recipes: DIY Recipes for Mermaid Furniture can be obtained through various methods. One way is by finding a Message in a Bottle on your island’s beaches. These bottles may contain DIY Recipes for Mermaid Furniture, among other things. Additionally, villagers may occasionally gift or trade DIY Recipes with you. Keep an eye out for both of these opportunities to expand your collection of Mermaid Furniture DIY Recipes.
Gathering Crafting Materials: To craft Mermaid Furniture, you’ll need specific crafting materials. The primary material required is Pearls, which can be found while swimming in the ocean. Pearls are rare and valuable, so make sure to dive deep and explore thoroughly to increase your chances of finding them. Other materials, such as shells and coral, may also be required for certain Mermaid Furniture DIY Recipes.
Crafting Mermaid Furniture: Once you have obtained the necessary DIY Recipe and gathered the required materials, head to a DIY Workbench or a crafting table and select the recipe to start crafting your desired piece of Mermaid Furniture. Follow the step-by-step instructions provided by the recipe to bring your creation to life. Each piece of Mermaid Furniture showcases its unique design and adds a touch of whimsy to your island.
Customizing Mermaid Furniture: Some Mermaid Furniture pieces offer customizable options. After crafting a base piece, you can further personalize it by using additional crafting materials or customizing kits available from Nook’s Cranny. Explore the customization options to create Mermaid Furniture that matches your island’s aesthetic and suits your personal style.
Completing your Mermaid Furniture collection: There are various Mermaid Furniture DIY Recipes to collect, each requiring different materials and offering its own distinct design. Keep an eye out for new Mermaid Furniture DIY Recipes, and work towards completing your collection by crafting and acquiring all the different pieces available. Showcase your creativity and imagination by incorporating Mermaid Furniture into your island’s interior or outdoor spaces.
The magical and whimsical charm of Mermaid Furniture DIY Recipes adds a delightful touch to your island. Explore the underwater world, collect the necessary materials, and let your creativity soar as you craft unique pieces of furniture inspired by the wonders of the sea.
Now that you’re familiar with Mermaid Furniture DIY Recipes, let’s dive into the next section to discover some helpful swimming tips and tricks.
Swimming Tips and Tricks
Swimming in Animal Crossing: New Horizons is an exciting and immersive activity that allows you to explore the depths of the ocean surrounding your island. To enhance your swimming experience and make the most of your underwater adventures, here are some helpful tips and tricks:
- Swim during different times: Certain sea creatures are more active during specific times of the day. Experiment with swimming during different hours to increase your chances of encountering different species. Swim during the day, at dusk, or even at night to discover a variety of underwater fauna.
- Pay attention to weather patterns: Weather conditions can affect the appearance rates of certain sea creatures. Some creatures may only appear during rain showers, while others may prefer sunny days. Keep an eye on the weather forecast or listen for Isabelle’s announcements to optimize your swimming trips.
- Explore different areas: Don’t limit yourself to one part of your island’s coastline. Explore different areas and check various beaches for different sea creatures. Each area may have its unique set of underwater inhabitants, so make sure to swim around your entire island to maximize your discoveries.
- Scare away unwanted visitors: If you encounter seaweed or jellyfish in the water, try using your diving technique to swim swiftly towards them. This scare tactic can often make them disappear, allowing you to continue your search for more desirable sea creatures.
- Utilize sound and shadows: Pay attention to the sound of bubbles rising to the water’s surface and the shadows cast by swimming sea creatures. These signs can help you locate hidden or rare species. Follow the sounds and shadows to increase your chances of spotting and catching elusive sea creatures.
- Take advantage of diving: Dive underwater frequently to explore the depths and find sea creatures hiding beneath the surface. Some creatures may only be found in the sandy ocean floor or amongst coral formations. Dive deep and be thorough in your exploration to uncover a wide range of sea creatures.
- Share and trade with friends: Connect with friends who also play Animal Crossing: New Horizons and share your sea creature discoveries. You can trade sea creatures you have caught for ones you haven’t encountered yet. Collaborate with friends to complete your Critterpedia and broaden your sea creature collection.
- Keep your inventory empty: To make the most of your swimming trips, ensure that your inventory has ample space. This allows you to catch multiple sea creatures without the worry of running out of storage. Sell, donate, or store your caught sea creatures promptly to keep your inventory space available for more underwater treasures.
- Use diving to reach secluded areas: Sometimes, there may be small islands or rocky areas just off the coast of your main island that are otherwise unreachable. Use your diving ability to swim across and reach these secluded spots. You may find rare sea creatures or hidden secrets waiting for you.
By applying these swimming tips and tricks, you can enhance your underwater exploration experience and make the most of your time in the ocean. Swim with purpose, be observant, and embrace the wonders that await in the depths of Animal Crossing: New Horizons.
Now that you’re equipped with swimming tips and tricks, let’s move on to the final section to discuss safe swimming practices to ensure a pleasant and worry-free time in the water.
Safe Swimming Practices
While swimming in Animal Crossing: New Horizons is a fun and relaxing activity, it’s essential to prioritize safety to ensure a pleasant experience. Here are some safe swimming practices to keep in mind:
- Know your limits: Each player has their own swimming abilities, so be aware of your limitations. Don’t push yourself too hard or dive deeper than you feel comfortable. Take breaks if needed to rest and replenish your character’s stamina.
- Watch out for strong currents: Occasionally, you may come across strong ocean currents while swimming. Be cautious and avoid swimming against the current, as it can drain your character’s stamina faster. Instead, swim with the current or back towards the shore to stay safe.
- Stay hydrated: Keep an eye on your character’s hydration level while swimming. If you notice a water droplet symbol above your character’s head, it means they are becoming dehydrated. Take a break, drink some water, and wait until your character is fully rehydrated before entering the water again.
- Be mindful of fatigue: Swimming for extended periods can cause fatigue. Keep an eye on your character’s energy level, displayed by the swimming goggles icon. If the energy level becomes low, take a break and rest on the shore to recharge before continuing your underwater exploration.
- Stay aware of surroundings: While swimming, it’s important to be aware of your surroundings. Keep an eye out for other players, obstacles, or potential hazards in the water. Avoid collisions or accidental encounters that may distract from your enjoyable swimming experience.
- Take regular breaks: Swimming can be a physically demanding activity in the game. Take frequent breaks to rest, have a snack, or explore the island on foot. Regular breaks will prevent exhaustion and allow you to fully appreciate the various aspects of the game beyond swimming.
- Never swim alone: It’s always more enjoyable and safer to swim with a friend in Animal Crossing: New Horizons. Swim with fellow players, invite friends to your island, or connect online to engage in cooperative swimming adventures. Swimming together enhances the social aspect of the game and ensures that you have someone to assist you if needed.
By following these safe swimming practices, you can enjoy the serene waters of Animal Crossing: New Horizons while keeping your character safe and happy. Remember, the aim is to have a pleasant swimming experience while staying mindful of your character’s well-being.
Now that you’re familiar with safe swimming practices, you are ready to embark on your underwater adventures with a greater sense of security and peace of mind.