
What is the Ledger Nano S?
The Ledger Nano S is a hardware wallet designed to securely store your cryptocurrency assets, including ICON (ICX). It offers a robust and convenient way to protect your digital currencies from hacking attempts and unauthorized access.
Unlike online wallets or software wallets, the Ledger Nano S keeps your private keys offline, ensuring that they are never exposed to the internet. This significantly reduces the risk of hacking and theft. It is a compact and portable device that resembles a USB flash drive, making it easy to carry and use wherever you go.
One of the key features of the Ledger Nano S is its secure element chip. This chip acts as a vault for your private keys and ensures that they never leave the device at any point during transactions. The device also uses a PIN code and a recovery seed phrase to provide an additional layer of security.
With its intuitive interface and high-quality OLED display, the Ledger Nano S allows you to securely manage your ICON holdings. It supports a wide range of cryptocurrencies, making it a versatile hardware wallet for all your digital assets. Whether you are a beginner or an experienced cryptocurrency investor, the Ledger Nano S provides a user-friendly and robust solution for storing your ICX.
Furthermore, the Ledger Nano S is compatible with various operating systems, including Windows, macOS, and Linux. It can be easily connected to your computer or smartphone using a USB cable. The device also comes with Ledger Live, a user-friendly software application that allows you to manage your accounts, check your balances, and initiate transactions.
Overall, the Ledger Nano S is a trusted and widely-used hardware wallet that offers a secure and user-friendly solution for storing ICON and other cryptocurrencies. Whether you are concerned about cybersecurity or want to have complete control over your digital assets, the Ledger Nano S is an excellent choice for safeguarding your ICX and ensuring peace of mind.
Setting up the Ledger Nano S
Setting up the Ledger Nano S is a straightforward process that requires a few simple steps. It is important to follow these steps carefully to ensure the security and functionality of your hardware wallet.
Here’s a step-by-step guide on how to set up your Ledger Nano S:
- Start by unpacking your Ledger Nano S and connecting it to your computer or smartphone using the provided USB cable.
- Once connected, the Ledger Nano S will display a welcome message along with the option to choose a PIN code. Using the buttons on the device, select a PIN code and confirm it. Make sure to choose a PIN code that is unique and secure. This PIN code will be required every time you connect your Ledger Nano S to authorize transactions.
- After setting up the PIN code, the device will prompt you to write down a recovery seed phrase. This seed phrase is a crucial backup of your private keys and should be stored in a safe and secure place. Write down the seed phrase on the provided recovery sheet and make sure to keep it away from prying eyes and potential hazards.
- Next, the Ledger Nano S will ask you to confirm the recovery seed phrase. This step is essential to ensure that you have correctly written down the words in the correct order. Carefully enter the requested words using the device’s button interface.
- Once you have confirmed the recovery seed phrase, the Ledger Nano S will finalize the setup process and display the main menu. From this menu, you can navigate through various options and manage your cryptocurrency accounts.
- At this point, you can install the Ledger Live software application on your computer or smartphone. Ledger Live is a user-friendly interface that allows you to manage your accounts, update firmware, and initiate transactions.
With the Ledger Nano S successfully set up, you can now move on to installing the ICON app and creating an ICON wallet on your device. These steps will enable you to securely store and manage your ICX holdings on the Ledger Nano S.
By following the setup process carefully and taking necessary precautions such as writing down the recovery seed phrase, you can ensure the security and integrity of your Ledger Nano S. It is important to store your device and recovery phrase in separate secure locations to mitigate the risk of loss or theft.
Installing the ICON app on Ledger Nano S
Before you can start storing and managing your ICON (ICX) on the Ledger Nano S, you need to install the ICON app on the device. The ICON app allows you to securely interact with the ICON blockchain and access your ICX holdings.
Here’s a step-by-step guide on how to install the ICON app on your Ledger Nano S:
- Ensure that your Ledger Nano S is connected to your computer or smartphone using the provided USB cable.
- Open the Ledger Live software application on your computer or smartphone and enter your PIN code on the Ledger Nano S when prompted.
- In the Ledger Live interface, navigate to the “Manager” tab, which displays a list of all available apps that can be installed on your Ledger Nano S.
- Search for the “ICON” app in the list and click on it to access the app details.
- Click on the “Install” button to initiate the installation of the ICON app onto your Ledger Nano S.
- Follow the on-screen instructions and confirm any prompts that appear on your Ledger Nano S. The device may ask you to unlock it by entering your PIN code again.
- Once the installation is complete, you will see a confirmation message on your computer or smartphone, indicating that the ICON app has been successfully installed on your Ledger Nano S.
With the ICON app installed, you can now proceed to create an ICON wallet on your Ledger Nano S and transfer your ICX to it. The ICON app provides a secure and user-friendly interface for managing your ICON holdings and initiating transactions on the ICON blockchain.
It is worth noting that the Ledger Nano S has limited storage capacity, so it can only store a limited number of apps at a time. If you want to manage multiple cryptocurrencies on your Ledger Nano S, you may need to uninstall apps that you are not currently using to free up space for new ones. However, the good news is that you can reinstall any apps you previously installed without losing access to your funds.
By following these steps, you can easily install the ICON app on your Ledger Nano S and gain secure control over your ICX holdings. The hardware wallet, combined with the dedicated ICON app, provides a robust and convenient solution for storing and managing your ICON cryptocurrency.
Creating an ICON Wallet on Ledger Nano S
Once you have installed the ICON app on your Ledger Nano S, the next step is to create an ICON wallet. Creating a wallet on the Ledger Nano S allows you to securely store and manage your ICON (ICX) tokens, providing you with full control over your digital assets.
Here’s how to create an ICON wallet on your Ledger Nano S:
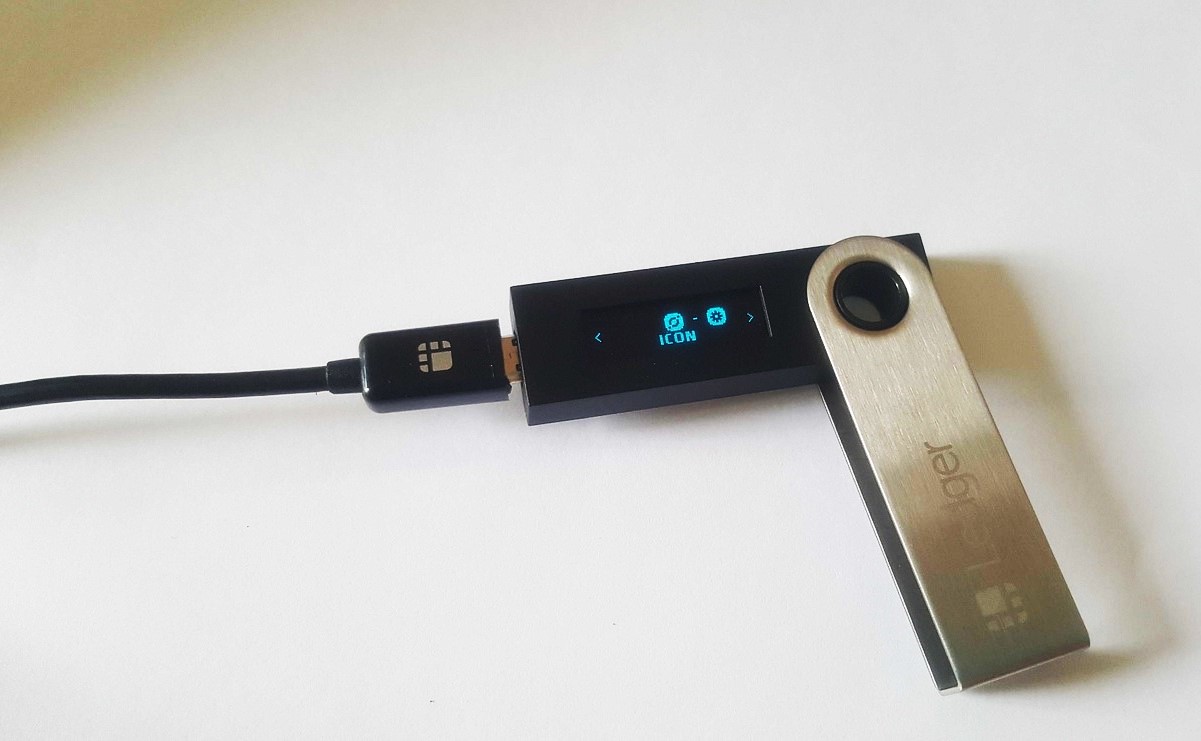
- Open the ICON app on your Ledger Nano S by navigating to it using the device’s buttons and pressing both buttons simultaneously to select it.
- On the Ledger Nano S display, select “Create a New Wallet” to start the wallet creation process.
- Follow the on-screen instructions displayed on your Ledger Nano S, which will guide you through the process of generating a new wallet address.
- During the wallet creation process, the device will display a unique public address for your ICON wallet. Take note of this address, as it will be needed to receive ICX tokens.
- Confirm the creation of the wallet address on your Ledger Nano S by following the prompts and using the device’s buttons.
- Once the wallet creation process is complete, you will see a confirmation message on your Ledger Nano S, indicating that your ICON wallet has been successfully created.
It’s important to stress the importance of backing up your wallet. Ledger Nano S automatically generates a recovery seed phrase during the wallet creation process. This recovery seed phrase is crucial for recovering your wallet if your Ledger Nano S is lost, stolen, or becomes inoperable.
Make sure to write down the recovery seed phrase on the provided recovery sheet, and keep it in a secure and separate location from your Ledger Nano S. Never disclose your recovery seed phrase to anyone, as it grants access to your wallet and funds.
With your ICON wallet created on your Ledger Nano S and the recovery seed phrase safely stored, you’re now ready to store and manage your ICX tokens securely. You can now proceed with transferring your ICX from an exchange or another wallet to your newly created ICON wallet on the Ledger Nano S.
By following these steps and taking the necessary precautions, you can create a secure ICON wallet on your Ledger Nano S and maintain full control over your ICX tokens. The combination of a hardware wallet and the dedicated ICON app provides a reliable and user-friendly solution for storing and managing your ICON cryptocurrency holdings.
Transferring ICX to Ledger Nano S
Now that you have created an ICON wallet on your Ledger Nano S, it’s time to transfer your ICX tokens to your hardware wallet for secure storage. By transferring your ICX to your Ledger Nano S, you ensure that your digital assets are protected from potential security risks.
Follow these steps to transfer ICX to your Ledger Nano S:
- Make sure that your Ledger Nano S is connected to your computer or smartphone and the ICON app is open on the device.
- Open the ICON wallet or exchange account from which you want to transfer your ICX.
- Find the “Send” or “Withdraw” option on the ICON wallet or exchange platform and select it.
- Enter your Ledger Nano S’s public address (the wallet address you generated during the wallet creation process) as the recipient address.
- Specify the amount of ICX you want to transfer. Ensure that you double-check the amount and that it is within your available balance.
- Confirm the transaction details, and if prompted, authorize the transaction using any additional security measures required by your ICON wallet or exchange.
- Once the transaction is confirmed, the ICX tokens will be transferred from your wallet or exchange to your Ledger Nano S ICON wallet.
- Wait for the transaction to be confirmed on the ICON blockchain. This may take a few minutes, so be patient.
- Once the transaction is confirmed, you can verify your ICX balance by accessing your ICON wallet on your Ledger Nano S. The ICX tokens should appear in your wallet balance.
It’s important to note that cryptocurrency transactions, including ICX transfers, are irreversible. Therefore, it’s crucial to double-check all transaction details, including the recipient address, before confirming the transfer. In case of any errors or mistakes, it may not be possible to recover the funds.
Transferring your ICX to your Ledger Nano S provides you with enhanced security and control over your digital assets. You can rest assured knowing that your ICX tokens are securely stored in an offline hardware wallet and protected by the robust security features of the Ledger Nano S.
By following these steps, you can easily transfer your ICX to your Ledger Nano S and enjoy peace of mind knowing that your digital assets are kept safe and accessible only by you.
Checking Your ICX Balance on Ledger Live
After transferring your ICX tokens to your Ledger Nano S, you may want to periodically check your ICX balance to stay updated on your holdings. Ledger Live, the companion software application for your Ledger Nano S, provides a convenient way to monitor your ICX balance and activity.
Follow these steps to check your ICX balance on Ledger Live:
- Ensure that your Ledger Nano S is connected to your computer or smartphone and the ICON app is open on the device.
- Launch the Ledger Live software application on your computer or smartphone.
- If prompted, enter your PIN code on the Ledger Nano S to authorize the connection. This step is necessary to establish a secure connection between Ledger Live and your Ledger Nano S.
- In the Ledger Live interface, navigate to the “Accounts” tab. Here you will find a list of your cryptocurrency accounts, including your ICON wallet.
- Select your ICON wallet from the list to access the details of your wallet and view your ICX balance.
- Within the ICON wallet details, Ledger Live will display the current balance of your ICX tokens, including the value in fiat currency if configured.
- Additionally, Ledger Live provides a transaction history for your ICON wallet, allowing you to view past transactions and monitor the activity of your ICX tokens.
By regularly checking your ICX balance on Ledger Live, you can keep track of your holdings and ensure the accuracy of your transactions. This feature allows you to stay informed about the value and movement of your ICX tokens, providing you with valuable insights for managing your cryptocurrency portfolio.
It’s worth noting that Ledger Live also offers advanced features, such as portfolio tracking, price alerts, and the ability to initiate transactions. Exploring these additional functionalities can enhance your overall experience with managing your ICX holdings and other cryptocurrencies.
By utilizing Ledger Live to check your ICX balance, you can easily monitor your ICON investments and stay informed about the status of your ICX tokens. This helps you make informed decisions regarding your cryptocurrency holdings and ensures that you have real-time visibility into your ICX portfolio.
Sending ICX from Ledger Nano S
If you want to send your ICX tokens to another wallet or exchange, you can easily do so using your Ledger Nano S and the ICON app. By following a few simple steps, you can securely initiate and authorize the transfer of your ICX from your Ledger Nano S.
Here’s how to send ICX from your Ledger Nano S:
- Ensure that your Ledger Nano S is connected to your computer or smartphone and the ICON app is open on the device.
- Launch the ICON app on your Ledger Nano S by navigating to it using the device’s buttons and pressing both buttons simultaneously to select it.
- On the ICON app, navigate to the “Send” or “Transfer” option.
- Enter the recipient’s wallet address to which you want to send your ICX. Double-check the address to ensure its accuracy. It’s recommended to copy and paste the address to prevent any typing errors.
- Specify the amount of ICX you want to send. Make sure to enter the correct amount without exceeding your available balance.
- Review the transaction details, including the recipient’s address and the amount to be sent.
- Authorize the transaction by following the prompts on your Ledger Nano S. Depending on the preferences you’ve set, you may need to enter your PIN code or verify the transaction using physical buttons on your device.
- Wait for the transaction to be confirmed on the ICON blockchain. This process may take a few minutes, and you can track the progress of the transaction using blockchain explorers or within the ICON app itself.
- Once the transaction is confirmed and included in a block on the ICON blockchain, the ICX tokens will be sent to the specified recipient.
It’s important to note that blockchain transactions are irreversible, so make sure to double-check all transaction details before authorizing the transfer. Once the transaction is confirmed, it cannot be reversed, and the ICX tokens cannot be retrieved without the cooperation of the recipient.
By following these steps, you can confidently send your ICX tokens from your Ledger Nano S to another wallet or exchange. Using Ledger’s robust security features and the intuitive interface of the ICON app, you can securely manage and authorize transactions with ease.
Always ensure that you are entering the recipient’s wallet address correctly and that you are sending the ICX to the intended recipient. Exercise caution when dealing with cryptocurrency transactions to avoid errors or potential scams.
With your Ledger Nano S, you have full control over your ICX tokens, allowing you to securely send and manage your assets on the ICON blockchain.
Updating the ICON App on Ledger Nano S
Regularly updating the ICON app on your Ledger Nano S is important to ensure that you have the latest features, bug fixes, and security enhancements. Updating the app keeps your Ledger Nano S up to date and ensures optimal functionality when interacting with the ICON blockchain.
Here’s how you can update the ICON app on your Ledger Nano S:
- Connect your Ledger Nano S to your computer or smartphone using the provided USB cable.
- Open the Ledger Live software application on your computer or smartphone.
- Enter your PIN code on the Ledger Nano S when prompted, ensuring that you authorize the connection.
- In the Ledger Live interface, navigate to the “Manager” tab, which displays a list of all installed apps on your Ledger Nano S.
- Search for the “ICON” app in the list and check if there is an available update.
- If an update is available for the ICON app, click on the “Update” button to initiate the update process.
- Follow the on-screen instructions and prompts to confirm and install the update on your Ledger Nano S.
- During the update process, make sure not to disconnect or interrupt the connection between your Ledger Nano S and the computer or smartphone.
- Once the update is complete, you will see a confirmation message on Ledger Live, indicating that the ICON app has been successfully updated on your Ledger Nano S.
It is crucial to keep your Ledger Nano S and its apps updated to maintain compatibility with the latest blockchain protocols and security measures. Updates often include important fixes and improvements that enhance the performance and security of your device.
Regularly checking for updates ensures that you have access to the latest features and bug fixes, providing you with a seamless and secure experience when using the ICON app on your Ledger Nano S.
It’s worth noting that updating the app on your Ledger Nano S will not affect your wallet or the security of your ICX tokens. The update process only applies to the software running on the device, ensuring that you have the latest version of the ICON app.
By following these steps and keeping your ICON app up to date on your Ledger Nano S, you can take advantage of the latest enhancements and features while maintaining the highest level of security for your ICX holdings.
Troubleshooting Common Issues
While using the Ledger Nano S with the ICON app, you may encounter some common issues. Here are a few troubleshooting tips to help resolve these issues:
1. Connection Issues: If you are unable to connect your Ledger Nano S to your computer or smartphone, try the following steps:
- Make sure that you are using a compatible USB cable.
- Try using a different USB port or a different computer or smartphone.
- Ensure that your Ledger Nano S is powered on and the ICON app is open.
- Double-check that you have installed the latest version of the ICON app and the latest firmware on your Ledger Nano S.
2. Incorrect Balance Display: If your ICX balance does not appear correctly on your Ledger Live or ICON app, try the following steps:
- Refresh the app and wait for it to synchronize with the blockchain.
- Ensure that you have successfully synchronized the latest transactions and blocks.
- If the issue persists, try resetting the app data or reinstalling the ICON app on your Ledger Nano S.
3. Transaction Issues: If you encounter problems with sending or receiving ICX, consider the following troubleshooting steps:
- Double-check that you have entered the correct recipient address.
- Verify that you have sufficient ICX in your wallet to cover the transaction fees.
- Ensure that you have confirmed the transaction on your Ledger Nano S.
- If the transaction is stuck or unconfirmed, you can try increasing the gas fees or contacting the ICON support team for further assistance.
4. Outdated Firmware or App: Keeping your Ledger Nano S firmware and the ICON app up to date is crucial. If you encounter issues, make sure you have the latest versions installed. Follow the device’s instructions and regularly check for firmware and app updates through the Ledger Live software.
5. Lost or Forgotten PIN Code: If you have forgotten or lost your PIN code, there is no way to recover it. You will need to reset your Ledger Nano S and restore it using your recovery seed phrase. Make sure you have your recovery seed phrase stored in a safe place before attempting to reset your device.
If you continue to experience issues, consult the official Ledger support documentation or reach out to their customer support for further assistance.
By troubleshooting common issues, you can ensure a smooth user experience while using the Ledger Nano S with the ICON app. Remember to stay patient and follow the recommended steps to address any difficulties that may arise.
Final Thoughts and Considerations
Using the Ledger Nano S to store and manage your ICON (ICX) tokens provides an additional layer of security and control over your digital assets. Before we conclude, here are some final thoughts and considerations to keep in mind:
1. Security: The Ledger Nano S offers enhanced security by keeping your private keys offline and providing additional layers of protection such as a PIN code and a recovery seed phrase. It is crucial to protect your device and recovery seed phrase from loss, theft, or unauthorized access.
2. Regular Updates: Stay informed about the latest firmware updates and app versions for your Ledger Nano S and the ICON app. Updating regularly ensures that you have access to the latest features, bug fixes, and security enhancements.
3. Backup and Recovery: Make sure to correctly and securely store your recovery seed phrase. This phrase is essential for recovering your wallet in case your Ledger Nano S is lost, damaged, or inaccessible. Keep your recovery seed phrase in a separate, secure location away from your device.
4. Double-Check Transactions: Before confirming any transactions, carefully review the details, including the recipient address and the amount to be sent. Cryptocurrency transactions are irreversible, so it’s vital to ensure accuracy to avoid any potential loss of funds.
5. Additional Security Measures: Consider enabling additional security features like passphrase encryption and Two-Factor Authentication (2FA) for enhanced protection of your cryptographic assets.
6. Stay Informed: Keep up with the latest news and updates regarding the ICON blockchain and the general cryptocurrency industry. Staying informed allows you to make informed decisions and stay ahead of any potential security risks.
Remember, the information provided in this guide is for educational purposes only and does not constitute financial or investment advice. It is essential to conduct thorough research and seek professional advice before making any financial decisions.
By following the best practices outlined in this guide and remaining vigilant, you can confidently store and manage your ICX tokens on your Ledger Nano S, ensuring a secure and convenient experience in the world of blockchain and cryptocurrencies.