
Why Share a Facebook Post to Instagram?
Instagram and Facebook are two of the most popular social media platforms, each with its own unique features and target audience. Facebook is known for its wide reach and diverse user base, while Instagram is famous for its visually appealing content and younger demographic. However, there may be times when you want to share a Facebook post on Instagram to expand your content’s visibility and engage with a different audience.
By sharing a Facebook post on Instagram, you can reach a wider audience and potentially increase your brand exposure. Instagram’s visually-oriented platform allows for more creativity and aesthetic appeal, making it an ideal platform for showcasing captivating images or videos. This can attract new followers, generate more likes and comments, and ultimately drive more traffic to your Facebook page or website.
In addition, sharing a Facebook post on Instagram can help you maintain a consistent brand presence across multiple platforms. If you have a cohesive brand identity and messaging strategy, sharing content on Instagram can reinforce your brand image and strengthen your online presence.
Another benefit of sharing a Facebook post on Instagram is the potential for increased engagement. Instagram users are often more active and engaged compared to Facebook users, which means your shared content has a higher chance of receiving likes, comments, and shares. This can lead to increased visibility on Instagram’s explore page and the opportunity to connect with new followers and potential customers.
Moreover, if you have a significant following on Facebook but are still building your Instagram presence, sharing Facebook posts on Instagram can help you bridge the gap. By leveraging your existing Facebook audience, you can drive them to follow you on Instagram and expand your reach on this popular platform.
Overall, sharing a Facebook post on Instagram offers numerous advantages in terms of reach, visibility, engagement, and brand consistency. It allows you to tap into a different audience, showcase your creativity, and strengthen your online presence. So, if you have compelling content on Facebook that can resonate with Instagram users, don’t hesitate to share it on both platforms and reap the rewards of cross-platform promotion.
Step 1: Choose the Facebook post you want to share
Before you can share a Facebook post on Instagram, you need to select the specific post you want to share. This could be a post from your own Facebook page or a post from another page or profile that you find interesting or relevant.
To choose the Facebook post, navigate to your Facebook account and locate the post you want to share. Take some time to review the post and consider whether it aligns with your Instagram audience’s interests and preferences.
When selecting a Facebook post to share on Instagram, keep in mind that Instagram is primarily a visual platform. Posts that have visually appealing images or videos are more likely to attract attention and engagement on Instagram. Look for posts with high-quality images, eye-catching graphics, or compelling videos that will resonate with your Instagram followers.
If the chosen post has a lot of text content, consider whether it can be shortened or condensed to communicate the main message effectively on Instagram. Remember that Instagram has a character limit for captions, so it’s essential to choose a post that can be adapted to fit within those limits.
Additionally, consider the relevance of the post to your Instagram audience. If the post is highly specific to a certain topic or niche, ensure that your Instagram followers will find it valuable or interesting. The goal is to share content that will resonate with your Instagram audience and encourage them to engage with your post.
Once you have chosen the Facebook post you want to share, remember its key elements, such as images, videos, captions, and any relevant links. These elements will be crucial in the following steps to ensure a seamless transition from Facebook to Instagram.
Remember, the post you choose should align with your overall Instagram content strategy and resonate with your target audience. By selecting the right Facebook post, you set the stage for a successful cross-platform promotion on Instagram.
Step 2: Download the Facebook post image or video
Once you have chosen the Facebook post you want to share on Instagram, the next step is to download the image or video associated with that post. This is necessary because Instagram requires you to upload content directly from your device’s gallery rather than accessing it from other platforms.
To download the Facebook post image or video, you can follow these simple steps:
- Open the Facebook post that you have chosen to share on Instagram.
- Right-click on the image or video and select the “Save Image As” or “Save Video As” option.
- Choose a location on your computer to save the file, and give it a memorable name for easy access.
- If you’re using a mobile device, long-press on the image or video and select the option to save it to your device’s gallery.
Downloading the image or video ensures that you have a local copy of the content, which you can then transfer to your mobile device in the later steps. It also gives you the flexibility to edit the image or video if needed before sharing it on Instagram.
Keep in mind that you should respect the original owner’s rights and only download and use the content if you have the necessary permissions or if it is a public post. Using copyrighted material without permission may result in legal consequences.
Once you have successfully downloaded the Facebook post image or video, you are ready to move on to the next step of the process: editing the content (if necessary) before transferring it to your mobile device for Instagram sharing.
Step 3: Edit the Facebook post image or video (if necessary)
After downloading the image or video from the chosen Facebook post, it’s essential to review and edit the content before sharing it on Instagram. This step ensures that the post is visually appealing and optimized for the Instagram platform.
Here are some editing considerations and techniques you can apply:
- Crop and resize: Instagram has specific image dimensions and aspect ratios that work best for the platform. Use photo editing software or online image editors to crop and resize the image to fit within Instagram’s recommended dimensions for optimal visibility and aesthetic appeal.
- Enhance image quality: If the downloaded image appears dull or lacks vibrancy, you can enhance the overall image quality using photo editing tools. Adjust brightness, contrast, saturation, and other image parameters to create a visually captivating image that will grab attention on Instagram.
- Add filters: Instagram offers a variety of filters that can transform the mood and appearance of an image. Experiment with different filters to enhance the aesthetics and create a consistent visual theme with your existing Instagram feed.
- Edit videos: If the chosen Facebook post includes a video, consider editing it to ensure it fits within Instagram’s video length restrictions (maximum of 60 seconds) and maintains its visual appeal. Trim the video, add captions, or apply video editing effects to make it engaging and suitable for the Instagram format.
- Add text or overlays: Depending on the nature of the post and your Instagram content strategy, you may want to add text, logos, or overlays to the image or video. This can help highlight the main message or brand identity and make the content more shareable and recognizable.
Remember, the goal of editing the Facebook post image or video is to optimize its visual appeal for the Instagram platform and align it with your existing Instagram branding and style. However, try not to over-edit or distort the original content, as authenticity and natural aesthetics are highly valued on Instagram.
Once you are satisfied with the edited image or video, you can proceed to the next step: transferring the content to your mobile device for seamless sharing on Instagram.
Step 4: Transfer the image or video to your mobile device
After editing the Facebook post image or video, the next step is to transfer the content to your mobile device. This will allow you to easily access and upload the edited image or video to your Instagram account.
Here are several methods you can use to transfer the content to your mobile device:
- Email or Cloud Storage: You can send the edited image or video to yourself via email or upload it to a cloud storage service like Google Drive or Dropbox. Access your email or cloud storage app on your mobile device to download the file and save it to your device’s gallery.
- USB Transfer: Connect your mobile device to your computer using a USB cable. Transfer the edited image or video file to your device’s internal storage or SD card. Once the file is successfully transferred, disconnect your device from the computer.
- Bluetooth or Airdrop: If your computer and mobile device support wireless transfer, you can use Bluetooth (for Android) or Airdrop (for iOS) to send the edited file directly from your computer to your mobile device.
- File-sharing apps: Utilize file-sharing apps such as SHAREit or Xender to transfer the edited image or video from your computer to your mobile device wirelessly and quickly.
Whichever method you choose, ensure that the edited image or video file is transferred and saved to your mobile device’s gallery or camera roll. This will make it easily accessible when you proceed to upload it to Instagram in the next steps.
Once the file transfer is complete, you’re ready to move on to the next step: opening the Instagram app and preparing to share your edited Facebook post on the platform.
Step 5: Open the Instagram app and tap on the plus (+) icon
With the edited image or video transferred to your mobile device, it’s time to open the Instagram app and begin the process of sharing your Facebook post. Follow these steps to get started:
- Launch the Instagram app on your mobile device. Make sure you are logged in to your Instagram account.
- On the home screen of the Instagram app, locate the “plus (+)” icon at the bottom center of the screen. Tap on it to start creating a new post.
- You will now be presented with options to select the type of content you want to share. Tap on the “Gallery” or “Library” option, depending on your device and the wording used by the app.
- This will open up your device’s gallery or camera roll, where all your saved images and videos are stored. Navigate to the folder or location where you saved the edited Facebook post content.
- Select the edited image or video from your device’s gallery by tapping on it. This will import the content into the Instagram app, allowing you to continue with the next steps of the sharing process.
Now that you have successfully opened the Instagram app and selected the edited Facebook post content, you’re ready to apply filters, add captions, and make any further edits to ensure your post is compelling and engaging on Instagram. Taking advantage of these features will help your post stand out and attract attention from your followers and the wider Instagram community.
Continue to the next step to learn how to customize and enhance your Facebook post content before sharing it on Instagram.
Step 6: Select the transferred image or video from your device’s gallery
After tapping on the plus (+) icon in the Instagram app, you have accessed your device’s gallery or camera roll. Now, it’s time to select the transferred image or video from your device’s gallery to proceed with the Instagram post creation process. Follow these steps:
- Browse through your device’s gallery or camera roll to find the folder or location where you saved the edited image or video from the Facebook post.
- Tap on the image or video to select it. You will notice that a blue checkmark or border appears around the selected content, indicating that it has been chosen for Instagram post creation.
- Take a moment to review the selected image or video to ensure it is the correct one and aligns with your intended Instagram post.
- Once you are satisfied with the selected content, look for the “Next” or similar button on the screen. Tap on it to proceed to the next step in the Instagram post creation process.
By selecting the transferred image or video from your device’s gallery, you have successfully chosen the visual content that will be the main focus of your Instagram post. This step sets the stage for customizing and enhancing the post to make it more captivating and engaging on the Instagram platform.
Now, let’s move on to the next step, where you’ll discover how to apply filters, add captions, and edit the transferred content to make your Instagram post stand out.
Step 7: Apply filters, add captions, and edit the post
Once you have selected the transferred image or video in the Instagram app, it’s time to customize and enhance your post. Instagram offers various features that allow you to apply filters, add captions, and make additional edits to make your content visually appealing and engaging. Follow these steps:
- Apply filters: Instagram offers a wide range of filters that can change the mood and aesthetic of your image or video. Swipe left or right to preview different filters and select the one that best complements your content. Experiment with different filters to create the desired look and feel for your post.
- Adjust settings: After applying a filter, you can further fine-tune your image or video by adjusting settings such as brightness, contrast, saturation, and more. Use the available editing tools to make the necessary adjustments to ensure the content looks the way you want it to.
- Add captions: Captions provide an opportunity to convey your message, engage with your audience, and add context to your post. Tap on the “Write a caption” field to add a caption that complements your visual content. You can also use hashtags to increase the discoverability of your post.
- Tag people and locations: If applicable, you can tag other Instagram users in your post by tapping on the “Tag people” option. Additionally, you can add a location tag by tapping on the “Add location” option, which can help increase the reach and engagement of your post.
- Add stickers or emojis: Instagram provides a variety of stickers and emojis that you can use to add a fun and creative touch to your post. Explore the available stickers and emojis, and select the ones that enhance your content and resonate with your target audience.
- Preview and make final adjustments: Before sharing your post, take a moment to preview how it will appear in your Instagram feed. Make any final adjustments, such as cropping or repositioning, to ensure the content is visually pleasing and matches your aesthetic preferences.
By applying filters, adding captions, and editing the post, you have transformed your transferred Facebook post content into a compelling and visually appealing Instagram post. These customization options allow you to fine-tune the post to align with your brand or personal style, and capture the attention of your followers and the Instagram community.
Now, it’s time to move on to the final step where you’ll choose your sharing options and tap on the “Share” button to publish your Facebook post on Instagram.
Step 8: Choose your sharing options and tap on “Share”
After applying filters, adding captions, and making any final edits to your Instagram post, you are now ready to choose your sharing options and share your Facebook post on Instagram. Follow these steps to complete the process:
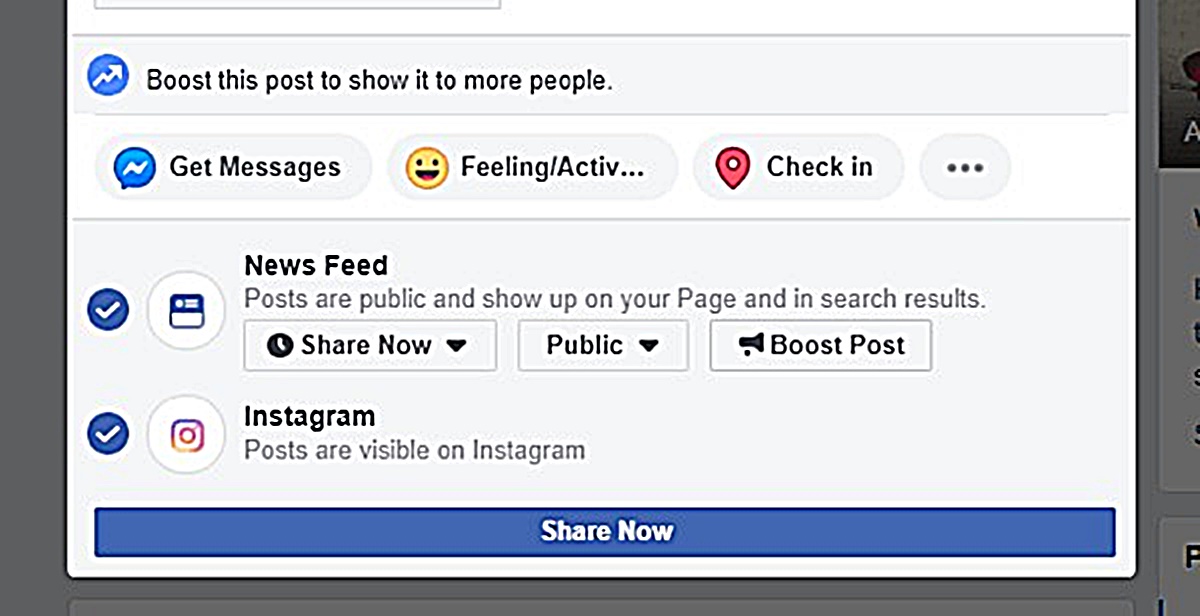
- Privacy settings: Before sharing your post, consider the privacy settings you want to apply. You can choose to make your post public, visible only to your followers, or limit its visibility to a select group of people. Adjust the privacy settings according to your preferences.
- Additional sharing platforms: Instagram allows you to cross-post your content to other social media platforms like Facebook, Twitter, and more. If you want to reach a wider audience and share your post on other platforms, enable the corresponding options and connect your accounts, if necessary.
- Photo map (optional): If the post is location-specific, you can add it to your photo map. This will show the general area where the photo or video was taken but won’t reveal the exact location.
- Tagging (optional): If there are people or brands in your Instagram post, you can tag them to give credit, recognition, or signal collaboration. Tap on the “Tag people” option and follow the prompts to tag the relevant accounts.
- Check post preview: Take a moment to review the final post preview on your screen. Ensure that the image or video, caption, tags, and additional options are displayed correctly and as intended.
- Tap on “Share”: Once you are satisfied with the post preview and have reviewed the sharing options, tap on the “Share” button. Instagram will then upload your post, and it will appear in your Instagram profile and feed for your followers and the wider Instagram community to see.
With a simple tap of the “Share” button, your Facebook post is now successfully shared on Instagram. Congratulations!
Remember to engage with your followers by responding to comments, liking other posts, and utilizing Instagram’s features such as stories and IGTV to further connect with your audience.
Keep in mind that Instagram’s algorithms prioritize recent and engaging content, so consistently posting high-quality and engaging posts will help you increase visibility, grow your follower base, and maximize the potential reach of your shared Facebook posts.
Now that you’ve completed all the steps, your Facebook post is successfully shared and accessible to a new audience on Instagram. Enjoy the benefits of cross-platform promotion and continue to share captivating content on both Facebook and Instagram to establish a strong online presence.