
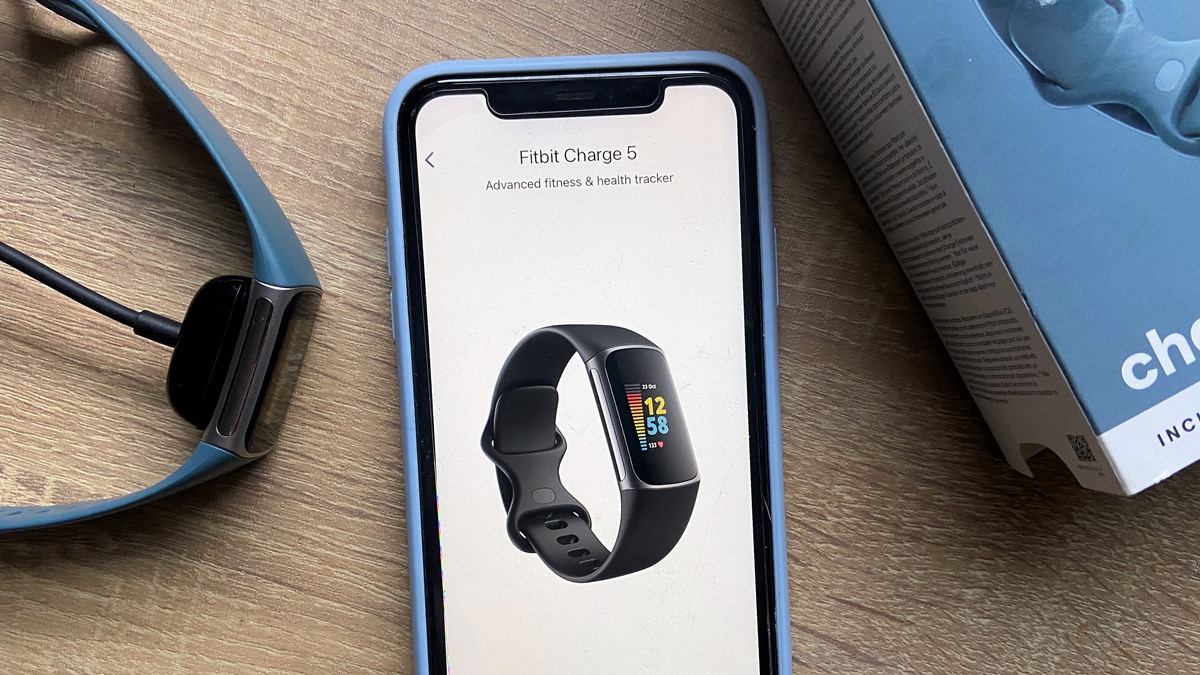
Unboxing and Charging Your Fitbit Charge
When you first get your Fitbit Charge, you’ll be eager to get it set up and start using it to track your fitness and health goals. Before you can do that, you need to unbox and charge it. Here’s a step-by-step guide to help you get started:
1. Open the box: Carefully open the packaging and remove the contents. You’ll find your Fitbit Charge, a USB charging cable, and a wireless sync dongle (if your device supports it).
2. Charge your Fitbit Charge: Connect one end of the USB charging cable to the charging port on the back of the device. Plug the other end into a USB port on your computer or use a wall adapter. Make sure it’s securely connected. Your device should start charging, and you’ll see a battery icon on the screen.
3. Check the battery level: While your Fitbit Charge is charging, you can check the battery level by pressing the side button. It will display the battery percentage on the screen. It’s recommended to fully charge your device before the initial setup.
4. Let it charge completely: Leave your Fitbit Charge connected to the charger until it reaches 100% battery. This may take a couple of hours. Once it’s fully charged, you can disconnect it from the charger.
5. Power on your Fitbit Charge: To power on your device, press and hold the side button until you see the Fitbit logo on the screen. It may take a few seconds to boot up.
By following these steps, you’ll have your Fitbit Charge unboxed, charged, and ready to set up. Make sure to keep the charging cable and accessories in a safe place so you can use them to charge and sync your device in the future.
Next, we’ll cover how to download and install the Fitbit app on your smartphone to complete the setup process.
Downloading and Installing the Fitbit App
In order to fully utilize the features of your Fitbit Charge and sync your data, you’ll need to download and install the Fitbit app on your smartphone. The Fitbit app is available for both iOS and Android devices. Here’s how to get started:
For iOS Users:
- Open the App Store on your iPhone.
- Tap on the Search tab at the bottom of the screen.
- Type “Fitbit” into the search bar and tap Search.
- Find the Fitbit app in the search results and tap Get to download and install it.
- Once the installation is complete, tap Open to launch the app.
For Android Users:
- Open the Google Play Store on your Android smartphone.
- Tap on the magnifying glass icon in the top-right corner of the screen to open the search bar.
- Type “Fitbit” into the search bar and tap Search.
- Find the Fitbit app in the search results and tap Install to download and install it.
- Once the installation is complete, tap Open to launch the app.
Once you have the Fitbit app installed on your smartphone, you’re ready to move on to the next step: setting up your Fitbit Charge on the app. Make sure to have your Fitbit Charge nearby as you’ll need to pair it with your smartphone during the setup process.
Now that the app is installed, let’s proceed to the next section on how to set up your Fitbit Charge on the app.
Setting Up Your Fitbit Charge on the App
Now that you have downloaded and installed the Fitbit app on your smartphone, it’s time to set up your Fitbit Charge and start personalizing it according to your preferences. Here’s a step-by-step guide to help you get started:
1. Open the Fitbit app: Launch the Fitbit app on your smartphone. If you haven’t already done so, create a Fitbit account or log in to your existing account.
2. Tap the “Account” tab: Look for the account icon in the bottom right corner of the app and tap on it.
3. Tap “Set Up a Device”: Under the Account settings, select “Set Up a Device” to begin setting up your Fitbit Charge.
4. Choose your device: From the list of Fitbit devices, select “Fitbit Charge” as your device model.
5. Follow the on-screen instructions: The app will guide you through the setup process step by step. Make sure your Fitbit Charge is nearby and ready to be paired with your smartphone.
6. Pair your Fitbit Charge: When prompted, ensure that Bluetooth is enabled on your smartphone and follow the instructions to pair your Fitbit Charge with the app.
7. Set up your personal profile: Provide the required information such as your name, gender, birthdate, and other details as prompted by the app. This will help in accurately tracking your fitness activities and goals.
8. Customize your goals: Set your daily activity goals, such as the number of steps you want to take or the number of calories you want to burn. You can always adjust these goals later according to your progress and preferences.
9. Sync your Fitbit Charge: Once the setup is complete, the Fitbit app will automatically sync with your Fitbit Charge, ensuring that all your data is up to date and ready to be tracked and analyzed.
By following these steps, you can easily set up your Fitbit Charge on the Fitbit app and start utilizing its features to achieve your fitness and health goals. In the next section, we’ll cover how to create a Fitbit account if you don’t already have one.
Creating a Fitbit Account
In order to fully utilize the features and benefits of your Fitbit Charge, you’ll need to create a Fitbit account. The Fitbit account serves as your personal hub for tracking and analyzing your fitness and health data. Here’s how you can create a Fitbit account:
1. Open the Fitbit app: Launch the Fitbit app on your smartphone.
2. Tap on “Join Fitbit”: On the login screen, you’ll see the option to “Join Fitbit.” Tap on it to start the account creation process.
3. Enter your email and password: Provide your email address and create a secure password for your Fitbit account. Make sure to choose a password that is strong and unique.
4. Select “Next”: Once you’ve entered your email and password, tap on “Next” to proceed to the next step.
5. Enter your personal details: Fill in your personal information such as your name, gender, birthdate, and height. Providing accurate information will help Fitbit to give you more accurate data and personalized insights.
6. Agree to the terms and privacy policy: Read and review the terms of service and privacy policy. If you agree to them, tap on the checkbox to indicate your acceptance.
7. Tap on “Create Account”: After reviewing and accepting the terms and privacy policy, tap on “Create Account” to complete the account creation process.
8. Verify your email address (optional): Fitbit may send you an email to verify your email address. If you receive this email, follow the instructions to complete the verification process. This step helps to ensure the security of your Fitbit account.
9. Log in to your Fitbit account: Once your account is created, you can log in using the email and password you provided during the account setup process.
With your Fitbit account created, you can now start using the app to track and analyze your fitness and health data. Your Fitbit Charge will be synced with your account, allowing you to seamlessly access your data and make the most of your Fitbit device.
Next, we’ll cover how to pair your Fitbit Charge with your smartphone for easy syncing and data access.
Pairing Your Fitbit Charge with Your Smartphone
Pairing your Fitbit Charge with your smartphone is a crucial step to ensure that your device can sync and receive notifications. By following these steps, you will be able to easily connect your Fitbit Charge with your smartphone:
1. Make sure Bluetooth is enabled: On your smartphone, go to the settings menu and make sure that Bluetooth is turned on.
2. Open the Fitbit app: Launch the Fitbit app on your smartphone. Make sure you are logged in to your Fitbit account.
3. Tap on your profile: In the app, tap on your profile icon in the top left corner of the screen.
4. Select “Set Up a Device”: Under your profile settings, select “Set Up a Device” to begin the pairing process.
5. Choose Fitbit Charge: From the list of Fitbit devices, select “Fitbit Charge” as the device you want to set up.
6. Follow the on-screen instructions: The Fitbit app will guide you through the pairing process step by step. Make sure your Fitbit Charge is nearby and ready to be connected.
7. Confirm the pairing code: The app will show a unique pairing code on your smartphone screen. Make sure this code matches the code displayed on your Fitbit Charge. If they match, confirm the pairing on both devices.
8. Wait for the pairing process to complete: It may take a few moments for the Fitbit app to establish a connection with your Fitbit Charge. Be patient and wait for the pairing process to complete.
9. Test the connection: Once the pairing process is complete, you can test the connection by syncing your Fitbit Charge. Open the Fitbit app and tap on the sync button to initiate the sync. Your Fitbit Charge should start syncing with the app and transferring data.
By successfully pairing your Fitbit Charge with your smartphone, you can easily track your fitness and health data, receive notifications, and access personalized insights through the Fitbit app. This connection allows for seamless data transfer, ensuring that your progress is accurately recorded and reflected in the app.
Next, we’ll cover how to set up your Fitbit Charge preferences and customize its settings according to your preferences.
Setting Up Your Fitbit Charge Preferences
Once you have paired your Fitbit Charge with your smartphone and completed the initial setup, it’s time to customize the preferences and settings of your device. These settings will allow you to personalize your Fitbit Charge according to your preferences and needs. Here’s how to set up your Fitbit Charge preferences:
1. Open the Fitbit app: Launch the Fitbit app on your smartphone and ensure that your Fitbit Charge is connected and synced with the app.
2. Tap on the profile icon: In the Fitbit app, tap on the profile icon located in the top left corner of the screen.
3. Select your device: Under your profile settings, select your Fitbit Charge device to access the device settings and preferences.
4. Customize the clock face: One of the ways to personalize your Fitbit Charge is by customizing the clock face. In the device settings, you’ll find several clock face options to choose from. Explore the available options and select the one that suits your style and preference.
5. Set up notifications: You can choose to receive notifications from your smartphone on your Fitbit Charge. In the device settings, you’ll find a section dedicated to notifications. Here, you can select the apps from which you want to receive notifications on your Fitbit Charge.
6. Adjust the brightness and display settings: To optimize the visibility and battery life of your Fitbit Charge, you can adjust the brightness and display settings. You’ll find options to set the brightness level and customize the display settings in the device settings menu.
7. Enable activity reminders: Fitbit Charge can remind you to move and stay active throughout the day. In the device settings, you’ll find the option to enable activity reminders. You can set the frequency and timing of these reminders to suit your daily routine.
8. Customize the heart rate monitoring settings: Fitbit Charge comes with built-in heart rate monitoring capabilities. You can customize the heart rate monitoring settings in the app to meet your preferences. Adjust the heart rate zones, enable or disable continuous heart rate monitoring, and set alerts for heart rate thresholds.
9. Explore additional settings: In the device settings, you’ll find various other options to explore and customize. These may include options to set alarms, enable sleep tracking, adjust reminder settings, and more. Take some time to explore these settings and adjust them according to your needs.
By setting up your Fitbit Charge preferences, you can tailor your device to meet your specific requirements. Personalizing the clock face, enabling notifications, adjusting display settings, and customizing other preferences will enhance your Fitbit experience and make it more aligned with your preferences.
Next, we’ll cover how to adjust the display and wristband of your Fitbit Charge for optimal comfort and usability.
Adjusting the Display and Wristband
To ensure optimal comfort and usability of your Fitbit Charge, it’s important to adjust the display and wristband settings according to your preference. Here are the steps to adjust the display and wristband of your Fitbit Charge:
1. Display Orientation: Depending on your preference, you can choose to wear your Fitbit Charge on your dominant or non-dominant hand. In the Fitbit app, go to the device settings and select “Dominant Hand”. Choose the appropriate option to adjust the display orientation of your Fitbit Charge.
2. Adjusting the Wristband: The Fitbit Charge comes with an adjustable wristband to ensure a comfortable fit. To adjust the wristband, follow these steps:
- Locate the metal clasp near the buckle on the wristband.
- Gently lift the metal clasp and pull the excess strap through the buckle.
- Position the wristband on your wrist and fasten the buckle.
- Ensure that the Fitbit Charge sits snugly on your wrist, without being too tight or loose.
- Ensure the wristband is securely fastened and does not move around excessively.
3. Optimal Display Placement: Ensure that the display of your Fitbit Charge is positioned on the top side of your wrist. The display should be facing towards you for easy visualization of the metrics and notifications. Adjust the wristband if necessary to achieve the optimal display placement.
4. Comfort and Fit: Pay attention to the comfort and fit of your Fitbit Charge on your wrist. It’s important that the device feels comfortable during everyday activities and doesn’t cause any discomfort or irritation. Adjust the wristband’s tightness if needed to achieve a comfortable fit without compromising on accuracy.
By adjusting the display and wristband settings of your Fitbit Charge, you’ll have a comfortable and personalized fit that ensures accurate tracking and ease of use. Take the time to experiment with the adjustments and find the perfect fit that suits your individual needs and preferences.
Next, we’ll cover how to set up notifications on your Fitbit Charge to stay connected with your smartphone throughout the day.
Setting Up Notifications on Your Fitbit Charge
To stay connected with your smartphone even when it’s not in your hand, you can set up notifications on your Fitbit Charge. This feature allows you to receive call, text, and app notifications directly on your wrist. Here’s how to set up notifications on your Fitbit Charge:
1. Open the Fitbit app: Launch the Fitbit app on your smartphone and ensure that your Fitbit Charge is connected and synced with the app.
2. Tap on the “Today” tab: In the Fitbit app, navigate to the “Today” tab located at the bottom of the screen.
3. Tap on your profile: In the top left corner of the “Today” tab, tap on your profile icon.
4. Select your device: Under your profile settings, select your Fitbit Charge device to access the device settings menu.
5. Tap on “Notifications”: In the device settings menu, select “Notifications” to access the notification settings for your Fitbit Charge.
6. Enable app notifications: To receive notifications from specific apps on your Fitbit Charge, toggle on the corresponding switches next to the app names. You can choose to enable notifications for text messages, calls, calendar events, and other compatible apps.
7. Customize vibration patterns (optional): If your Fitbit Charge supports custom vibrations, you can tap on “Vibration Patterns” in the notification settings to set unique vibration patterns for different types of notifications. This can help you distinguish between different notification types without even looking at your wrist.
8. Set a notification timeout (optional): Fitbit allows you to set a timeout for the notifications on your Fitbit Charge. This means that if you don’t dismiss a notification within a certain time, it will automatically disappear. You can adjust the timeout duration in the notification settings.
By setting up notifications on your Fitbit Charge, you can conveniently stay informed about incoming calls, texts, and important app alerts on your wrist. This feature allows you to stay connected and up-to-date without having to constantly check your smartphone.
Next, we’ll cover how to customize the clock face on your Fitbit Charge to suit your style and preference.
Customizing Your Fitbit Charge Clock Face
One of the ways to personalize your Fitbit Charge and make it uniquely yours is by customizing the clock face. Fitbit offers a variety of clock face designs to choose from, allowing you to display the information most important to you. Here’s how to customize the clock face on your Fitbit Charge:
1. Open the Fitbit app: Launch the Fitbit app on your smartphone and ensure that your Fitbit Charge is connected and synced with the app.
2. Tap on the “Today” tab: In the Fitbit app, navigate to the “Today” tab located at the bottom of the screen.
3. Tap on your profile: In the top left corner of the “Today” tab, tap on your profile icon.
4. Select your device: Under your profile settings, select your Fitbit Charge device to access the device settings menu.
5. Tap on “Clock Faces”: In the device settings menu, select “Clock Faces” to explore the available options.
6. Browse clock face options: In the clock faces gallery, scroll through the available options and tap on the ones you like to see a preview of how they will look on your Fitbit Charge.
7. Select a clock face: Once you’ve found a clock face design that you like, tap on it to select it as your default clock face.
8. Customize clock face options (if available): Some clock face designs may offer customization options. If available, you can tap on the clock face to access and customize additional settings, such as color themes, display metrics, or other personalization options.
9. Sync the changes: After customizing your clock face, make sure to sync your Fitbit Charge with the app. This will ensure that the changes you made are reflected on your device.
By customizing the clock face on your Fitbit Charge, you can showcase your style and display the information that matters most to you. Whether you prefer a minimalist design or a more detailed display of your fitness metrics, Fitbit offers a wide range of clock face options to suit your preferences.
Next, we’ll cover how to track your activities using your Fitbit Charge and make the most of its fitness tracking features.
Tracking Your Activities with Fitbit Charge
One of the key features of Fitbit Charge is its ability to track and monitor your daily activities. This includes counting your steps, measuring distance traveled, and monitoring calories burned. Here’s how you can make the most of the activity tracking features on your Fitbit Charge:
1. Wear your Fitbit Charge consistently: To accurately track your activities, it’s important to wear your Fitbit Charge consistently throughout the day. Make it a habit to put it on as soon as you wake up and keep it on until you go to bed.
2. Set goals and track your progress: In the Fitbit app, you can set daily activity goals, such as the number of steps you want to achieve or the number of calories you want to burn. Monitor your progress throughout the day and make adjustments if needed to stay on track.
3. Use the Fitbit app to track specific activities: Fitbit Charge can automatically track certain activities, such as walking, running, and cycling. However, if you’re engaging in other activities like swimming or yoga, you can manually start and stop the tracking using the Fitbit app.
4. Utilize the SmartTrack feature: Fitbit Charge comes with a SmartTrack feature that automatically recognizes and tracks certain activities, such as workouts or active sports. You can enable SmartTrack in the Fitbit app to take advantage of this convenient feature.
5. Pay attention to Active Zone Minutes: Fitbit Charge tracks your Active Zone Minutes, which measure the time you spend in various intensity zones during workouts. Strive to accumulate enough Active Zone Minutes each week to improve your overall fitness level.
6. Monitor your heart rate: Fitbit Charge provides continuous heart rate monitoring, allowing you to track your heart rate trends and effectively gauge your workout intensity. Keep an eye on your heart rate during exercise to ensure that you’re working within your target zone.
7. Take advantage of guided workouts: Fitbit Charge offers guided workouts directly on the device’s screen. These workouts provide step-by-step instructions to help you perform exercises correctly and reach your fitness goals.
8. Review your activity history: In the Fitbit app, you can view your activity history and analyze your progress over time. This can help you identify patterns, set new goals, and make adjustments to your routine for better results.
By utilizing the activity tracking features on your Fitbit Charge, you can gain valuable insights into your daily activities, monitor your progress, and stay motivated to reach your fitness goals. Incorporate these tracking features into your routine to make the most out of your Fitbit Charge.
Next, we’ll cover how to set up exercise modes on your Fitbit Charge to track specific workouts and optimize your training sessions.
Setting Up Exercise Modes on Your Fitbit Charge
To get the most accurate tracking and insights during specific workouts, Fitbit Charge allows you to set up exercise modes. These exercise modes help you track activities like running, biking, or yoga more precisely. Here’s how you can set up exercise modes on your Fitbit Charge:
1. Open the Fitbit app: Launch the Fitbit app on your smartphone and ensure that your Fitbit Charge is connected and synced with the app.
2. Tap on the “Today” tab: In the Fitbit app, navigate to the “Today” tab located at the bottom of the screen.
3. Tap on the exercise tile: Look for the exercise tile representing the activity you want to track. Tap on it to access the exercise mode settings.
4. Customize your exercise mode: In the exercise mode settings, you can customize various parameters to match your specific workout. Some customization options include activity names, GPS settings (if applicable), heart rate zones, and more.
5. Enable auto-detection (optional): Fitbit Charge can automatically detect and track certain exercises using its SmartTrack feature. If you want Fitbit Charge to automatically detect your workouts, toggle on the “Auto-Track Exercise” option in the exercise mode settings.
6. Adjust goals and alerts (optional): You can set specific goals or alerts for your exercise mode. For example, if you’re a runner, you can set distance or time goals and receive alerts when you reach them. Adjust these settings to suit your training needs.
7. Save your exercise mode: Once you’ve customized the exercise mode according to your preferences, tap on “Save” to apply the settings.
8. Start and end your workout: To start an exercise mode, simply swipe to the exercise tile on your Fitbit Charge and tap on it. Your device will start tracking the workout according to the predefined settings. Once you’re finished, swipe and tap on the exercise tile again to end the workout.
By setting up exercise modes on your Fitbit Charge, you can ensure accurate tracking of specific activities and gain valuable insights into your performance. Customize the exercise modes to match your personal goals and preferences, and make the most out of your training sessions.
Next, we’ll cover how to track your sleep using your Fitbit Charge and understand the importance of quality sleep for overall well-being.
Tracking Your Sleep with Fitbit Charge
Getting quality sleep is essential for overall health and well-being, and Fitbit Charge allows you to track and monitor your sleep patterns. By tracking your sleep, you can gain insights into the duration and quality of your rest, helping you make adjustments for better sleep habits. Here’s how to track your sleep with Fitbit Charge:
1. Wear your Fitbit Charge to bed: Make it a habit to wear your Fitbit Charge while you sleep, as it automatically tracks your sleep patterns without any additional steps required.
2. Sync your Fitbit Charge: Ensure that you sync your Fitbit Charge with the Fitbit app on your smartphone to transfer the sleep data collected by your device.
3. Check your sleep stats: Open the Fitbit app and navigate to the sleep section to access your sleep stats. Here, you’ll find information about your total sleep time, time spent in different sleep stages (light, deep, REM), and the number of times you woke up during the night.
4. View sleep stages: Fitbit Charge provides insights into your sleep stages, including when and how long you spent in each stage. These sleep stages help you understand the quality and depth of your sleep.
5. Monitor sleep trends: Over time, the Fitbit app will provide you with trends and patterns related to your sleep. You can analyze your sleep trends to identify factors that may be affecting the duration or quality of your sleep.
6. Set sleep goals: Fitbit allows you to set sleep goals to help you establish consistent sleep patterns. Set a target sleep duration that aligns with the recommended amount of sleep for your age group and lifestyle.
7. Utilize sleep insights: Fitbit provides personalized sleep insights based on your sleep data. These insights can help you identify areas where you can make improvements to enhance the quality of your sleep.
8. Implement healthy sleep habits: Use the information and insights provided by Fitbit Charge to make positive changes to your sleep routine. This may include setting a regular bedtime, creating a relaxing pre-sleep routine, and making adjustments to your sleep environment for optimal comfort.
By tracking your sleep with Fitbit Charge, you can gain a better understanding of your sleep patterns and make the necessary adjustments to improve the quality of your rest. Utilize the sleep data and insights provided by Fitbit to establish healthy sleep habits and ensure you’re getting the recommended amount of sleep each night.
Next, we’ll cover how to use Fitbit Charge to monitor your heart rate and understand its significance for your fitness and health.
Using Fitbit Charge to Monitor Your Heart Rate
Fitbit Charge comes equipped with a built-in heart rate monitor that allows you to track your heart rate throughout the day, enabling you to monitor and optimize your workouts and overall health. Here’s how to use Fitbit Charge to monitor your heart rate:
1. Wear your Fitbit Charge: To monitor your heart rate, wear your Fitbit Charge snugly on your wrist, ensuring that the sensor is in contact with your skin.
2. Check your resting heart rate: Fitbit Charge provides you with your resting heart rate, which is the number of times your heart beats per minute while at rest. This metric can provide insights into your cardiovascular health and fitness level. Check your resting heart rate in the Fitbit app under the “Today” tab.
3. Monitor heart rate throughout the day: Fitbit Charge continuously tracks your heart rate throughout the day, providing you with real-time data on your heart rate zones and intensity of activity. You can view your heart rate stats on the device’s screen or in the Fitbit app.
4. Use heart rate zones to gauge workout intensity: Fitbit Charge categorizes your heart rate into different zones, indicating the intensity of your exercise. By understanding which zone you are in, you can optimize your workouts and ensure they align with your fitness goals.
5. Track heart rate during workouts: Fitbit Charge automatically tracks your heart rate during exercise. Whether you’re running, biking, or doing a high-intensity workout, Fitbit Charge monitors your heart rate to help you stay on target and maximize your workouts.
6. Set heart rate alerts: Fitbit Charge allows you to set heart rate alerts to notify you when your heart rate goes above or below a specific threshold. This can help you maintain a safe and effective workout intensity level.
7. Analyze heart rate trends: In the Fitbit app, you can analyze your heart rate trends over time. By reviewing these trends, you can identify patterns and understand how various factors, such as stress, sleep, and physical activity, affect your heart rate.
8. Use heart rate data for health insights: Fitbit Charge uses your heart rate data to provide personalized insights and recommendations for improving your fitness and overall health. These insights are based on your specific heart rate patterns and can help you make informed decisions about your well-being.
By utilizing the heart rate monitoring feature on your Fitbit Charge, you can gain valuable insights into your cardiovascular health, optimize your workouts, and make informed decisions about your fitness and well-being. Make sure to wear your Fitbit Charge consistently to get accurate heart rate data throughout the day.
Next, we’ll cover how to customize your Fitbit Charge notifications to stay connected with your smartphone throughout the day.
Customizing Your Fitbit Charge Notifications
Fitbit Charge allows you to stay connected with your smartphone by receiving notifications directly on your wrist. You can customize which notifications you receive, ensuring that you stay informed without constantly checking your phone. Here’s how to customize your Fitbit Charge notifications:
1. Open the Fitbit app: Launch the Fitbit app on your smartphone and ensure that your Fitbit Charge is connected and synced with the app.
2. Tap on the “Today” tab: In the Fitbit app, navigate to the “Today” tab located at the bottom of the screen.
3. Tap on your profile: In the top left corner of the “Today” tab, tap on your profile icon.
4. Select your device: Under your profile settings, select your Fitbit Charge device to access the device settings menu.
5. Tap on “Notifications”: In the device settings menu, select “Notifications” to access the notification settings for your Fitbit Charge.
6. Choose the apps for notifications: You can select the specific apps from your smartphone that you want to receive notifications from on your Fitbit Charge. Toggle on the switches next to the app names to enable notifications for those apps.
7. Customize the notification settings: Fitbit Charge allows you to customize how notifications are displayed on your device. You can choose to receive full notifications or just a summary, and you can also customize the alert type (vibration or silent) for different types of notifications.
8. Enable or disable call notifications: Fitbit Charge can display notifications for incoming calls on your wrist. Toggle on the switch next to “Call Notifications” in the notification settings to enable this feature.
9. Fine-tune your notification preferences: Fitbit Charge also provides options for customizing advanced notification settings. In the notification settings, you can set a “Do Not Disturb” schedule, which mutes notifications during specific hours. You can also customize the display timeout for notifications.
10. Sync the changes: After customizing your notification settings, make sure to sync your Fitbit Charge with the app to save the changes and reflect them on your device.
By customizing your Fitbit Charge notifications, you can stay connected and receive important alerts and updates directly on your wrist. Whether it’s text messages, app notifications, or incoming calls, Fitbit Charge ensures that you don’t miss out on what matters to you.
Next, we’ll cover how to set up alarms on your Fitbit Charge to help you stay on schedule throughout the day.
Setting Up Alarms on Your Fitbit Charge
Fitbit Charge allows you to set up alarms to help you stay on schedule throughout the day. Whether you need a wake-up alarm, a reminder for an important task, or a gentle notification to take medication, Fitbit Charge has got you covered. Here’s how to set up alarms on your Fitbit Charge:
1. Open the Fitbit app: Launch the Fitbit app on your smartphone and ensure that your Fitbit Charge is connected and synced with the app.
2. Tap on the “Today” tab: In the Fitbit app, navigate to the “Today” tab located at the bottom of the screen.
3. Tap on your profile: In the top left corner of the “Today” tab, tap on your profile icon.
4. Select your device: Under your profile settings, select your Fitbit Charge device to access the device settings menu.
5. Tap on “Alarms”: In the device settings menu, select “Alarms” to access the alarm settings for your Fitbit Charge.
6. Add a new alarm: Tap on the “Add Alarm” button to create a new alarm.
7. Set the alarm time: Use the time selector to set the desired alarm time. Scroll through the hours and minutes, and select the desired wake-up time, reminder time, or any other time you need.
8. Choose the days: Select the days of the week on which you want the alarm to repeat. This allows you to set alarms only on specific days or have them repeat daily.
9. Select the alarm type: Fitbit Charge offers different alarm types, including vibration or sound (if your device supports it). Choose the alarm type that suits your preference.
10. Save the alarm: After setting the alarm time, days, and type, tap on “Save” to add the alarm to your Fitbit Charge.
11. Sync the changes: Make sure to sync your Fitbit Charge with the app to save the alarm settings and ensure they are reflected on your device.
By setting up alarms on your Fitbit Charge, you can stay organized and on track throughout the day. Whether it’s waking up in the morning or reminding yourself of important tasks, Fitbit Charge keeps you alerted and helps you manage your time effectively.
Next, we’ll cover how to sync your Fitbit Charge with the app to ensure your data is up to date and easily accessible.
Syncing Your Fitbit Charge with the App
Syncing your Fitbit Charge with the Fitbit app is an essential step to ensure that your data is up to date and easily accessible. By syncing, you can view your latest activity stats, track your progress, and receive personalized insights. Here’s how to sync your Fitbit Charge with the app:
1. Open the Fitbit app: Launch the Fitbit app on your smartphone and ensure that your Fitbit Charge is within range and connected to your device’s Bluetooth.
2. Tap on the “Today” tab: In the Fitbit app, navigate to the “Today” tab located at the bottom of the screen.
3. Swipe down to refresh: Swipe down on the screen to initiate a manual sync. The app will start looking for your Fitbit Charge and sync any new data captured by your device.
4. Wait for the sync to complete: The sync process may take a few moments to complete, depending on the amount of data to be transferred. Ensure that your Fitbit Charge remains in close proximity to your smartphone during the sync process.
5. Check for sync confirmation: Once the sync is complete, you’ll see a confirmation message or a green checkmark indicating that your Fitbit Charge is synced with the app.
6. View updated data: After syncing, navigate through the various sections of the Fitbit app to view the updated data from your Fitbit Charge. This includes your activity stats, heart rate readings, sleep data, and more.
7. Enable automatic background sync (optional): Fitbit also offers an automatic background sync feature that allows your Fitbit Charge to continuously sync with the app in the background. To enable this feature, go to the app settings and toggle on the “All-Day Sync” option.
By regularly syncing your Fitbit Charge with the app, you ensure that your data remains accurate and up to date. Syncing also allows you to track your progress, set new goals, and receive personalized insights and recommendations based on your activity.
Next, we’ll cover troubleshooting common issues that you may encounter with your Fitbit Charge and how to resolve them.
Troubleshooting Common Issues with Fitbit Charge
While Fitbit Charge is a reliable fitness tracker, you may occasionally encounter some common issues. Here are some troubleshooting tips to help you resolve these issues:
1. Ensure proper placement on your wrist: Make sure that your Fitbit Charge is properly positioned on your wrist and the heart rate monitor is in contact with your skin. Adjust the wristband to ensure a snug fit. This will help in the accurate tracking of your activities and heart rate.
2. Restart your Fitbit Charge: Sometimes, a simple restart can resolve minor issues. Restart your Fitbit Charge by connecting it to the charger and pressing and holding the side button for a few seconds until the Fitbit logo appears on the screen.
3. Update the Fitbit app and firmware: Keep your Fitbit app and Fitbit Charge firmware up to date. Check for updates in the app store and follow the instructions to install them. This can resolve compatibility issues and improve the overall performance of your device.
4. Check Bluetooth connection: Ensure that Bluetooth is enabled on your smartphone and that your Fitbit Charge is paired and connected to your device. If the connection is lost, try unpairing and then pairing your Fitbit Charge again in the Bluetooth settings of your smartphone.
5. Clean the charging contacts: Over time, dirt or sweat accumulation can affect the charging efficiency. Clean the charging contacts on the back of your Fitbit Charge and the connectors on the charging cable using a soft cloth or tissue. This can help improve the charging process.
6. Reset your Fitbit Charge: If the previous steps don’t resolve the issue, try resetting your Fitbit Charge. Go to the Settings menu in the Fitbit app, select your device, and choose the “Reset” option. Note that this will remove all settings, data, and activity history from your device.
7. Contact Fitbit Customer Support: If the issue persists, it’s recommended to reach out to Fitbit Customer Support for further assistance. They can provide specific troubleshooting steps or offer a replacement if your device is still under warranty.
Remember to refer to the Fitbit support website and user manual for additional troubleshooting tips specific to your Fitbit Charge model. Following these steps should help you resolve common issues and ensure the smooth operation of your Fitbit Charge.
Next, we’ll cover how to use Fitbit Charge to track your food and water intake, assisting you in achieving your nutritional goals.
Using Fitbit Charge to Track Your Food and Water Intake
Fitbit Charge not only helps you track your activity and monitor your health but also allows you to track your food and water intake. Monitoring your nutrition can provide valuable insights into your eating habits and help you make healthier choices. Here’s how to use Fitbit Charge to track your food and water intake:
1. Log your meals and snacks: Open the Fitbit app and go to the “Today” tab. Tap on the “+” icon or the “Log” button to log your meals and snacks throughout the day.
2. Search or scan barcodes: Use the food database in the Fitbit app to search for specific food items or scan the barcodes of packaged foods. This helps in accurately tracking the nutritional information of what you’re consuming.
3. Enter portion sizes: When logging your food, be sure to enter the portion sizes accurately. Fitbit offers preset portion sizes, but you can also customize them to match your actual serving sizes.
4. Monitor water intake: In addition to food tracking, Fitbit Charge allows you to track your water intake. Log the amount of water you consume throughout the day in the Fitbit app to ensure you’re staying hydrated.
5. Set nutritional goals: Set specific nutritional goals within the Fitbit app based on your dietary needs and preferences. This can include goals for calorie intake, macronutrients, or specific nutrients you want to focus on.
6. Track your progress: As you log your meals, snacks, and water intake, you can view your progress towards your nutritional goals in the Fitbit app. This provides insights into your overall dietary patterns and helps you make adjustments if needed.
7. Gain insights into your eating habits: Fitbit provides insights and trends based on your food and water intake. These insights help you understand your eating habits, identify areas for improvement, and make informed decisions about your nutrition.
8. Utilize the barcode scanner: Fitbit Charge offers a barcode scanner feature, allowing you to easily log packaged foods by scanning their barcodes. This saves time and ensures accurate tracking of nutritional information.
By using Fitbit Charge to track your food and water intake, you can develop a clearer understanding of your eating habits and make necessary adjustments for a healthier lifestyle. Consistently logging your food and water intake will support you in achieving your nutritional goals and maintaining a well-balanced diet.
Next, we’ll cover tips and tricks for getting the most out of your Fitbit Charge to enhance your fitness journey.
Tips and Tricks for Getting the Most out of Your Fitbit Charge
Fitbit Charge is a powerful tool for tracking your fitness and health goals. To maximize its potential and enhance your overall experience, here are some tips and tricks to get the most out of your Fitbit Charge:
1. Customize your dashboard: In the Fitbit app, you can customize your dashboard to prioritize the information and stats that are most important to you. Rearrange the tiles or add/remove metrics for a personalized view of your progress.
2. Set reminders and alerts: Utilize the reminders and alerts feature on your Fitbit Charge to keep yourself motivated and accountable. Set reminders to move, drink water, or take breaks throughout the day for better overall health.
3. Compete with friends: Challenge your friends or join community challenges using the Fitbit app. Engaging in friendly competition can boost your motivation and help you stay on track with your fitness goals.
4. Utilize guided breathing exercises: Fitbit Charge offers guided breathing exercises to help you relax and manage stress. Use this feature to practice deep breathing and promote mindfulness throughout the day.
5. Track additional metrics: Explore the Fitbit app to discover additional metrics you can track, such as weight, blood pressure, or blood glucose levels. Sync compatible devices or manually log these metrics to get a comprehensive view of your health.
6. Use silent alarms: Take advantage of silent alarms on your Fitbit Charge to wake up without disturbing others. Set multiple alarms for different times or purposes, such as reminders for medication or important tasks.
7. Utilize the battery-saving mode: If you want to extend the battery life of your Fitbit Charge, enable the battery-saving mode. This reduces the frequency of certain tracking features, allowing your device to last longer between charges.
8. Pair with third-party apps: Sync your Fitbit Charge with third-party apps, such as MyFitnessPal or Strava, to track your nutrition, explore new workouts, or share your achievements on social media. This integration enhances your fitness journey and provides a more comprehensive view of your progress.
9. Keep it clean: Regularly clean your Fitbit Charge and its wristband to maintain its performance and longevity. Follow the cleaning instructions provided by Fitbit to keep your device free from dirt, sweat, and other debris.
10. Stay motivated with Fitbit challenges: Engage in Fitbit challenges, such as step challenges or distance challenges, to stay motivated and reach new milestones. Team up with friends or join community challenges to push your boundaries and achieve your fitness goals.
By implementing these tips and tricks, you can make the most out of your Fitbit Charge and enhance your fitness journey. From customization options to engaging in challenges, these features and strategies will help you stay motivated, track your progress, and achieve your desired results.
Next, we’ll cover how to maintain and clean your Fitbit Charge to keep it in optimal condition.
Maintaining and Cleaning Your Fitbit Charge
To keep your Fitbit Charge in optimal condition and ensure accurate tracking, it’s important to maintain and clean your device regularly. Proper maintenance and cleaning practices will help prolong the life of your Fitbit Charge. Here’s how to effectively maintain and clean your device:
1. Keep it dry: Remove your Fitbit Charge before swimming, showering, or participating in any water-based activities. Excessive moisture can damage the device and affect its performance.
2. Clean the charging contacts: Regularly check the charging contacts on the back of your Fitbit Charge for any dirt, sweat, or debris. Use a soft, lint-free cloth or a cotton swab moistened with water to gently clean the charging contacts. Avoid using harsh chemicals or abrasive cleaners.
3. Clean the wristband: Depending on the material of your Fitbit Charge wristband, follow the appropriate cleaning method. For elastomer bands, rinse them with water and pat them dry with a lint-free cloth. For leather bands, use a damp cloth to gently clean the band without saturating it.
4. Avoid extreme temperatures: Avoid exposing your Fitbit Charge to extreme temperatures as it can damage the device. Do not leave it in direct sunlight or in extremely cold conditions for extended periods.
5. Tighten the wristband periodically: Over time, the wristband may become loose. Check the fit of your Fitbit Charge periodically and tighten it if necessary. The device should be snug on your wrist without being too tight or uncomfortable.
6. Take care when removing the device from the charger: When disconnecting your Fitbit Charge from the charging cable, grasp it by the body of the device rather than pulling on the wristband. This will prevent any unnecessary strain on the wristband and prevent damage to the connector.
7. Keep the firmware updated: Regularly check for firmware updates in the Fitbit app and install them as they become available. Firmware updates often include bug fixes and performance improvements.
By following these maintenance and cleaning practices, you can ensure the longevity and optimal performance of your Fitbit Charge. Regular cleaning and proper care will help minimize wear and tear, keep your device in good condition, and provide you with accurate data for a seamless tracking experience.
Next, we’ll address some frequently asked questions about Fitbit Charge.
Frequently Asked Questions about Fitbit Charge
As a popular fitness tracker, Fitbit Charge often raises some common questions among users. Here are some frequently asked questions about Fitbit Charge, along with their answers:
Q: How long does the battery of Fitbit Charge last?
A: The battery life of Fitbit Charge can vary depending on usage. Typically, it can last up to 5-7 days on a single charge. However, this can be affected by several factors, including the number of notifications, GPS usage, brightness settings, and more.
Q: Can I wear Fitbit Charge while swimming?
A: Fitbit Charge is water-resistant, but it is not designed to be fully submerged in water. It can handle splashes, perspiration, and rain, but it is not recommended to wear it while swimming, showering, or participating in water activities.
Q: Can I change the wristband of Fitbit Charge?
A: Yes, the wristbands of Fitbit Charge are interchangeable. Fitbit offers a range of wristbands in different materials, colors, and styles that allow you to customize the look of your device. Ensure that you choose a wristband that is compatible with your specific Fitbit Charge model.
Q: Does Fitbit Charge track sleep automatically?
A: Yes, Fitbit Charge can automatically track your sleep. Simply wear it throughout the night, and it will monitor your sleep patterns, including the duration and quality of your sleep. The sleep data will be synced to the Fitbit app for you to view and analyze.
Q: Can I wear Fitbit Charge on either wrist?
A: Yes, you can wear Fitbit Charge on either wrist. During the initial device setup in the Fitbit app, you have the option to select whether you will be wearing it on your dominant or non-dominant hand. The settings can be adjusted at any time in the app.
Q: Can I use Fitbit Charge without a smartphone?
A: Yes, Fitbit Charge can be used without a smartphone. It tracks your activities and displays your stats directly on the device’s screen. However, to fully utilize the features and access more detailed insights, it is recommended to sync it with the Fitbit app on your smartphone.
Q: Can I track my heart rate continuously with Fitbit Charge?
A: Yes, Fitbit Charge offers continuous heart rate monitoring. It tracks your heart rate throughout the day, providing real-time data and allowing you to monitor your heart rate trends during workouts and daily activities.
Q: Can Fitbit Charge receive phone notifications?
A: Yes, Fitbit Charge can receive phone notifications from your paired smartphone. You can customize the notifications you want to receive, such as calls, texts, calendar alerts, and app notifications, directly on your device.
Q: Can I wear Fitbit Charge while charging?
A: It is not recommended to wear Fitbit Charge while charging. It is best to remove it from your wrist and connect it to the charging cable to ensure a proper and safe charging process.
Q: Is Fitbit Charge waterproof?
A: Fitbit Charge is not fully waterproof but is water-resistant. It can withstand water splashes, sweat, and rain. However, it is important to avoid submerging it or exposing it to excessive moisture to prevent damage to the device.
These are some of the frequently asked questions about Fitbit Charge. If you have any additional questions or concerns, referring to the Fitbit support website or reaching out to Fitbit Customer Support can provide you with further assistance.
Next, we’ll cover some final thoughts and closing remarks.