
The Basics: What You Need to Know Before Setting Up Philips Hue Alarm Lights
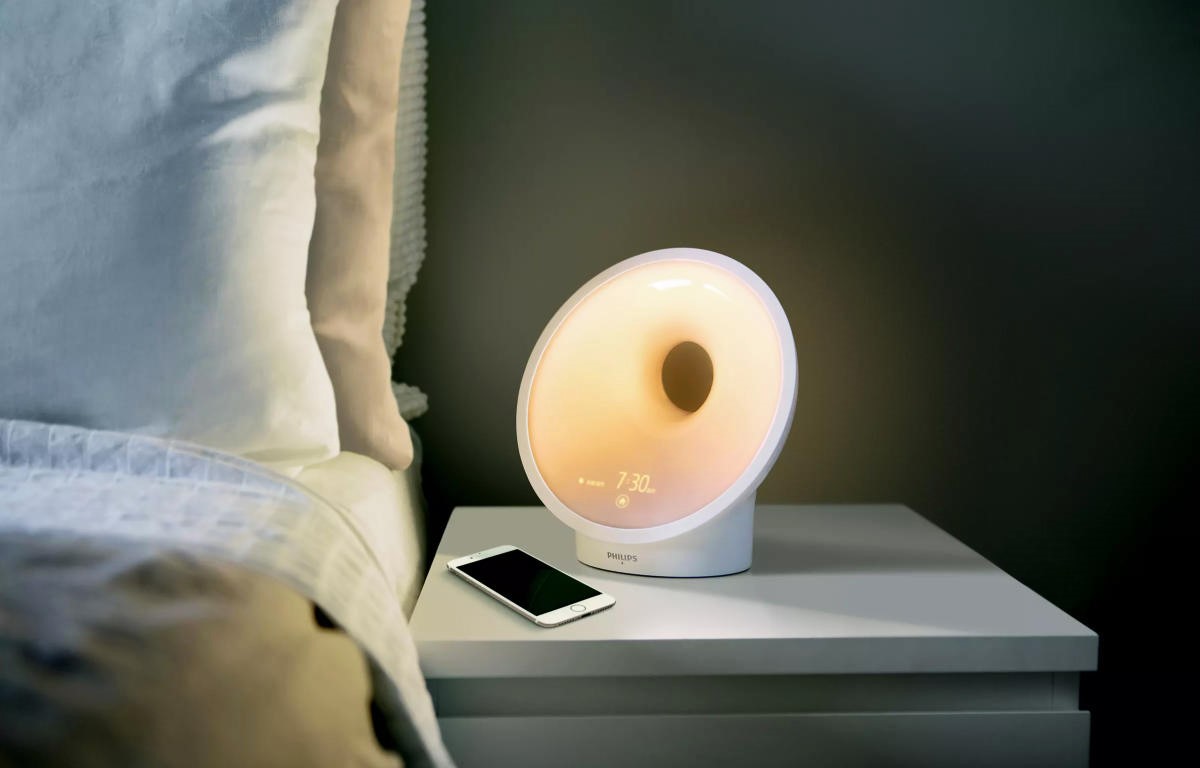
If you’re tired of waking up to a jarring alarm sound and want a gentler way to start your day, Philips Hue Alarm Lights could be the perfect solution. These smart lights gradually brighten to mimic the rising sun, creating a more natural and peaceful wake-up experience. Before you dive into the setup process, here are a few important things you need to know:
- Compatibility: Ensure that Philips Hue Alarm Lights are compatible with your existing devices and systems. They work seamlessly with popular smart home platforms like Amazon Alexa, Google Assistant, and Apple HomeKit, allowing you to control the lights using voice commands.
- Required Components: To set up Philips Hue Alarm Lights, you will need a Philips Hue Bridge, which acts as the central hub for controlling the lights. The bridge connects to your Wi-Fi network and communicates with the Hue bulbs. Additionally, make sure you have sufficient Hue bulbs to place in your bedroom or any other desired location.
- Mobile App: Download and install the Philips Hue app on your smartphone or tablet. This app will be your primary tool for controlling and customizing the alarm lights. It provides a user-friendly interface where you can set up schedules, adjust brightness levels, and choose from various light colors.
- Wi-Fi Connection: Ensure that your Wi-Fi network is stable and has a strong signal in the area where the Philips Hue Bridge and bulbs are located. A reliable internet connection is crucial for smooth communication and proper functioning of the alarm lights.
By familiarizing yourself with these basics before setting up Philips Hue Alarm Lights, you’ll have a smoother and more successful installation process. With the right components, compatible devices, and a reliable internet connection, you’ll be well on your way to creating a tranquil wake-up experience that will greet you with gentle, simulated sunlight every morning.
Step 1: Download and Install the Philips Hue App
Before you can begin setting up your Philips Hue Alarm Lights, you’ll need to download and install the Philips Hue app on your smartphone or tablet. The app is available for both iOS and Android devices and acts as the central control hub for your smart lights. Here’s how to get started:
- Visit the App Store or Google Play: Open the App Store on your iPhone or the Google Play Store on your Android device. Search for “Philips Hue” and locate the official Philips Hue app.
- Download and Install the App: Tap the “Download” or “Install” button to begin the installation process. Depending on your device and internet connection, the app may take a few moments to download and install.
- Launch the App: Once the app is successfully installed, locate the Philips Hue icon on your home screen or app drawer and tap it to launch the app.
- Create a Philips Hue Account: Upon launching the app, you will be prompted to create a Philips Hue account. Follow the on-screen instructions to set up an account by providing your email address and creating a password.
- Connect to the Hue Bridge: After creating your account, the app will guide you through the process of connecting to the Philips Hue Bridge. Make sure your phone or tablet is connected to the same Wi-Fi network that the bridge will be connected to. Follow the instructions in the app to establish the connection.
- Pairing the Lights: Once the app has successfully connected to the bridge, it will prompt you to pair your Philips Hue lights. Simply follow the instructions to press the button on the Hue Bridge, which will allow the app to discover and pair with your lights.
Following these steps will ensure that you have the Philips Hue app installed and ready to control your alarm lights. Once the app is set up, you can move on to the next steps to fully customize and personalize your wake-up experience using Philips Hue Alarm Lights.
Step 2: Set Up the Philips Hue Bridge
Setting up the Philips Hue Bridge is a crucial step in creating your smart lighting system. The bridge acts as the central hub that connects your Philips Hue lights to your Wi-Fi network, allowing you to control them through the app. Follow these steps to set up the Philips Hue Bridge:
- Connect the Bridge: Start by plugging in the power adapter that came with the Philips Hue Bridge. Then, using an Ethernet cable, connect the bridge to your home’s router or modem. Ensure that the Ethernet cable is securely connected to both the bridge and the router.
- Wait for the Lights: Once the bridge is properly connected, the lights on the bridge will illuminate. These lights indicate that the bridge is powered on and ready for configuration. Wait for a few moments until the lights stabilize.
- Download the Philips Hue App: If you haven’t already done so, download and install the Philips Hue app on your smartphone or tablet. This app will be used to control and configure your Philips Hue Bridge and lights.
- Launch the App and Connect to the Bridge: Open the Philips Hue app and follow the instructions to connect to the bridge. Make sure that your phone or tablet is connected to the same Wi-Fi network that the bridge will be connected to.
- Press the Button on the Bridge: Within the app, you will be prompted to press the button on the Philips Hue Bridge to allow it to be discovered and connected. Locate the button on the bridge and press it. The app will now establish a connection to the bridge.
- Name Your Bridge: Once the bridge is successfully connected, you will have the option to name your bridge. Choose a name that is easy to remember and identify, such as “Living Room Bridge” or “Bedroom Bridge.” This will help you differentiate between multiple bridges if you decide to expand your Philips Hue system in the future.
Following these steps will ensure that your Philips Hue Bridge is set up and ready to be connected to your lights. The bridge acts as the backbone of your smart lighting system, allowing you to control and customize your Philips Hue Alarm Lights with ease.
Step 3: Connect the Hue Bulbs to the Bridge
Now that you have set up the Philips Hue Bridge, it’s time to connect the Philips Hue bulbs to the bridge. This will enable you to control and customize the alarm lights through the Philips Hue app. Follow these steps to connect your Hue bulbs to the bridge:
- Screw in the Hue Bulbs: Start by screwing the Philips Hue bulbs into the desired light fixtures. Ensure that the bulbs are securely inserted and properly seated. You can place these bulbs in your bedroom lamps, ceiling fixtures, or any other location where you want to have alarm lights.
- Turn On the Lights: Flip the light switch or use the wall switch to turn on the power to the Philips Hue bulbs. Make sure the bulbs are receiving power before proceeding.
- Open the Philips Hue App: Launch the Philips Hue app on your smartphone or tablet.
- Navigate to the Bridge: Within the app, navigate to the section that allows you to configure the Philips Hue Bridge. This may be under the “Settings” or “Setup” menu, depending on the app version.
- Select “Add Bulbs”: Look for the option to add bulbs or lights to the bridge. Tap on this option to start the process of connecting the bulbs to the bridge.
- Follow the On-Screen Instructions: The app will guide you through the process of connecting the bulbs to the bridge. Typically, this involves pressing a button on the bridge, and then the app will search for and detect the bulbs. Once the bulbs are detected, they will be added to your smart lighting system.
- Group and Assign Rooms: After connecting the bulbs, you can group them together and assign them to specific rooms within the Philips Hue app. This will allow you to control multiple bulbs simultaneously and customize their settings based on the desired room or area.
By following these steps, you will successfully connect your Hue bulbs to the Philips Hue Bridge. This will enable you to control and configure your alarm lights with ease through the Philips Hue app, making your waking experience even more personalized and enjoyable.
Step 4: Customize Your Alarm Light Schedule
Once you have connected your Philips Hue bulbs to the bridge, it’s time to customize your alarm light schedule. This allows you to set the desired time for your lights to gradually brighten in the morning, simulating a natural sunrise and helping you wake up more gently. Follow these steps to customize your alarm light schedule using the Philips Hue app:
- Open the Philips Hue App: Launch the Philips Hue app on your smartphone or tablet.
- Select the “Routines” or “Schedules” Tab: Look for the section in the app that allows you to create and manage routines or schedules for your lights. This is where you will set up your alarm light schedule.
- Create a New Schedule: Tap on the option to create a new schedule or routine.
- Choose the Desired Lights: Select the Philips Hue bulbs that you want to include in the alarm light schedule. You can choose individual bulbs or group them together, depending on your preferences.
- Set the Schedule Parameters: Set the desired time for your wake-up routine. You can choose the exact time or select options such as “Sunrise” or “Wake up naturally” to have the lights gradually brighten over a specific duration.
- Adjust the Light Intensity: Customize the brightness level of the alarm lights. You can decide how bright or dim you want the lights to be when they start to gradually brighten in the morning.
- Choose the Color: If your Philips Hue bulbs support different colors, you can also select the desired color or temperature of the light for your wake-up routine. Warm tones or soft white light often create a more soothing and natural wake-up experience.
- Save and Activate the Schedule: Once you have customized your alarm light schedule, save the settings and activate the routine. The app will take care of gradually brightening the lights at the designated time, helping you wake up more peacefully.
By personalizing your alarm light schedule using the Philips Hue app, you can enjoy a gentle and natural wake-up experience every morning. Experiment with different settings to find the combination that works best for you, and wake up feeling refreshed and energized.
Step 5: Personalize Your Alarm Light Settings
To truly make your Philips Hue Alarm Lights your own, it’s important to personalize and fine-tune the settings according to your preferences. This step allows you to customize various aspects of your alarm lights, from brightness levels to color schemes. Follow these tips to personalize your alarm light settings using the Philips Hue app:
- Adjust Brightness Levels: Open the Philips Hue app and navigate to the section that allows you to control your lights. From there, you can adjust the brightness levels of your alarm lights to your liking. Some people prefer a soft and subtle glow, while others may prefer a brighter light to help them wake up more effectively.
- Experiment with Colors: If your Philips Hue bulbs support different colors, take advantage of this feature to create a personalized wake-up experience. Choose colors that evoke a sense of calm and tranquility for a more soothing start to your day. You can also experiment with warmer or cooler tones to mimic the changing colors of the sunrise.
- Explore Light Scenes: The Philips Hue app offers pre-programmed light scenes that can enhance your alarm light experience. These scenes can simulate different moods or environments, such as a tropical sunrise or a calm ocean setting. Browse through the available light scenes and select the ones that resonate with you.
- Create Your Own Scene: If the pre-programmed light scenes don’t suit your preferences, create a custom scene that aligns with your unique taste. The app allows you to select specific colors and brightness levels for different bulbs, giving you full control over the ambiance you want to create.
- Explore Additional Features: The Philips Hue app often includes additional features and settings that can further enhance your alarm light experience. For example, you may find options to gradually increase the volume of a connected smart speaker alongside the brightening lights, providing an all-encompassing wake-up experience.
- Continuously Refine and Customize: Take the time to regularly check and refine your alarm light settings as your preferences evolve. Play around with different combinations of brightness levels, colors, and scenes to find the optimal configuration that suits your needs.
By personalizing your alarm light settings, you can create a uniquely tailored wake-up experience that aligns with your preferences and helps you greet each day on a positive note. Enjoy the flexibility and versatility of the Philips Hue app as you experiment with different settings to find what works best for you.
Step 6: Test and Adjust Your Alarm Lights
After setting up and personalizing your Philips Hue Alarm Lights, it’s important to test and refine the settings to ensure they provide the ideal wake-up experience. In this step, you’ll be able to make any necessary adjustments to brightness, color, and timing. Follow these steps to test and adjust your alarm lights using the Philips Hue app:
- Set a Test Alarm: Choose a time during the day when you can simulate your wake-up routine. This will allow you to experience how your alarm lights gradually brighten and adjust to your desired settings.
- Observe the Light Gradually Brightening: As the set time approaches, pay close attention to how the lights start to brighten. Make note of whether the brightness level is appropriate and if it provides a gentle wake-up experience.
- Assess the Desired Color: Evaluate the color of the light as it gradually brightens. Determine if the chosen color or temperature creates the desired mood and ambiance for waking up. You may want to adjust the color settings to better match your preferences.
- Assess the Timing: Consider whether the time it takes for the lights to reach the desired brightness level matches your waking routine. If the lights brighten too quickly or too slowly, you can adjust the timing in the app to ensure a seamless wake-up experience.
- Make Adjustments in the App: Once you’ve identified any necessary changes, open the Philips Hue app and navigate to the alarm light settings. From there, you can refine the brightness, color, and timing to better align with your preferences.
- Repeat the Testing Process: After making adjustments, set another test alarm to experience the changes you’ve made. Repeat this process until you’re satisfied with the wake-up experience provided by your Philips Hue Alarm Lights.
- Continuously Fine-Tune: Keep in mind that personal preferences may change over time. Periodically re-evaluate and fine-tune your alarm light settings to ensure they continue to meet your needs and preferences.
By testing and adjusting your alarm lights, you can fine-tune the settings to perfection. Through careful observation and evaluation, you’ll be able to create a wake-up experience that perfectly suits your preferences and helps you start your day feeling refreshed and revitalized.
Troubleshooting Guide: Common Issues and How to Solve Them
While setting up and using Philips Hue Alarm Lights, you may encounter some common issues. Don’t worry! Here are a few troubleshooting tips to help you resolve these issues and ensure that your alarm lights work smoothly:
- Connection Issues: If you’re experiencing connection problems between the Philips Hue Bridge and your bulbs, check that the bridge is connected to your Wi-Fi network and that your internet connection is stable. Also, ensure that the bulbs are within range of the bridge.
- Unresponsive Lights: If your Philips Hue bulbs are not responding to commands, first verify that they are receiving power and that the light switches are turned on. If the issue persists, try resetting the bulbs by turning them off and on multiple times or using the Philips Hue app to reset them to factory settings.
- Inconsistent Brightness: Inconsistencies in brightness may occur due to varying brightness levels of different bulbs. To address this, adjust the brightness settings individually for each bulb or group them together and set a unified brightness level.
- Delayed or No Light Changes: If you notice delays or inconsistencies in the light changes during your alarm routine, check your Wi-Fi network’s stability and make sure the Philips Hue app is up to date. You can also try restarting the Philips Hue Bridge or resetting your Wi-Fi router if necessary.
- Compatibility Issues: If you’re having compatibility issues with third-party devices or applications, check if they are officially supported by Philips Hue. Ensure that you have the latest firmware updates for your Philips Hue products. Consult the official Philips Hue website or support resources for more information.
- App Malfunctions: If you experience crashes or glitches within the Philips Hue app, try force quitting the app and relaunching it. If the problem persists, uninstall and reinstall the app or check for any available updates.
- Smart Home Integration: If you’re having trouble integrating your Philips Hue Alarm Lights with your smart home system, ensure that your smart home hub or device is compatible with Philips Hue. Follow the integration instructions provided by the hub or device manufacturer or consult the support resources for troubleshooting guidance.
If you’re unable to resolve an issue using the troubleshooting tips above, don’t hesitate to reach out to Philips Hue customer support for additional assistance. They can provide specific guidance based on your situation and help you enjoy a seamless experience with your Philips Hue Alarm Lights.