
Unboxing the Amazon Smart Plug
When you first receive your Amazon Smart Plug, the excitement of setting it up and experiencing its convenience is hard to resist. Before you begin, take a moment to unbox the device and familiarize yourself with its components.
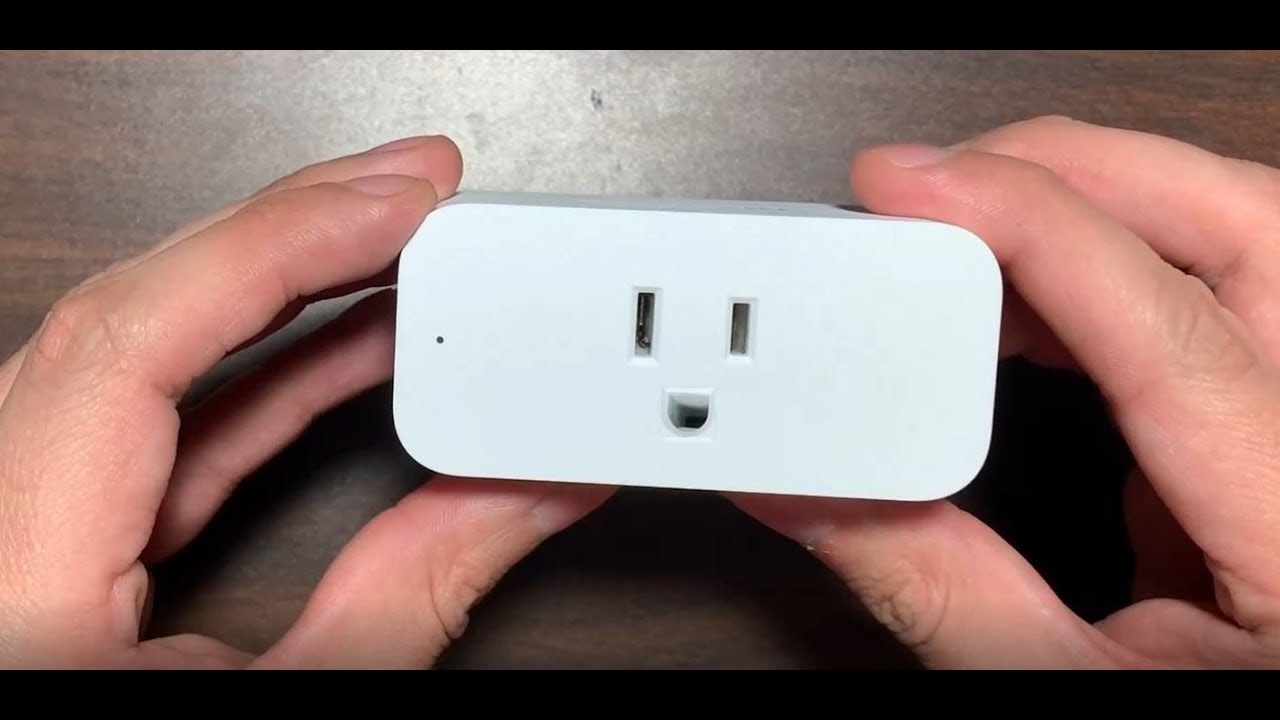
Upon opening the package, you will find the Amazon Smart Plug itself, along with a user manual that provides detailed instructions. Carefully remove the plug from its protective packaging and inspect it for any visible damage.
The Amazon Smart Plug has a sleek and compact design, allowing it to fit seamlessly into any standard power outlet without obstructing neighboring sockets. Its white casing gives it a modern and clean look, blending well with any home decor.
Next, examine the power cord attached to the smart plug. The length of the cord is typically sufficient to reach the nearest power outlet without requiring an extension cord, ensuring a neat setup. Check the cord for any signs of fraying or damage before proceeding.
Inside the box, you may also find additional accessories, such as a quick start guide or warranty information. Take a moment to read through these materials to familiarize yourself with the product’s features and warranty coverage.
Keep in mind that it’s essential to have a stable Wi-Fi connection and a compatible smartphone or tablet before proceeding with the setup process. Ensure that your device is charged and ready before diving into the setup process.
Now that you’ve unboxed the Amazon Smart Plug and familiarized yourself with its components, you’re ready to move on to the next step: connecting the smart plug to a power outlet.
Connecting the Amazon Smart Plug to the Power Outlet
Once you’ve unboxed your Amazon Smart Plug, the next step is to connect it to a power outlet. This simple process ensures that your smart plug will receive the necessary power supply for its functionality.
Begin by selecting a suitable power outlet in your home. Ensure that the outlet is easily accessible and not obstructed by other objects. It’s best to choose an outlet that is close to the device you intend to control with the smart plug.
Take the power cord attached to the smart plug and insert the plug into the chosen power outlet. Push the plug firmly into the outlet to ensure a secure connection. You may hear a subtle click or feel a slight resistance when the plug is properly inserted.
Once the smart plug is connected to the power outlet, you will notice a small indicator light on the front of the device. This light indicates that the smart plug is receiving power and is ready to be set up.
If the indicator light does not turn on, double-check the power connection. Ensure that the power outlet is functioning correctly by plugging in another device and confirming that it receives power.
It’s important to note that the Amazon Smart Plug is designed for indoor use only. Avoid using the smart plug in damp or wet areas, or areas with extreme temperatures, as it may cause damage to the device.
With the smart plug successfully connected to the power outlet, you’re now ready to proceed with the next step: downloading and installing the Alexa app on your smartphone or tablet.
Downloading and Installing the Alexa App
To fully utilize the features of the Amazon Smart Plug, you need to download and install the Alexa app on your smartphone or tablet. The Alexa app serves as the control hub for setting up and managing your smart home devices.
Here’s how you can download and install the Alexa app:
- Open the app store on your smartphone or tablet. If you have an iPhone or iPad, go to the App Store. For Android devices, go to the Google Play Store.
- In the search bar, type “Alexa” and tap the search icon.
- Look for the official Amazon Alexa app and tap on it to access the app’s page.
- Tap the “Install” or “Get” button to begin the download and installation process. The app will automatically install on your device.
- Once the installation is complete, open the Alexa app on your device.
- If you don’t have an Amazon account, you will need to create one. Follow the on-screen instructions to sign up for an Amazon account.
- Sign in to your Amazon account using your credentials. If you already have an Amazon account, enter your email address and password.
Once you have successfully downloaded and installed the Alexa app, you’re one step closer to setting up your Amazon Smart Plug.
The Alexa app provides an intuitive interface for controlling and managing your smart home devices. It allows you to set up routines, schedules, and voice commands to control your Amazon Smart Plug and other compatible smart devices.
Now that you have the Alexa app up and running, it’s time to proceed with the setup process for your Amazon Smart Plug within the app itself.
Setting Up the Amazon Smart Plug in the Alexa App
With the Alexa app installed on your smartphone or tablet, you can now proceed with setting up your Amazon Smart Plug. The Alexa app will guide you through the process, making it quick and easy to get your smart plug up and running.
Follow these steps to set up your Amazon Smart Plug in the Alexa app:
- Open the Alexa app on your device and sign in to your Amazon account if you haven’t already.
- Tap on the menu icon (typically represented by three horizontal lines) in the top-left corner of the screen to open the side menu.
- Select “Add Device” from the menu options.
- Tap on “Amazon Echo & Alexa” and then choose “Plug” from the list of compatible devices.
- Ensure that your Amazon Smart Plug is plugged into a power outlet and the indicator light is illuminated.
- The app will begin searching for nearby devices. Once it detects your smart plug, select it from the list of available devices.
- Follow the on-screen instructions to connect the smart plug to your Wi-Fi network. You will need to enter the network name and password when prompted.
- Wait for the app to complete the setup process. This may take a few moments while the smart plug connects to your Wi-Fi network.
- Once the setup is complete, you can assign a name to your smart plug that is easy to remember and identify.
- Finally, select the location or room where the smart plug is located to help organize your smart home devices.
After completing these steps, your Amazon Smart Plug is now successfully set up and ready to be controlled using the Alexa app or through voice commands.
Setting up your Amazon Smart Plug in the Alexa app allows you to conveniently control the connected device using your smartphone or tablet. You can turn the device on or off, create schedules and timers, and even include it in custom routines for a personalized smart home experience.
Next, we will explore how to connect your Amazon Smart Plug to your Wi-Fi network for seamless connectivity and control.
Connecting the Amazon Smart Plug to Wi-Fi
Connecting your Amazon Smart Plug to your Wi-Fi network is an essential step in ensuring seamless communication and control through the Alexa app or voice commands. By connecting the smart plug to Wi-Fi, you can remotely control your devices from anywhere within your home.
Follow these steps to connect your Amazon Smart Plug to Wi-Fi:
- Ensure that your Amazon Smart Plug is plugged into a power outlet and the indicator light is illuminated.
- Open the Alexa app on your smartphone or tablet and sign in to your Amazon account if prompted.
- In the Alexa app, tap on the Devices icon at the bottom right corner of the screen.
- Select the “+” button at the top right corner to add a new device.
- Choose “Amazon Echo & Alexa” and then select “Plug” from the list of device types.
- The app will start scanning for nearby devices. Once your smart plug is detected, select it from the list of available devices.
- Follow the on-screen instructions to connect the smart plug to your Wi-Fi network. You may need to enter your Wi-Fi network name and password when prompted.
- Wait for the app to complete the setup process. This may take a few moments as the smart plug connects to your Wi-Fi network.
- Once the setup is complete, the Alexa app will confirm that your Amazon Smart Plug is now connected to Wi-Fi.
With your Amazon Smart Plug successfully connected to Wi-Fi, you can now control your devices remotely using the Alexa app or through voice commands with your Alexa-enabled device.
It’s important to note that a stable and reliable Wi-Fi connection is crucial for optimal performance of your smart plug. If you experience connectivity issues, make sure that your Wi-Fi network is functioning properly and try restarting your router if necessary.
Now that your smart plug is connected to Wi-Fi, we can move on to the next step: naming and grouping your Amazon Smart Plug for easier management and control.
Naming and Grouping the Amazon Smart Plug
After successfully connecting your Amazon Smart Plug to Wi-Fi, it’s time to give it a name and consider grouping it with other smart devices. This step helps you easily identify and manage your smart plug, particularly if you have multiple devices or rooms in your home.
Follow these steps to name and group your Amazon Smart Plug:
- Open the Alexa app on your smartphone or tablet and sign in to your Amazon account if prompted.
- In the Alexa app, tap on the Devices icon at the bottom right corner of the screen.
- Scroll through the list of devices and locate your Amazon Smart Plug by its automatically assigned name or the name you previously set.
- Tap on the smart plug to access its settings.
- Tap on the Edit button located at the top right corner of the screen.
- Enter a new name for your smart plug that is descriptive and easy to remember. For example, you might name it “Living Room Lamp” or “Kitchen Coffee Maker”.
- Tap on Save to apply the new name.
- To group your smart plug with other devices, tap on the Group button and follow the prompts to create or select an existing group.
- Select the appropriate location or room for your smart plug to help organize your devices.
- Tap on Save to finalize the changes.
Naming and grouping your Amazon Smart Plug enhances the overall control and management of your smart home devices. With a clear and descriptive name, you can easily identify and refer to specific devices when issuing voice commands or adjusting settings in the Alexa app.
In addition, grouping your smart plug with other devices in the same room allows you to control multiple devices simultaneously. For example, you can create a group called “Living Room” and add the smart plug, smart lights, and smart TV to the group. This way, you can turn off all the devices in the living room with a single command.
With your Amazon Smart Plug named and grouped, you can now proceed to set up schedules and timers, allowing for automated control of your devices.
Setting Up Schedules and Timers for the Amazon Smart Plug
One of the key features of the Amazon Smart Plug is the ability to set up schedules and timers, allowing you to automate the power control of your connected devices. By creating schedules and timers, you can enhance convenience and energy efficiency in your home.
Follow these steps to set up schedules and timers for your Amazon Smart Plug:
- Open the Alexa app on your smartphone or tablet and sign in to your Amazon account if prompted.
- In the Alexa app, tap on the Devices icon at the bottom-right corner of the screen.
- Scroll through the list of devices and locate your Amazon Smart Plug.
- Tap on the smart plug to access its settings.
- Tap on “Create a Routine” or “Create a Timer” to set up a schedule or timer, respectively.
- Follow the on-screen prompts to customize the schedule or timer according to your preferences.
- Select the days of the week, specific time, and duration for the schedule, or choose the desired start time and duration for the timer.
- Specify whether you want the connected device to turn on or off during the specified schedule or timer.
- Repeat the process to set up additional schedules or timers for different days or devices, if needed.
- Review and confirm your settings, then tap on Save to apply the changes.
By setting up schedules, you can automate the operation of your devices based on your daily routine. For example, you can schedule your coffee maker to turn on every morning at 7 AM, ensuring a fresh brew awaits you in the kitchen. This eliminates the need to manually turn on the device each day.
Timers, on the other hand, provide a convenient way to control devices for a specific duration. For instance, you can set a timer for your bedside lamp to automatically turn off after 30 minutes, allowing you to fall asleep without worrying about leaving it on overnight.
With schedules and timers in place, you can enjoy the benefits of hands-free control and energy efficiency in your smart home. The Amazon Smart Plug, coupled with the power of the Alexa app, offers a seamless and customizable experience.
In the next section, we will explore how to use voice commands with the Amazon Smart Plug to control your connected devices effortlessly.
Using Voice Commands with the Amazon Smart Plug
One of the most convenient features of the Amazon Smart Plug is its compatibility with voice commands. By utilizing voice commands through Alexa, you can control your connected devices with ease, providing a hands-free and efficient smart home experience.
To use voice commands with the Amazon Smart Plug, follow these simple steps:
- Make sure that your Amazon Smart Plug is set up and connected to both Wi-Fi and the Alexa app.
- Ensure that you have an Alexa-enabled device nearby, such as an Amazon Echo smart speaker or a smartphone with the Alexa app.
- Begin your voice command by saying the “wake word” for your Alexa-enabled device. By default, the wake word is “Alexa,” but you can change it to “Echo,” “Computer,” or “Amazon” if desired.
- Once you hear the prompt tone or see the visual notification, you can proceed with your command.
- To control the Amazon Smart Plug, simply say the device name followed by the desired action. For example, you can say, “Alexa, turn off the living room lamp.”
- If you have grouped your smart plug with other devices, you can control them together with a single command. For instance, you can say, “Alexa, turn off the bedroom lights.”
- Experiment with different voice commands to discover the full range of control options. You can specify specific devices, rooms, or even set up routines that include multiple actions for various devices.
Using voice commands with the Amazon Smart Plug offers a seamless and intuitive way to control your connected devices. Whether you’re in the same room or across the house, simply speaking your commands allows you to effortlessly manage your smart home.
With voice commands, you can turn devices on or off, adjust settings, and even create a personalized smart home experience by incorporating routines and automation into your daily life.
Next, we will explore some troubleshooting tips to help address common issues that may arise during the setup or usage of the Amazon Smart Plug.
Troubleshooting Tips for the Amazon Smart Plug
While setting up and using the Amazon Smart Plug is typically a smooth process, you may encounter occasional issues or challenges. Here are some troubleshooting tips to help you resolve common problems and ensure optimal performance:
- Check the power connection: Ensure that the smart plug is properly inserted into the power outlet and that the outlet is functioning correctly. Try plugging in another device to verify if the outlet is providing power.
- Check the Wi-Fi connection: Ensure that your Wi-Fi network is stable and that the smart plug is within range. Try reconnecting the smart plug to your Wi-Fi network by following the setup process again.
- Restart your devices: Sometimes, a simple restart can resolve temporary issues. Try restarting your smart plug, router, and any other devices in your network to refresh the connections.
- Update firmware: Check for any available firmware updates for your smart plug in the Alexa app. Keeping your device firmware up to date can improve performance and resolve any known issues.
- Reset the smart plug: If you are still experiencing problems, you can try resetting the smart plug to its factory settings. Refer to the user manual or the manufacturer’s website for specific instructions on how to reset your device.
- Contact customer support: If all else fails, reach out to customer support for further assistance. They can provide you with specific troubleshooting steps or guide you through the resolution process.
Remember, troubleshooting may vary depending on the specific issue you are facing, so always refer to the user manual or contact customer support for detailed instructions.
By following these troubleshooting tips, you can quickly address common issues and enjoy a seamless experience with your Amazon Smart Plug. Embrace the convenience and control of your smart home while ensuring smooth operation.
With these troubleshooting tips in mind, you can now navigate any challenges that may arise and fully experience the benefits of the Amazon Smart Plug in your smart home setup.