
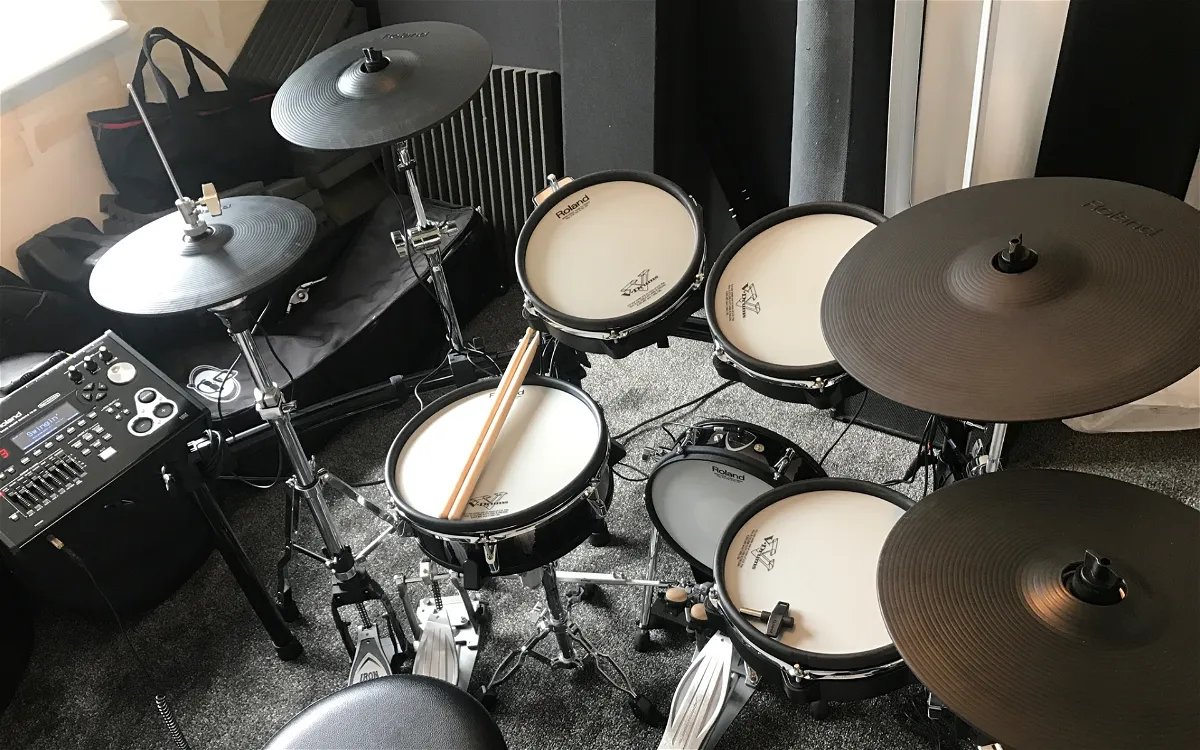
Choosing the Right Alesis Electronic Drum Kit
When it comes to electronic drums, Alesis is a renowned brand known for its high-quality products and innovative features. Whether you’re a beginner looking to explore the world of drumming or an experienced musician in need of a versatile kit, Alesis has a wide range of options to suit your needs. Here are some factors to consider when choosing the right Alesis electronic drum kit for you.
Firstly, consider your skill level and playing style. Alesis offers kits for beginners, intermediate players, and professionals. If you’re just starting, a basic kit with essential features and a user-friendly interface would be ideal. Intermediate and advanced players might prefer kits with advanced features, such as multiple zones and responsive mesh drumheads, that allow for a more nuanced playing experience.
Next, take into account your musical preferences and the genres you primarily play. Certain Alesis kits are designed specifically for certain genres, such as rock, jazz, or electronic music. These kits often come with pre-loaded drum sounds and patterns that cater to those styles. However, if you enjoy experimenting with different genres, opt for a versatile kit that offers a wide variety of drum sounds and customization options.
Consider the size and portability of the drum kit. If you have limited space or frequently need to transport your kit, a compact and lightweight option would be more practical. Alesis offers both full-size kits and compact models that are easy to assemble and disassemble. Keep in mind that portable kits may have fewer pads and cymbals compared to larger ones.
Budget is also an important consideration. Alesis electronic drum kits come in a range of price points, so it’s crucial to establish your budget before starting your search. Determine how much you’re willing to invest based on your playing goals and requirements. Even if you have a limited budget, there are affordable Alesis kits available that still offer excellent sound quality and playability.
Lastly, do your research and read reviews from other drummers. Online forums and music gear websites can provide valuable insights into the pros and cons of different Alesis electronic drum kits. Pay attention to factors like build quality, reliability, and customer support. Hearing from others with firsthand experience can help you make a more informed decision.
By considering these factors, you can confidently choose the right Alesis electronic drum kit that aligns with your skill level, musical preferences, space requirements, budget, and overall needs. Remember, the perfect kit for you is the one that inspires you to play and helps you develop as a drummer.
Assembling the Drum Kit
Once you have chosen the perfect Alesis electronic drum kit, it’s time to start assembling the components. Follow these steps to ensure a proper setup:
1. Start by unpacking all the components and lay them out in an organized manner. This will help you visualize the placement of the different parts and ensure nothing is missing.
2. Begin by setting up the drum rack. Connect the vertical and horizontal bars according to the manufacturer’s instructions. Make sure the rack stands firm and stable.
3. Attach the drum pads and cymbal mounts to the rack. Each drum pad and cymbal will have a specific mount or a clamp that allows it to be properly attached to the rack. Ensure that they are securely fastened.
4. Connect the drum pads and cymbals to the corresponding inputs on the drum module. Most Alesis kits use a standard 1/4″ jack or a TRS cable for connection. Double-check the labeling on the drum module and the pads to ensure proper connectivity.
5. Adjust the height and position of the drum rack and pads to your preference. Make sure the drum pads are within easy reach and at a comfortable playing height. Experiment with different positions to find the most ergonomic setup.
6. Once the rack and pads are positioned correctly, tighten all the clamps and locks to secure them in place. This will prevent any unwanted movement during your drumming sessions.
7. Connect the drum module to a power source and turn it on. Many Alesis kits use an AC adapter, so make sure it is plugged in properly.
8. Adjust the sensitivity and trigger settings of the drum pads. Each drummer has a unique playing style, so it’s essential to customize these settings to your liking. Refer to the drum module’s manual for instructions on how to access and adjust these parameters.
9. Test each drum pad and cymbal to ensure they are triggering properly. Play each pad with varying degrees of force to determine if any adjustments need to be made.
10. Finally, connect your Alesis drum module to an amplifier or headphones for audio output. Use the appropriate cables to establish the connection, ensuring that the volume levels are appropriate and the sound is clear.
By following these steps, you will be able to assemble your Alesis electronic drum kit correctly, allowing you to start practicing and enjoying your drumming experience. Remember to consult the user manual for specific instructions related to your kit model.
Connecting the Drum Pads and Cymbals
Once you have assembled the drum rack, the next step is to connect the drum pads and cymbals to your Alesis electronic drum kit. Follow these steps to ensure a proper and secure connection:
1. Start by identifying the specific inputs on the drum module for each drum pad and cymbal. These inputs are typically labeled or color-coded. Ensure that you have a clear understanding of which input corresponds to each pad or cymbal.
2. Take note of the type of cable required for connection. Most Alesis kits use a standard 1/4″ jack or a TRS (Tip-Ring-Sleeve) cable. Ensure that you have the correct cables for each pad and cymbal.
3. Connect the cables from each drum pad and cymbal to their corresponding inputs on the drum module. Insert the cable securely into the input, making sure it is fully seated. Give it a gentle tug to ensure it is properly connected.
4. For electronic drum pads, some models may require tightening the connection using a drum key or a screwdriver. Refer to the user manual of your specific kit to determine if this step is necessary.
5. If your electronic drum kit utilizes a snake cable, which combines multiple cables into one, carefully route the snake cable through the drum rack. Make sure it is not twisted or tangled to prevent any signal interference.
6. Once the cables are connected, ensure that they are organized and secured to prevent accidental disconnections or tripping hazards. A cable management system or zip ties can help keep the cables tidy and out of the way during your drumming sessions.
7. Before proceeding, do a quick visual check to ensure that all the pads and cymbals are securely connected and properly aligned. Adjust any loose connections or misalignments, if necessary.
8. Once you are confident that all the drum pads and cymbals are correctly connected, power on the drum module. Test each pad and cymbal individually to ensure that they are triggering properly and producing the desired sound.
By following these steps, you can confidently connect your drum pads and cymbals to your Alesis electronic drum kit. Taking the time to properly connect and secure the components ensures optimal performance and a seamless drumming experience. Remember to consult the user manual for specific instructions related to your kit model and to troubleshoot any connectivity issues that may arise.
Setting Up the Drum Module
The drum module is the brain of your Alesis electronic drum kit, controlling the sounds, settings, and features of the kit. Follow these steps to set up your drum module for optimal performance:
1. Begin by placing the drum module in a convenient and accessible location. Ensure that it is easily within reach while you are playing, allowing you to make any necessary adjustments without interrupting your drumming.
2. Connect the power adapter to the drum module and plug it into a power source. Double-check that the power is switched off before connecting to prevent any electrical mishaps.
3. Power on the drum module and wait for it to initialize. This may take a few seconds. Once it is fully powered up, you will see the display screen come to life.
4. Familiarize yourself with the interface and navigation buttons on the drum module. Each model may have slightly different controls, so consult the user manual for specific instructions. The navigation buttons allow you to navigate through the different menu options and make adjustments to settings and parameters.
5. Take some time to explore the various options and settings on the drum module. This includes selecting drum sounds, adjusting volume levels, setting up drum kits, customizing parameters like reverb and sensitivity, and accessing additional features such as built-in metronomes or recording capabilities.
6. Customize the settings to match your preferences and playing style. Adjust parameters like pad sensitivity, trigger thresholds, and crosstalk cancellation to ensure that the drum module responds accurately to your drumming technique. Experiment with different settings to find the optimal balance for your playing needs.
7. Save your customized settings and drum kits if your drum module allows for it. This will allow you to easily access your preferred setup in future sessions without the need for recalibration.
8. If your drum module has MIDI capabilities, you can connect it to a computer or external MIDI device using a USB or MIDI interface. This allows you to use the drum module as a MIDI controller, trigger virtual instruments, and record your performances directly into music production software.
9. Lastly, refer to the user manual for any additional features or functionalities specific to your drum module. Take advantage of tutorials or online resources offered by Alesis to further enhance your understanding of the drum module’s capabilities.
By following these steps, you can effectively set up your Alesis electronic drum module and unleash the full potential of your drum kit. Remember to periodically check for firmware updates or software upgrades to ensure that you have the latest features and improvements for an optimal drumming experience.
Adjusting the Height and Position of the Drum Rack
Properly adjusting the height and position of the drum rack is crucial for achieving a comfortable and ergonomic playing experience with your Alesis electronic drum kit. Follow these steps to ensure the optimal positioning of your drum rack:
1. Start by standing in front of your drum kit in a natural and relaxed playing position. Consider factors such as your arm length and height to determine the ideal height for your drum rack.
2. To adjust the height of the drum rack, loosen the clamps or locks on the vertical bars. Slide the bars up or down to achieve a comfortable height. It is important to find a height that allows your arms to be slightly bent when striking the drum pads, avoiding strain or discomfort.
3. Once you have adjusted the height, tighten the clamps or locks to secure the position of the vertical bars. Make sure they are securely fastened to keep the drum rack stable during your drumming sessions.
4. Consider the position of the drum pads and cymbals in relation to your reach and preferred playing style. Ensure that the drum pads are positioned within easy reach of your drumsticks while maintaining a balanced layout across the rack.
5. Adjust the horizontal bars of the drum rack to align the drum pads and cymbals according to your preference. The horizontal bars can usually be adjusted by loosening the clamps and sliding them along the vertical bars.
6. Take into account the spacing between the drum pads and cymbals. A comfortable distance between each pad and cymbal allows for efficient drumming while minimizing the risk of accidentally hitting adjacent pads during fast and vigorous playing.
7. Experiment with different positions and orientations of the drum rack to find the most ergonomic setup. Tilt the entire drum rack forward or backward to accommodate your playing style and ensure a natural wrist and arm position while hitting the drum pads and cymbals.
8. Once you have found the optimal height and position for your drum rack, tighten all the clamps and locks to secure the adjustments. This ensures that the drum rack remains stable and does not shift or move during your drumming sessions.
By taking the time to adjust the height and position of the drum rack, you can create a comfortable and customized setup for your Alesis electronic drum kit. Remember that everyone’s preferences and body proportions may be different, so it’s important to find the position that feels most natural and allows for efficient and enjoyable drumming. Don’t be afraid to experiment and make minor adjustments until you find the perfect setup for your playing style.
Adjusting the Drum Pad Sensitivity and Trigger Settings
Properly adjusting the drum pad sensitivity and trigger settings on your Alesis electronic drum kit is essential for achieving accurate and responsive drumming performance. Follow these steps to fine-tune the settings to your preference:
1. Access the drum module settings. Different Alesis models may have different methods for accessing the settings menu. Refer to your drum module’s user manual for specific instructions on how to navigate to the settings.
2. Locate the sensitivity settings. The sensitivity controls determine how the drum module responds to your drum hits. Higher sensitivity values result in more responsive triggering, while lower sensitivity values may require harder hits to register. Adjust the sensitivity levels for each individual drum pad to match your playing style and technique.
3. Strike each drum pad with varying degrees of force to test the sensitivity. Observe how the drum module registers the hits and evaluate whether the sensitivity settings need adjustments. Make incremental changes until you find the ideal sensitivity level for each drum pad.
4. Adjust the dynamic range settings. The dynamic range controls dictate the range of soft to loud hits that the drum module can accurately detect and reproduce. Determine if you want a wider dynamic range for more expressive playing or a more limited range to maintain consistent volume levels. Make adjustments accordingly to achieve your desired response.
5. Check and adjust the trigger thresholds. Trigger thresholds control the minimum force required to activate a drum pad or cymbal. If you find that a specific pad triggers erratically or becomes overly sensitive, you can raise the trigger threshold to minimize false triggers. Conversely, if a pad doesn’t respond consistently, lowering the trigger threshold may help improve its sensitivity.
6. Experiment with the crosstalk cancellation settings. Crosstalk occurs when hitting one drum pad inadvertently triggers a neighboring pad. Adjusting the crosstalk cancellation settings helps minimize interference between pads, ensuring that each hit is registered accurately. Fine-tune the crosstalk settings to eliminate unwanted triggering and improve overall drum pad responsiveness.
7. Save your customized settings. Once you have adjusted the sensitivity and trigger settings to your satisfaction, ensure that you save your changes. This allows you to recall your preferred settings in future drumming sessions without the need for reconfiguration.
8. Test the sensitivity and trigger settings in a real playing scenario. Take the time to play different patterns and techniques to gauge the responsiveness of the drum pads. Make further adjustments as necessary to achieve the desired feel and accuracy.
By correctly adjusting the drum pad sensitivity and trigger settings on your Alesis electronic drum kit, you can enhance your drumming experience and achieve more precise and expressive performances. Keep in mind that these settings may vary depending on your personal preferences and playing style, so don’t hesitate to experiment and make adjustments to suit your individual needs. Regularly reassess and fine-tune the settings as your drumming technique evolves to ensure optimal performance from your electronic drum kit.
Configuring the Drum Module Settings
Configuring the drum module settings on your Alesis electronic drum kit allows you to customize various parameters, sounds, and features to suit your preferences and playing style. Here’s a step-by-step guide to help you configure your drum module:
1. Access the settings menu on your drum module. Depending on the model, this can typically be done by pressing a dedicated button or navigating through the menu options using the control buttons. Refer to your drum module’s user manual for specific instructions on how to access the settings menu.
2. Explore the different menu options. Take some time to familiarize yourself with the available settings and features. This may include options to adjust drum sensitivity, sound parameters, metronome settings, MIDI configurations, and more. Take note of any additional sub-menus or hidden settings that may be available.
3. Adjust the drum sensitivity and response settings. Fine-tune the sensitivity of the drum pads to match your playing style and technique. This can involve adjusting the threshold for triggering, dynamic range, and crosstalk cancellation settings. Experiment with different settings to find the right balance between responsiveness and accuracy.
4. Customize the drum sounds and kits. Depending on your drum module, you may have access to a wide range of pre-loaded drum sounds and kits. Explore these options and select the ones that best fit your musical preferences and genre. Some models also allow you to add your own custom samples or sounds for a more personalized touch.
5. Adjust the volume levels and balance of individual drums and cymbals. Ensure that each element of your drum kit is properly balanced in terms of volume. Adjust the levels to ensure that no drum or cymbal is overpowering or too soft compared to the others.
6. Customize the metronome settings. If your drum module has a built-in metronome, access the metronome settings to adjust the tempo, beat subdivision, and sound options. This allows you to tailor the metronome to your playing requirements and practice sessions.
7. Configure MIDI settings if applicable. If your drum module has MIDI capabilities, you can configure various aspects related to MIDI output and control. This includes setting MIDI channels, assigning MIDI notes to individual drum pads, and adjusting velocity sensitivity for MIDI triggering.
8. Save your customized settings. Once you have made all the desired adjustments and configurations, be sure to save your changes. Some drum modules allow you to save multiple user profiles or kits, so you can easily switch between different setups based on your playing requirements.
9. Test and refine your settings. After configuring the drum module settings, spend some time playing and experimenting with different drumming techniques. Monitor the response, sound quality, and overall performance to determine whether any further adjustments are needed.
By taking the time to configure the drum module settings, you can personalize your Alesis electronic drum kit to match your unique playing style and musical preferences. Regularly revisit and fine-tune these settings as needed to ensure an optimal drumming experience that is tailored to your specific needs.
Connecting the Drum Module to an Amplifier or Headphones
To fully experience your Alesis electronic drum kit, you’ll want to connect the drum module to an amplifier or headphones for audio output. Here’s how you can do it:
1. Determine the audio output options available on your drum module. Common options include 1/4″ TRS (Tip-Ring-Sleeve) output jacks, stereo headphone jacks, or digital audio connections like USB or MIDI.
2. If you’re using an amplifier, locate the audio output jacks on your drum module. Typically, these are labeled as “Output” or “Main Out.” Connect one end of a 1/4″ audio cable to the output jack(s) of the drum module.
3. Connect the other end of the audio cable to the input jack on your amplifier. Most amplifiers have a dedicated input labeled “Line In” or “Aux In.” Ensure that the cable is securely plugged into both the drum module and the amplifier.
4. If you’re using headphones, locate the headphone jack on your drum module. This is typically labeled as “Headphones” or “Phones.” Insert the headphone plug into the headphone jack on the drum module.
5. If your drum module offers separate volume controls for different outputs, adjust the headphone volume or output level on your drum module to a comfortable listening level. This allows you to control the volume independently from the main output volume.
6. If you’re using an amplifier, turn on the drum module and then power on the amplifier. Make sure the amplifier is set to an appropriate volume level.
7. If you’re using headphones, ensure that the headphone volume is also set to an appropriate level. Start with a lower volume and gradually increase it to avoid any sudden loud sounds.
8. Test the audio output by playing the drum pads. If you’re using an amplifier, you should hear the drum sounds coming through the speakers. If you’re using headphones, the drum sounds should be audible in both ears.
9. Adjust the volume levels on the drum module or amplifier/headphone controls as needed to achieve a balanced and enjoyable listening experience. Be mindful of your surroundings and the sound levels to avoid disturbing others or causing hearing damage.
10. If you’re using headphones, ensure that they are comfortable and properly positioned on your ears for the best audio quality and isolation from external noise.
By connecting your Alesis drum module to an amplifier or headphones, you can fully immerse yourself in the drumming experience. Whether you prefer the amplified sound through speakers or the personal listening experience with headphones, make sure to follow the appropriate steps and adjust the volume levels to suit your preferences. Enjoy the rich and dynamic sounds of your electronic drums as they come to life through the audio output of your choice.
Testing and Troubleshooting the Drum Kit
After setting up your Alesis electronic drum kit, it’s essential to test and troubleshoot any potential issues to ensure smooth and optimal performance. Here are some steps to help you test and troubleshoot your drum kit:
1. Perform a basic functionality test. Play each drum pad and cymbal to ensure that they are triggering properly and producing the expected sounds. Pay attention to sensitivity, responsiveness, and any inconsistencies in triggering.
2. Check for any physical issues. Inspect the drum pads, cymbals, and other components for any signs of damage or wear. Ensure that all cables are securely connected and free from any twists or knots that could impede the signal.
3. Adjust the sensitivity settings. If you notice any inconsistencies in triggering or responsiveness, access the drum module settings and fine-tune the sensitivity levels for each drum pad. Experiment with different settings to achieve the optimal response.
4. Identify and address any cross-talk issues. Cross-talk occurs when hitting one drum pad triggers a neighboring pad. Adjust the crosstalk cancellation settings in the drum module to minimize any interference between pads.
5. Test the drum module’s audio outputs. Connect the drum module to an amplifier or headphones and play the drum kit to ensure that the audio output is clear and balanced. If you encounter any issues, check the connections and volume levels, and make appropriate adjustments.
6. Evaluate the playing experience. Pay attention to the overall feel and comfort of the drum kit. Ensure that the pads and cymbals are positioned correctly and at a suitable height and angle for your playing style.
7. Consult the user manual and online resources. If you encounter any specific issues or need assistance with troubleshooting, refer to the user manual that came with your drum kit. Additionally, check the manufacturer’s website or online forums for helpful troubleshooting tips and resources.
8. Contact customer support if necessary. If you are unable to resolve any issues on your own or require additional assistance, reach out to Alesis customer support. They can provide further guidance and help troubleshoot any persistent problems you may be facing.
By testing and troubleshooting your Alesis electronic drum kit, you can address any potential issues and ensure that it is functioning optimally. Regular maintenance and care, along with timely troubleshooting, will help you enjoy a seamless drumming experience and make the most out of your investment in electronic drums.
Customizing the Drum Sounds and Assigning MIDI Notes
One of the advantages of an Alesis electronic drum kit is the ability to customize the drum sounds and assign MIDI notes to the drum pads. This allows you to personalize your drum kit and create a unique playing experience. Follow these steps to customize the drum sounds and assign MIDI notes:
1. Access the drum module settings. Navigate to the sound or kit editing section on your drum module. This is where you can customize the individual drum sounds and assign MIDI notes to each drum pad.
2. Select a drum sound to customize. Choose a drum pad or cymbal from your electronic drum kit that you want to customize the sound for. This can include altering the tone, pitch, decay, or effects applied to that specific sound.
3. Adjust the parameters of the selected drum sound. Depending on your drum module, you can modify various sound parameters such as attack, decay, tuning, and effects settings. Make changes to these parameters to achieve the desired sound for the selected drum pad or cymbal.
4. Save your customized drum sound. Once you are satisfied with the modifications, save the customized drum sound to the corresponding drum pad or cymbal. This ensures that the sound settings are retained every time you play that specific instrument.
5. Assign MIDI notes to the drum pads. If you plan to use your electronic drum kit as a MIDI controller, you can assign specific MIDI notes to each drum pad. This allows you to trigger virtual instruments and record MIDI data in music production software.
6. Access the MIDI settings on your drum module. Navigate to the MIDI settings section and locate the option for assigning MIDI notes. This may involve selecting the drum pad and inputting the desired MIDI note value or accessing a MIDI mapping menu.
7. Assign the MIDI notes to the drum pads. Determine which MIDI notes you want to assign to each drum pad. Consult the MIDI documentation or software you are using to ensure compatibility and proper mapping. Enter the MIDI note values for each drum pad through the drum module’s interface.
8. Save the MIDI settings. Once you have assigned the MIDI notes to the drum pads, save the settings on your drum module. This ensures that the MIDI notes are retained when using your electronic drum kit as a MIDI controller.
9. Test the customized drum sounds and MIDI notes. Play the drum pads to ensure that the customized sounds are triggered correctly and that the assigned MIDI notes are sending the intended MIDI messages to external devices or software.
By customizing the drum sounds and assigning MIDI notes on your Alesis electronic drum kit, you can create a personalized and expressive drumming experience. Take the time to experiment with different sound parameters and MIDI assignments to find the perfect blend that matches your musical style and preferences. Enjoy the versatility and creative possibilities that electronic drum customization offers.
Adding Additional Pads or Cymbals to your Alesis Electronic Drum Kit
One of the great features of an Alesis electronic drum kit is the ability to expand and customize it according to your drumming needs and preferences. If you want to add more pads or cymbals to your kit, follow these steps to do so:
1. Check compatibility: Begin by ensuring that your Alesis drum module has the necessary inputs and channels to support additional pads or cymbals. Consult the user manual or contact Alesis customer support to verify compatibility and compatibility limitations.
2. Determine the type of pad or cymbal you want to add: Alesis offers a variety of additional drum pads and cymbals that are compatible with their electronic drum kits. Choose the type of pad or cymbal that fits your playing style and musical preferences. This can include additional drum pads, cymbal pads, or even specialty pads like a kick drum tower or multi-zone pads.
3. Purchase the additional pads or cymbals: Once you have decided on the type of pad or cymbal you want to add, purchase it from a reputable retailer or authorized Alesis dealer. Ensure that it is compatible with your drum module and comes with the necessary cables and mounting hardware.
4. Assemble the pad or cymbal: Follow the manufacturer’s instructions to assemble the additional pad or cymbal. This typically involves attaching it to a mounting arm or rack clamp using screws or a clamp mechanism, depending on the pad or cymbal design.
5. Connect the additional pad or cymbal: Locate the appropriate input on your drum module for the new pad or cymbal. Connect the pad or cymbal using the supplied cable, ensuring a secure connection. Some pads or cymbals may require specific types of cables, so refer to the user manual for guidance.
6. Adjust the settings: Access the drum module’s settings menu and navigate to the pad or cymbal settings. Configure the sensitivity, volume, and other parameters to ensure the new addition integrates seamlessly with the rest of your drum kit. Make any necessary adjustments to achieve the desired response and feel.
7. Mount the additional pad or cymbal: Use the supplied mounting hardware to attach the new pad or cymbal to your existing drum rack. Adjust the position and angle as needed for optimal playability and comfort.
8. Test and familiarize yourself: Test the new pad or cymbal by playing it and evaluating its response and sound. Spend some time practicing with it to get comfortable and familiarize yourself with the playing dynamics and nuances it offers.
9. Customize settings if necessary: If the new pad or cymbal allows for customization, explore the options in the drum module settings to fine-tune the sound, sensitivity, and other parameters to your liking.
By following these steps, you can easily expand and customize your Alesis electronic drum kit with additional pads or cymbals. Adding new elements not only enhances your overall drumming experience but also opens up new possibilities for creativity and expression. Enjoy the expanded capabilities of your drum kit as you explore and incorporate the new sounds and playing options that the additional pads or cymbals provide.
Maintenance and Care for your Electronic Drums
Proper maintenance and care for your Alesis electronic drum kit will not only prolong its lifespan but also ensure optimal performance. Follow these guidelines to keep your electronic drums in excellent condition:
1. Clean regularly: Regularly clean the drum pads, cymbals, and drum module using a soft, lint-free cloth. Wipe away any dust, sweat, or debris that may accumulate during playing. Avoid using abrasive or harsh cleaning agents as they may damage the surfaces or sensors.
2. Avoid moisture: Electronic drum pads and cymbals are sensitive to moisture. Wipe off any excess sweat or liquid immediately to prevent damage to the sensors or electronics. Consider using drum covers or towels to protect the pads and cymbals during intense playing sessions.
3. Protect from extreme temperatures: Avoid exposing your electronic drums to extreme temperatures or rapid temperature changes. High heat or extreme cold can affect the performance and lifespan of the drum module and components. Store the drums in a temperature-controlled environment when not in use.
4. Use proper drumsticks: Ensure that you use drumsticks specifically designed for electronic drums. Avoid using excessive force or heavy-hitting techniques as they can accelerate wear and tear on the drum pads. If you prefer a more powerful playing style, consider investing in mesh or silicone drumheads that are more durable.
5. Check cables and connections: Regularly inspect the cables connecting the drum pads, cymbals, and drum module. Look for any signs of wear, damage, or loose connections. Replace any damaged cables immediately to prevent signal loss or other issues.
6. Store the kit safely: When not in use, store your electronic drum kit in a secure and dry area. Use protective covers or cases to prevent dust accumulation and potential damage from accidental bumps or scratches.
7. Update firmware or software: Stay updated with the latest firmware or software updates for your drum module. These updates often include bug fixes and performance enhancements that can improve the overall functionality and stability of your electronic drums.
8. Follow manufacturer guidelines: Refer to the user manual and follow the manufacturer’s guidelines and recommendations for maintenance and care. They provide specific instructions and advice for your particular model of Alesis electronic drum kit.
9. Seek professional assistance when needed: In the event of any technical issues or complex maintenance tasks, it is advisable to seek assistance from Alesis customer support or a qualified technician. They can provide the necessary expertise and guidance to address any issues effectively.
By following these maintenance and care guidelines, you can ensure that your Alesis electronic drum kit remains in optimal condition for years to come. Regular cleaning, protection from moisture and extreme temperatures, and proper storage are key in preserving the performance and durability of your electronic drums. With proper care, your electronic drum kit will continue to provide you with endless hours of enjoyment and inspiration.