
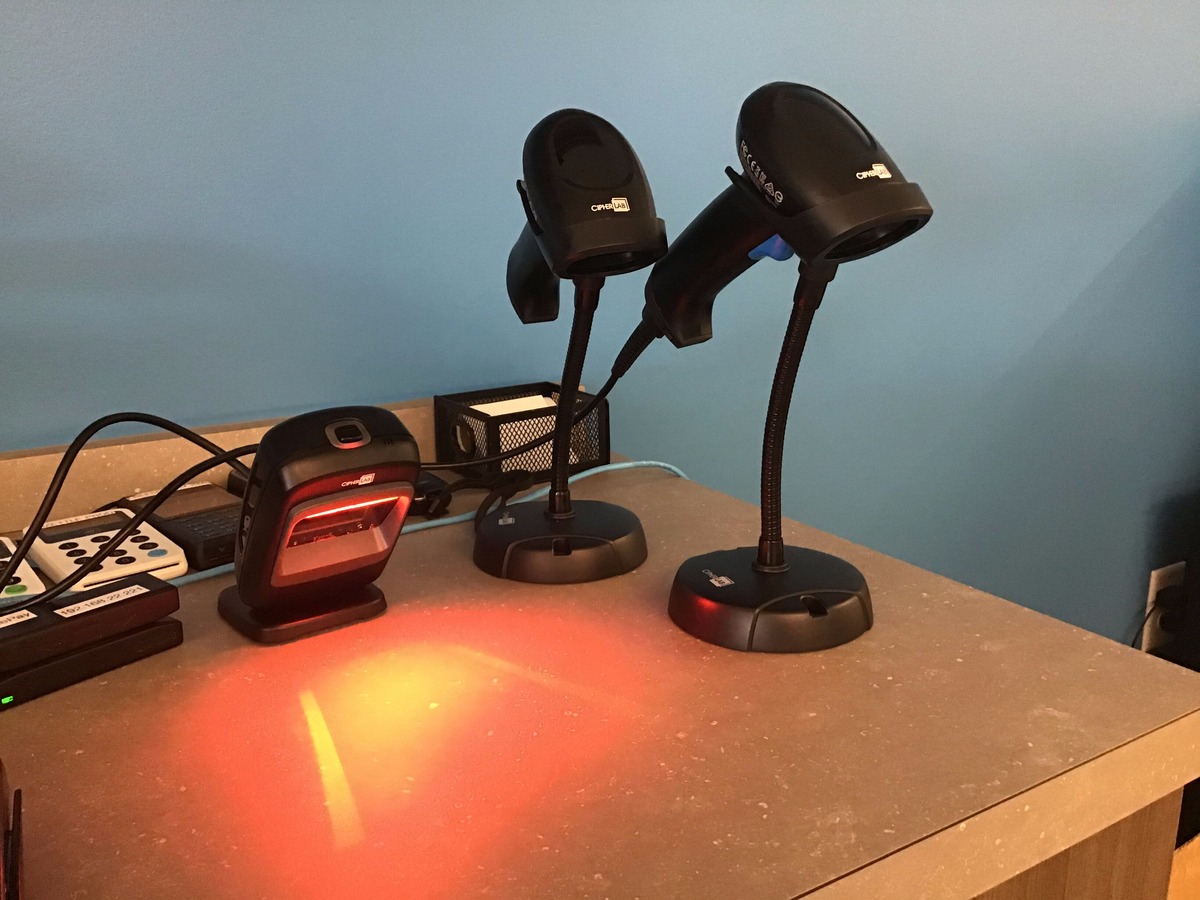
Choosing a Barcode Scanner
When it comes to choosing a barcode scanner, there are a few important factors to consider. Whether you’re a small business owner looking to streamline your inventory management or a tech enthusiast wanting to experiment with barcode scanning, finding the right scanner for your needs is crucial. Here are some key points to keep in mind when making your decision.
1. Barcode Compatibility: The first thing to consider is the type of barcode you will be scanning. Barcodes come in various formats, such as 1D (linear) barcodes, 2D barcodes, and QR codes. Make sure the scanner you choose is compatible with the type of barcodes you will be working with.
2. Wired or Wireless: Barcode scanners come in both wired and wireless options. Wired scanners are typically more affordable and have a direct connection to the device, but they offer limited mobility. On the other hand, wireless scanners allow for greater flexibility and freedom of movement.
3. Scanning Distance: Consider the scanning distance you require. If you need to scan items from a distance, look for a scanner with a longer range. Keep in mind that longer-range scanners may be more expensive.
4. Durability: Depending on your usage, you may need a rugged and durable scanner that can withstand harsh environments. If you’ll be using the scanner in busy, high-traffic areas, look for models that are built to withstand drops, impacts, and spills.
5. Compatibility with System: Ensure that the barcode scanner you choose is compatible with your operating system. Most scanners have drivers or software that need to be installed on your device for proper functioning.
6. Budget: Set a budget for your barcode scanner purchase. Determine the features that are essential for your needs and find a scanner that fits within your price range. Remember to also consider long-term costs such as maintenance and support.
By considering these factors, you can make an informed decision and select a barcode scanner that meets your specific requirements. Once you have chosen the right scanner, you can proceed with setting it up and integrating it into your system.
Connecting the Barcode Scanner to Your Device
Now that you have chosen the right barcode scanner, it’s time to connect it to your device. The steps may vary depending on whether you have a wired or wireless scanner. Follow the instructions below to establish a connection:
Wired Scanner:
- Locate the USB cable that came with your barcode scanner.
- Plug one end of the cable into the barcode scanner and the other end into an available USB port on your device.
- Wait for your device to recognize the scanner. It may automatically install the necessary drivers or prompt you to do so.
- Once the scanner is recognized, it is ready for use. Test it by scanning a barcode to ensure it is functioning properly.
Wireless Scanner:
- Ensure that your device has Bluetooth capabilities.
- Put the barcode scanner into pairing mode. Refer to the scanner’s user manual for instructions on how to do this, as the process may vary depending on the model.
- On your device, go to the Bluetooth settings and search for available devices.
- Select the barcode scanner from the list of available devices.
- Follow any additional on-screen prompts to complete the pairing process.
- Once paired, the scanner should be ready to use. Test it by scanning a barcode to confirm functionality.
It is essential to ensure that the connection between your device and the barcode scanner is stable and reliable. In some cases, you may need to troubleshoot connectivity issues or adjust settings to establish a proper connection.
Now that the barcode scanner is connected to your device, you can move on to installing any necessary software or drivers that are required for optimal functionality.
Installing the Necessary Software
After connecting your barcode scanner to your device, you may need to install additional software or drivers to ensure its proper functionality. The specific requirements vary depending on the type and model of your scanner. Here are the general steps to install the necessary software:
- Refer to the user manual or manufacturer’s website for the barcode scanner.
- Download the latest version of the software or driver that corresponds to your operating system.
- Open the downloaded file and follow the on-screen instructions to start the installation process.
- Read and accept the license agreement if prompted.
- Choose the installation location and wait for the software or driver to be installed.
- Once the installation is complete, restart your device if required.
- Connect your barcode scanner to your device again (if disconnected during the installation process).
- Test the scanner using a barcode to ensure that it is functioning properly.
If you encounter any issues during the installation process, consult the user manual or visit the manufacturer’s support website for troubleshooting steps. It’s also a good idea to check for any software updates or firmware upgrades to keep your barcode scanner up to date with the latest features and enhancements.
By installing the necessary software or drivers, you ensure that your barcode scanner is fully compatible with your operating system and can efficiently decode and transmit barcode information to your device.
Setting Up the Scanner Driver
Once you have installed the necessary software or driver for your barcode scanner, you may need to configure the scanner driver settings to optimize its performance and customize the scanning process. Although the specific steps may vary depending on your scanner model, here are some general guidelines to help you set up the scanner driver:
- Open the scanner driver software on your device.
- Navigate to the configuration settings or preferences section.
- Adjust the scanning parameters according to your specific requirements. This may include settings such as scanning speed, reading angle, symbology options, and triggering method.
- Select the appropriate barcode types that you want the scanner to decode.
- Configure any additional functionality or features, such as data formatting, auto-enter, or prefix/suffix settings.
- Save the changes to apply the updated scanner driver settings.
It is recommended to refer to the user manual or manufacturer’s instructions for your particular barcode scanner model to ensure that you are configuring the settings correctly. Additionally, take some time to experiment with different settings to find the optimal configuration that suits your scanning needs.
Properly setting up the scanner driver allows you to customize the scanning process and improve the efficiency and accuracy of your barcode scanning operations. It gives you greater control over how the scanner reads and interprets barcode data, ensuring seamless integration with your inventory or data management system.
Calibrating the Barcode Scanner
Calibrating your barcode scanner is an essential step to ensure accurate and reliable scanning results. The calibration process may vary depending on the scanner model, but here are some general steps to follow:
- Locate the calibration sheet that came with your barcode scanner. If you don’t have one, check the manufacturer’s website for a downloadable version.
- Place the calibration sheet on a flat surface in a well-lit area.
- Launch the scanner calibration software on your device.
- Select the calibration option within the software interface.
- Follow the on-screen prompts to start the calibration process.
- Place the barcode scanner onto the calibration sheet, ensuring that the scanner window aligns with the calibration targets on the sheet.
- Wait for the scanner to capture the calibration targets and perform the necessary adjustments.
- Once the calibration is complete, you should see a confirmation message or indicator on your device.
- Test the scanner by scanning a barcode to ensure that it is accurately reading and decoding the information.
Calibrating your barcode scanner helps to minimize errors and optimize the accuracy of your scanning operations. It ensures that the scanner is properly aligned and calibrated to read barcodes efficiently, even in challenging lighting conditions or with damaged or distorted barcode labels.
If you encounter any difficulties during the calibration process, refer to the user manual or contact the manufacturer’s support for assistance. They can provide specific instructions and troubleshooting steps for your particular barcode scanner model.
By regularly calibrating your barcode scanner, you can maintain the highest level of scanning performance and ensure that your business processes run smoothly and efficiently.
Testing the Barcode Scanner
After setting up and calibrating your barcode scanner, it’s crucial to test its functionality to ensure accurate scanning and decoding of barcodes. Testing the scanner allows you to verify that it is working correctly and can effectively capture and process barcode information. Here are some steps to follow when testing your barcode scanner:
- Open an application or software that accepts barcode input, such as a spreadsheet or inventory management system.
- Position the scanner in close proximity to a barcode.
- Aim the scanner’s laser or imaging module at the barcode and press the trigger button (or follow the specific scanning method for your scanner).
- Observe the scanner as it reads the barcode. If successful, you should see the barcode information appear in the application or software.
- Repeat the scanning process with different types of barcodes, including 1D, 2D, and QR codes, to ensure the scanner can decode various formats.
- Verify that the scanned information matches the expected data associated with each barcode.
During the testing process, pay attention to the scanner’s speed, accuracy, and responsiveness. It should quickly and accurately capture the barcode data without any delay or misinterpretation.
If the scanner does not read a barcode or if there are discrepancies in the scanned data, you may need to re-check the scanner’s settings, recalibrate if necessary, or troubleshoot any potential issues. Refer to the user manual or contact the manufacturer’s support for guidance on resolving any problems.
Regularly testing your barcode scanner is essential to ensure it remains in optimal working condition. It allows you to identify any potential issues early on and take the necessary steps to maintain or repair the scanner, ensuring uninterrupted scanning operations and accurate data capture in your business processes.
Adjusting Scanner Settings
Adjusting the scanner settings allows you to customize the scanning experience to better suit your specific needs. Depending on your barcode scanner model, you may have access to various settings and parameters that can be modified. Here are some common settings you may consider adjusting:
- Scanning Mode: Choose between the trigger mode, where the scanner only scans when the trigger button is pressed, or continuous mode, where the scanner scans automatically when a barcode is detected.
- Barcode Types: Configure the scanner to recognize specific barcode types, such as UPC, EAN, Code 39, or Code 128. Enable or disable decoding for different barcode formats based on your scanning requirements.
- Scanner Symbology: Adjust the settings related to the barcode symbology, such as enabling or disabling check digit verification, adding or removing prefix or suffix characters, or adjusting the barcode length limitations.
- Interface Options: Manage the communication interface of the scanner, such as USB, Bluetooth, or wireless settings.
- Beeper Volume: Set the volume level or disable the beep sound that is typically produced when a barcode is successfully scanned.
- Auto-Enter: Determine if the scanner automatically enters the scanned barcode data into a text field or application without manual intervention.
- Trigger Delay: Adjust the delay between scans for continuous mode to prevent accidental scanning or to control the scanning speed.
To adjust these settings, consult the user manual or manufacturer’s instructions for your particular barcode scanner model. The adjustments can typically be made through the scanner’s configuration software or by scanning specific configuration barcodes provided by the manufacturer.
By fine-tuning the scanner settings, you can optimize the scanning experience, improve efficiency, and ensure accurate and reliable barcode scanning results aligned with your specific requirements.
Troubleshooting Common Issues
While barcode scanners are typically reliable and efficient, occasional issues may arise that can impede their performance. Understanding how to troubleshoot common problems can help you quickly identify and resolve these issues. Here are some common barcode scanner issues and their possible solutions:
1. Scanner Not Scanning:
- Ensure that the barcode scanner is properly connected to your device.
- Check that the barcode is clean and undamaged.
- Adjust the scanner’s positioning and angle to the barcode to improve scanning accuracy.
- Verify that the scanner’s settings are configured correctly for the specific barcode symbology.
2. Slow Scanning:
- Evaluate the scanning distance and adjust it if necessary, ensuring it falls within the scanner’s specified range.
- Check if there is any interference or obstruction between the barcode scanner and the barcode.
- Verify that the scanner’s settings are optimized for speed, such as adjusting the scanning mode or trigger delay.
3. Inaccurate Scanning:
- Ensure that the barcode scanner is properly calibrated and configured to read the specific barcode symbology.
- Clean the scanner lens or window to remove any dust or debris that may affect scanning accuracy.
- Test the barcode scanner with different barcodes to determine if the issue is specific to a particular type of barcode.
- Check for software or firmware updates for the scanner that may address any known scanning accuracy issues.
4. Connectivity Issues:
- If using a wireless scanner, verify that the scanner is within range of the device it’s connected to.
- Reset the scanner’s Bluetooth connection and re-pair it with the device if necessary.
- Ensure that the correct communication interface is selected and properly configured, such as USB or Bluetooth.
- Check for any hardware or driver conflicts that may be affecting the scanner’s connectivity.
If you encounter persistent issues that you cannot resolve, consult the user manual or contact the manufacturer’s support for further assistance. They can provide specific troubleshooting steps and guidance based on your barcode scanner model.
By effectively troubleshooting common barcode scanner issues, you can minimize downtime, enhance productivity, and ensure smooth and efficient scanning operations in your business.
Maintenance and Cleaning of the Barcode Scanner
To maintain optimal performance and extend the lifespan of your barcode scanner, it is important to regularly clean and perform basic maintenance tasks. By following these guidelines, you can ensure that your scanner remains in excellent working condition:
1. Cleaning:
- Before cleaning the scanner, make sure it is disconnected from the power source or device.
- Use a soft, lint-free cloth lightly moistened with a mild cleaning solution or isopropyl alcohol to gently wipe the scanner’s external surfaces. Avoid using abrasive or harsh cleaning agents that may damage the scanner’s components.
- Carefully clean the scanner window or lens to remove any dirt, dust, or smudges that may affect scanning accuracy. Use a lens cleaning solution and a microfiber cloth for this purpose.
- Periodically clean the keyboard or trigger button if applicable, as these areas are prone to accumulating debris or residues over time.
2. Avoiding Physical Damage:
- Handle the scanner with care and avoid dropping or subjecting it to strong impacts.
- Store the scanner in a secure and safe location when not in use to prevent accidental damage or exposure to extreme temperatures or humidity.
- Use protective cases or pouches to shield the scanner from potential scratches or impacts during transportation.
3. Regular Maintenance:
- Periodically check the scanner’s cables and connectors for any signs of wear or damage. Replace any faulty or frayed cables to ensure reliable connectivity.
- Refer to the user manual for any recommended maintenance tasks specific to your scanner model, such as replacing batteries, cleaning internal components, or performing firmware updates.
By following these maintenance practices, you can keep your barcode scanner in optimal condition and prevent issues that may arise due to dirt, debris, or physical damage. Regular cleaning and proper care will help maintain accurate scanning performance and prolong the lifespan of your barcode scanner.