
How to Access the Reminders App
The Reminders app is a built-in application on the iPhone that provides a convenient way to keep track of tasks, appointments, and important dates. Accessing the Reminders app is easy, and there are a few different methods you can use.
Method 1: Home Screen
To access the Reminders app from your iPhone’s home screen, simply locate the app icon. It looks like a white square with a yellow background and a white checkbox inside. Tap on the app icon to open the Reminders app.
Method 2: Control Center
Another way to access the Reminders app is through the Control Center. To open the Control Center, swipe down from the top-right corner of your iPhone’s screen (on iPhone X or later models) or swipe up from the bottom of the screen (on earlier iPhone models). In the Control Center, you’ll see various shortcuts for different functions, including the Reminders app. Simply tap on the Reminders icon to launch the app.
Method 3: Siri
If you have Siri enabled on your iPhone, you can also use voice commands to access the Reminders app. Simply say “Hey Siri” followed by a command like “Open Reminders” or “Launch Reminders.” Siri will then open the Reminders app for you.
Method 4: Spotlight Search
Spotlight Search is another convenient way to access the Reminders app. To use Spotlight Search, swipe down on your iPhone’s home screen to reveal the search bar. Type “Reminders” in the search bar, and you’ll see the Reminders app appear in the search results. Tap on the app icon to open it.
Now that you know how to access the Reminders app on your iPhone, you can start using it to stay organized and manage your tasks effectively.
Creating a New Reminder
The Reminders app on your iPhone allows you to easily create and manage reminders for your tasks and appointments. Follow these steps to create a new reminder:
1. Open the Reminders app on your iPhone using one of the methods mentioned in the previous section.
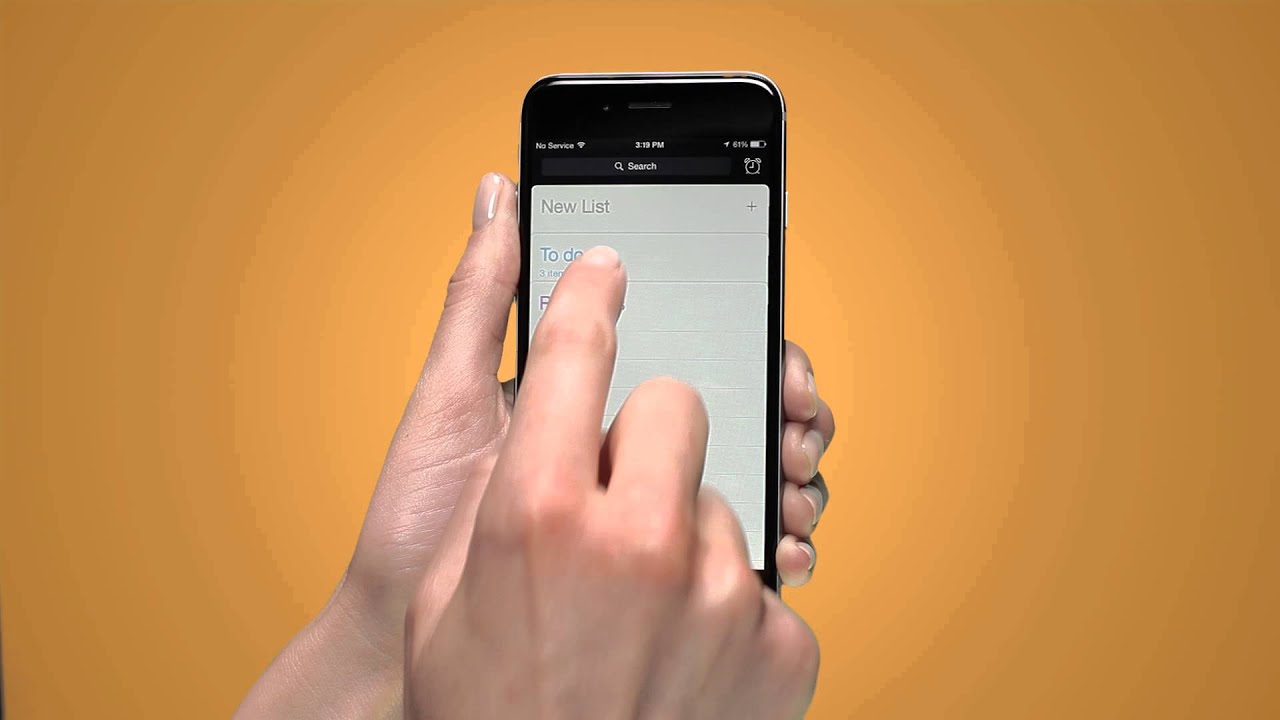
2. Once in the app, you’ll see a list of your existing reminders or an empty screen if you haven’t created any reminders yet.
3. To create a new reminder, tap the “+” (plus) icon located in the top-right corner of the screen. This will open a new reminder entry.
4. In the title field of the reminder, type a brief description of the task or appointment you want to be reminded of. For example, “Buy groceries” or “Doctor’s appointment at 3 PM.”
5. If you want to add additional details to your reminder, you can tap on the “i” (information) icon next to the title field. This will open a menu where you can add a due date, assign a priority, set a reminder to repeat, add notes, and more.
6. Optional: To set a due date for your reminder, tap on the “Remind me on a day” option and select the desired date from the calendar. You can also set a specific time by tapping on the “Remind me at a time” option and selecting the appropriate time.
7. Optional: If you want your reminder to repeat on a regular schedule, tap on the “Does not repeat” option and choose from the available repeat intervals (e.g., Daily, Weekly, Monthly).
8. Optional: Tap on the “Add notes” option to enter any additional information or specific instructions related to the reminder.
9. Once you’ve finished entering the details for your new reminder, tap “Done” to save it.
By following these simple steps, you can easily create new reminders in the Reminders app on your iPhone. This will help you stay organized and ensure that you don’t miss any important tasks or appointments.
Setting a Reminder Date and Time
Setting a specific date and time for a reminder in the Reminders app can help you stay on top of your tasks and appointments. Follow these steps to set a reminder date and time:
1. Open the Reminders app on your iPhone and select the reminder you want to edit or create a new reminder by following the steps outlined in the previous section.
2. In the reminder details screen, tap on the “i” (information) icon next to the title field to open the reminder options.
3. Tap on the “Remind me on a day” option to set the date for your reminder. A calendar will appear, allowing you to select the desired date. Scroll through the calendar or use the search bar at the top to find and choose the specific date.
4. After selecting the date, you can set a specific time for the reminder by tapping on the “Remind me at a time” option. A clock interface will appear, allowing you to select the desired time. Scroll through the hours and minutes or use the search bar at the bottom to set the exact time.
5. Once you’ve set the date and time for your reminder, tap “Done” to save the changes.
Your reminder will now be scheduled for the specified date and time. When the reminder is due, your iPhone will send you a notification to alert you. Depending on your device settings, the notification may appear as an alert, a banner, or in the Notification Center.
Setting reminder dates and times can help you stay organized, prioritize tasks, and ensure that you don’t miss any important deadlines or appointments. By utilizing this feature, you can effectively manage your time and stay on track with your responsibilities.
Adding a Location to a Reminder
The Reminders app on your iPhone allows you to add a location to your reminders, which can be incredibly helpful for tasks or appointments that are location-dependent. By attaching a specific location to a reminder, you’ll receive a notification when you arrive at or leave that location. Here’s how to add a location to a reminder:
1. Open the Reminders app on your iPhone and select the reminder you want to edit or create a new reminder by following the steps outlined in the previous sections.
2. In the reminder details screen, tap on the “i” (information) icon next to the title field to open the reminder options.
3. Scroll down to find the “Remind me at a location” option and tap on it.
4. You’ll be presented with three options: “When I arrive,” “When I leave,” or “At a specific time.” Choose the option that suits your reminder best.
5. If you choose “When I arrive” or “When I leave,” your iPhone will prompt you to select the desired location. You can search for a location using the search bar, choose from your recent locations, or pick a location from your contacts.
6. If you choose “At a specific time,” you’ll have the option to set a specific date and time for your reminder, similar to the steps outlined in the previous section.
7. Once you’ve set the location or time for your reminder, tap “Done” to save the changes.
Now, when you arrive at or leave the specified location, your iPhone will send you a notification for the related reminder. This feature is particularly useful for tasks such as picking up groceries when you’re near a supermarket, or reminding yourself to make a phone call when you leave your workplace.
By adding a location to your reminders, you can ensure that you never miss an important task that is tied to a specific place. This feature can save you valuable time and help you stay organized in your daily life.
Setting a Reminder to Repeat
Setting a reminder to repeat in the Reminders app can be useful for tasks or events that occur on a regular schedule. Instead of creating a new reminder each time, you can set it to repeat automatically. Here’s how you can do it:
1. Open the Reminders app on your iPhone and select the reminder you want to edit or create a new reminder by following the steps outlined in the previous sections.
2. In the reminder details screen, tap on the “i” (information) icon next to the title field to open the reminder options.
3. Scroll down and you’ll find the “Repeat” option. Tap on it to select the desired repeating interval for your reminder.
4. You’ll see different options for repeating, such as “Every day,” “Every week,” “Every month,” or “Every year.” Choose the option that best suits the repeating pattern for your reminder.
5. Specify any additional details for the repetition, such as the days of the week, the specific date of the month, or the number of occurrences. You can also set an end date for the repeating reminder if necessary.
6. Once you’ve set the repeating interval and any additional details, tap “Done” to save the changes.
Now, your reminder will repeat automatically according to the specified repeating interval. For example, if you set it to repeat every day, the reminder will appear again in your list of reminders each day at the designated time.
Setting a reminder to repeat is perfect for tasks such as taking medications, paying bills, or attending weekly meetings. By utilizing this feature, you can ensure that you never forget important recurring tasks and stay organized with your ongoing responsibilities.
Adding Notes to a Reminder
The Reminders app on your iPhone allows you to add notes to your reminders, providing you with the ability to include additional details, instructions, or important information related to a specific task or event. Here’s how you can add notes to a reminder:
1. Open the Reminders app on your iPhone and select the reminder you want to edit or create a new reminder by following the steps outlined in the previous sections.
2. In the reminder details screen, tap on the “i” (information) icon next to the title field to open the reminder options.
3. Scroll down to find the “Notes” field and tap on it.
4. A keyboard will appear, allowing you to enter text and add your notes. You can type directly into the text field to include any relevant information or instructions that you want to associate with the reminder.
5. You can also format your notes by using the formatting options available on the keyboard. For example, you can make text bold or italic, create bulleted or numbered lists, or even add hyperlinks.
6. Once you’ve added your notes, tap “Done” to save the changes.
Adding notes to a reminder can be incredibly useful for providing additional context or instructions to yourself or others who might be involved in the task or event. You can use this feature to include reminders, specific details, URLs, contact information, or any other relevant information that will help you complete the task or be prepared for the event.
By including notes in your reminders, you can ensure that all the necessary information is easily accessible and that nothing important is overlooked. It’s a great way to enhance your organization, productivity, and overall efficiency.
Changing the Priority of a Reminder
The Reminders app on your iPhone allows you to prioritize your tasks and appointments by changing the priority level of each reminder. This feature helps you focus on the most important and urgent tasks first. Here’s how you can change the priority of a reminder:
1. Open the Reminders app on your iPhone and select the reminder you want to edit or create a new reminder by following the steps outlined in the previous sections.
2. In the reminder details screen, tap on the “i” (information) icon next to the title field to open the reminder options.
3. Scroll down and you’ll find the “Priority” option. Tap on it to see the available priority levels.
4. The priority levels are represented by exclamation mark icons, with the highest priority being three exclamation marks and the lowest being one exclamation mark. Choose the appropriate priority level for your reminder by tapping on the corresponding icon.
5. Once you’ve selected the desired priority level, tap “Done” to save the changes.
By changing the priority of a reminder, you can visually distinguish urgent tasks from those that are less important, helping you allocate your time and effort accordingly. This feature allows you to focus on tasks with higher priority and ensure that they are completed promptly.
For example, you can assign a high priority to an important project deadline, while assigning a low priority to a routine task. This way, when viewing your reminders, you can quickly identify which tasks require your immediate attention.
Changing the priority of your reminders can be a valuable tool in organizing your tasks and managing your time effectively. It helps you stay on top of your responsibilities and ensures that tasks are completed in a timely manner.
Marking a Reminder as Completed
When you have finished a task or accomplished a goal, it’s satisfying to mark it as completed in the Reminders app on your iPhone. This allows you to keep track of your progress and stay organized. Here’s how you can mark a reminder as completed:
1. Open the Reminders app on your iPhone and select the reminder you want to mark as completed. You can do this by tapping on the reminder in the list or by finding it within a specific list or folder.
2. Once you have the reminder open, you’ll see a checkbox next to the title of the reminder. Simply tap the checkbox to mark the reminder as completed.
3. When you mark a reminder as completed, it will be visually indicated in the app. Depending on your device settings, completed reminders may be crossed out or displayed in a different format.
4. Additionally, completed reminders may be automatically moved to a separate section or folder within the app, keeping your active reminders organized and easy to find.
Marking a reminder as completed not only helps you keep track of your productivity but also allows you to focus on the tasks that still need your attention. It gives you a sense of satisfaction and accomplishment as you see your completed reminders stack up.
If you accidentally marked a reminder as completed or want to reopen a completed reminder, you can easily unmark it. Simply tap the checkbox again to remove the completed status.
The ability to mark reminders as completed is a valuable feature in the Reminders app. It encourages productivity, provides a visual representation of your progress, and allows you to maintain a clear overview of your tasks and goals.
Sorting and Filtering Reminders
The Reminders app on your iPhone offers various options to sort and filter your reminders, allowing you to customize the way you view and organize your tasks. Sorting and filtering can help you quickly find specific reminders and prioritize your tasks effectively. Here’s how you can sort and filter your reminders:
1. Open the Reminders app on your iPhone.
2. At the top of the app, you’ll see the “Sort” button. Tap on it to reveal the sorting options.
3. You can choose to sort your reminders by “Date,” “Priority,” or “Title.” Select the option that best suits your needs.
4. Once you’ve selected a sorting option, your reminders will be rearranged accordingly. For example, if you choose to sort by date, reminders with earlier due dates will appear first in the list.
5. To further refine your view, you can apply filters to display specific subsets of reminders. Tap on the “Filter” button located next to the “Sort” button.
6. You’ll see various filters such as “Scheduled,” “Flagged,” “All,” or “Completed.” Choose the filter that matches the type of reminders you want to see.
7. Once you’ve selected a filter, only the reminders that meet the criteria will be displayed. For instance, if you choose the “Completed” filter, only completed reminders will be shown.
8. You can combine sorting and filtering options to customize your view even further. For example, you could sort by priority and filter to show only flagged reminders.
Sorting and filtering reminders can help you better manage your tasks and focus on what’s important. By organizing your reminders in a way that makes sense to you, you can prioritize your work and ensure that nothing slips through the cracks.
Whether you prefer to view reminders by due date, priority level, or title, or if you want to filter them based on their status, the Reminders app provides you with the flexibility to tailor your reminders display to your workflow and preferences.
Snoozing Reminders
Have you ever come across a reminder on your iPhone, but you weren’t able to address it at that exact moment? The Reminders app allows you to snooze reminders, giving you the flexibility to postpone them for a specific period of time and be reminded again later. Here’s how you can snooze reminders:
1. Open the Reminders app on your iPhone and locate the reminder you want to snooze.
2. Swipe the reminder to the left to reveal the options menu.
3. Tap on the “Zz” (snooze) icon, or choose the “Snooze” option from the menu that appears.
4. A list of preset snooze options will display, usually ranging from a few minutes to a few hours. Select the duration that best suits your needs. Alternatively, you can tap on “Custom” to enter a specific snooze time.
5. Once you’ve chosen a snooze duration, the reminder will be postponed, and you won’t receive any notifications for the reminder during that time.
6. When the snooze duration ends, you’ll receive a new notification for the reminder, reminding you to address it again.
Snoozing reminders allows you to temporarily reschedule tasks, ensuring that they are not forgotten, while also giving you the flexibility to deal with them at a more convenient time. It’s particularly useful for reminders that require your immediate attention but are not feasible to address right at that moment.
By snoozing reminders, you can stay organized and maintain control over your tasks and priorities. It helps you manage your time effectively and ensures that important actions don’t get overlooked or buried in a busy schedule.
Remember that while snoozing can be a useful tool, it’s important to use it judiciously. Avoid snoozing reminders too frequently, as it may lead to procrastination and the accumulation of unresolved tasks. Use it as a means to temporarily defer non-urgent tasks, while still maintaining a proactive approach towards completing your responsibilities.
Deleting a Reminder
If you no longer need a reminder or want to remove it from your list of tasks, you can easily delete it from the Reminders app on your iPhone. Here’s how you can delete a reminder:
1. Open the Reminders app on your iPhone and locate the reminder you want to delete.
2. Swipe the reminder to the left to reveal the options menu.
3. Tap on the “Delete” button or the trash bin icon.
4. Confirm the deletion by selecting “Delete” again in the pop-up confirmation message.
Alternatively, you can follow these steps to delete a reminder:
1. Open the Reminders app on your iPhone and select the reminder you want to delete.
2. Tap on the “i” (information) icon next to the title field to open the reminder options.
3. Scroll to the bottom of the reminder details screen and tap on the “Delete Reminder” option.
Once you have deleted a reminder, it will be permanently removed from your Reminders app and cannot be undone. However, if you accidentally delete a reminder, there’s a chance you can still recover it if you have a backup of your iPhone using iCloud or iTunes.
Deleting reminders is a useful way to declutter your task list and keep it up to date. It allows you to remove unnecessary or completed reminders, ensuring that you focus on the tasks that are still relevant.
Regularly reviewing and deleting reminders that are no longer needed can help you maintain an organized and efficient task management system. It reduces visual clutter and makes it easier to prioritize and find the reminders that truly matter.
Managing Reminders with Siri
Siri, the virtual assistant on your iPhone, can be a powerful tool for managing your reminders hands-free and with ease. With Siri, you can create, edit, and delete reminders using voice commands, making it a convenient way to stay organized on the go. Here’s how you can manage reminders with Siri:
1. Activating Siri: To activate Siri, simply say “Hey Siri” or press and hold the Home button (for older iPhone models) or the side/power button (for newer iPhone models with Face ID). You’ll see the Siri interface appear, indicating that Siri is ready to assist you.
2. Creating a Reminder: Say “Hey Siri, create a reminder” followed by the details of the reminder. For example, you could say “Hey Siri, create a reminder to buy groceries.” Siri will create the reminder for you.
3. Editing a Reminder: To edit a reminder with Siri, you can say commands like “Hey Siri, change the reminder to buy milk” or “Hey Siri, add a note to the reminder.” Siri will understand your command and make the necessary changes to the reminder.
4. Deleting a Reminder: If you want to delete a reminder, simply say “Hey Siri, delete the reminder” followed by the details of the reminder you want to remove. Siri will confirm the deletion and remove the reminder from your list.
5. Checking Reminders: You can ask Siri to check your reminders by saying something like “Hey Siri, show me my reminders for today” or “Hey Siri, what’s on my calendar?” Siri will provide you with a summary of your upcoming reminders.
6. Completing a Reminder: When a reminder is completed, you can tell Siri to mark it as done. Say “Hey Siri, mark the reminder as completed” followed by the details of the reminder. Siri will mark it as done in the Reminders app.
Managing reminders with Siri offers a hands-free and convenient way to stay on top of your tasks and appointments. Whether you’re driving, cooking, or simply have your hands full, Siri can help you efficiently manage your reminders without touching your iPhone.
Siri works seamlessly with the Reminders app, allowing you to effortlessly create, edit, and delete reminders using natural language commands. This integration makes managing your reminders a breeze and enables you to stay organized with minimal effort.
Syncing Reminders across Devices
The Reminders app on your iPhone offers seamless synchronization across all your Apple devices, allowing you to access and manage your reminders from anywhere. This means that any changes you make on one device will automatically be reflected on all your other devices. Here’s how syncing reminders across devices works:
iCloud Sync:
1. To enable synchronization across your devices, make sure you’re signed in to the same iCloud account on all your Apple devices, including your iPhone, iPad, and Mac.
2. On your iPhone, Open the Settings app and tap on your Apple ID at the top of the screen.
3. Tap on “iCloud” and ensure that the toggle next to “Reminders” is enabled. This will enable iCloud syncing for your reminders.
4. Repeat steps 2 and 3 on your other Apple devices to ensure they are also set up to sync reminders through iCloud.
Syncing Behavior:
1. When you create a new reminder or make changes to an existing reminder on one device, the updates are immediately saved to iCloud.
2. iCloud then pushes these changes to all your other devices connected to the same iCloud account.
3. This synchronization happens seamlessly and automatically, ensuring that your reminders are always up to date across all your devices.
With reminders syncing across devices, you can easily access and manage your tasks from your iPhone, iPad, or Mac, depending on your convenience and the device you have on hand. Any updates you make on one device will be instantly reflected on all your other devices, providing a consistent and unified experience.
Syncing reminders across devices is especially useful when you need to switch between devices throughout the day. For example, if you create a reminder on your iPhone while on the go, you can later view and edit that reminder on your iPad or Mac when you are back at your desk.
By leveraging the power of iCloud synchronization, the Reminders app ensures that you have access to your tasks and appointments no matter which Apple device you’re using. This makes it easier to stay organized, stay on top of your commitments, and effectively manage your time.