
Tools Needed
Removing the SIM card from your iPhone requires a few simple tools that you may already have at home. Before you begin the process, ensure you have the following items ready:
- Sim card removal tool or a small paperclip
That’s it! You only need one tool to safely remove the SIM card from your iPhone.
The sim card removal tool is a small pin-like object that usually comes with your iPhone when you first purchase it. If you don’t have the tool, don’t worry. A small paperclip can serve the same purpose.
Now that you have the necessary tools, you’re ready to start removing the SIM card from your iPhone. It’s a quick and simple process that can be done in just a few steps.
Remember to handle your iPhone and the SIM card with care to avoid any damage. Now, let’s move on to the step-by-step guide on how to remove the SIM card from your iPhone.
Step 1: Locate the SIM Card Slot
The first step in removing the SIM card from your iPhone is to locate the SIM card slot. Depending on the model of your iPhone, the location of the SIM card slot may vary slightly.
If you have an iPhone 4 or 4s, you’ll find the SIM card slot on the right side of the device. Look for a small round hole near the edge of the phone.
For iPhone 5, 5c, and 5s models, the SIM card slot is located on the right side of the phone, near the power button. Again, you’ll see a small round hole that indicates the location of the slot.
With the release of iPhone 6 and newer models, Apple moved the SIM card slot to the right side of the device. However, the slot is now a rectangular tray that you can easily eject using a SIM card removal tool or a paperclip.
Take a close look at your iPhone and locate the correct SIM card slot based on its model. Once you’ve identified the slot, you’re ready to move on to the next step.
It’s important to power off your iPhone before proceeding with the SIM card removal process. This will ensure that no data is lost or corrupted during the procedure. Now, let’s explore how to power off your iPhone in step 2.
Step 2: Power Off Your iPhone
Before removing the SIM card from your iPhone, it’s crucial to power off the device to prevent any potential damage or loss of data. Follow these steps to power off your iPhone:
- Press and hold the power button, which is typically located on the right side or top of your iPhone, depending on the model.
- After a few seconds, you’ll see a “Slide to Power Off” option appear on your screen.
- Slide the power icon from left to right to turn off your iPhone.
Once your iPhone is completely powered off, you can proceed to the next step of removing the SIM card.
Ensure that your iPhone is powered off before continuing to avoid any potential damage or interference during the SIM card removal process.
Now that your iPhone is powered off, let’s move on to step 3, where we will discuss how to insert a SIM card removal tool or a paperclip into the designated slot.
Step 3: Insert a SIM Card Removal Tool or Paperclip
In this step, you will need to insert a SIM card removal tool or a paperclip into the designated slot to eject the SIM card tray. Here’s how to do it:
- Locate the small round hole or rectangular slot on the side of your iPhone, near the SIM card slot.
- If you have a SIM card removal tool, insert the thin end of the tool into the hole or slot. Apply gentle pressure until you feel a slight resistance.
- If you don’t have a SIM card removal tool, you can straighten out a small paperclip and insert one end into the hole or slot. Be careful not to apply too much pressure.
Both the SIM card removal tool and the paperclip will serve the same purpose of triggering the SIM card tray release mechanism. Choose whichever option you have readily available.
Once you have inserted the tool or the paperclip, you’re ready to proceed to the next step, where we will learn how to eject the SIM card tray from your iPhone.
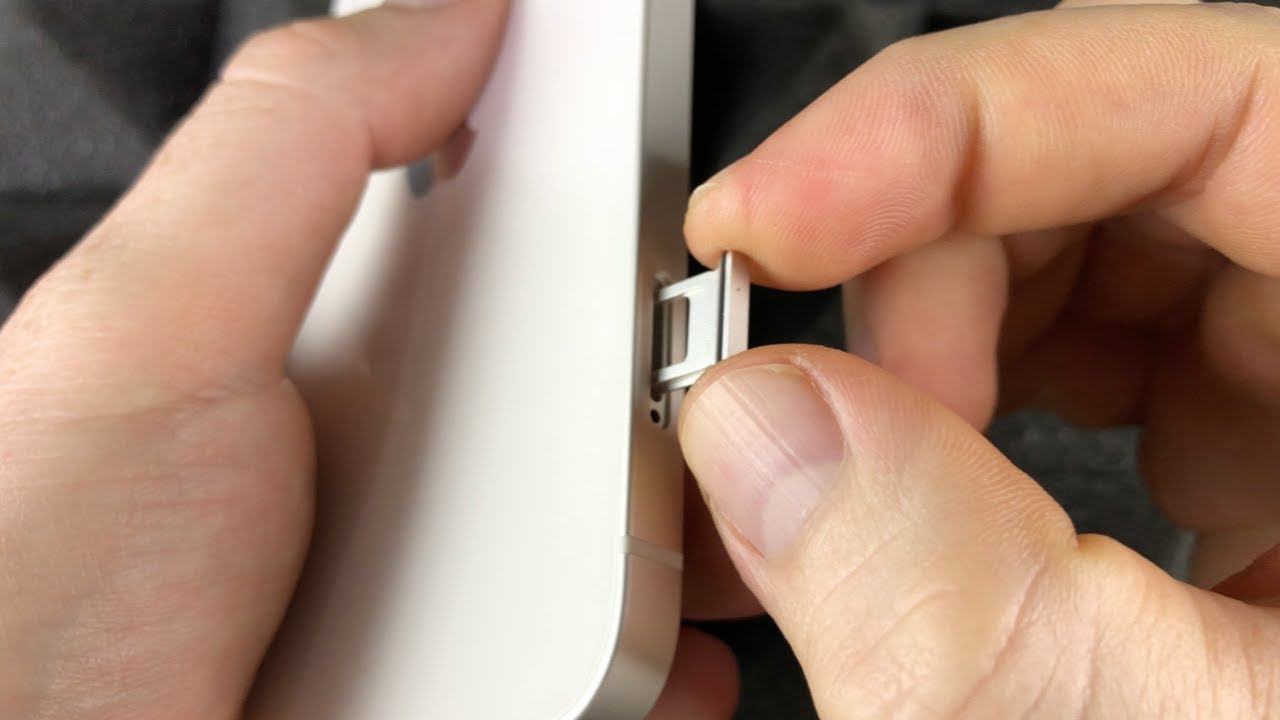
Step 4: Eject the SIM Card Tray
Now that you have inserted a SIM card removal tool or a paperclip into the designated slot, it’s time to eject the SIM card tray from your iPhone. Follow these steps:
- Gently push the tool or paperclip further into the slot until you feel a small click or a slight resistance.
- Apply steady pressure to the tool or paperclip to push the tray out.
- The SIM card tray will pop out slightly, allowing you to pull it out completely.
Be cautious while ejecting the SIM card tray to avoid applying excessive force, as this may damage your iPhone or the tray itself. Take your time and be gentle throughout the process.
Once you have successfully ejected the SIM card tray, proceed to the next step to learn how to remove the SIM card from your iPhone.
Step 5: Remove the SIM Card
With the SIM card tray ejected, you can now remove the SIM card from your iPhone. Follow these simple steps:
- Take a careful look at the SIM card tray to identify the position of the SIM card.
- Gently lift the SIM card from the tray using your fingers or a pair of tweezers.
- Inspect the SIM card for any damage or debris. If there are any issues, such as a bent or dirty SIM card, clean or replace it as necessary.
It’s important to handle the SIM card with care, as any damage to the delicate chip on the card can affect its functionality. Avoid touching the metallic contacts on the card and keep it in a safe place while not in use.
Now that you have successfully removed the SIM card from your iPhone, we can move on to the next step: reinserting the SIM card tray.
Step 6: Reinsert the SIM Card Tray
After removing the SIM card from your iPhone, it’s time to reinsert the SIM card tray. Follow these steps:
- Take the SIM card tray you had previously ejected.
- Align the tray with the slot in your iPhone, ensuring that the tray fits smoothly into place.
- Gently push the tray back into the slot until it is fully inserted and flush with the side of your iPhone.
Make sure that the SIM card tray is properly seated in the slot to ensure a secure connection between the SIM card and your iPhone’s hardware.
If you encounter any resistance while reinserting the tray, double-check its alignment to avoid any damage or jamming.
Now that you have successfully reinserted the SIM card tray, proceed to the next step to learn how to power on your iPhone again.
Step 7: Power On Your iPhone
Now that you have completed the process of removing and reinserting the SIM card from your iPhone, it’s time to power it back on. Follow these steps:
- Press and hold the power button, typically located on the right side or top of your iPhone, depending on the model.
- After a few seconds, the Apple logo will appear on the screen, indicating that your iPhone is powering on.
- Release the power button and wait for your iPhone to finish booting up.
Once your iPhone has powered on, it will search for a cellular signal and establish a connection with your network provider using the newly inserted SIM card.
Ensure that you have a working network connection and test your iPhone to confirm that it is functioning properly after reinserting the SIM card.
Congratulations! You have successfully completed the process of removing and reinserting the SIM card from your iPhone.
Throughout this guide, we have covered each step in detail to assist you in safely and correctly performing this task. Remember, if you encounter any difficulties or uncertainties, it is always recommended to consult the official Apple support documentation or reach out to an authorized service center for assistance.
Thank you for using this guide, and we hope it has helped you successfully remove and reinsert the SIM card from your iPhone.
Additional Tips and Troubleshooting
While removing and reinserting the SIM card from your iPhone is generally a straightforward process, there are a few additional tips and troubleshooting steps you can follow to ensure a smooth experience:
- If you encounter resistance when inserting the SIM card removal tool or paperclip, double-check that you are inserting it into the correct slot and not applying excessive force.
- If the SIM card tray does not eject, make sure you are using the proper tool or paperclip and that you are inserting it correctly.
- If your iPhone does not power on after reinserting the SIM card and pressing the power button, try charging it for a few minutes and then attempt to power it on again.
- If you experience issues with your network connection after reinserting the SIM card, check your iPhone’s settings to ensure that your cellular data and network settings are properly configured.
- If you accidentally damage your SIM card or lose it, contact your network provider to request a replacement SIM card.
- If you are unsure about the process or encounter any difficulties, it is always advisable to consult the official Apple support documentation or seek assistance from an authorized service center.
By following these additional tips and troubleshooting steps, you can overcome any potential challenges and ensure a successful SIM card removal and reinsertion process.
Remember, it is important to handle your iPhone and SIM card with care throughout the entire process to avoid any damage. Take your time, be patient, and follow the instructions precisely to ensure a safe and successful outcome.
We hope these tips and troubleshooting steps have been helpful to you. Should you have any further questions or concerns, do not hesitate to seek assistance from a professional or reach out to your network provider for support.