
Why Remove the Facial Interface?
The facial interface of the Oculus Rift S headset is the part that comes into direct contact with your face during VR gaming sessions. Over time, sweat, dirt, and oils can accumulate on the interface, leading to discomfort and potentially affecting the overall hygiene of your VR experience. Removing and cleaning the facial interface is essential to maintain a fresh and comfortable gaming environment.
Regularly removing the facial interface allows you to keep it clean and free from any buildup. This not only helps to prevent any unpleasant odors but also ensures that your skin doesn’t come into contact with any dirt or bacteria that may have accumulated over time.
Another reason to remove the facial interface is to replace or upgrade it with a different accessory. Some VR users prefer aftermarket facial interfaces that offer different materials, padding, or airflow options to enhance comfort during longer gaming sessions. Removing the original facial interface makes it possible to install these alternatives and customize your VR experience to your preferences.
Additionally, removing the facial interface can be beneficial if you want to share your Oculus Rift S headset with others. By removing and thoroughly cleaning the interface between users, you maintain a higher level of hygiene. This is particularly important if you regularly have friends or family members using your VR headset, as it helps to minimize the transfer of bacteria or allergens from one person to another.
Overall, removing the facial interface of the Oculus Rift S headset is a simple yet important maintenance task. It helps to keep your VR experience comfortable, hygienic, and customizable according to your preferences. Whether you want to clean the interface, replace it with a different accessory, or ensure hygiene when sharing the headset, knowing how to remove the facial interface is an essential skill for every Oculus Rift S owner.
Tools Needed
Before you begin removing the facial interface of your Oculus Rift S headset, gather the following tools:
- Microfiber cloth or soft cleaning cloth
- Isopropyl alcohol or disinfectant wipes
- Small flathead screwdriver or plastic spudger
The microfiber cloth or soft cleaning cloth is essential for gently wiping away any dirt or debris on the facial interface. It helps to ensure a clean and hygienic surface for your next VR session.
Isopropyl alcohol or disinfectant wipes are useful for effectively disinfecting the facial interface. They help to eliminate any bacteria or germs that may have accumulated on the surface. If you use disinfectant wipes, make sure they are safe to use on the material of the facial interface.
A small flathead screwdriver or plastic spudger can be handy for releasing the tabs on the facial interface. This will enable you to detach the interface from the VR headset easily and safely.
Having these tools ready before starting the process ensures that you have everything you need to successfully remove and clean the facial interface of your Oculus Rift S headset. With the proper tools in hand, you can proceed with confidence, knowing that you are equipped to maintain the hygiene and comfort of your VR gaming experience.
Step 1: Unplug the Oculus Rift S
Before removing the facial interface of your Oculus Rift S headset, it’s essential to unplug the device to ensure your safety and prevent any accidental damage. Follow these steps to unplug the Oculus Rift S:
- Shut down any games or applications running on your computer that are connected to the Oculus Rift S.
- Locate the cable that connects the headset to your computer. It is usually a thick, black cable with a USB and DisplayPort connector.
- Gently disconnect the cable from your computer by holding the connector and pulling it straight out. Avoid pulling on the cable itself to prevent any damage.
- Disconnect the other end of the cable from the headset. The connector is located on the left side of the headset, near the strap.
- Once the cable is disconnected, carefully set it aside, ensuring it is not tangled or resting on any sharp objects that may cause damage.
By unplugging the Oculus Rift S, you eliminate the risk of accidental tugs or twists while removing the facial interface. This step helps to protect the headset and its components from unnecessary strain or potential damage.
Now that you have safely unplugged your Oculus Rift S, you can proceed to the next step, which involves locating the tabs on the facial interface.
Step 2: Locate the Tabs on the Facial Interface
Once you have unplugged your Oculus Rift S headset, the next step is to locate the tabs on the facial interface. These tabs secure the interface to the headset and need to be released to remove the interface. Follow these instructions to find the tabs:
- Hold the Oculus Rift S headset with both hands, one hand on each side.
- Look for the bottom part of the facial interface, where it meets the padding around the nose area.
- Gently examine the bottom edge of the facial interface to locate the tabs. There are typically two tabs, one on each side, that need to be released to remove the interface.
- The tabs are small and made of plastic. They may be slightly recessed or flush with the interface.
Take a moment to familiarize yourself with the location and appearance of the tabs before proceeding to the next step. This will help ensure a smooth and efficient removal process.
Once you have located the tabs, you’re ready to move on to the next step, which involves gently pulling the tabs to release the facial interface from the Oculus Rift S headset.
Step 3: Gently Pull the Facial Interface tabs
Now that you have located the tabs on the facial interface of your Oculus Rift S headset, it’s time to gently pull them to release the interface. Follow these steps to safely remove the interface:
- Using your thumb and index finger, grip one of the tabs firmly but not too forcefully.
- Apply gentle pressure and pull the tab away from the headset, towards the outside. You may feel a slight resistance, but avoid using excessive force to prevent any damage to the interface or headset.
- Repeat the same process with the other tab on the opposite side.
- As you pull both tabs, the facial interface will start to detach from the Oculus Rift S headset.
It’s important to note that the facial interface tabs require a delicate touch. Applying too much force or pulling at an extreme angle can cause unnecessary strain and potentially damage the tabs or interface. Take your time and ensure a smooth and controlled pulling motion to safely release the facial interface.
With the tabs pulled, you have successfully loosened the facial interface from the headset. Now, you can proceed to the next step, which involves fully removing the facial interface.
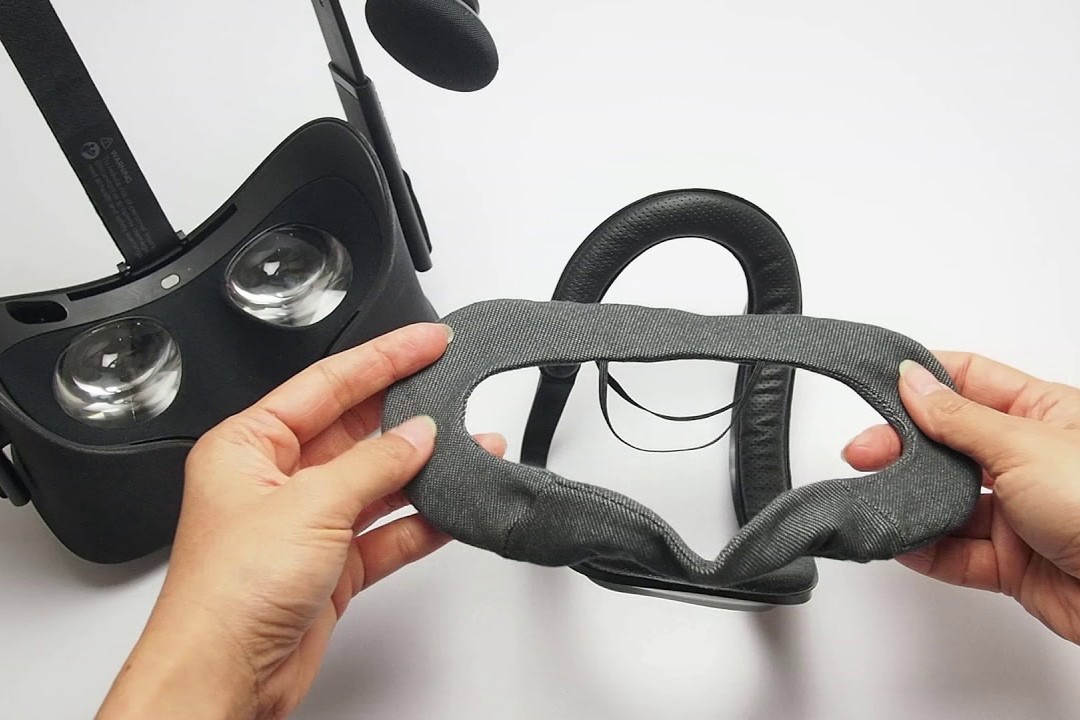
Step 4: Remove the Facial Interface
With the tabs of the facial interface pulled, you can now proceed to remove the interface from your Oculus Rift S headset. Follow these steps to safely detach the interface:
- With one hand holding the headset, use your other hand to carefully lift the facial interface away from the headset.
- Gently pull the facial interface forward, away from your face, ensuring a smooth and controlled motion.
- Continue pulling until the facial interface is fully detached from the headset.
- Set the facial interface aside in a clean and safe location.
During the removal process, be mindful of any cables or connectors that may be attached to the interface. Take care not to inadvertently pull or strain these cables to avoid any potential damage.
With the facial interface removed, you now have access to the inner parts of the Oculus Rift S headset. This not only allows you to clean the interface more effectively but also presents an opportunity to replace or upgrade it with a different accessory if desired.
Before moving on to the next steps, take a moment to inspect the facial interface for any signs of damage. If you notice any cracks, tears, or other issues, it may be necessary to replace the interface before reattaching it.
Now that the facial interface is removed, you can proceed to the next step, which involves cleaning the facial interface to ensure optimal hygiene and comfort for your VR gaming sessions.
Step 5: Cleaning the Facial Interface
Once you have removed the facial interface from your Oculus Rift S headset, it’s time to clean it thoroughly. Follow these steps to ensure optimal hygiene and comfort for your VR gaming sessions:
- Start by using a microfiber cloth or soft cleaning cloth to gently wipe the surface of the facial interface. This will help remove any dust or debris that may have accumulated.
- If there are any stubborn stains or spots on the interface, dampen the cloth with a small amount of isopropyl alcohol or use disinfectant wipes specifically designed for electronic devices. Make sure to follow the manufacturer’s instructions for using disinfectant wipes.
- Gently wipe the entire surface of the facial interface, paying careful attention to areas that come into contact with your face. This includes the nose area, forehead, and cheek pads.
- If there are any hard-to-reach areas or crevices on the interface, use a cotton swab dampened with isopropyl alcohol to clean them thoroughly.
- Allow the facial interface to air dry completely before reattaching it to the Oculus Rift S headset. This will help ensure that no moisture remains on the surface.
It’s important to note that the facial interface should not be submerged in water or soaked. This can cause damage to the material and potentially affect the functionality of the interface.
Regularly cleaning the facial interface is essential to maintain optimal hygiene and comfort during your VR gaming sessions. By removing sweat, dirt, and oils, you can prevent any unpleasant odors and ensure a clean and enjoyable experience.
Now that you have thoroughly cleaned the facial interface, you can proceed to the next step, which involves reattaching the interface to your Oculus Rift S headset.
Step 6: Reattaching the Facial Interface
With the facial interface of your Oculus Rift S headset cleaned and dried, it’s time to reattach it. Follow these steps to securely fasten the interface back onto the headset:
- Hold the Oculus Rift S headset with one hand, ensuring a firm grip.
- Align the tabs on the facial interface with the corresponding slots on the headset. Make sure the tabs are properly lined up before proceeding.
- Gently press the facial interface against the headset from the bottom, near the nose area, and gradually work your way up towards the top. Apply even pressure to ensure a secure fit.
- Continue pressing until you hear a click or feel a noticeable snap, indicating that the interface is properly attached.
- Give the facial interface a gentle tug to ensure it is securely in place and does not easily come off.
It’s important to note that you should not use excessive force when reattaching the facial interface. Applying too much pressure or using a jerking motion can damage the interface or the tabs on the headset.
Once the facial interface is reattached, take a moment to inspect it and ensure that it is aligned correctly and sits flush against the headset. This will ensure optimal comfort and a secure fit during your VR gaming sessions.
Now that the facial interface is securely reattached, you can proceed to the final step, which involves plugging in your Oculus Rift S headset and preparing for your next immersive VR experience.
Step 7: Plug in the Oculus Rift S
Now that you have successfully reattached the facial interface to your Oculus Rift S headset, it’s time to plug it back in and prepare for your next VR experience. Follow these steps to ensure a proper connection:
- Locate the cable that you had previously disconnected from the headset.
- With the connector in hand, carefully insert it into the port on your Oculus Rift S headset. Make sure it is aligned correctly and insert it straight in without forcing it.
- Gently push the connector in until you feel it click into place, indicating a secure connection.
- On the other end of the cable, connect the USB and DisplayPort connectors to the corresponding ports on your computer.
- Make sure the connections are secure and fit tightly to prevent any data or power interruptions.
Once the Oculus Rift S headset is properly plugged in, you can power up your computer and launch the Oculus software. Follow the on-screen instructions to set up your VR experience and calibrate the headset if necessary.
It’s important to note that when using the Oculus Rift S, it’s recommended to have a dedicated USB 3.0 port available for the best performance. Additionally, ensure that your computer meets the system requirements to run the Oculus Rift S smoothly.
With your Oculus Rift S headset plugged in, you are now ready to immerse yourself in the captivating world of virtual reality. Enjoy your VR gaming sessions with a clean and comfortable facial interface!