
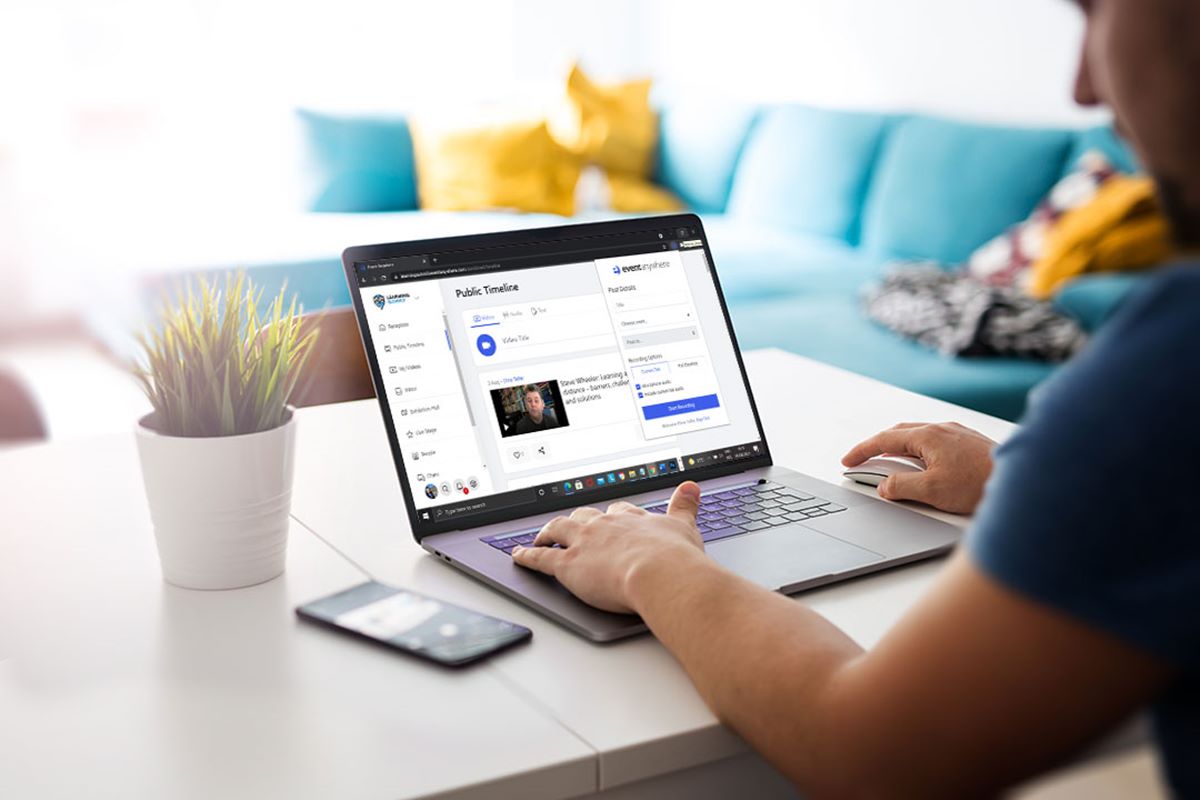
Choosing the Right Screen Recording Software
Recording your laptop screen can be incredibly useful for a variety of purposes, such as creating tutorials, capturing gameplay, or conducting online presentations. However, choosing the right screen recording software can greatly impact the quality and ease of your recordings. Here are some key factors to consider when selecting the best software for your needs:
- Features: Look for software that offers the features you require. Some common features include the ability to record audio along with your screen, customizable hotkeys for easy control, the option to annotate and highlight during recording, and the ability to edit and export your recordings.
- User-Friendly Interface: Opt for software that has an intuitive and user-friendly interface. This will make it easier for you to navigate and control the recording process, saving you time and frustration in the long run.
- Compatibility: Ensure that the software is compatible with your specific operating system, whether it’s Windows, macOS, or Linux. Check if it supports the version of your operating system to avoid any compatibility issues.
- Video and Audio Quality: The quality of your recorded videos and audio is crucial. Look for software that supports high-definition recording (at least 1080p) and offers options to adjust the frame rate, bitrate, and audio settings for optimal clarity.
- File Format Options: Consider the file formats supported by the software. It’s best to choose software that offers a wide range of output formats, such as MP4, AVI, or MOV, to ensure compatibility with different devices and platforms.
When choosing screen recording software, it’s also a good idea to read reviews and comparisons from other users. This can provide valuable insights into the software’s performance, reliability, and customer support. Additionally, many software providers offer free trials or basic versions of their products, allowing you to test them out before making a purchase.
Remember, the right screen recording software will not only meet your current needs but also provide flexibility for future projects. Take your time to evaluate different options and select the software that best aligns with your requirements and budget.
Adjusting the Recording Settings
Before you start recording your laptop screen, it’s important to adjust the recording settings to ensure optimal results. Here are some key settings you should consider:
- Resolution: Determine the resolution at which you want to record your screen. Higher resolutions, such as 1080p or 4K, will produce sharper and more detailed videos, but keep in mind that larger resolutions will also result in larger file sizes.
- Frame Rate: Choose the frame rate for your recording. The standard frame rate is 30 frames per second (FPS), which provides smooth and natural-looking videos. However, for capturing fast-action content, you might want to increase the frame rate to 60 FPS or higher.
- Bitrate: The bitrate of your recording affects the quality of the video. Higher bitrates result in better quality but also larger file sizes. Balancing the bitrate will depend on your needs and the available storage space on your laptop.
- Audio Source: Decide whether you want to record audio along with your screen. If you’re recording a tutorial or giving a presentation, capturing audio can enhance the viewer’s experience. Ensure that you select the appropriate audio source, such as your laptop’s built-in microphone or an external microphone if you have one connected.
- File Format: Choose the file format in which you want to save your recorded videos. Popular formats include MP4, AVI, and MOV. Consider the compatibility of the file format with different devices and platforms.
- File Saving Location: Determine the destination folder where your recorded videos will be saved. Select a location on your laptop’s storage that has sufficient space to accommodate your recordings.
Most screen recording software will provide options to adjust these settings. It’s recommended to experiment with different configurations to find the optimal combination for your specific needs. Keep in mind that higher settings (resolution, frame rate, bitrate) may require more processing power from your laptop, so ensure that your device meets the requirements for smooth recording.
Remember, adjusting the recording settings allows you to capture the screen exactly the way you want it, whether you’re aiming for high-quality videos or smaller file sizes. Take the time to explore and customize these settings based on your requirements and the purpose of your screen recording.
Setting Up Your Audio
When recording your laptop screen, having high-quality and clear audio can greatly enhance the viewer’s experience. Here are some essential steps to follow for setting up your audio:
- Select the Audio Source: Determine the source from which you want to capture audio. Depending on your setup and preferences, you can choose to record audio from your laptop’s built-in microphone, an external microphone, or an audio input device connected to your laptop.
- Test and Adjust the Volume: Before you begin the screen recording, ensure that the audio input level is set appropriately. Use the audio settings on your laptop or the specific audio control panel of your recording software to adjust the volume. Test the audio level by speaking or playing a sample sound to ensure it is clear and balanced.
- Consider Using Headphones: If you’re recording in a noisy environment or want to capture a specific audio source without any interference, it’s best to use headphones. This helps minimize background noise and provides better audio isolation.
- Eliminate External Interference: To achieve professional-sounding audio, it’s crucial to minimize external noise and interference. Close any unnecessary applications or windows on your laptop, turn off fans or air conditioning units, and ensure that you are in a relatively quiet environment.
- Monitor Audio Levels: During the recording process, keep an eye on the audio levels to ensure they are not too low or too high. Some screen recording software provides audio level indicators or visualizers that display the volume in real-time. Adjust the input volume accordingly to prevent distorted or inaudible audio.
- Consider Post-Processing: After you’ve finished recording, you may want to further enhance the audio quality through post-processing. Use audio editing software, such as Audacity or Adobe Audition, to remove background noise, improve clarity, or apply effects if needed.
Remember, clear and high-quality audio is as important as the visual aspect of your screen recording. By following these steps and ensuring optimal audio setup, you can provide an engaging and professional experience for your viewers.
Selecting the Screen Area to Be Recorded
When recording your laptop screen, it’s essential to choose the specific area that you want to capture. By selecting the appropriate screen area, you can focus on the relevant content and avoid unnecessary distractions. Here are some methods to help you select the screen area for recording:
- Full Screen Recording: If you want to capture your entire laptop screen, choose the full-screen recording option. This is particularly useful when you want to showcase software demonstrations, presentations, or gameplay that requires capturing the entire screen.
- Custom Screen Size: Some screen recording software allows you to manually select a specific screen size or aspect ratio. This feature is handy when you want to record a specific window, a defined region, or a specific application. Simply drag and adjust the recording frame to encompass your desired area.
- Multi-Monitor Support: If you have multiple monitors connected to your laptop, ensure that you select the correct screen to record. Most recording software gives you the option to choose which monitor you wish to capture or allows you to record multiple screens simultaneously.
- Exclude Unnecessary Elements: Before you start recording, consider excluding any elements on your screen that are not relevant to the content you want to capture. Close unnecessary applications, remove any personal information or sensitive data, and hide any desktop icons or system notifications that may distract viewers.
- Ensure Proper Aspect Ratio: If you plan to share your recorded videos on specific platforms or devices, it’s important to maintain the correct aspect ratio. For example, if you’re recording content for YouTube, ensure that you select a screen area with a 16:9 aspect ratio to avoid any cropping or distortion when uploading.
- Preview and Adjust: Before you start recording, take advantage of the preview mode in your screen recording software. This allows you to see how the selected screen area will be captured and make any necessary adjustments before you begin.
By carefully selecting the screen area to be recorded, you can ensure that your viewers focus on the most important content without any unnecessary visual distractions. Take the time to experiment with different screen selection methods and choose the one that best suits your recording needs.
Starting and Stopping the Screen Recording
Once you have selected the screen area you want to capture, it’s time to start and stop the screen recording process. Here are the essential steps to follow:
- Launch the Screen Recording Software: Open the screen recording software on your laptop. Depending on the software you are using, you may need to click on a specific button, access it from the menu, or use a keyboard shortcut to activate the recording function.
- Adjust Recording Settings (if necessary): Before you start recording, ensure that the recording settings, such as resolution, frame rate, and audio source, are configured according to your preferences. Make any necessary adjustments to optimize the recording quality.
- Prepare Your Screen: Set up the content or application you want to record on your laptop screen. Ensure that everything is arranged and organized as desired.
- Start the Recording: When you’re ready to begin recording, click the “Start Recording” button or use the designated keyboard shortcut. The screen recording software will start capturing the selected screen area in real-time.
- During the Recording: While recording, you can freely interact with your laptop and perform actions as needed. Whether you’re giving a tutorial, demonstrating software, or showing gameplay, make sure to speak clearly and concisely to provide valuable context or commentary. Monitor the recording indicators or interface provided by the software to ensure that the recording is progressing smoothly.
- Stop the Recording: When you’ve finished capturing the desired content, click the “Stop Recording” button or use the designated keyboard shortcut to end the recording. The screen recording software will finalize the video and save it to the specified location on your laptop.
It’s important to note that some screen recording software may allow you to pause and resume the recording process instead of stopping and starting a new recording each time. This can be useful when you need to take breaks or make edits during a long recording session.
With these steps, you can easily start and stop the screen recording process, ensuring that you capture the desired content seamlessly. Familiarize yourself with the specific functions and keyboard shortcuts of your chosen screen recording software for a more efficient recording experience.
Using Hotkeys for Easy Control
Hotkeys are keyboard shortcuts that provide quick and convenient control over various functions of your screen recording software. By utilizing hotkeys, you can streamline the recording process and perform actions without having to navigate through the software’s interface. Here’s how you can use hotkeys for easy control during screen recording:
- Start and Stop Recording: Assign a hotkey to initiate and terminate the screen recording. This allows you to quickly begin capturing your screen without the need to click on buttons or access menus.
- Pause and Resume Recording: Some screen recording software offers a pause and resume function. Assigning hotkeys for these actions enables you to temporarily halt the recording when needed and resume seamlessly without creating separate video files.
- Mute and Unmute Audio: To control the audio during recording, assign hotkeys for muting and unmuting the microphone or audio source. This comes in handy when you want to provide commentary during specific segments or temporarily silence any unwanted background noise.
- Toggle Webcam Overlay: If you want to include a webcam overlay in your screen recording, assign hotkeys to easily toggle it on or off. This allows you to show or hide your webcam feed without interrupting the recording process.
- Highlight or Draw on Screen: Many screen recording software options offer annotation tools for highlighting or drawing on the screen during recording. Assign hotkeys to activate and deactivate these tools, making it effortless to emphasize important points or draw the viewer’s attention to specific areas.
- Quickly Save and Export: Assign a hotkey combination to swiftly save and export your recorded video. This ensures that you can wrap up the recording process efficiently and move on to the next step, whether it’s editing, sharing, or archiving the file.
Most screen recording software allows customization of hotkeys within their settings or preferences. Take the time to familiarize yourself with these options and select hotkeys that are comfortable for you to use and remember during the recording process.
By utilizing hotkeys, you can maintain a smooth and uninterrupted recording experience. Experiment with different hotkey combinations and configurations, and find the setup that best suits your recording needs. With practice, hotkeys will become second nature, allowing you to effortlessly control your screen recording software with speed and efficiency.
Annotating and Highlighting During Recording
Adding annotations and highlights to your screen recording can greatly enhance the clarity and understanding of your content. They allow you to emphasize important points, provide additional context, and draw attention to specific elements on the screen. Here’s how you can annotate and highlight during your recording:
- Annotation Tools: Look for screen recording software that offers built-in annotation tools such as text boxes, arrows, shapes, or freehand drawing. These tools enable you to add text, graphics, or drawings directly onto the screen while recording.
- Focus on Key Information: Use annotations to highlight crucial information, key steps, or important sections on the screen. This helps guide your viewers’ attention and ensures they don’t miss any critical details.
- Provide Explanatory Text: Add text annotations to provide explanations or additional information about the content on the screen. This can be particularly useful when demonstrating complex processes or presenting statistics or data.
- Use Arrows and Callouts: Arrows and callouts can help direct your viewers’ attention to specific areas of the screen. They are particularly effective when you want to point out specific elements or steps within a larger interface or document.
- Highlight and Underline: Highlighting or underlining important sections of text or specific content can make them stand out and emphasize their significance. This helps viewers quickly identify and focus on key details.
- Draw Attention with Shapes: Use shapes, such as rectangles or circles, to enclose or frame important sections of the screen. This technique draws attention to specific areas or elements, making them more easily noticeable.
- Show Mouse Cursor: Enable the option to display your mouse cursor in the recording. This makes it easier for viewers to follow your actions and understand the steps you’re performing on the screen.
During the recording process, it’s important to use annotations and highlights strategically and sparingly. Overusing them can clutter the screen and distract viewers from the main content. Keep it clear, concise, and focused on the most important aspects of your presentation or demonstration.
Experiment with different annotation tools and techniques provided by your screen recording software to find the ones that best suit your recording style and enhance the viewer’s understanding of your content. With practice, you’ll become more proficient in using annotations and highlights effectively to create engaging and informative screen recordings.
Editing Your Recorded Video
Once you have finished the screen recording, you may want to edit the recorded video to further enhance its quality, trim unnecessary parts, add transitions, or include additional effects. Here are some key steps to consider when editing your recorded video:
- Select a Video Editing Software: Choose a video editing software that suits your needs and skill level. There are various options available, ranging from beginner-friendly tools to more advanced software with a wide range of features.
- Import Your Recorded Video: Import the recorded video file into the video editing software of your choice. Most video editing software allows you to drag and drop the video file directly into the timeline or use the “Import” function to browse and select the file from your computer’s storage.
- Trim and Cut: Review the recorded video and identify sections that you want to remove or trim. Use the editing software’s tools to cut out unwanted parts, ensuring that your final video includes only the essential content you want to share.
- Add Transitions and Effects: Enhance the visual appeal of your video by adding transitions between different sections or applying effects such as filters, overlays, or text animations. These elements can make your video more engaging and professional-looking.
- Apply Audio Enhancements: Utilize the audio editing features of the software to improve the sound quality of your video. You can adjust the volume levels, remove background noise, add background music, or synchronize audio recordings from external sources.
- Include Captions or Subtitles: If needed, add captions or subtitles to your video to make it more accessible to a wider audience. Video editing software often provides tools for adding text overlays and syncing them with the audio.
- Preview and Fine-Tune: Take the time to preview your edited video to ensure that everything flows smoothly and looks as expected. Make any necessary adjustments, such as reordering scenes, refining transitions, or correcting any visual or audio discrepancies.
- Export or Render: Once you are satisfied with the edits, export or render your video in the desired format and quality. Choose an output setting that best suits your intended use, whether it’s for online sharing, presentation, or further post-production.
Remember, the goal of editing your recorded video is to enhance its overall quality and ensure that it effectively communicates your message. Use the available editing tools and features creatively, but also be mindful not to overdo or distract from the main content. Strive for a polished and professional video that resonates with your target audience.
Keep in mind that the editing process may require some time and practice to master. Don’t be afraid to experiment, learn from tutorials, and explore different techniques to refine your video editing skills over time.
Saving and Exporting Your Recording
After you have finished editing your recorded video, it’s time to save and export your final product. The saving and exporting process ensures that your video is in a format and quality suitable for your intended use. Here’s how you can save and export your recording:
- Choose the Output Format: Determine the format in which you want to save your video. Most video editing software offers a range of output formats, such as MP4, AVI, MOV, or WMV. Consider the compatibility of the format with your intended playback devices or platforms.
- Select the Quality Settings: Adjust the quality settings of your exported video. This includes selecting the resolution, frame rate, and bitrate to ensure that your video meets your desired specifications. Higher quality settings generally result in larger file sizes.
- Choose a Storage Location: Select the destination folder where you want to save your exported video. Choose a location on your computer or external storage device that has sufficient space to accommodate the video file.
- Specify the Filename: Give your video a meaningful and descriptive filename to help you easily identify it in the future. Consider including relevant keywords or information to make it easier to search or organize.
- Preview the Exported Video: Before finalizing the export, take the time to preview the exported video file. Check for any visual or audio issues that may have occurred during the export process. Make adjustments if necessary.
- Start the Export Process: Initiate the export process by clicking the “Export” or “Render” button in your video editing software. The software will then start converting your edited video into the specified format and saving it to the designated storage location.
- Monitor the Export Progress: Depending on the length and complexity of your video, the export process may take some time. Monitor the progress bar of the export to estimate the remaining time. Avoid interrupting or shutting down your computer during the export to prevent any potential file corruption.
- Review the Exported Video: Once the export is complete, verify that the exported video matches your intended specifications. Play it back using a video player to ensure that the quality and content are as expected.
By following these steps, you can save and export your recording with the appropriate format, quality, and storage location. Keep in mind that the export time may vary depending on the size and complexity of your video, as well as the processing power of your computer.
After exporting, you can further share, distribute, or upload your video to various platforms or devices to reach your intended audience. Consider making backups of your exported videos to ensure that you always have a copy in case of loss or unexpected circumstances.
Tips and Tricks for Better Screen Recording
Screen recording is a powerful tool for creating informative and engaging content. To enhance your screen recording skills and produce high-quality videos, here are some tips and tricks to keep in mind:
- Plan and Prepare: Before you start recording, plan out the structure and content of your video. Have a clear outline or script in mind to ensure a smooth and organized recording process.
- Optimize Your Computer’s Performance: Close unnecessary applications and processes on your computer to allocate more resources to the screen recording. This helps prevent lag or stuttering in the recording, ensuring a smoother playback experience.
- Use a Clean Desktop: Keep your desktop clutter-free and organized, removing any unnecessary icons or files that may distract viewers from the main content.
- Use a Stable Screen Recorder: Choose a reliable and stable screen recording software to minimize potential technical issues during recording. Read reviews, try out demos, and ensure that the software is compatible with your operating system.
- Check Your Microphone: Test your microphone and audio settings before recording to ensure clear and high-quality audio. Adjust the microphone position and settings to reduce background noise and capture your voice effectively.
- Record in a Quiet Environment: Find a quiet space for recording to minimize unwanted background noise. Inform others in your surroundings about your recording session to avoid interruptions.
- Consider Using a Script: If you’re recording a tutorial or a presentation, using a script can help you deliver your content more effectively. It ensures that you cover all the necessary points and helps maintain a consistent flow.
- Utilize Keyboard Shortcuts: Learn and utilize keyboard shortcuts to control your screen recording software easily. This allows for smooth and efficient recording without interrupting your workflow.
- Record in Short Segments: Instead of recording lengthy videos in a single take, consider breaking them down into shorter segments. This makes it easier to manage and edit the content, while also allowing for more flexibility and control over the final product.
- Practice and Review: Take the time to practice your recording techniques and review your recordings. Pay attention to areas where you can improve, such as clarity of instructions, pacing of speech, or minimizing mistakes or pauses.
- Engage with Your Audience: Maintain a conversational and engaging tone during your recording to connect with your audience. Ask questions, provide examples, and encourage feedback to make your content more interactive and valuable.
- Continuously Learn and Improve: Keep exploring new features and techniques offered by your screen recording software. Stay updated with the latest trends and best practices in screen recording to refine your skills and deliver even better content.
By implementing these tips and tricks, you can elevate the quality of your screen recording videos and engage your audience more effectively. Remember, practice makes perfect, so keep recording, reviewing, and refining your approach to achieve the best results.
Troubleshooting Common Issues
While screen recording can be a valuable tool, it’s not uncommon to encounter certain issues along the way. Understanding how to troubleshoot common problems can save you time and frustration. Here are some common issues that may arise during screen recording and their potential solutions:
- Lag or Poor Performance: If you experience lag or performance issues during recording, try closing any unnecessary applications or processes running in the background to free up system resources. You can also adjust the recording settings to lower the resolution, frame rate, or bitrate. Additionally, consider updating your graphics card drivers to ensure optimal performance.
- Audio Sync Issues: If you notice that the audio and video are not synchronized in your recordings, adjust the audio settings of your screen recording software. You can try adjusting the audio delay to align it with the video or use a separate audio recording device synchronized externally.
- Background Noise: To reduce background noise during recording, make sure you are in a quiet environment and consider using a high-quality external microphone. Position the microphone closer to your mouth and adjust the input levels to capture your voice clearly while minimizing ambient noise.
- Insufficient Storage Space: If you encounter an error stating that you have insufficient storage space, delete unnecessary files or transfer them to an external storage device to free up space. You can also change the default recording location to a drive with more available storage.
- Recording Interruptions: If your screen recording gets interrupted by notifications, pop-up windows, or other interruptions, enable “Do Not Disturb” mode on your computer to prevent interruptions during recording. Disable or adjust any notification settings that may appear during your recording session.
- Recording Glitches or Artifacts: If you notice graphical glitches or artifacts in your recordings, ensure that your graphics drivers are up to date. Additionally, try adjusting the recording settings to a lower resolution or bitrate to reduce the strain on your system and minimize potential artifacts.
- Software Compatibility: If you encounter issues with your screen recording software, check for updates or contact the software provider’s support team for assistance. In some cases, certain software or hardware configurations may not be fully compatible, so it’s helpful to review the system requirements before using a new screen recording software.
Remember, troubleshooting techniques may vary depending on the specific screen recording software you are using. It’s also beneficial to consult the software’s documentation, user forums, or online resources for specific troubleshooting tips and solutions.
By addressing these common issues, you can overcome obstacles that may arise during screen recording and ensure a smoother and more successful recording experience.
Alternative Methods for Recording Your Laptop Screen
While screen recording software is the most common method for capturing your laptop screen, there are alternative approaches you can consider. These methods can be useful if you’re unable to install or use screen recording software or if you’re looking for different options to meet your specific needs. Here are some alternative methods for recording your laptop screen:
- Built-in Recording Tools: Some operating systems, such as Windows 10 and macOS, have built-in screen recording tools. These tools allow you to capture your screen without the need for third-party software. Explore the screen recording features available in your operating system to see if they meet your requirements.
- Web-Based Screen Recorders: There are web-based screen recording applications available that allow you to capture your screen directly from your browser. These tools typically require no installation and can be accessed through a web page. Keep in mind that web-based tools may have limitations in terms of features and recording quality.
- External Hardware Capture: If you’re looking for professional-grade screen recording or need to record high-quality gameplay, consider using external hardware capture devices. These devices connect to your laptop and capture the screen output directly, bypassing the need for software. They often offer advanced features and options for capturing and recording at high resolutions and frame rates.
- Mobile Device Screen Mirroring: If you want to record the screen of your mobile device, you can use screen mirroring tools that allow you to display your mobile screen on your laptop. By using screen recording software on your laptop, you can then capture the mirrored mobile screen.
- Virtual Machine Screen Recording: If you’re working within a virtual machine environment, you may be able to utilize screen recording tools within the virtual machine software itself. Investigate the features and options available in your virtual machine software to determine if screen recording capabilities are present.
- Remote Access and Control: Remote access and control tools, such as TeamViewer or AnyDesk, allow you to access and control your laptop from another device. By using screen recording software on the device you’re accessing from, you can capture and record the screen of your laptop remotely.
These alternative methods for recording your laptop screen offer flexibility and options depending on your specific circumstances and preferences. However, it’s important to note that each method comes with its own advantages and limitations. Consider your needs, the desired recording quality, and the available resources when choosing the most suitable method for your screen recording.
Experiment with different approaches and find the method that best aligns with your requirements, technical setup, and overall preferences. Remember to follow any applicable licensing or copyright laws when recording content from your laptop screen.