
Overview of NEO and Trezor Wallet
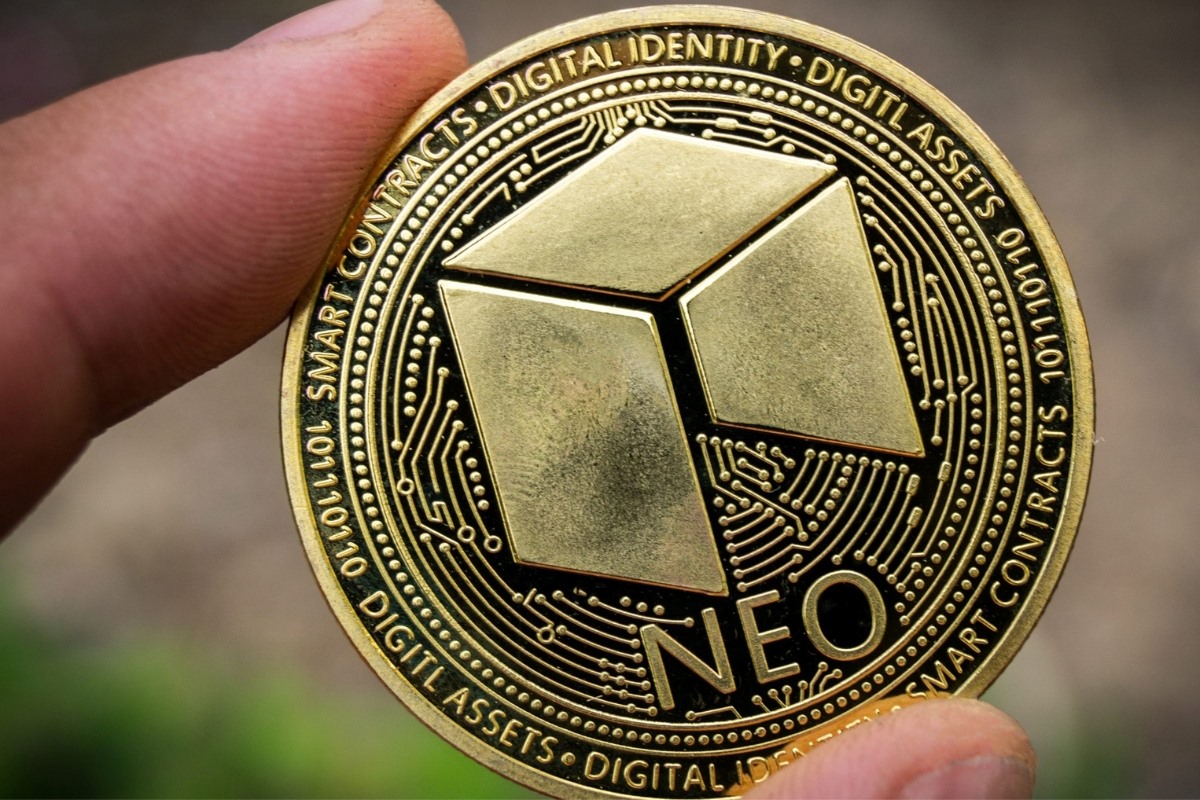
NEO is a popular cryptocurrency that offers a unique platform for building and deploying decentralized applications (dApps). Launched in 2014, NEO aims to revolutionize the way digital assets are managed and exchanged. With its focus on smart contracts and digital identities, NEO has gained a reputation as the “Chinese Ethereum.”
One of the key considerations for any cryptocurrency holder is the security and safe storage of their digital assets. This is where Trezor Wallet comes into play. Trezor Wallet is a hardware wallet that offers an offline storage solution for cryptocurrencies. It provides an extra layer of protection by keeping your private keys offline, away from the reach of hackers.
By combining the power of NEO and the security of Trezor Wallet, you can ensure the safe storage and management of your NEO holdings. With Trezor Wallet, you have full control over your private keys, making it a reliable and trusted option for NEO investors.
Setting up Trezor Wallet is a straightforward process that involves a few simple steps. Once you have your Trezor Wallet up and running, you can proceed to install the NEO app and transfer your NEO tokens to your Trezor Wallet.
By utilizing Trezor Wallet’s intuitive interface and secure infrastructure, you can easily access, manage, and send your NEO tokens with peace of mind. Additionally, Trezor Wallet supports multiple cryptocurrencies, allowing you to store a diverse portfolio of digital assets in one secure location.
Managing your NEO holdings on Trezor Wallet is an efficient and user-friendly experience. You can track your NEO balance, view transaction history, and monitor the performance of your holdings directly from the Trezor Wallet interface.
Keeping your Trezor Wallet secure is of utmost importance. Trezor Wallet includes robust security features, such as a PIN code and passphrase, to protect your funds from unauthorized access. Additionally, Trezor Wallet provides backups and recovery options, ensuring that you can regain access to your funds in case of loss or theft.
In the following sections, we will guide you through the process of setting up your Trezor Wallet, installing the NEO app, transferring NEO to your Trezor Wallet, and utilizing the various features offered by Trezor Wallet for managing your NEO holdings.
Step 1: Setting up your Trezor Wallet
Before you can start using your Trezor Wallet to store NEO, you need to set it up. Here’s a step-by-step guide on how to do it:
1. Purchase a Trezor Wallet: Visit the official Trezor website or authorized resellers to purchase a Trezor hardware wallet. Make sure to buy from a trusted source to avoid counterfeit products.
2. Unbox and connect your Trezor: Once you receive your Trezor Wallet, unbox it and connect it to your computer via the provided USB cable.
3. Install the Trezor Bridge: To interact with your Trezor Wallet, you’ll need to install the Trezor Bridge software. Visit the Trezor website and follow the instructions to download and install the Trezor Bridge for your operating system.
4. Set up your Trezor Wallet: Open the Trezor Wallet interface on your computer and click on “Create new wallet.” Follow the prompts on the screen to choose a PIN code, recover seed, and verify your device.
5. Write down your recovery seed: During the setup process, you’ll be given a recovery seed. This seed is crucial for restoring access to your wallet in case your device is lost, stolen, or damaged. Write down your recovery seed and store it in a secure and offline location.
6. Verify your recovery seed: Trezor will display a random set of words from your recovery seed. Verify that the words are correct by entering them in the correct order on your computer. This ensures that you have accurately written down your recovery seed.
7. Create a strong passphrase (optional): Trezor offers an additional security feature called a passphrase. This is an extra layer of protection for your wallet. If you choose to set up a passphrase, make sure it is strong and unique.
8. Set a label for your Trezor: Give your Trezor Wallet a label that helps you identify it. This can be useful if you own multiple Trezor devices or have different wallets for various cryptocurrencies.
9. Update firmware: It is vital to keep your Trezor Wallet firmware up to date to ensure the latest security features and improvements. If there is a firmware update available, follow the instructions provided by Trezor to update your device.
10. Your Trezor Wallet is ready: Once you have completed these steps, your Trezor Wallet is ready to be used. You can now move on to the next steps of installing the NEO app and transferring your NEO tokens to your Trezor Wallet.
Setting up your Trezor Wallet is a crucial first step in ensuring the security of your NEO tokens. By following these steps carefully, you can have peace of mind knowing that your digital assets are stored in a safe and reliable hardware wallet.
Step 2: Installing the NEO app on your Trezor Wallet
Once you have set up your Trezor Wallet, the next step is to install the NEO app on your device. The NEO app allows you to access, manage, and send your NEO tokens securely. Follow these simple steps to install the NEO app:
1. Open the Trezor Wallet interface: Connect your Trezor Wallet to your computer and open the Trezor Wallet interface.
2. Enter your PIN code: Enter your PIN code on the device to unlock your Trezor Wallet.
3. Navigate to the Trezor Wallet App Manager: In the Trezor Wallet interface, click on the “App Manager” tab located on the top navigation bar.
4. Find and install the NEO app: Scroll down the list of available apps in the App Manager until you find the “NEO” app. Click on the “Install” button next to the NEO app to begin the installation process.
5. Confirm the installation on your Trezor Wallet: Follow the instructions on the Trezor Wallet interface, which will prompt you to confirm the installation on your Trezor device. Verify the details displayed on your Trezor device’s screen and press the corresponding button to allow the installation.
6. Wait for the installation to complete: The installation process may take a few moments. Wait for the progress bar to reach 100% and display the “Installed” status for the NEO app.
7. Verify the installation: Once the installation is complete, the NEO app will appear in the App Manager as “Installed.” You can now access the NEO app on your Trezor Wallet.
Congratulations! You have successfully installed the NEO app on your Trezor Wallet. This app will enable you to securely interact with your NEO tokens and perform various operations, such as checking your balance, viewing transaction history, and sending NEO tokens.
Installing the NEO app on your Trezor Wallet ensures that your NEO tokens remain securely stored offline, away from the risks of online wallets. With the combination of Trezor’s hardware security and the NEO app, you can confidently manage your NEO holdings and engage in the NEO ecosystem with peace of mind.
Step 3: Accessing the NEO app on your Trezor Wallet
Now that you have installed the NEO app on your Trezor Wallet, it’s time to access it and start managing your NEO tokens. Follow these steps to access the NEO app on your Trezor Wallet:
1. Connect your Trezor Wallet: Connect your Trezor Wallet to your computer using the provided USB cable.
2. Open the Trezor Wallet interface: Launch the Trezor Wallet interface on your computer. If you have already set up your Trezor Wallet, you should see the main dashboard.
3. Enter your PIN code: Enter your PIN code on the Trezor device to unlock your wallet.
4. Select your Trezor device: If you have multiple Trezor devices connected, ensure that you select the correct device from the list displayed on the Trezor Wallet interface.
5. Navigate to the NEO app: In the Trezor Wallet interface, click on the “Accounts” tab located on the top navigation bar. You will see a list of supported cryptocurrencies. Find and click on the “NEO” option to access the NEO app.
6. Confirm the app on your Trezor device: Follow the instructions displayed on the Trezor device’s screen to confirm that you want to access the NEO app. Verify the details shown on the Trezor device and press the corresponding button to proceed.
7. Start using the NEO app: Once you have confirmed the app on your Trezor device, the Trezor Wallet interface will display the NEO app. You can now view your NEO balance, transaction history, and manage your NEO tokens.
By accessing the NEO app through your Trezor Wallet, you can securely interact with your NEO tokens. The private keys required for accessing and signing transactions with your NEO tokens are stored offline on your Trezor device, ensuring that they are protected from potential threats.
It’s important to note that while the Trezor device securely stores your private keys, you still need to follow best practices for online security. This includes ensuring that your computer is free from malware, using strong and unique passwords, and being cautious when entering sensitive information on websites.
With the NEO app on your Trezor Wallet, you can confidently manage your NEO tokens without compromising on security. Take advantage of the features offered by the NEO app to stay up to date with your NEO holdings and engage in the exciting world of NEO and decentralized applications.
Step 4: Transferring NEO to your Trezor Wallet
Now that you have set up and accessed the NEO app on your Trezor Wallet, you can proceed with transferring your NEO tokens to your wallet. Follow these steps to transfer NEO to your Trezor Wallet:
1. Generate your NEO address: In the NEO app on your Trezor Wallet, click on the “Receive” tab. You will be presented with a NEO address, which is a unique identifier for your wallet. Click on the “Show full address” button to display the complete address.
2. Copy your NEO address: Select and copy the generated NEO address to your clipboard. Take care to double-check the accuracy of the address to avoid any errors.
3. Navigate to your existing NEO wallet: If you already have NEO tokens in another wallet or exchange, log in to that account and locate the option to send or withdraw funds.
4. Enter your Trezor NEO address: In the withdrawal or send funds section of your existing NEO wallet, paste the previously copied NEO address from your Trezor Wallet. Specify the amount of NEO you want to transfer.
5. Review and confirm the transaction: Take a moment to review the transaction details, including the correct recipient address and the amount of NEO being transferred. Once you have confirmed that all details are correct, initiate the transaction and wait for it to be processed.
6. Monitor the transaction: After initiating the transfer, keep an eye on the transaction status. Transactions on the NEO blockchain typically take a short amount of time to confirm, but it may vary depending on network congestion.
7. Verify the transaction on your Trezor Wallet: Once the transaction is confirmed on the NEO blockchain, you will see the transferred NEO tokens appearing in your Trezor Wallet’s NEO app. You can view your updated balance in the “Accounts” tab of the app.
When transferring NEO to your Trezor Wallet, it’s essential to ensure that you are using the correct NEO address generated by your wallet. Double-checking the address before initiating the transaction can prevent the loss of funds due to human error.
Remember that the NEO blockchain requires a small amount of GAS to process transactions. This GAS is separate from the NEO tokens themselves and is used to pay for the computational resources needed to run the network. Make sure to have a small amount of GAS in your wallet to cover transaction fees.
By transferring your NEO tokens to your Trezor Wallet, you benefit from the increased security and peace of mind provided by a hardware wallet. Your private keys are securely stored offline, protecting your assets from potential online threats.
Transferring NEO to your Trezor Wallet is a straightforward process, allowing you to have complete control over your NEO holdings and engage in the NEO ecosystem with confidence.
Step 5: Managing your NEO holdings on Trezor Wallet
Once you have transferred your NEO tokens to your Trezor Wallet, you can easily manage and monitor your holdings directly from the NEO app. Here are some key features and functionalities for managing your NEO holdings on Trezor Wallet:
1. Check your NEO balance: In the “Accounts” tab of the NEO app, you can view your current NEO balance. This allows you to keep track of the value of your NEO holdings and monitor any changes in real-time.
2. View transaction history: The NEO app on your Trezor Wallet provides a comprehensive transaction history for all your NEO tokens. You can easily review past transactions, including the date, time, sender, and recipient addresses.
3. Token swaps and airdrops: NEO regularly conducts token swaps and airdrops, where they distribute new tokens or swap existing ones. With your NEO holdings on Trezor Wallet, you can participate in these events and easily claim any new tokens or swapped assets.
4. Secure storage and backup: Trezor Wallet ensures the secure storage of your NEO tokens by keeping your private keys offline. Additionally, Trezor Wallet provides backup and recovery options, enabling you to restore access to your funds in case of a lost or damaged device.
5. Multi-currency support: Trezor Wallet supports multiple cryptocurrencies, allowing you to manage a diverse portfolio of digital assets in one place. You can easily switch between different cryptocurrencies using the intuitive interface.
6. Account labeling: Trezor Wallet allows you to label your NEO account with a custom name or description. This feature is useful if you have multiple accounts or want to keep track of specific addresses for organizational purposes.
7. Staking and voting: The NEO blockchain supports staking, where token holders can participate in network consensus and earn rewards. With Trezor Wallet, you can stake your NEO tokens and vote in the governance process, influencing the direction of the NEO ecosystem.
8. Stay updated with Trezor firmware: It’s essential to keep your Trezor firmware up to date to benefit from the latest security features and improvements. Regularly check for firmware updates and follow the instructions provided by Trezor to ensure you have the latest version installed.
By managing your NEO holdings on Trezor Wallet, you have complete control over your assets, with the added advantage of enhanced security and protection against potential online threats. The Trezor interface provides a user-friendly and intuitive experience, making it easy to navigate and access the features you need.
Remember to keep your Trezor Wallet passphrase and recovery seed in a secure and offline location. These are crucial for restoring access to your wallet in case of any unforeseen circumstances.
With Trezor Wallet, you can confidently manage your NEO holdings, engage in the NEO ecosystem, and explore the exciting world of decentralized applications built on the NEO platform.
Step 6: Sending NEO from your Trezor Wallet
Once you have managed your NEO holdings and identified the need to send NEO tokens to another wallet or exchange, you can do so easily using your Trezor Wallet. Follow these steps to send NEO from your Trezor Wallet:
1. Open the NEO app on your Trezor Wallet: Connect your Trezor Wallet to your computer and navigate to the NEO app. Enter your PIN code on the device to unlock the wallet.
2. Select the correct account: If you have multiple NEO accounts in your Trezor Wallet, ensure that you have selected the account containing the NEO tokens you want to send.
3. Click on the “Send” tab: In the NEO app interface, click on the “Send” tab to initiate the process of sending NEO tokens.
4. Enter the recipient’s NEO address: Provide the recipient’s NEO address in the designated field. Double-check the address to ensure its accuracy, as sending NEO to an incorrect address can result in permanent loss of funds.
5. Specify the amount of NEO to send: Indicate the amount of NEO you want to send to the recipient. Take note of any minimum or maximum limits imposed by the recipient or exchange you are sending the tokens to.
6. Review transaction details: Take a moment to review the transaction details, including the recipient’s address and the amount of NEO being sent. Verify that the information is correct before proceeding.
7. Confirm the transaction on your Trezor device: Follow the instructions displayed on the Trezor device’s screen to confirm the transaction. Review the transaction details and press the corresponding button on your device to confirm the transfer.
8. Wait for the transaction to be processed: Once you have confirmed the transaction on your Trezor device, it will be broadcasted to the NEO network. Transactions on the NEO blockchain usually take a short amount of time to be confirmed, but it may vary depending on network congestion.
9. Monitor the transaction status: While the transaction is being processed, you can monitor its status on the blockchain. You can use blockchain explorers like neoscan.io or other NEO blockchain monitoring tools to track the progress of your transaction.
10. Verify the successful completion of the transaction: Once the transaction is confirmed on the blockchain, you can verify its completion by checking the recipient’s account balance or transaction history. You will also see a deduction in your Trezor Wallet’s NEO balance.
By following these steps, you can securely send NEO tokens from your Trezor Wallet to another wallet or exchange. The Trezor device’s offline storage of private keys ensures that your tokens are protected from potential online threats during the transaction process.
It is crucial to double-check the recipient’s NEO address and transaction details before confirming the transaction on your Trezor device. Any errors in the address or the amount can result in permanent loss of funds.
With Trezor Wallet, you have peace of mind knowing that your NEO tokens are stored safely and that you have full control over their movement. Enjoy the convenience of securely sending NEO tokens while maintaining the highest standards of security.
Step 7: Keeping your Trezor Wallet secure
Ensuring the security of your Trezor Wallet is of utmost importance to protect your NEO tokens and other digital assets. Here are some essential measures to keep your Trezor Wallet secure:
1. Choose a strong PIN code: Set a strong PIN code for your Trezor Wallet that is difficult to guess. Avoid using common patterns or easily guessable numbers. Consider using a combination of numbers and letters to create a robust PIN code.
2. Enable passphrase protection: Trezor Wallet offers the option to set up a passphrase, an additional layer of security for your wallet. Enable passphrase protection and choose a strong, unique passphrase that is not easily guessable. Remember to store the passphrase securely in an offline location.
3. Update your firmware: Keep your Trezor Wallet firmware up to date by installing the latest firmware releases. Firmware updates often include important security enhancements and bug fixes. Regularly check for firmware updates on the Trezor website and follow the provided instructions to update your device.
4. Be cautious with firmware updates: When updating your Trezor Wallet firmware, always ensure that you are on the official Trezor website and download firmware updates from trusted sources. Avoid clicking on suspicious links or downloading firmware from unknown websites to prevent malware infections.
5. Keep your recovery seed secure: The recovery seed is an essential component of your Trezor Wallet. Write down the recovery seed that was generated during the initial setup process. Store it in a safe and offline location, like a fireproof safe or a secure bank deposit box. Never expose your recovery seed to anyone and avoid storing it digitally or on cloud storage.
6. Protect against physical theft: Store your Trezor Wallet in a safe and secure place when not in use. Consider using a hardware security case or a lockable drawer to further protect your device from physical theft.
7. Use official software and apps: When accessing your Trezor Wallet, only use official software and apps provided by Trezor. Avoid using third-party apps or solutions as they may compromise the security of your wallet.
8. Be mindful of phishing attacks: Watch out for phishing attacks where scammers attempt to trick you into revealing your Trezor Wallet information or recovery seed. Always double-check the website’s URL and ensure you are on the legitimate Trezor website before entering any sensitive information.
9. Regularly check your transactions and balances: Regularly monitor your Trezor Wallet transactions and balances to detect any suspicious activity. If you notice any unauthorized transactions or discrepancies, take immediate action to secure your wallet and contact the Trezor support team for assistance.
10. Educate yourself: Stay informed about the latest security practices and updates in the cryptocurrency space. Keep up with news and developments related to Trezor Wallet and familiarize yourself with best practices for online security.
By following these security measures, you can significantly enhance the protection of your Trezor Wallet and safeguard your NEO tokens from potential threats. The peace of mind that comes with knowing your digital assets are secured is invaluable as you engage in the world of cryptocurrencies.