
Why Program a Police Scanner
A police scanner is a valuable tool that allows you to stay informed about the latest happenings in your community. Whether you are interested in staying up-to-date on local news, following emergency services activity, or simply curious about the daily operations of law enforcement agencies, programming a police scanner can provide you with real-time information right at your fingertips. Here are a few reasons why programming a police scanner is a worthwhile endeavor:
- Stay Informed: Programming a police scanner enables you to tune in to various emergency services, including police, fire, and ambulance frequencies. By doing so, you can receive immediate updates on important incidents, accidents, or emergencies happening in your area.
- Monitor Traffic and Road Conditions: Police scanners also provide access to transportation channels, allowing you to monitor traffic updates and road conditions. This can be particularly useful for planning your daily commute or avoiding areas prone to congestion or accidents.
- Enhance Community Awareness: By programming a police scanner, you can gain valuable insights into the everyday activities and challenges faced by local law enforcement agencies. This awareness fosters a sense of community and helps you understand the efforts made to ensure public safety in your area.
- Stay Prepared during Emergencies: During times of severe weather, natural disasters, or other emergency situations, a police scanner can be an invaluable resource. By staying informed about unfolding events, you can take necessary precautions and make informed decisions to keep yourself and your loved ones safe.
- Develop Hobbies and Interests: Programming a police scanner can also be a hobby that introduces you to the fascinating world of radio communications. It provides an opportunity to learn about different radio frequencies, protocols, and technologies, fostering a deeper understanding of the mechanics behind emergency services operations.
These reasons highlight the importance and benefits of programming a police scanner. Whether you are interested in staying informed, ensuring personal safety, or simply exploring a new hobby, a police scanner can be a valuable addition to your life.
Step 1: Choosing the Right Police Scanner
Choosing the right police scanner is crucial to ensure optimal performance and compatibility with your needs. With numerous brands and models available in the market, it’s essential to consider a few factors before making a purchase. Here are some steps to help you choose the right police scanner:
- Determine your Frequency Needs: Before purchasing a police scanner, evaluate the types of frequencies you wish to monitor. Police scanners come in different variants, including handheld, mobile, and desktop models, catering to different frequency ranges. Consider whether you want to monitor just local police frequencies or expand your coverage to include other emergency services, aviation, or weather channels.
- Research Supported Features: Look for scanners that offer features aligned with your requirements. This could include programmable memory banks, weather alerts, priority scanning, digital or trunked system support, and compatibility with computer software for easy programming and updates. Make sure the scanner supports the specific features necessary for your intended use.
- Evaluate Scanner Restrictions: Some scanners have certain limitations or restrictions imposed by manufacturers or regulatory agencies. For example, in some areas, certain frequencies or encryption methods may be restricted, particularly in the case of law enforcement communications. Ensure that the scanner you choose complies with legal and regulatory requirements in your jurisdiction.
- Consider Budget and Affordability: Set a budget for your scanner purchase and stick to it. Police scanners can range from affordable handheld models to more advanced, feature-rich desktop models with higher price tags. Evaluate the features that are essential for your needs and find a scanner within your budget that meets those requirements.
- Read Reviews and Seek Recommendations: Before finalizing your decision, read online reviews, scan forums, and seek recommendations from experienced scanner enthusiasts. Pay attention to feedback regarding scanner reliability, ease of use, and customer support. This can provide valuable insights and help you make an informed decision.
By following these steps, you can select a police scanner that aligns with your frequency needs, desired features, and budget. Taking the time to choose the right scanner now will ensure a more satisfying and effective scanning experience in the future.
Step 2: Getting the Necessary Equipment
Once you have chosen the right police scanner, the next step is to acquire the necessary equipment to ensure a seamless scanning experience. While some scanners come as complete packages, others may require additional accessories. Here are the essential equipment you will need:
- Antenna: A high-quality antenna is crucial for optimal reception. Depending on your scanning needs, you may choose between a portable, indoor, or an outdoor antenna. Outdoor antennas typically offer better range and signal reception, but indoor antennas can be more convenient for handheld scanners.
- Power Source: You will need a reliable power source to operate your scanner efficiently. Depending on the scanner type, power options can include batteries (for handheld scanners), AC adapters for home use, or DC adapters for use in vehicles. Consider the portability and accessibility of power sources based on your scanning requirements.
- Programming Cable: Some scanners require a programming cable to connect to a computer for easier programming and firmware updates. Check if your scanner model supports this feature and acquire the appropriate programming cable if needed.
- Mounting Accessories: If you plan to use a mobile or desktop scanner in a fixed location, you may need mounting accessories such as brackets or stands. These accessories provide stability and ensure convenient placement of your scanner for easy access and operation.
- Scanner Software: Consider installing scanner software on your computer to assist with programming and managing your scanner. Many scanners have manufacturer-provided software that allows you to organize frequencies, update firmware, and customize settings from your computer.
- Scanner Case or Cover: To protect your scanner from physical damage and ensure its longevity, consider investing in a case or cover specifically designed for your scanner model. This will keep your scanner safe during travel or when not in use.
By obtaining the necessary equipment, you can ensure that your police scanner operates smoothly and delivers the best possible scanning experience. Take the time to research and invest in quality equipment to enhance the performance and longevity of your scanner.
Step 3: Identifying the Frequencies in Your Area
Before programming your police scanner, it’s essential to identify the frequencies used by emergency services in your area. This will enable you to tune in to the relevant channels and receive real-time updates. Here’s how you can identify the frequencies:
- Online Resources: Start by exploring online resources dedicated to scanner enthusiasts. Websites, forums, and online databases provide comprehensive lists of frequencies used by various agencies in different regions. These resources can be invaluable in identifying the frequencies you need for programming your scanner.
- Local Government Websites: Check the websites of your local government or law enforcement agencies. Many municipalities and police departments provide information about the frequencies they use for dispatch, emergency services, and public safety communications.
- Scanner Apps: Install scanner apps on your smartphone or tablet that offer live scanner feeds from around the world. While you may not find frequencies specific to your local area, these apps can give you a broad understanding of the types of channels and frequencies used by emergency services. This can serve as a starting point for further research.
- Listen to Scanners: Use your scanner to listen to active frequencies in your area. This will allow you to identify the agencies and services using specific frequencies. You can monitor police, fire, and other emergency services channels to gather information about the frequencies you need to program.
- Join Online Scanner Communities: Engage with online scanner communities and forums to connect with fellow enthusiasts in your area. They can help you identify the frequencies used by local agencies and offer guidance in programming your scanner effectively.
- Local Radio Enthusiasts: Reach out to local radio enthusiasts or ham radio operators who may have a wealth of knowledge and experience in monitoring and programming scanners. They can provide insights into the frequencies used in your area and offer valuable tips and tricks.
By utilizing these methods, you can successfully identify the frequencies used by emergency services in your area. This information is vital for programming your police scanner accurately, ensuring that you can tune in to the relevant channels and stay informed about local events and emergencies.
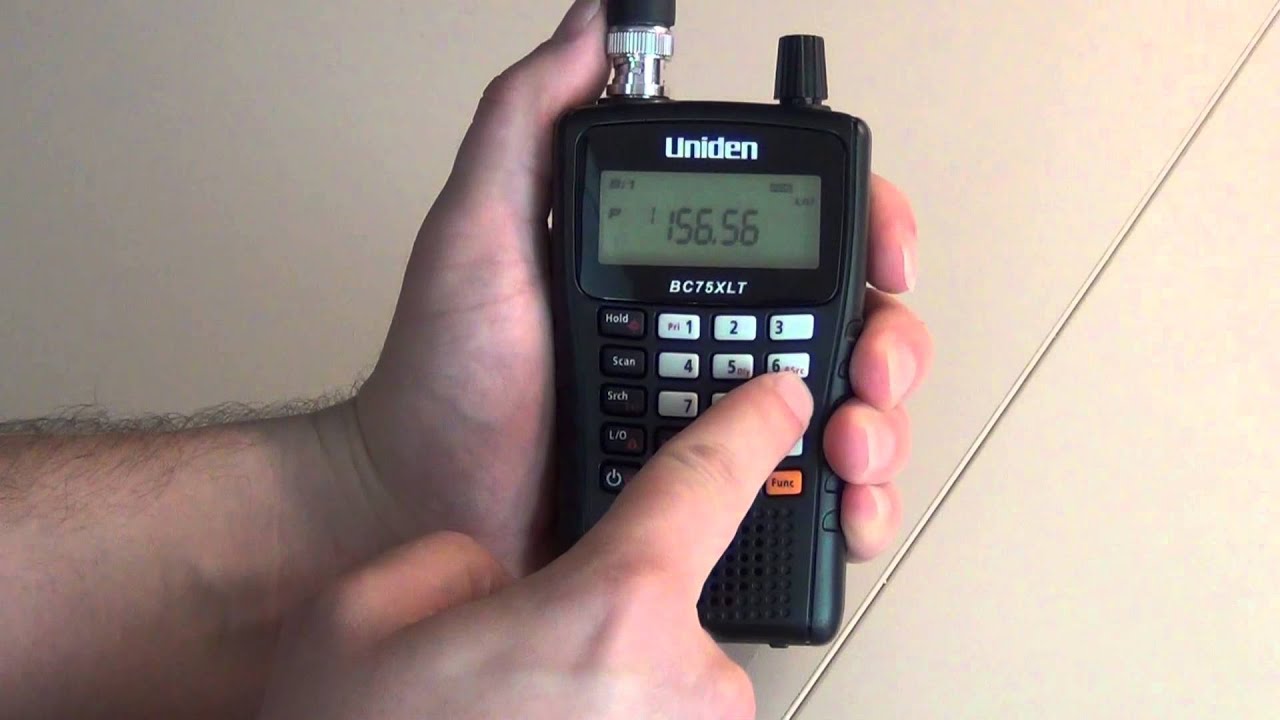
Step 4: Inputting Frequencies into the Scanner
Once you have identified the frequencies used by emergency services in your area, the next step is to input these frequencies into your police scanner. Here’s a step-by-step guide on how to do it:
- Read the Manual: Familiarize yourself with the user manual that comes with your scanner. This will provide specific instructions on how to program frequencies into your particular scanner model. Pay attention to any special programming methods or considerations mentioned in the manual.
- Access Programming Mode: Most scanners have a dedicated programming mode that allows you to enter frequencies and customize settings. Refer to your scanner’s manual to understand how to access this mode. It often involves pressing a combination of buttons or accessing a specific menu option.
- Enter Frequency: Once in programming mode, follow the instructions to input the desired frequency. Specify the frequency using the correct format (e.g., in megahertz) and save it in the appropriate memory location or channel number.
- Store Additional Information: Some scanners allow you to store additional information along with the frequency, such as agency names or location details. Take advantage of this feature to make it easier to identify the frequencies later.
- Repeat for Other Frequencies: Continue entering frequencies one by one until you have programmed all the desired channels. Use the same process for each frequency, ensuring that it is stored in the appropriate memory location or channel number.
- Test and Verify: After programming the frequencies, it’s essential to test and verify that they have been correctly stored. Use the scanner’s scanning feature to cycle through the programmed channels and confirm that you can hear the desired transmissions on each channel.
- Make Adjustments, if Necessary: If you are not receiving clear transmissions or encountering issues with specific frequencies, refer to your scanner’s manual for troubleshooting tips. Adjust settings such as squelch level, modulation mode, or attenuation to improve reception quality.
By following these steps, you can successfully input the frequencies into your police scanner and ensure that you can tune in to the desired channels. It’s important to consult your scanner’s manual for model-specific instructions and to familiarize yourself with the programming process to optimize your scanning experience.
Step 5: Programming Trunked Systems
Trunked radio systems are complex communication systems used by many public safety agencies. These systems allow multiple agencies to share a pool of frequencies, enabling more efficient and organized communication. Programming trunked systems into your police scanner requires specific steps to ensure proper functionality. Here’s how you can program trunked systems:
- Understand Trunking Terminology: Familiarize yourself with trunking terminology, such as talk groups, control channels, and trunking IDs. Understanding these terms will make the programming process clearer.
- Select Trunking Option: Ensure that your scanner supports trunked system programming. Some scanners come pre-programmed with common trunking protocols, while others require firmware updates or additional programming software.
- Determine System Type: Identify the type of trunked system in your area, such as APCO P25, Motorola, or EDACS. This information is often available online or through local scanner communities.
- Find Control Channels: Determine the control channels used by the trunked system. These channels coordinate communication and control the allocation of frequencies. Usually, scanners can automatically determine the control channels, but manual programming might be necessary in some cases.
- Program Talk Groups: Talk groups are subsets of a trunking system assigned to specific agencies or departments. Identify the talk groups you want to monitor and assign them to the appropriate channels in your scanner.
- Configure Settings: Depending on your scanner, you may need to configure additional settings such as trunking delay, priority settings, or trunking bank organization. Refer to your scanner’s manual for guidance on configuring these settings.
- Verify Programming: After programming the trunked system, test and verify that you can receive transmissions from the assigned talk groups. Make adjustments if needed, such as adding or removing talk groups or adjusting reception settings.
Programming trunked systems can be more complex than conventional frequency programming. It’s important to consult your scanner’s manual and explore online resources or scanner communities for specific guidance related to your scanner model and the trunked system in your area. With proper programming, you can monitor trunked systems and gain valuable insights into agency communications.
Step 6: Programming Talk Groups
Talk groups are subsets within a trunked radio system that allow communication between specific agencies, departments, or user groups. Programming talk groups into your police scanner allows you to monitor the conversations of interest to you. Here are the steps to effectively program talk groups:
- Identify Talk Groups: Determine which talk groups you want to monitor. Research the talk group IDs or names associated with the agencies, departments, or user groups that you wish to listen to. This information can be obtained from online resources, local scanner communities, or by contacting the agencies directly.
- Access Talk Group Programming Mode: Enter the talk group programming mode on your scanner. Consult your scanner’s manual for instructions on how to access this mode, as the process can vary depending on the model.
- Assign Talk Groups: Once in talk group programming mode, enter the talk group IDs or names for each agency or user group you want to monitor. Save these talk group assignments in the appropriate memory locations on your scanner.
- Program Additional Settings: Some scanners offer additional settings for talk group programming, such as priority settings, talk group alerts, or talk group hold times. Customize these settings according to your preferences and scanning needs.
- Organize Talk Groups: Consider organizing the talk groups into memory banks or groups for easier access. This allows you to navigate through different sets of talk groups efficiently, ensuring that you can quickly find and monitor the conversations you want.
- Verify Programming: Test your programmed talk groups by scanning through them. Listen for transmissions and ensure that you are receiving the conversations from the assigned talk groups. Adjust settings as needed for optimal reception.
- Update and Modify: Keep track of any changes or updates to talk group assignments in your area. Revisit and update your talk group programming accordingly to ensure that you are continuously monitoring the relevant conversations.
Programming talk groups in your police scanner allows you to focus on the specific agencies or user groups you are interested in monitoring. Follow these steps, consult your scanner’s manual, and seek guidance from scanner communities to ensure accurate and efficient talk group programming.
Step 7: Adjusting Settings and Fine-Tuning
After programming your police scanner with the desired frequencies, trunked systems, and talk groups, it’s important to adjust settings and fine-tune your scanner to optimize its performance. Fine-tuning allows you to improve reception, reduce interference, and customize the scanner to your preferences. Here are the steps to adjust settings and fine-tune your scanner:
- Squelch Level: Adjust the squelch level to eliminate background noise and static, while still allowing clear reception of transmissions. Experiment with different settings to find the optimal balance between reducing interference and capturing strong signals.
- Modulation Mode: Select the modulation mode that matches the type of transmissions you want to receive. Common options include AM, FM, NFM (Narrowband FM), and P25 (for digital transmissions). Ensure that your scanner is set to the appropriate mode for the frequencies you are monitoring.
- Attenuation: If you live in an area with strong signal sources, such as near a radio or TV tower, you may need to enable attenuation to reduce signal overload and interference. Attenuation helps maintain the quality of the desired transmissions while reducing the impact of nearby strong signals.
- Scan Delays: Adjust the scan delays to control how long the scanner stays on each channel or talk group before moving to the next one. Set longer delays if you want to capture more of the conversation, or shorter delays for faster scanning speed.
- Weather Alerts: If your scanner is equipped with weather alert capabilities, ensure that the settings are configured to receive alerts for severe weather or emergency broadcasts in your area. Set up the appropriate weather channels and enable alert notifications as desired.
- Review Additional Features: Familiarize yourself with any other features or settings offered by your scanner. This might include priority scanning, search modes, lockouts, or tone settings. Experiment with these features to customize your scanning experience and tailor it to your specific interests.
- Monitor Reception Quality: Regularly monitor the reception quality of your scanner to identify any issues or areas for improvement. If you notice weak or distorted signals, consider adjusting the antenna, changing the location, or exploring additional accessories to enhance reception.
- Stay Up-to-Date: Keep your scanner’s firmware and programming software up-to-date. Manufacturers often release updates to improve performance, add features, or address compatibility issues. Regularly check for updates and apply them as necessary to ensure the best performance of your scanner.
By adjusting settings and fine-tuning your police scanner, you can optimize its performance and customize it to your scanning preferences. Take the time to experiment with different settings, consult your scanner’s manual for detailed instructions, and seek advice from scanner communities to achieve the best scanning experience possible.
Step 8: Organizing Channels and Banks
Organizing the channels and banks on your police scanner is essential for efficient and convenient scanning. By grouping related frequencies and talk groups together, you can easily access the information you need when monitoring specific agencies or services. Here’s how you can organize channels and banks on your scanner:
- Plan Your Organization: Determine how you want to group the frequencies and talk groups based on your scanning needs. Consider organizing them by agency, service type, location, or any other logical grouping that makes sense for your monitoring objectives.
- Create Banks: Banks are groups of channels that can be assigned to specific categories. Decide on the number of banks you want to create and label them accordingly based on your planned organization scheme. This will help you quickly locate and access the desired channels.
- Assign Channels to Banks: Assign the programmed channels to the appropriate banks. Follow your planned organization scheme, assigning each frequency or talk group to the bank that corresponds to its category or relevance. This will help keep your scanning experience organized and streamlined.
- Label Channels: Label each channel with a name or description that accurately represents the content or agency it corresponds to. This will make it easier to identify and select the desired channels from the organized banks, especially if you have a large number of frequencies programmed.
- Assign Quick Keys: Some scanners offer the option to assign quick keys to banks or individual channels. This allows you to enable or disable specific banks or channels quickly and with the press of a button. Assign quick keys to ensure easy access and control over the channels you want to monitor most frequently.
- Test and Refine: Once you have organized your channels and banks, test the setup by scanning through them. Ensure that you can easily navigate and find the desired frequencies or talk groups. Make adjustments or refinements as necessary to maximize the efficiency and usability of your organized channels and banks.
- Maintain and Update: Regularly review and update your channel organization as needed. This includes adding new frequencies, removing outdated ones, and adjusting the organization to reflect any changes in your monitoring priorities. Stay proactive in managing your scanner’s channels and banks for a consistently enhanced scanning experience.
By organizing channels and banks on your police scanner, you can quickly access the frequencies, talk groups, and agencies you wish to monitor. This saves time and ensures a more efficient scanning process, allowing you to stay informed and engaged with the conversations that matter most to you.
Step 9: Customizing the Display and Sound
Customizing the display and sound settings on your police scanner helps personalize your scanning experience and provides important visual and audio cues. By fine-tuning these settings, you can optimize readability, clarity, and overall user experience. Here’s how to customize the display and sound on your scanner:
- Display Brightness and Contrast: Adjust the brightness and contrast levels of the scanner display to ensure optimal visibility. Find settings that are comfortable for your eyes, making it easy to read the information displayed on the screen in different lighting conditions.
- Backlighting Color: Some scanners offer the option to change the backlighting color of the display. Select a color that suits your preference or enhances visibility. This can be particularly useful if you use your scanner in low-light environments.
- Font Size and Style: Customize the font size and style to improve readability. Choose a font size that suits your needs and consider using bold or larger fonts for important information. Experiment with different font styles to find one that is visually appealing and easy to read.
- Alert Tones and Volume: Adjust the alert tones and volume levels to your liking. Set distinctive tones for priority channels, weather alerts, or specific talk groups to instantly capture your attention. Find a comfortable volume level that allows you to hear important transmissions without being too intrusive.
- Scan/Search Speed: Set the scan or search speed according to your preference. Some scanners offer multiple speed options, allowing you to control the rate at which the scanner cycles through channels or searches for frequencies. Adjust the speed based on your scanning preferences and the information you are trying to capture.
- Display Mode and Information: Customize the display mode to show the information that is most relevant to you. This might include frequency or talk group names, signal strength, or other metadata. Select the display mode that provides the information you need at a glance without overwhelming the screen.
- Key Beep and Keypad Lock: Enable or disable the key beep sound when pressing buttons on the scanner. This feature is useful for auditory feedback while programming or operating the scanner. Additionally, consider using the keypad lock function to prevent accidental button presses and changes to your settings.
- Save Customized Settings: Once you have customized the display and sound settings according to your preferences, save the settings so that they are retained even after powering off the scanner. This way, you don’t have to repeat the customization each time you use the scanner.
By customizing the display and sound settings, you can create a personalized and tailored scanning experience. These settings enhance readability, provide important audio cues, and enable you to focus on the information that matters most to you.
Step 10: Updating and Maintaining the Scanner
Regularly updating and maintaining your police scanner is crucial to ensure optimal performance, compatibility with new technologies, and access to the latest features. By keeping your scanner up to date and properly maintained, you can continue enjoying a seamless scanning experience. Here are the steps to update and maintain your scanner:
- Check for Firmware Updates: Visit the manufacturer’s website or scanner community forums to check for firmware updates. Manufacturers often release updates that address bugs, improve performance, and introduce new features. Download the latest firmware update for your scanner model and follow the provided instructions to install it.
- Update Programming Software: If your scanner utilizes programming software, check for available updates for the software. Updated software often improves functionality, adds new features, and enhances compatibility with different operating systems. Install the latest version of the programming software to ensure smooth programming and management of your scanner.
- Backup Your Scanner’s Programming: Regularly back up the programming and settings of your scanner. Use the manufacturer’s software or third-party applications to create a backup file that contains all the programmed frequencies, talk groups, and settings. This way, if you ever need to reset or replace your scanner, you can quickly restore your customized programming.
- Clean and Maintain: Keep your scanner clean and free from dust or debris that can affect performance. Use a soft, lint-free cloth to wipe the scanner’s exterior and display, and consider using compressed air to blow out any dust from the vents or buttons. Be cautious not to use harsh chemicals or excessive force that could damage the scanner.
- Monitor Scanner Battery: If your scanner relies on batteries, monitor their condition and performance. Replace batteries as necessary to ensure consistent power supply. If your scanner uses rechargeable batteries, follow the manufacturer’s instructions on charging and maintaining battery life.
- Join Scanner Communities: Engage with online scanner communities or forums where you can connect with other scanner enthusiasts. Participate in discussions, seek advice, and stay updated on the latest trends, resources, and troubleshooting tips related to your scanner model.
- Stay Informed: As technology evolves and new frequency allocations or system changes occur, stay informed about updates related to your local area. Monitor government websites, scanner community forums, and official communications from public safety agencies to ensure that your scanner remains compatible with any modifications or advancements.
- Perform Routine Checks: Regularly perform routine checks on your scanner to ensure that it is functioning properly. Scan through programmed frequencies, test reception, and verify that you are receiving transmissions clearly. Make adjustments or troubleshoot any issues that arise promptly.
- Upgrade or Replace: As your scanning needs change or new technologies emerge, consider upgrading or replacing your scanner when necessary. Stay informed about the latest scanner models and features, and determine if an upgrade would enhance your scanning experience.
By following these steps to update and maintain your scanner, you can ensure that it operates efficiently and stays up to date with the latest enhancements. Regular maintenance and staying informed about updates will contribute to a seamless and enjoyable scanning experience.