Choosing the Right Equipment
When it comes to producing and recording a video interview, one of the first and most important steps is to choose the right equipment. The equipment you use will ultimately determine the quality of the video and audio, so it’s crucial to invest in reliable and suitable gear. Here are some key considerations to keep in mind:
1. Camera: The camera is the heart of your video production setup. Opt for a high-quality camera that can capture crisp and clear footage. If you’re on a budget, a DSLR or mirrorless camera with video capabilities can work well. Make sure it has manual controls for exposure and focus, as these will give you more control over the final result.
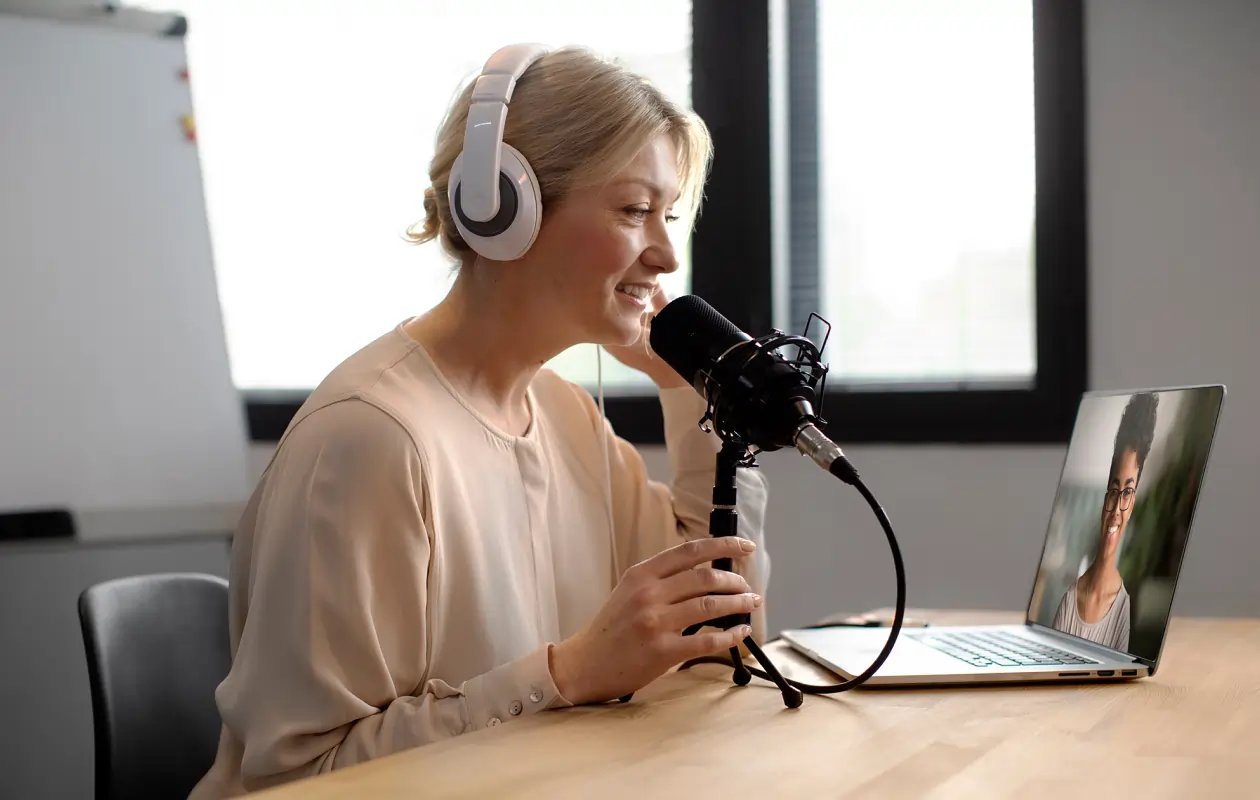
2. Microphone: Good audio is just as important as good video quality. Invest in a high-quality microphone for clear and professional sound. A lavalier or lapel microphone is a popular choice for interviews, as it can be discreetly attached to the interviewee’s clothing. Alternatively, a shotgun microphone mounted on a boom pole can provide excellent sound capture, especially in a controlled environment.
3. Lighting: Proper lighting can make a huge difference in the look and feel of your video. Natural light is the best option if you have access to a well-lit location, but if not, consider investing in a basic lighting kit. Softbox lights or LED panels can provide even and flattering lighting for your interview setup.
4. Tripod or Stabilizer: To ensure steady footage, it’s essential to use a tripod or stabilizer. This will help eliminate any camera shakes or movements that can be distracting to viewers. Choose a tripod or stabilizer that suits the weight and size of your camera, and make sure it’s easy to set up and adjust.
5. Backup Storage: Recording interviews often involves capturing a significant amount of data. Invest in reliable storage options such as SD cards or external hard drives to ensure that you have enough space to store and backup your footage.
Remember, the equipment you choose should align with your budget, the level of professionalism you aim to achieve, and the specific needs of your project. It’s important to select gear that suits your requirements without breaking the bank. Take the time to research and test different equipment options before making a final decision.
Setting up the Camera
Once you have chosen the right camera for your video interview, the next crucial step is setting it up properly. Proper camera setup ensures that you capture high-quality footage and make the most of your equipment. Here are some tips to help you get started:
1. Camera Placement: Position the camera at eye level with the interviewee for a natural look. The camera should be stable and securely mounted on a tripod or stabilizer. Make sure the camera is positioned slightly off-center to create a visually pleasing composition.
2. Framing the Shot: Pay attention to the frame and composition of your shot. Keep the interviewee in the center of the frame or off-center based on the rule of thirds. Leave some headroom above the interviewee’s head and allow space below for subtitles or captions if necessary. Use the camera’s grid overlays or guidelines to help achieve a balanced composition.
3. Focus and Exposure: Take manual control over the focus and exposure to ensure that the interviewee is in sharp focus and properly exposed. Use the camera’s autofocus feature to set the focus initially, and then switch to manual focus to prevent any accidental focus shifts. Adjust the exposure settings to achieve the desired brightness and contrast for the video.
4. White Balance: Set the correct white balance to ensure accurate and natural colors. White balance settings are usually found in the camera’s menu settings or can be set by pointing the camera at a white or neutral gray surface and adjusting the settings accordingly.
5. Camera Settings: Adjust the camera settings according to your preferences and the shooting environment. Set the video resolution and frame rate based on your intended output. Check if your camera has additional features like image stabilization or picture profiles that can enhance the quality of the footage.
6. Test and Monitor: Before starting the interview, conduct test shots to ensure everything looks and sounds as expected. Use the camera’s built-in LCD screen or an external monitor to monitor the recording. Check the framing, focus, exposure, and audio levels to make any necessary adjustments.
Remember, setting up the camera properly is crucial to capturing high-quality footage. Take the time to adjust and fine-tune the camera settings to achieve the desired result. Regularly review your shots during breaks to ensure consistency and make any necessary adjustments as you proceed with the interview.
Selecting the Perfect Location
When it comes to recording a video interview, choosing the right location can greatly enhance the overall impact of your interview. The location sets the tone and ambiance of the video, and it can help create a visually appealing and engaging backdrop for your interviewee. Here are some tips to help you select the perfect location:
1. Consider the Context: Think about the subject matter and the tone of the interview. The location should align with the theme or topic being discussed. For example, if the interview is about nature conservation, consider conducting it in a park or surrounded by greenery to visually support the topic.
2. Background: Choose a location with a clean and uncluttered background. Avoid busy or distracting backgrounds that could take away from the focus on the interviewee. Look for a background that is visually appealing and complements the interview subject without overpowering it.
3. Lighting Conditions: Assess the lighting conditions of potential locations. Natural light is typically the most flattering and pleasing to the eye. Look for areas with ample natural light or consider using artificial lighting to create a well-lit environment. Avoid harsh shadows or direct sunlight that can create unflattering lighting on the interviewee’s face.
4. Noise Control: Ensure that the location has minimal background noise. Choose a quiet environment where you can easily control any potential distractions. Avoid spaces with excessive echo or ambient noise that can interfere with the clarity of the interviewee’s voice.
5. Accessibility and Comfort: Consider the comfort of both the interviewer and interviewee when selecting a location. Choose a space that is easily accessible, comfortable, and allows for an uninterrupted interview session. If necessary, provide seating and any additional amenities that may be required during the interview.
6. Branding and Aesthetics: If the interview is part of a larger brand or concept, select a location that aligns with the brand’s aesthetics and identity. Incorporate elements that reinforce the brand’s visual language and messaging. This could include using branded props or featuring specific colors or textures in the background.
Keep in mind that the location should enhance the interview and support the overall message you want to convey. Take the time to scout and evaluate potential locations before making a final decision. Consider conducting a test shoot in each location to assess its visual appeal and suitability for recording a video interview.
Lighting Techniques for a Professional Look
Lighting plays a crucial role in creating a professional and visually appealing video interview. Properly lit interviews can enhance the mood, highlight facial expressions, and ensure that the interviewee is well-lit and easily visible. Here are some essential lighting techniques to achieve a professional look:
1. Three-Point Lighting: One of the most popular lighting setups for interviews is the three-point lighting technique. This technique consists of three key lights: a key light, a fill light, and a backlight. The key light is the main source of light and is usually placed on one side of the interviewee. The fill light helps reduce shadows and is positioned on the opposite side of the key light. The backlight is placed behind the interviewee to separate them from the background and add depth to the image.
2. Soft Lighting: Soft lighting is more flattering and gentle on the interviewee’s face. It helps reduce harsh shadows and creates a more even and natural look. Soft lighting can be achieved by using diffusers or by bouncing light off reflectors or walls. Softbox lights or diffused LED panels are great options for creating soft and diffused lighting.
3. Natural Light: If you have access to a location with ample natural light, consider utilizing it for your interview. Natural light can create a soft and pleasing look, especially during specific times of the day when the light is more diffused. Position the interviewee near a window or in an outdoor location, making sure to diffuse the light if necessary to avoid harsh shadows.
4. Color Temperature: Pay attention to the color temperature of your lighting. Different light sources emit light with different color temperatures. Ensure consistency by using lights with the same color temperature or by using color correction gels to match the lights. This will help create a polished and professional look in your interview footage.
5. Eye Lights: Adding subtle eye lights can bring life and vibrancy to the interviewee’s eyes. These small lights are positioned slightly above and to the side of the camera to create a natural sparkle in the eyes. Eye lights can be achieved using small LED lights or by bouncing light off a reflector or white card.
6. Lighting Control: Use lighting accessories such as barn doors, flags, or flags to control and shape the light as needed. Barn doors can be used to block light spillage and direct the light onto the interviewee. Flags can be used to prevent unwanted light from hitting certain areas, such as the background or reflective surfaces.
Remember, lighting is a crucial element in creating a professional look in your video interview. Take the time to experiment, adjust, and fine-tune the lighting setup to achieve the desired result. Proper lighting not only enhances the overall quality of your video but also ensures that the focus remains on the interviewee and their message.
Preparing and Conducting the Interview
Preparing and conducting a successful interview requires careful planning and organization. It’s not only about the questions you ask, but also how you create a comfortable and engaging environment for the interviewee. Here are some tips to help you prepare and conduct a successful video interview:
1. Research: Before the interview, thoroughly research the interviewee and the topic to gain a better understanding. This will enable you to ask informed and relevant questions, showing your interviewee that you value their expertise and knowledge.
2. Create an Outline: Develop a general outline or set of questions that you want to cover during the interview. This will help guide the conversation and ensure that you cover all the important points. However, be flexible and open to organic and spontaneous moments that may arise during the interview.
3. Establish Rapport: Create a friendly and comfortable environment for the interviewee by starting with some casual conversation. This will help put them at ease and build rapport. Remember to actively listen and engage with their responses to encourage a natural and flowing conversation.
4. Active Listening: Pay close attention to the interviewee’s responses and show genuine interest in what they have to say. Respond thoughtfully and ask follow-up questions to dig deeper into their insights. Active listening will not only make the interviewee feel valued but also lead to more thoughtful and valuable answers.
5. Body Language: Maintain good eye contact and open body language during the interview. Show attentiveness and interest through your gestures and facial expressions. A warm and engaged demeanor will help build trust and create a positive atmosphere.
6. Time Management: Keep an eye on the time and ensure that the interview stays on track. While it’s important to allow the conversation to flow naturally, it’s equally important to stick to the schedule you’ve set. Avoid rushing through questions or lingering on specific topics for too long.
7. Flexibility: Be prepared to adapt and adjust your approach during the interview. Sometimes, unexpected or unplanned aspects may arise that can lead to fascinating insights or moments. Embrace these unplanned moments and allow them to shape the conversation organically.
8. Post-Interview Wrap-up: After the interview, take a few extra minutes to thank the interviewee and evaluate the session. If necessary, clarify any details or go over any additional points that may have been missed. This not only shows professionalism but also helps in building lasting and positive relationships.
Remember, the success of an interview lies not only in the questions asked but also in creating a comfortable and engaging environment. With careful preparation and a genuine interest in your interviewee, you can capture compelling and insightful content that will resonate with your audience.
Capturing High-Quality Audio
When it comes to producing a video interview, capturing high-quality audio is just as vital as capturing clear video footage. Poor audio quality can undermine the entire interview, making it difficult for viewers to follow and understand the conversation. Here are some essential tips to ensure you capture high-quality audio:
1. Use External Microphones: While many cameras have built-in microphones, they often capture subpar audio. Invest in external microphones for clear and professional sound. Lavalier or lapel microphones are ideal for interview settings as they can be discreetly attached to the interviewee’s clothing, ensuring consistent audio levels.
2. Position Microphones Carefully: Proper microphone placement is crucial for capturing clear and balanced audio. Position lavalier microphones close to the interviewee’s mouth to ensure optimal sound capture while minimizing background noise. Use a windscreen or a foam cover to reduce unwanted wind or vocal plosives during recording.
3. Adjust Audio Levels: Before recording, test the audio levels to ensure they are not too low or too high. Set audio levels to a peak of -12dB to -6dB to provide enough headroom for any sudden increases in volume. Monitor the audio levels during the interview to prevent distortion or clipping.
4. Control Background Noise: Minimize background noise and distractions as much as possible. Choose a quiet location, away from ambient noise. If necessary, use soundproofing materials or blankets to absorb echoes and minimize external noise. Conduct test recordings to identify and eliminate any potential noise sources.
5. Monitor Audio During the Interview: Use headphones to monitor the audio during the interview. This allows you to address any issues with volume, clarity, or unexpected noises in real-time. Adjust the microphone position or audio levels if needed, ensuring a clear and balanced sound throughout the interview.
6. Record Backup Audio: To avoid any potential loss or corruption of audio, consider using an external audio recorder as a backup. This provides a separate audio file that can be synced with the video footage during the editing process. Having a backup ensures you have a reliable audio source in case of any technical issues.
7. Post-Production Enhancements: After the interview, use audio editing software to refine the captured audio. Remove any background noise, adjust volume levels, and apply equalization to enhance clarity and balance. Be careful not to over-process the audio, as it can lead to an unnatural and artificial sound.
Capturing high-quality audio is essential for ensuring a professional and enjoyable video interview. By following these tips, you can provide your audience with clear and engaging audio that enhances the overall viewing experience.
Directing and Framing the Shot
Directing and framing the shot effectively is crucial to creating visually engaging video interviews. The way you position the camera and compose the image can greatly impact the overall look and feel of the interview. Here are some tips to help you direct and frame your shots:
1. Rule of Thirds: The rule of thirds is a fundamental principle in composition. Imagine dividing the frame into nine equal parts using two horizontal and two vertical lines. Position the interviewee’s eyes or face along these lines or at the points where they intersect. This creates a visually balanced composition and adds interest to the shot.
2. Headroom and Lead Room: Leave some headroom above the interviewee’s head, ensuring they are not too close to the upper frame. This creates a more natural and comfortable composition. Similarly, consider the lead room or nose space, which is the space in front of the interviewee’s face. Leaving adequate lead room ensures that the subject has space to look or talk into.
3. Framing and Composition: Pay attention to the composition of the shot to create a visually appealing and well-balanced image. Avoid framing the interviewee in the center of the frame, as it can result in a static and less dynamic shot. Instead, try various compositions such as the rule of thirds, asymmetrical framing, or diagonal lines to add visual interest.
4. Camera Angles: Experiment with different camera angles to create different moods and perspectives. A straight-on angle can provide a direct and engaging connection between the subject and the viewer. A high angle can create a sense of authority or vulnerability, while a low angle can enhance the subject’s presence or dominance in the frame.
5. Visual Elements: Consider the visual elements in the background and foreground of your shot. Avoid cluttered or distracting backgrounds that may divert attention from the interviewee. Instead, choose visually pleasing or relevant elements that enhance the overall composition. Be mindful of any props or objects that may unintentionally appear in the frame and potentially detract from the focus of the interview.
6. Movement and Stability: Keep the camera stable during the interview to avoid distracting movements or shakes. If necessary, use a tripod or stabilizer to ensure a steady shot. However, don’t hesitate to experiment with subtle camera movements, such as panning or tilting, to add dynamism or emphasize certain moments during the interview.
7. Eye Contact: Ensure that the interviewee maintains eye contact with the camera or the interviewer. This creates a connection with the audience, making the interview more engaging. Encourage the interviewee to speak directly towards the camera, giving the impression of a one-on-one conversation with the viewer.
Directing and framing the shot effectively requires careful attention to detail and creative decision-making. By following these tips, you can create visually compelling video interviews that captivate and resonate with your audience.
Using B-Roll to Enhance the Interview
Integrating B-roll footage into your video interview can significantly enhance its visual appeal and storytelling capabilities. B-roll refers to supplementary footage that is used to support and complement the main interview footage. By incorporating B-roll strategically, you can create a more engaging and dynamic video. Here are some tips on using B-roll effectively:
1. Enhance Visual Storytelling: B-roll footage allows you to visually illustrate and enhance the story being told in the interview. It provides additional visual context and helps break up the visual monotony of a single shot. Use B-roll to showcase relevant locations, activities, or objects that align with the interviewee’s narrative.
2. Highlight Key Points: Utilize B-roll to emphasize important points or concepts discussed in the interview. For example, if the interviewee is talking about a particular project, include footage of that project in action. This adds visual interest and helps the audience connect with the interviewee’s words on a deeper level.
3. Create Smooth Transitions: B-roll can be used to create smooth transitions between different segments or topics in the interview. By including relevant and visually appealing footage, you can bridge the gaps and maintain a cohesive flow in the overall video. Use B-roll to transition from one topic to another seamlessly.
4. Show Diversity and Variety: Incorporate B-roll that showcases diversity and variety. This can include footage of different locations, people, or activities related to the interviewee’s story. Use B-roll to give viewers a glimpse into the broader world surrounding the interviewee’s experiences and expertise.
5. Add Visual Interest: B-roll adds visual interest and dynamic elements to the video. It prevents the interview from becoming stagnant by providing viewers with something visually stimulating to watch. Use creative camera angles, slow motion shots, or interesting compositions in your B-roll footage to captivate your audience.
6. Sync B-Roll with Audio: When editing, make sure to sync the B-roll footage with the audio from the interview. This ensures that the visuals and audio work harmoniously to tell the story. Cut to the B-roll at appropriate moments, aligning it with relevant discussions or statements made by the interviewee.
7. Maintain Consistency: While B-roll footage adds diversity and visual interest, it’s essential to maintain a consistent visual style throughout the video. Use B-roll that complements the overall visual look and feel of the interview, ensuring that it blends seamlessly with the main footage.
Remember, the effective use of B-roll can significantly enhance the overall impact of your video interview. By incorporating visually appealing and relevant footage strategically, you can engage your audience and create a more compelling and immersive viewing experience.
Editing and Post-Production
Editing and post-production are critical stages in creating a polished and compelling video interview. This is where you have the opportunity to refine the footage, enhance the narrative flow, and add finishing touches to deliver a seamless final product. Here are some key steps to consider during the editing and post-production process:
1. Organize Your Footage: Begin by organizing your footage in a logical and structured manner. Create folders or bins to categorize different shots, B-roll footage, and audio clips. This will make it easier to locate and access the necessary assets during the editing process.
2. Select the Best Takes: Review the interview footage and select the best takes for each question or topic. Look for moments where the interviewee is clear and articulate, expresses their thoughts effectively, and showcases genuine emotion. Be sure to maintain continuity and consistency in the interviewee’s appearance and audio quality.
3. Trim and Cut: Remove any unnecessary or redundant parts of the interview to keep the video concise and engaging. Trim long pauses, repetitions, or any portions that don’t contribute to the overall flow and narrative. Use smooth cuts or transitions to create a seamless viewing experience.
4. Enhance Visuals: Adjust the visual quality of the footage during the editing process. Adjust the color grading, contrast, and brightness to give the video a consistent and professional look. Eliminate any visual imperfections or distractions that may detract from the interviewee or the overall video presentation.
5. Incorporate B-Roll: Integrate B-roll footage strategically throughout the video to add visual interest and support the interview content. Cut to relevant B-roll footage during specific moments or to illustrate key points discussed by the interviewee. Ensure that the B-roll enhances the narrative and complements the overall story being told.
6. Add Graphics and Transitions: Include graphics, lower thirds, or captions to provide additional context or highlight important information. Use subtle and professional transitions between shots to ensure smooth scene changes. Avoid overusing flashy transitions that can distract from the content and the interviewee’s message.
7. Enhance Audio: Improve the audio quality by adjusting levels, enhancing clarity, and reducing background noise. Use audio editing tools to remove any unwanted noise or distractions. Ensure that the interviewee’s voice remains the main focus and is clear and intelligible throughout.
8. Music and Sound Design: Consider adding background music or sound effects to create a more immersive and engaging experience. Use music that complements the mood and tone of the interview without overpowering the dialogue. Ensure that the sound levels are balanced and the music seamlessly blends with the overall audio mix.
9. Review and Refine: Once the initial edit is complete, review the video multiple times to fine-tune the details. Pay attention to pacing, timing, and the overall narrative flow. Make any necessary adjustments to ensure that the video delivers a cohesive and impactful story.
10. Export and Share: Choose the appropriate video format and resolution for the intended platform or distribution method. Export the final video file and consider adding relevant metadata or captions to optimize accessibility and searchability. Share the finalized video with your intended audience and take note of any feedback for future improvements.
The editing and post-production process allows you to shape the raw material into a refined and compelling video interview. By utilizing various editing techniques and paying attention to detail, you can create a final product that effectively communicates your interviewee’s message and engages your audience.
Adding Transitions and Graphics
Adding transitions and graphics to your video interview can elevate its visual appeal and enhance the overall storytelling experience. Transitions help create smooth and seamless scene changes, while graphics such as lower thirds and captions provide additional context and information. Here are some tips for effectively incorporating transitions and graphics:
1. Establish a Transition Style: Choose a transition style that suits the tone and mood of your video interview. Common transition techniques include cuts, fades, dissolves, and wipes. Use them to create a logical and aesthetically pleasing flow between different shots or sections of the interview.
2. Maintain Consistency: Ensure that the transitions you use are consistent throughout the video interview. Establishing a consistent transition style helps create visual coherence and prevents distractions. Avoid using too many different transition effects that can be jarring or confusing for the viewer.
3. Use Transitions to Emphasize Key Moments: Utilize transitions strategically to highlight important points or emphasize impactful moments during the interview. For instance, you can use a subtle fade or dissolve to transition into a key anecdote or shift in topic. Transitions can help create a sense of anticipation and draw attention to significant moments.
4. Incorporate Lower Thirds: Lower thirds are graphics that appear at the bottom of the screen and typically provide the interviewee’s name, occupation, or any other relevant information. Use lower thirds sparingly, ensuring they are clear, concise, and easy to read. Choose fonts and colors that align with the overall visual tone of the video.
5. Add Captions or Subtitles: If needed, include captions or subtitles to improve accessibility and enable viewers to follow along, especially if the interviewee speaks in a different language or if you want to cater to a broader audience. Make sure the captions are accurately synchronized with the interviewee’s dialogue.
6. Utilize Text and Callouts: Consider using text or callouts to highlight important quotes or key takeaways from the interview. These can be displayed as overlays on relevant footage or as standalone elements. Keep the text visually appealing and readable without overwhelming the interviewee or the visual content.
7. Animations and Visual Effects: Use animations or visual effects sparingly and purposefully to enhance the visual impact of the video interview. Visual effects can be used to draw attention to specific elements or to add a touch of creativity. However, be cautious not to overuse them, as they can become distracting or overshadow the interview’s content.
8. Test and Adjust: Review the video interview multiple times to ensure that the transitions and graphics work seamlessly with the footage. Pay attention to timing, pacing, and visual cohesion. Make any necessary adjustments to fine-tune the transitions and graphics for optimal impact.
Adding transitions and graphics to your video interview enhances its visual appeal and helps convey information effectively. Whether it’s to create smooth scene transitions, provide additional context through lower thirds, or enhance accessibility with captions, thoughtful incorporation of transitions and graphics can elevate the overall viewing experience.
Exporting and Sharing the Video
Once you have completed the editing and post-production process of your video interview, the final step is to export and share it with your intended audience. Exporting the video involves selecting the appropriate file format and settings to ensure optimal quality and compatibility. Here are some tips for exporting and sharing your video:
1. Select the Right Format: Choose a video format that is widely supported and compatible with the platforms on which you plan to distribute or share the video. Common formats include MP4, MOV, and AVI. Consider the resolution and aspect ratio to ensure the video looks best across different devices.
2. Adjust Video Settings: Adjust the video settings such as bit rate, frame rate, and codec based on the intended use and desired balance between video quality and file size. Higher bit rates and frame rates typically result in better quality but larger file sizes, so find the right balance for your needs.
3. Optimize for Screen Sizes: If you plan to share the video on multiple platforms or devices with varying screen sizes, consider exporting multiple versions optimized for different screen resolutions. This ensures that the video looks great and doesn’t lose clarity or detail regardless of the viewing device.
4. Consider Compression: To reduce file size without significant loss in quality, consider compressing the video. There are various video compression tools available that can help optimize file size while preserving good image quality. Be mindful not to over-compress, as it can result in noticeable degradation of the video.
5. Add Metadata: Include relevant metadata to your video such as title, description, and tags. Metadata helps in search engine optimization and improves discoverability of your video. It provides the necessary information for viewers to understand and find your video easily.
6. Secure Rights and Permissions: If you include any copyrighted material in your video, ensure that you have obtained the necessary rights and permissions to use them. It’s important to respect copyright laws and avoid any legal issues when sharing your video.
7. Choose the Right Platform: Decide on the platforms or channels where you will share your video interview. Popular options include YouTube, Vimeo, social media platforms, and your own website or blog. Consider your target audience and choose platforms that align with your goals and reach the widest audience.
8. Optimize for SEO: When sharing your video, optimize it for search engines by including relevant keywords and a compelling title and description. This will increase the chances of your video being discovered by users who are searching for related content.
9. Engage with the Audience: Once your video is shared, actively engage with the audience by responding to comments and feedback. Encourage viewers to share and interact with the video on social media platforms. This helps create a dialogue and extends the reach of your video interview.
10. Analyze and Evaluate Performance: Monitor the performance of your video interview by analyzing metrics such as views, engagement, and audience retention. This data provides valuable insights into how your audience is responding to the video, allowing you to make necessary adjustments and improvements for future video projects.
By following these steps for exporting and sharing your video interview, you can effectively reach and engage your target audience, creating a wider impact with your valuable content.