
Check Printer Compatibility
Before you start printing in black and white on your Mac, it’s important to check the compatibility of your printer. Not all printers support black and white printing, so it’s crucial to ensure that your printer is capable of this function. Here’s how to verify printer compatibility:
- 1. Check the printer’s specifications: Consult the user manual or visit the manufacturer’s website to find out if your printer supports black and white printing. Look for keywords like “monochrome” or “black and white” in the printer’s specifications.
- 2. Search online: If you don’t have the manual or cannot find the necessary information, conduct an online search using your printer’s make and model. This may provide you with the required compatibility details.
- 3. Update printer drivers: Ensure that you have installed the latest drivers for your printer. Visit the manufacturer’s website or use the software update feature on your Mac to check for any available updates. Updated drivers often provide additional functionality, including black and white printing.
If your printer is not compatible with black and white printing, you may want to consider alternative options. Depending on your needs, you could purchase a monochrome printer specifically designed for black and white printing or explore software solutions to convert color documents to grayscale before printing.
Checking printer compatibility is the first step towards successfully printing in black and white on your Mac. By ensuring that your printer supports this function, you can move on to the next steps confidently and enjoy high-quality black and white prints.
Check Ink Levels
Before you start printing in black and white on your Mac, it’s essential to check the ink levels of your printer. Proper ink levels ensure high-quality prints and prevent any issues during the printing process. Here’s how to check the ink levels:
- 1. Look for printer software: Many printers come with software that allows you to check the ink levels directly from your computer. Look for an application or utility on your Mac that is specific to your printer brand and model.
- 2. Check printer control panel: If your printer doesn’t have dedicated software for checking ink levels, you can often find the information on the printer’s control panel. Access the printer’s menu options, look for an “Ink” or “Cartridge” section, and check the displayed ink levels.
- 3. Consult printer manual: If you’re having trouble locating the ink levels or need more specific instructions, refer to the printer’s manual. The manual should provide step-by-step guidance on how to check the ink levels on your particular printer model.
If the ink levels are low or empty, you’ll need to replace the ink cartridges before printing in black and white. Refer to the printer’s manual or manufacturer’s website to find the appropriate replacement cartridges for your printer model.
Checking the ink levels of your printer ensures that you have sufficient ink for high-quality prints. By being proactive in monitoring the ink levels, you can avoid any last-minute surprises and ensure a smooth printing experience on your Mac.
Select Text or Image to Print
When printing in black and white on your Mac, you have the option to print either text or images. This allows you to choose the specific content you want to print without using unnecessary ink. Here’s how to select the desired text or image for printing:
- 1. Highlight the text: If you want to print a specific portion of a document or webpage, use your mouse or trackpad to select the desired text. This could be a paragraph, a section, or even a single sentence.
- 2. Right-click and choose “Print”: Once you’ve highlighted the text, right-click on it and select “Print” from the context menu. This will open the Print dialog box with the selected text ready for printing.
- 3. Print the entire document: If you prefer to print the entire document or webpage, navigate to the File menu or use the keyboard shortcut (Command + P) to open the Print dialog box. From there, select the document or webpage you want to print and adjust the settings accordingly.
- 4. Choose the image file: In case you want to print an image file, locate the image on your Mac and open it in an image viewing application. Once opened, go to the File menu and choose the “Print” option. This will bring up the Print dialog box with the image ready for printing.
Selecting the specific text or image you want to print allows you to conserve ink and paper. By printing only what you need, you can reduce waste and save costs in the long run.
Open Print Dialog
The Print dialog is a crucial tool that allows you to customize and fine-tune your printing settings before sending your documents to the printer. To open the Print dialog on your Mac, follow these steps:
- 1. Access the File menu: From the application you are working in, navigate to the File menu located at the top left corner of your screen. Click on it to reveal a dropdown menu.
- 2. Select the “Print” option: In the File menu, locate and select the “Print” option. Alternatively, you can use the keyboard shortcut (Command + P) to quickly open the Print dialog.
- 3. Look for the printer selection: Once the Print dialog appears, you will see a section where you can choose the printer you want to use. If you have multiple printers connected to your Mac, ensure that you select the correct one.
- 4. Explore the print settings: Take a moment to explore the various print settings available in the Print dialog. You can adjust settings such as paper size, orientation, scale, and more, depending on your specific requirements.
- 5. Preview your document: Many printing applications provide a preview of how your document will appear when printed. Use this feature to ensure that all the content is correctly formatted and fits within the printable area.
- 6. Make additional adjustments: If needed, you can make additional adjustments to the print settings based on your preferences. This could include selecting specific pages to print, choosing the number of copies, or enabling duplex printing.
- 7. Confirm and send to print: Once you are satisfied with your print settings, click the “Print” button to send your document to the selected printer. The printer will start processing your print job according to the specified settings.
The Print dialog is a versatile tool that allows you to customize your printing experience. Familiarizing yourself with this dialog will enable you to take full advantage of the available options and achieve optimal print results.
Select Printer
When printing in black and white on your Mac, it’s crucial to select the correct printer to ensure your documents are accurately and efficiently printed. Here’s how you can select the printer of your choice:
- 1. Open the Print dialog: To get started, open the document you want to print or navigate to the webpage you wish to print. Access the Print dialog through the File menu or by using the keyboard shortcut (Command + P).
- 2. Review available printers: In the Print dialog, you will see a list of available printers. Take a moment to review the options and locate the printer you want to use. If your desired printer doesn’t appear in the list, ensure that it is properly connected to your Mac or check if the printer is powered on.
- 3. Set default printer: If you frequently use a specific printer, you can set it as your default printer in the System Preferences of your Mac. This way, whenever you open the Print dialog, your default printer will be selected automatically.
- 4. Select the desired printer: Click on the printer name in the Print dialog to select it. A checkmark or highlighted text will indicate that the printer has been successfully chosen for this print job.
- 5. Choose printer properties: Some printers offer additional properties that can be customized. To access these options, look for a “Properties” or “Printer Settings” button within the Print dialog. Here, you can adjust settings such as paper type, print quality, and more.
By selecting the correct printer, you ensure that your black and white printing job is executed accurately and efficiently. Choosing the right printer will help you achieve the desired results without any unnecessary complications or delays.
Set Preferences
Setting your preferences in the Print dialog allows you to customize various aspects of your print job, ensuring that it meets your specific requirements. Here’s how you can set your preferences when printing in black and white on your Mac:
- 1. Open the Print dialog: Start by opening the document you want to print or navigating to the webpage you wish to print. Access the Print dialog through the File menu or by using the keyboard shortcut (Command + P).
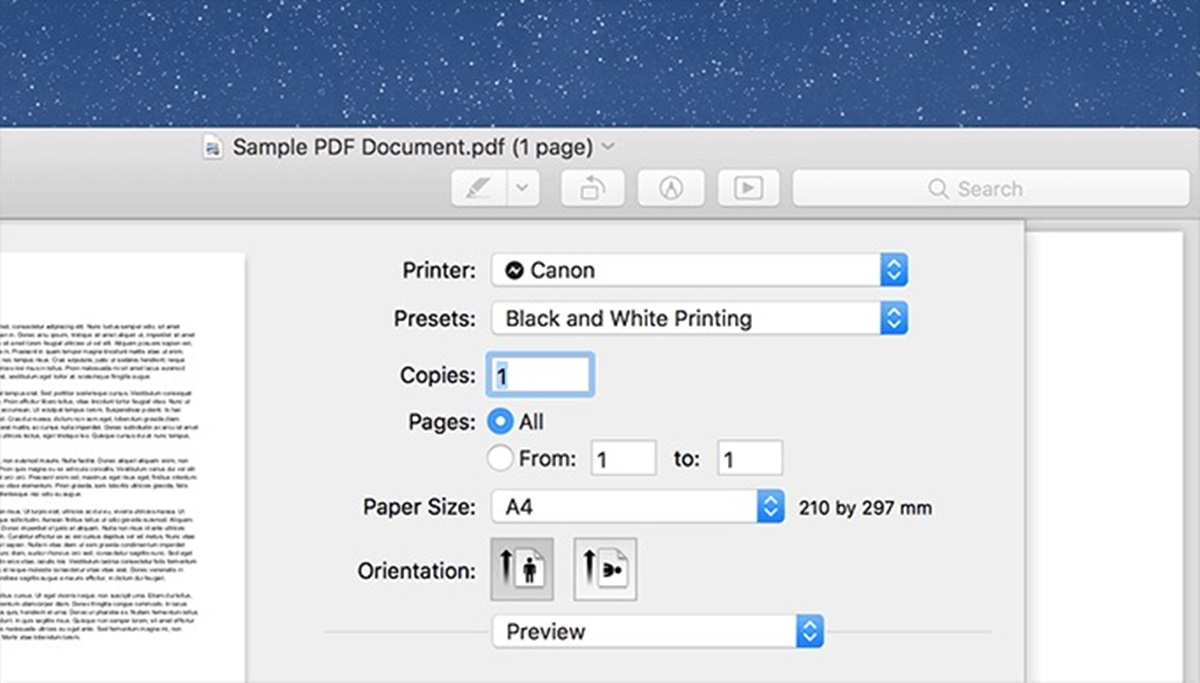
- 2. Explore the available options: In the Print dialog, you will find a range of preferences that you can adjust to personalize your print job. These options can include paper size, orientation, scale, and more.
- 3. Paper size and orientation: Choose the appropriate paper size and orientation based on your specific needs. If you’re printing on standard letter-sized paper, select “Letter” as the paper size, and choose between “Portrait” (vertical) or “Landscape” (horizontal) for the orientation.
- 4. Adjust scaling: Depending on the size of your document and print area, you may need to adjust the scaling. You can choose to scale the content to fit the page or print it at its actual size.
- 5. Select page range: If you only need to print specific pages of a document, select the desired page range in the Print dialog. This allows you to conserve paper and ink by excluding unnecessary pages.
- 6. Duplex printing: If your printer supports duplex (double-sided) printing, you can enable this option in the Print dialog. This can help reduce paper usage for longer documents.
- 7. Customize print quality: Some printers offer adjustable print quality settings. If desired, you can set the print quality to a higher or lower level depending on your needs and preferences.
By setting your preferences in the Print dialog, you can tailor the print job to your exact specifications. This allows you to achieve the desired results while optimizing the use of resources such as paper and ink.
Choose Black and White Option
When printing in black and white on your Mac, you have the option to specifically select the black and white printing mode. This ensures that your documents or images are printed in grayscale, without using any color ink. Here’s how you can choose the black and white option:
- 1. Open the Print dialog: Start by opening the document you want to print or navigate to the webpage you wish to print. Access the Print dialog through the File menu or by using the keyboard shortcut (Command + P).
- 2. Locate the color settings: In the Print dialog, look for a section that includes color settings or print mode. This section may have different names depending on the printer model or software you are using.
- 3. Choose grayscale or black and white: Within the color settings, locate and select the option for grayscale or black and white printing. This setting instructs the printer to only use black ink or shades of gray, producing a monochrome printout.
- 4. Verify the preview: Some printing applications provide a preview of how your document will appear when printed in black and white. Take a moment to review the preview to ensure that the desired effect is achieved.
- 5. Adjust other settings if needed: While selecting the black and white option, you may also need to make adjustments to other settings such as paper type, print quality, or paper source. Modify these settings according to your specific requirements.
- 6. Complete the print job: Once you have chosen the black and white printing option and made any necessary adjustments, click the “Print” button to initiate the print job. The printer will now proceed to print your document in black and white.
By selecting the black and white option, you can conserve color ink and achieve grayscale printouts that are suitable for documents, articles, or images that do not require color. This allows you to print efficiently and also gives you the opportunity to enhance the visual contrast of your prints.
Adjust Print Settings
Adjusting the print settings in the Print dialog allows you to fine-tune various aspects of your print job, ensuring that it meets your specific needs and preferences. Here’s how you can adjust the print settings when printing in black and white on your Mac:
- 1. Open the Print dialog: Start by opening the document you want to print or navigate to the webpage you wish to print. Access the Print dialog through the File menu or by using the keyboard shortcut (Command + P).
- 2. Review the available settings: In the Print dialog, you will find a range of settings that you can adjust to customize your print job. These settings include paper size, orientation, scaling, and more.
- 3. Set the paper size and orientation: Choose the appropriate paper size and orientation based on the document or image you are printing. For standard letter-sized paper, select “Letter” as the paper size, and choose between “Portrait” (vertical) or “Landscape” (horizontal) for the orientation.
- 4. Adjust the scaling: Depending on the size of your document and the available print area, you may need to adjust the scaling. You can choose to scale the content to fit the page or print it at its actual size.
- 5. Select the desired page range: If you only need to print specific pages of a document, select the desired page range in the Print dialog. This allows you to conserve paper and ink by excluding unnecessary pages.
- 6. Customize print quality: Some printers offer adjustable print quality settings. If desired, you can set the print quality to a higher or lower level based on your needs and the desired outcome.
- 7. Enable or disable duplex printing: If your printer supports duplex printing (printing on both sides of the page), you can enable or disable this option in the Print dialog. Enabling duplex printing can help save paper for longer documents.
- 8. Consider other settings: Depending on your specific print job, you may need to adjust additional settings such as paper type, print layout, or color options. Explore these settings to ensure your printout meets your expectations.
By adjusting the print settings in the Print dialog, you can tailor your print job to your exact requirements. This customization allows you to achieve the desired print results while optimizing the use of resources such as paper, ink, and time.
Preview and Print
Previewing your document before printing allows you to ensure that everything appears as intended and make any necessary adjustments. Once you’re satisfied with the preview, you can proceed with the printing process. Here’s how you can preview and print your document in black and white on your Mac:
- 1. Open the Print dialog: Start by opening the document you want to print or navigate to the webpage you wish to print. Access the Print dialog through the File menu or by using the keyboard shortcut (Command + P).
- 2. Configure print settings: Set your desired print settings, including paper size, orientation, scaling, and any other customizations you require. Ensure that you have selected the black and white printing option if needed.
- 3. Preview the printout: Many printing applications offer a preview feature that allows you to see how your document will look when printed. Take the time to review the preview and ensure that it meets your expectations.
- 4. Make adjustments if necessary: If you notice any issues or inconsistencies in the preview, go back to the print settings to make the necessary adjustments. This could include modifying the scaling, changing the paper type, or adjusting other settings to achieve the desired outcome.
- 5. Confirm the print job: Once you are satisfied with the preview and have made any necessary adjustments, click the “Print” or “Print Now” button in the Print dialog to initiate the print job.
- 6. Monitor the printing process: Monitor the progress of the print job as it is being processed. You may receive prompts or notifications regarding the status of the print job, such as paper replenishment or ink levels.
- 7. Collect your printed document: Once the printing process is complete, collect your printed document from the printer’s output tray. Ensure that the printed pages appear correctly in black and white as desired.
Previewing your document and double-checking your print settings before printing helps to avoid unnecessary wastage and ensures that you achieve the desired results. By taking the time to preview and adjust as needed, you can enjoy high-quality black and white prints from your Mac.