
Finding the Right Envelope Size
When it comes to printing addresses on envelopes, one of the first things you need to consider is finding the right envelope size. The size of the envelope will determine how much space you have to work with and what types of addresses you can print. Here are some helpful tips to guide you in finding the perfect envelope size:
- Consider the size of the mailing piece: Before choosing an envelope size, you need to determine the size of the material you intend to mail. Whether it’s a letter, invitation, or brochure, make sure the envelope can accommodate it without being too tight or loose.
- Check postal regulations: It’s essential to comply with postal regulations to ensure that your mail piece will be delivered without any issues. Visit your local post office or the postal service’s website to determine the acceptable envelope sizes for different types of mail.
- Consider the weight of the mailing piece: If you’re sending a bulkier or heavier item, such as a catalog or a package, you may need a larger envelope size to fit the contents comfortably. Be sure to choose an envelope with the appropriate weight capacity.
- Think about branding and design: If you’re using envelopes for business correspondence, consider the opportunity to showcase your branding. Look for envelope sizes that allow you to print your logo, company name, or a design element alongside the address.
By taking these factors into consideration, you can find an envelope size that meets your mailing needs and allows you to print addresses in a clear and professional manner. Remember to double-check the dimensions of the envelope before printing to ensure that it aligns perfectly with your printer settings.
Gathering the Necessary Materials
Before you can start printing addresses on envelopes, it’s important to gather all the necessary materials. Having everything you need at hand will ensure a smooth and efficient process. Here’s a list of essential items to gather:
- Envelopes: Choose envelopes that are compatible with your printer and appropriate for your mailing needs. Make sure they are clean and free from any folds or wrinkles that could affect the printing quality.
- Printer: You’ll need a reliable printer that can handle envelope printing. Ensure that it supports your chosen envelope size and has the capability to print in high quality.
- Address List: Have an electronically saved address list handy. Ensure that the addresses are accurate, properly formatted, and free from any errors. Using a spreadsheet program like Microsoft Excel or Google Sheets can help keep your address list organized.
- Address Labels or Stamps: Depending on your preferred method, you may need address labels with adhesive backing or stamps for manually affixing addresses to the envelopes.
- Quality Ink or Toner: Make sure you have enough ink or toner cartridges for your printer. Using high-quality ink or toner will ensure that the addresses are printed clearly and legibly.
- Computer and Software: You’ll need a computer or laptop with the necessary software installed to design and print the addresses. Popular software options include Microsoft Word, Adobe Photoshop, and dedicated envelope printing software.
- Scratch Paper: Keep scratch paper nearby to test print the addresses before printing them directly onto the envelopes. This will help you avoid wasting envelopes if any adjustments or corrections are needed.
By gathering these materials before you start, you’ll save time and avoid any unnecessary interruptions during the printing process. Make sure to have an adequate supply of envelopes and other consumables so that you can print all the addresses you need without any interruptions.
Designing the Envelope Layout
When printing addresses on envelopes, it’s important to consider the layout to ensure that the addresses are clear, legible, and visually appealing. Here are some tips for designing the envelope layout:
- Placement: Decide where you want the address to appear on the envelope. Typically, it is positioned towards the center and slightly above the middle section. Keep in mind any pre-printed logos or designs that may already exist on the envelope.
- Font and Size: Choose a font that is easy to read, such as Arial, Times New Roman, or Calibri. Opt for a font size that is large enough to be clearly visible, around 10–12 points, depending on the envelope size.
- Formatting: Ensure that the address is properly formatted with the recipient’s name on the first line, followed by the street address, city, state, and ZIP code on subsequent lines. Use appropriate punctuation and spacing to make the address look neat and professional.
- Alignment: Align the address horizontally and vertically within the designated area of the envelope. Test print a few envelopes to ensure that the address is properly centered and aligned before printing in bulk.
- Bolding and Italics: Use bold formatting for the recipient’s name to make it stand out. However, avoid excessive use of italics or underlining as it may affect the overall readability of the address.
- Color Considerations: It’s usually recommended to print addresses in black ink for a clean and professional look. However, you can consider using different colors for specific occasions or to match your branding, as long as the address remains legible and contrasts well with the envelope color.
Remember, the goal is to create a visually appealing envelope layout that accurately presents the address information. Take the time to experiment with different designs and print a few test envelopes to ensure that the final layout meets your expectations.
Printing Envelopes with a Printer
Printing addresses on envelopes using a printer can save time and ensure a professional look. Follow these steps to print envelopes with your printer:
- Set up your printer: Ensure that your printer is compatible with envelope printing. Refer to the printer manual or manufacturer’s website to check if your printer has a specific paper tray or envelope slot for feeding envelopes.
- Prepare the envelope template: Open a word processing program like Microsoft Word and create a new document. Go to the ‘Page Layout’ or ‘Print Setup’ section and select the envelope size you’re using. Adjust the margins and layout as needed for your specific envelope size.
- Enter the address information: Type or copy the recipient’s address into the document. Make sure to format the address correctly and preview it on the template to ensure proper alignment.
- Print a test envelope: Insert a blank envelope into your printer’s designated envelope tray or slot. Print a test envelope to verify the address placement and alignment. If any adjustments are needed, edit the template and print another test envelope until you’re satisfied with the results.
- Load envelopes for printing: Once you’re confident in the template, load a stack of envelopes into the printer paper tray or envelope slot. Make sure to align the envelopes neatly and adjust any envelope guides or sliders to hold them in place.
- Print the envelopes: With the envelopes loaded, print the addresses onto the envelopes using the envelope template. Keep an eye on the printing process to ensure that the envelopes are feeding correctly and that no paper jams occur.
- Allow the envelopes to dry: After printing, give the envelopes a few minutes to dry completely before handling them to avoid smudging the ink. Avoid stacking the envelopes immediately to prevent potential smudging or sticking together.
By following these steps, you can print addresses on envelopes efficiently and achieve professional-looking results. Remember to check the printer’s manual for any specific instructions or recommendations on envelope printing. It’s always a good idea to perform a final quality check on a few printed envelopes to confirm the accuracy and readability of the addresses.
Printing Envelopes by Hand
If you don’t have access to a printer or prefer a more personalized touch, you can print addresses on envelopes by hand. Here’s a step-by-step guide on how to do it:
- Prepare the envelope: Start with a clean and flat envelope. Ensure that there are no creases or folds that could affect the writing surface.
- Choose a suitable writing instrument: Select a pen or marker that writes smoothly and provides good visibility. A fine-tip pen or a permanent marker would be ideal for clear and legible writing.
- Plan the placement: Determine the area on the envelope where you want to write the address. Typically, it’s best to position the address towards the center and slightly above the middle section.
- Begin writing the address: Write the recipient’s name on the first line, using clear and legible handwriting. Proceed with the street address, city, state, and ZIP code on subsequent lines. Ensure that your writing is neat and easy to read.
- Use proper formatting: Follow standard address formatting, including capitalizing appropriate words (e.g., names and cities) and using proper punctuation. Aim for consistency and ensure that the address is well-organized on the envelope.
- Allow the ink to dry: Once you’ve finished writing the address, give the ink a few moments to dry completely before handling the envelope. This will prevent smudging or smearing of the written address.
- Double-check for accuracy: Before sending the envelope, take a moment to review the address for any errors or missing information. Double-check that the address is complete and accurate to ensure successful delivery.
While it may take a bit more time and effort, printing addresses on envelopes by hand can add a personal touch and showcase your attention to detail. Make sure to write with care, maintaining consistent lettering and providing sufficient space between lines for clarity.
Troubleshooting Tips for Printing Addresses
Printing addresses on envelopes can sometimes present challenges, but with a few troubleshooting tips, you can overcome them and ensure successful results. Here are some common issues that may arise and how to address them:
- Printer alignment issues: If the addresses are not printing in the desired location on the envelope, check your printer settings or the envelope template you’re using. Adjust the margins or layout to align the addresses correctly.
- Ink smudging or bleeding: If the ink smears or bleeds on the envelopes, ensure that you’re using a compatible envelope type and quality ink or toner. Allow the envelopes to dry completely before handling them to prevent smudging.
- Paper jams: If the envelopes frequently get stuck or cause paper jams in the printer, verify that you’re using the correct envelope size and that the envelopes are loaded properly. Consult your printer manual for guidance on envelope feeding.
- Poor print quality: If the addresses appear faint or blurry, check for low ink or toner levels. Replace the cartridges if necessary. Additionally, adjust the print settings for higher quality or consider cleaning the print heads for improved results.
- Incorrect formatting or alignment: If the addresses don’t align properly or the formatting is incorrect, review the envelope template to ensure the correct settings for your envelope size. Make adjustments as needed to achieve the desired layout.
- Address misprints: If you notice errors or misspelled words in the addresses, double-check your address list for accuracy. Correct any errors in the document before printing the addresses onto the envelopes.
- Envelopes curling or bending: If the envelopes tend to curl or bend during printing, check the envelope material and weight. Opt for sturdier envelopes or adjust the printer settings to use slower feed speeds to prevent curling.
By following these troubleshooting tips, you can overcome common challenges and ensure that addresses are printed correctly onto the envelopes. Remember to always test print a few envelopes before printing in bulk and keep spare envelopes on hand in case any issues arise.
Tips for Properly Inserting Envelopes in a Printer
Properly inserting envelopes in a printer is essential to ensure accurate addressing and prevent any damage to the envelopes or printer. Follow these tips to ensure a smooth printing process:
- Choose the right envelope size: Make sure the envelope size matches the settings in your printer. Using an envelope size that is not compatible with your printer can lead to feeding and printing issues.
- Check the envelope orientation: Some printers require envelopes to be inserted face down, while others may require them to be face up. Consult your printer manual or manufacturer’s website to determine the correct orientation.
- Adjust the paper guides: Before inserting the envelopes, adjust the paper guides in the printer’s paper tray to snugly hold the envelopes in place. This will help prevent skewing or misalignment during printing.
- Prepare a small stack of envelopes: To maintain a consistent feeding process, stack a small number of envelopes together (around 10-15) and tap them gently on a flat surface to align the edges. This will help ensure that the envelopes feed smoothly into the printer.
- Straighten the envelopes: Before inserting the stack of envelopes into the printer, make sure to straighten them properly to avoid any folds, bends, or wrinkles. This will prevent any feeding issues or damage to the envelopes.
- Insert the stack of envelopes carefully: Slowly and gently insert the stack of envelopes into the designated paper tray, ensuring that they are positioned against the paper guides. Do not force the envelopes into the printer as this can cause jamming or misfeeding.
- Verify the print settings: Before printing, double-check the print settings in your software or printer menu to ensure they match your envelope size and desired layout. This will help avoid any misalignment or cropping of the addresses.
- Print a test envelope: Once the envelopes are loaded, print a test envelope to confirm the alignment and print quality. Check that the addresses are positioned correctly, and make any necessary adjustments before printing in bulk.
- Monitor the printing process: Keep an eye on the printing process to ensure that the envelopes are feeding smoothly and that no jams or misprints occur. If any issues arise, pause the printing process and troubleshoot the problem before resuming.
By following these tips, you can properly insert envelopes into your printer and ensure a smooth and efficient printing process. Always consult your printer manual or manufacturer’s website for specific instructions on envelope feeding, as different printers may have different recommendations.
Adding a Return Address to the Envelope
In addition to printing the recipient’s address, adding a return address to the envelope is important for mailings. It allows for proper identification and ensures that undeliverable mail can be returned to the sender if necessary. Here are some tips for adding a return address:
- Choose the location: Decide where you want to place the return address on the envelope. Typically, it is positioned in the upper left corner of the envelope, either aligned with the left edge or a short distance from the left and top edges.
- Include your name or business: Start the return address with your name or the name of your business. It helps the recipient or the postal service identify the sender of the mail.
- Include the street address: Write the street address on the next line, followed by the city, state, and ZIP code on subsequent lines. Use the correct formatting and ensure that the address is complete and accurate.
- Use legible handwriting: If you’re writing the return address by hand, use legible handwriting or consider using a printed label. Ensure that the writing is clear and easy to read, as it will be used for identification and potential returns.
- Consider using a stamp: If you frequently send mail, you may consider using a return address stamp. This can save time and provide a consistent and professional look for your return address.
- Review for accuracy: Double-check the return address for any errors or misspellings. Any inaccuracies may result in the mail being undeliverable or returned to the wrong location.
- Print the return address: If you’re printing envelopes with a printer, you can include the return address in your envelope template. Ensure that the return address is properly aligned and formatted before printing.
- Avoid using abbreviations: To ensure clarity, it’s best to avoid using abbreviations in the return address. Instead, write out the full name of the city and state for better recognition and delivery.
Adding a return address to the envelope is a crucial step, whether you’re sending personal mail or business correspondence. It helps maintain effective communication and ensures efficient handling of undelivered mail. Take the time to include a clear and accurate return address on each envelope to enhance the professionalism and reliability of your mailings.
Considering Decorative Options for Envelopes
In addition to printing addresses accurately, considering decorative options for envelopes can add a personal touch and make your mailings stand out. Here are some creative ideas to enhance the appearance of your envelopes:
- Envelope colors: Choose envelopes in different colors to make your mailings visually appealing. Opt for colors that align with your branding or the theme of the occasion. Just make sure that the color doesn’t make the addresses difficult to read.
- Envelope sizes and shapes: Explore various envelope sizes and shapes to add uniqueness to your mailings. Consider square envelopes, smaller notecard envelopes, or oversized envelopes for special invitations or announcements.
- Envelope liners: Add a touch of elegance by including envelope liners. These decorative sheets fit inside the envelopes and can come in various patterns, colors, or even custom designs. Liners can make a significant impact when the envelope is opened.
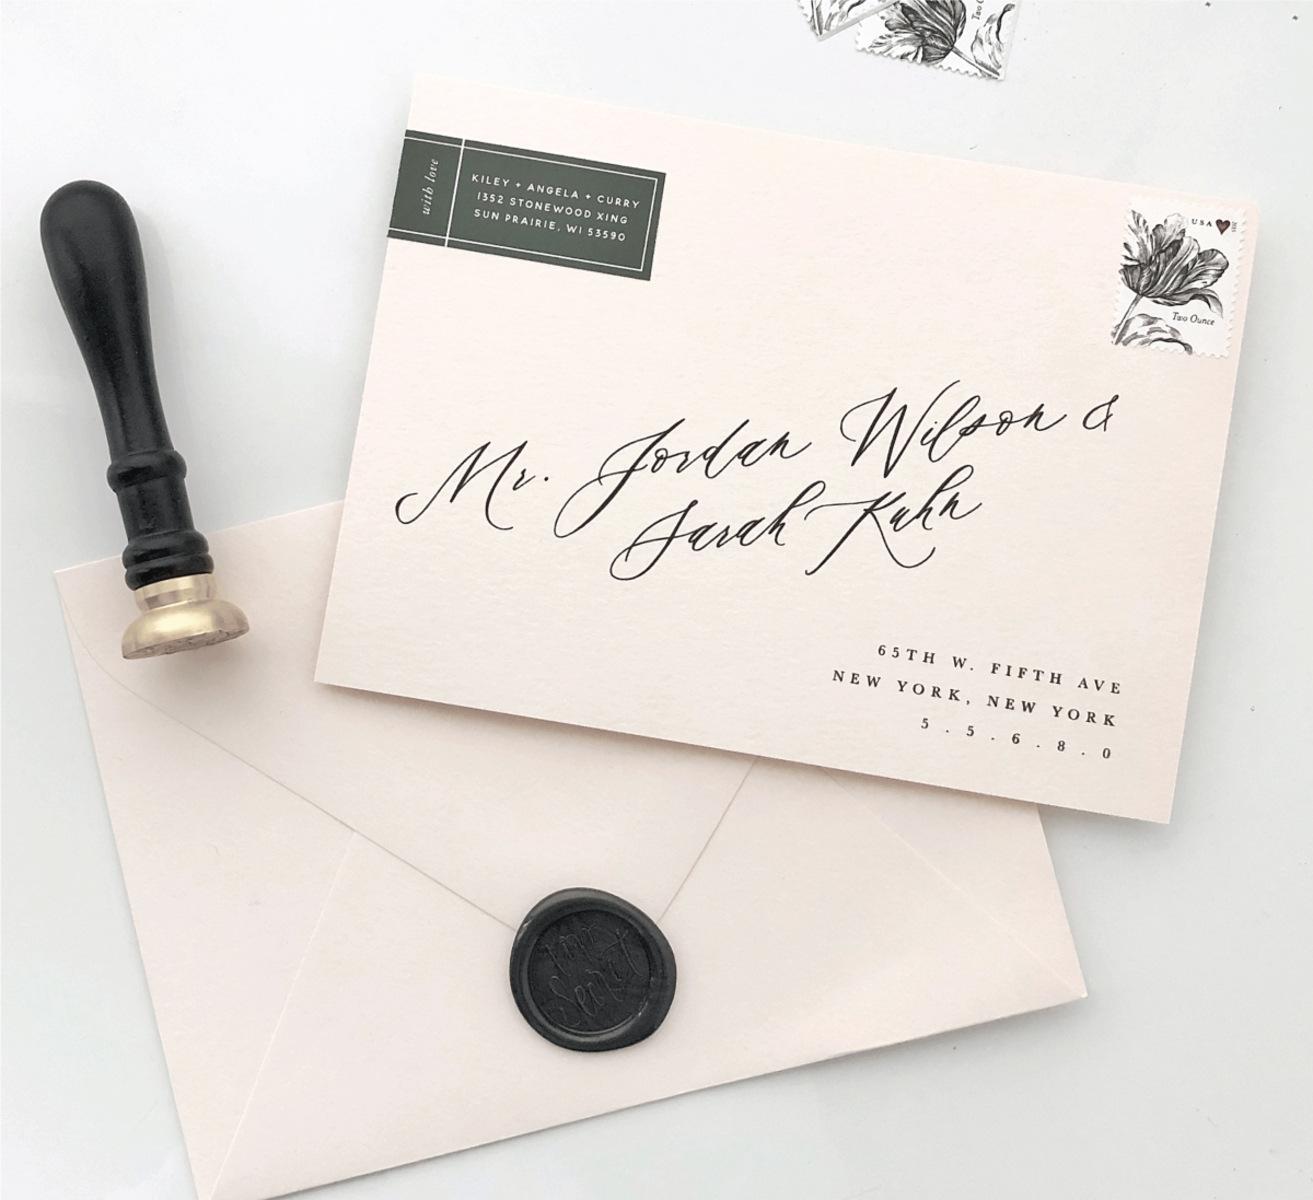
- Sealing options: Instead of using standard adhesive, consider sealing envelopes with wax seals or personalized stickers. These decorative elements can add a sense of charm and exclusivity to your mailings.
- Hand-drawn illustrations: Add a personal touch by incorporating hand-drawn illustrations on the envelope. This can be a simple doodle, a custom-designed motif, or a personalized monogram. It adds a unique and artistic touch to your mailings.
- Stamps and postage: Go beyond traditional postage stamps and consider using vintage stamps, themed stamps, or custom-designed stamps that align with the purpose or theme of your mailings. These stamps can add an extra visual appeal to your envelopes.
- Calligraphy or unique fonts: If you have good handwriting skills or access to calligraphy, consider writing the addresses in beautiful script. If printing, experiment with unique fonts that complement the style and theme of your mailing.
- Customized labels: Create personalized address labels featuring unique designs or your company logo. Labels can save time and provide a consistent and professional appearance for your mailings.
Remember, while decorative options can enhance the visual appeal of your envelopes, it’s essential to strike a balance between creativity and legibility. Ensure that the addresses remain clear and easy to read and that any decorative elements do not obstruct important information.
By considering these decorative options, you can transform plain envelopes into eye-catching mailings that make a memorable impression on recipients.