
What is a PSP?
The PlayStation Portable, commonly known as the PSP, is a handheld gaming console developed by Sony. Released in 2004, it was the first handheld device to offer console-like gaming experiences on the go. The PSP quickly gained popularity due to its impressive graphics, extensive library of games, and multimedia capabilities.
The PSP featured a vibrant display, intuitive controls, and a powerful processor, making it a portable powerhouse for gaming enthusiasts. Its sleek design and compact size made it easy to carry around, allowing gamers to enjoy their favorite titles anytime, anywhere.
Aside from gaming, the PSP offered a wide range of multimedia functions. Users could listen to music, watch videos, and even browse the internet on the device. It also had built-in Wi-Fi capabilities, enabling multiplayer gaming and online connectivity.
The PSP’s library of games catered to various genres and interests, ranging from action and adventure to sports and puzzles. Notable titles like “God of War: Chains of Olympus,” “Monster Hunter Freedom,” and “Final Fantasy Tactics: The War of the Lions” showcased the console’s capabilities and attracted a dedicated fanbase.
As the popularity of the PSP grew, so did the demand for more immersive gaming experiences. To cater to this, Sony introduced accessories like the PSP Camera and GPS attachment, further expanding the console’s functionalities.
Though the PSP was eventually succeeded by the PlayStation Vita in 2011, it remains an iconic device in the gaming industry. Its innovation and impact paved the way for future handheld consoles and set a benchmark for portable gaming experiences.
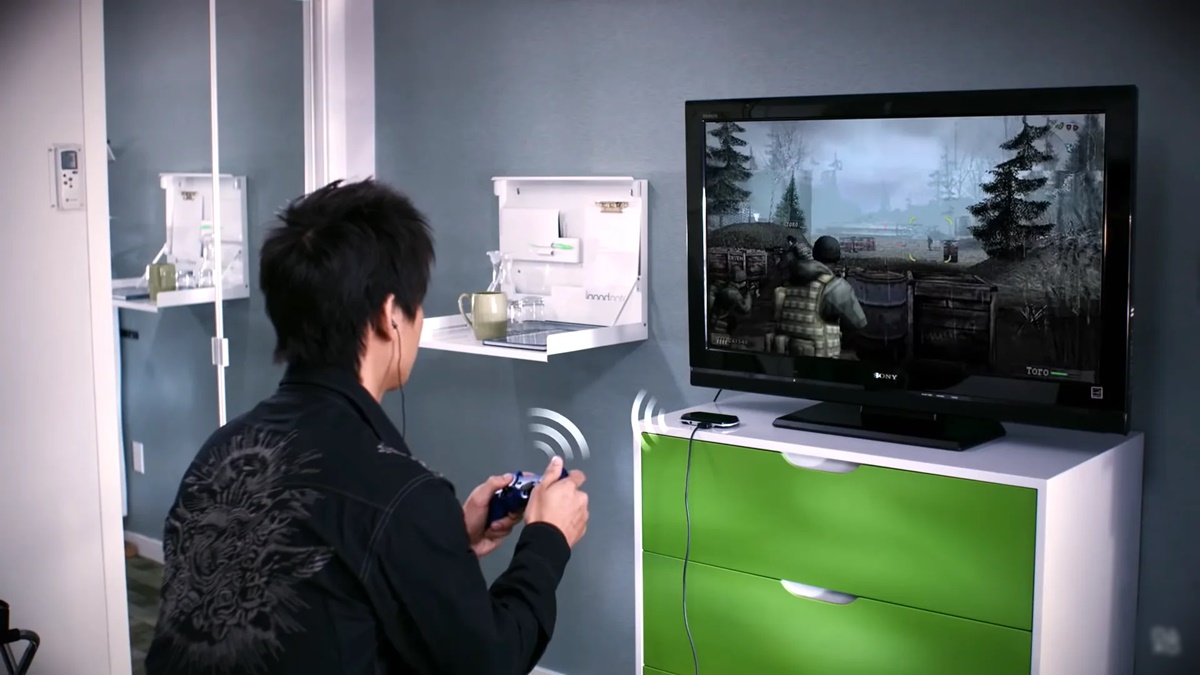
Whether you’re a long-time PSP enthusiast or new to the console, connecting your PSP to your TV can enhance your gaming experience and allow you to enjoy your favorite games on a larger screen. In the following sections, we’ll explore various methods of connecting your PSP to your TV and optimize your settings for optimal gameplay.
Connecting Your PSP to Your TV
Connecting your PSP to your TV can open up a whole new world of gaming possibilities. Whether you want to enjoy your favorite PSP games on a larger screen or experience multiplayer gaming with friends and family, there are several methods you can use to connect your PSP to your TV.
1. Connecting with a Component Video Cable:
If your TV has component video input ports, you can use a component video cable to connect your PSP to the TV. Simply plug one end of the cable into the PSP’s video output port and the other end into the corresponding input ports on your TV. Make sure to match the colors of the connectors with the corresponding ports. Once connected, switch your TV to the appropriate input channel and you should see your PSP screen displayed on the TV.
2. Connecting with an AV Cable:
An AV cable is another option for connecting your PSP to your TV. Plug one end of the AV cable into the PSP’s video output port and the other end into the AV input ports on your TV. Similar to the component video cable, make sure to match the colors of the connectors with the corresponding ports. Select the right input channel on your TV and you’ll be able to see your PSP screen on the TV.
3. Connecting with an HDMI Adapter:
If your TV supports HDMI input, you can use an HDMI adapter for a high-quality connection. Connect the adapter to the PSP’s video output port, then connect one end of the HDMI cable to the adapter and the other end to your TV’s HDMI input port. Switch your TV to the HDMI input channel, and you’re ready to enjoy your PSP games on the big screen with sharp, clear visuals.
It’s important to note that not all PSP models have video output capabilities. Make sure to check your PSP’s user manual or consult the manufacturer’s website to determine if your specific model supports video output.
Once you’ve connected your PSP to your TV using any of the above methods, you can start enjoying your games on a larger display. In the following sections, we’ll explore how to check your TV’s input settings, adjust the PSP’s display settings, and troubleshoot common connection issues.
Connecting with a Component Video Cable
If your TV has component video input ports, connecting your PSP to the TV using a component video cable is a great option. This method allows you to enjoy your PSP games on a larger screen with better visual quality. Here’s how you can connect your PSP to your TV using a component video cable:
1. Check the PSP: Ensure that your PSP model supports video output. Refer to the user manual or visit the manufacturer’s website to confirm if your specific PSP model has video output capabilities.
2. Gather the components: Get a component video cable that is compatible with your PSP model and your TV. Make sure the cable has the appropriate connectors for your PSP’s video output port and your TV’s component video input ports. The component video cable typically has red, blue, and green connectors for video signals and red and white connectors for audio signals.
3. Connect the PSP to the TV: Plug one end of the component video cable into the PSP’s video output port, which is located on the bottom edge of the PSP. Then, connect the other end of the cable to the corresponding component video input ports on your TV. The component video input ports are usually color-coded and labeled “Y,” “Pb,” and “Pr.” Make sure to match the colors of the connectors with the corresponding ports.
4. Adjust your TV’s input settings: Use your TV’s remote control to select the appropriate input source for the component video cable connection. This is usually labeled “Component” or “AV.” Refer to your TV’s user manual if you’re unsure how to change the input source.
5. Power on your PSP: Turn on your PSP and navigate to the display settings. You may need to go to the “Settings” menu and look for the “Display Settings” or “Video Output Settings” option.
6. Configure the PSP’s display settings: Within the display settings, choose the option to enable video output to the TV. You may also have the option to select the resolution and aspect ratio that best suits your TV. Follow the on-screen prompts to save the settings.
7. Start gaming on your TV: Once the PSP’s display settings are configured, you should see your PSP screen displayed on your TV. You can now enjoy your PSP games on the larger screen of your TV.
By connecting your PSP to your TV using a component video cable, you can experience your favorite games with improved graphics and a more immersive gaming experience. Enjoy the larger display and dive into the world of PSP gaming right from the comfort of your couch.
Connecting with an AV Cable
If your TV doesn’t have component video input ports, you can still connect your PSP to the TV using an AV cable. While it may not offer the same level of video quality as a component video cable, this method is still a convenient way to enjoy your PSP games on a larger screen. Here’s how you can connect your PSP to your TV using an AV cable:
1. Check the PSP: Confirm whether your PSP model supports video output. Refer to the user manual or visit the manufacturer’s website to ensure that your specific PSP model has video output capabilities.
2. Get the necessary components: Acquire an AV cable that is compatible with your PSP model and your TV. The AV cable typically has three connectors: a yellow connector for video, and red and white connectors for audio.
3. Connect the PSP to the TV: Plug one end of the AV cable into the PSP’s video output port, usually located on the bottom edge of the device. Then, connect the other end of the cable to the corresponding AV input ports on your TV. The AV input ports are typically color-coded and labeled “Video” and “Audio-L” and “Audio-R.” Match the colors of the connectors with the corresponding ports.
4. Adjust your TV’s input settings: Use your TV’s remote control to select the appropriate input source for the AV cable connection. This may be labeled as “AV” or “Composite.” Refer to your TV’s user manual if you’re unsure about changing the input source.
5. Power on your PSP: Turn on your PSP and navigate to the display settings. You may need to access the “Settings” menu and search for the “Display Settings” or “Video Output Settings” option.
6. Configure the PSP’s display settings: Within the display settings, enable video output to the TV. Some PSP models may provide additional options for fine-tuning the display settings. Follow the on-screen instructions to save the settings.
7. Start gaming on your TV: Once you have properly configured the PSP’s display settings, you will see your PSP screen displayed on your TV. Now, you can enjoy your PSP games on the larger screen of your TV.
By connecting your PSP to your TV using an AV cable, you can experience your favorite games on a bigger display. While the video quality may not be as high as with other connection methods, this option is still a viable way to enjoy an enhanced gaming experience.
Connecting with an HDMI Adapter
If you want to achieve the best possible video and audio quality when connecting your PSP to your TV, using an HDMI adapter is the ideal method. This option allows you to enjoy your PSP games on a larger screen with stunning visuals and crystal-clear sound. Here’s how you can connect your PSP to your TV using an HDMI adapter:
1. Check the PSP: Verify that your specific PSP model supports video output. Refer to the user manual or visit the manufacturer’s website to confirm if your PSP has video output capabilities.
2. Get the necessary components: Acquire an HDMI adapter that is compatible with your PSP model. The adapter should have a video output port that matches your PSP’s video output connector.
3. Connect the adapter to the PSP: Connect one end of the HDMI adapter to the video output port on your PSP, which is usually located on the bottom edge. Make sure the connection is secure to ensure a stable signal transmission.
4. Connect the HDMI cable: Connect one end of an HDMI cable to the HDMI output port of the adapter. Then, connect the other end of the cable to the HDMI input port on your TV. Choose an available HDMI input port on your TV if there are multiple options.
5. Turn on your TV: Power on your TV and use the TV remote to switch to the HDMI input channel that corresponds with the HDMI port you connected the cable to. This will activate the PSP’s display on your TV screen.
6. Power on your PSP: Turn on your PSP and navigate to the display settings. Access the “Settings” menu and locate the “Display Settings” or “Video Output Settings” option.
7. Configure the PSP’s display settings: Within the display settings, enable video output to the TV. Depending on your PSP model, you may have options to select the resolution and aspect ratio that best matches your TV’s capabilities. Follow the on-screen instructions to finalize the settings.
8. Start gaming on your TV: With the HDMI adapter properly connected and the PSP’s display settings configured, you will see your PSP screen displayed on your TV. You can now dive into your favorite PSP games on the larger screen with superb video and audio quality.
By connecting your PSP to your TV using an HDMI adapter, you can enjoy your gaming sessions with stunning visuals and immersive audio. This method provides the best video quality available, delivering an enhanced gaming experience that truly brings your PSP games to life.
Checking Your TV’s Input Settings
Before you can start enjoying your PSP games on your TV, it’s essential to ensure that your TV is set to the correct input source. By checking and adjusting your TV’s input settings, you can ensure a seamless connection and a smooth gaming experience. Here’s how you can check your TV’s input settings:
1. Locate the input/source button: Look for the input/source button on your TV or its remote control. This button is usually labeled as “Input,” “Source,” or has an icon depicting multiple arrows pointing into a box.
2. Access the input/source menu: Press the input/source button on your remote control or directly on your TV. This action will open the input/source menu on your TV screen.
3. Select the correct input source: Navigate through the input/source menu to find the corresponding input source for the connection used to connect your PSP. Common input sources include HDMI, component video, AV, or composite. Choose the input source that matches the cable or adapter you used to connect your PSP to your TV.
4. Confirm the input selection: Once you have selected the appropriate input source, press the enter or OK button on your remote control. Confirm that the TV screen displays the signal from your PSP. If not, return to the input/source menu and reselect the correct input source.
5. Adjust additional TV settings (if necessary): Depending on your TV model, you may need to adjust additional settings to optimize the display for your PSP. These settings can include picture mode, aspect ratio, or color temperature. Refer to your TV’s user manual for specific instructions on how to access and adjust these settings.
6. Test the connection: Launch a game on your PSP and verify that the gameplay appears on your TV screen. Ensure that both the video and audio are being transmitted correctly from your PSP to the TV. If you experience any issues, refer to the troubleshooting section for assistance.
By checking and selecting the correct input source on your TV, you can ensure that the video and audio signals from your PSP are properly displayed. This step is crucial to establishing a successful connection between your PSP and TV, allowing you to fully enjoy your gaming experience on the larger screen.
Changing the PSP’s Display Settings
To ensure optimal visual performance and proper compatibility with your TV, it is important to adjust the display settings on your PSP. By customizing these settings, you can enhance the gaming experience and make the most out of playing PSP games on your TV. Here’s how you can change the display settings on your PSP:
1. Access the Settings menu: Turn on your PSP and navigate to the Settings menu. This can typically be found in the Home menu or by pressing the “Settings” icon.
2. Select Display Settings: Within the Settings menu, locate and select “Display Settings” or “Video Output Settings.” This option allows you to configure various display-related settings for your PSP.
3. Choose Video Output Mode: In the Display Settings menu, select “Video Output Mode.” You will be presented with options such as “Composite,” “Component,” or “AV Cable.” Choose the mode that matches the cable or adapter you are using to connect your PSP to your TV.
4. Select TV Output: Once you’ve chosen the appropriate Video Output Mode, select “TV Output.” Here, you can adjust settings like the resolution and aspect ratio. It is recommended to set the resolution to match your TV’s native resolution for the best display quality.
5. Configure Scaling and Overscan: Some PSP models offer options for scaling and overscan. These settings allow you to adjust how the image is displayed on your TV screen. Experiment with these settings to achieve the optimal fit and eliminate any black bars or overscan issues.
6. Save your changes: After adjusting the display settings according to your preferences, select “Save” or “Apply” to save your changes. The PSP will prompt you to confirm the new settings before applying them.
7. Test the display: Launch a game or an application on your PSP and verify that the visuals are correctly displayed on your TV screen. Ensure that the aspect ratio, resolution, and scaling settings are adjusted to your liking.
8. Make further adjustments (if necessary): If you’re not satisfied with the new display settings, go back to the Display Settings menu and make additional adjustments as needed. Don’t be afraid to experiment until you find the settings that provide the best visual experience.
By changing the display settings on your PSP, you can optimize the visual output and ensure compatibility with your TV. Take the time to fine-tune these settings based on your preferences and maximize your gaming experience on the larger screen of your TV.
Enhancing Graphics with Upscaling
If you want to further enhance the graphics of your PSP games when playing them on your TV, you can take advantage of upscaling. Upscaling is a process that increases the resolution of lower-resolution content to match the display resolution of your TV. By employing this technique, you can improve the visual quality and make the most out of your gaming experience. Here’s how you can enhance graphics with upscaling:
1. Check your TV’s upscaling capabilities: Ensure that your TV has upscaling capabilities. Most modern TVs are equipped with built-in upscaling technology that automatically scales lower-resolution content to fit the screen. Consult your TV’s user manual or visit the manufacturer’s website to determine if your specific TV model supports upscaling.
2. Enable upscaling on your TV: Access your TV’s settings menu and locate the display or picture settings. Look for an option related to upscaling or resolution enhancement. Enable or activate this option to allow the TV to upscale lower-resolution content, such as PSP games, to a higher resolution that matches the display capabilities of your TV.
3. Configure upscaling settings: Depending on your TV model, you may have access to additional upscaling settings. These settings can allow you to adjust parameters such as sharpness, noise reduction, and image enhancement. Experiment with these settings to find the level of enhancement that suits your preferences.
4. Optimize PSP display settings: In addition to enabling upscaling on your TV, ensure that the display settings on your PSP are configured to output the best possible resolution. Set the resolution to match the native resolution supported by your TV for optimal results.
5. Test and assess the visual improvement: Launch a PSP game on your TV and observe the visual enhancements achieved through upscaling. Compare the graphics with and without upscaling enabled to determine the difference in image quality and clarity.
6. Adjust settings for optimal results: If you’re not satisfied with the upscaling performance, revisit your TV’s upscaling settings and experiment with different configurations. Fine-tune parameters like sharpness or noise reduction to achieve the desired visual improvement.
By utilizing upscaling technology, you can elevate the graphical quality of your PSP games when playing them on your TV. This feature brings a sharper image, enhances details, and delivers a more immersive visual experience, providing you with a heightened sense of enjoyment while gaming.
Adjusting Audio Settings
In addition to optimizing the visual aspects of your PSP games when playing them on your TV, it’s important to consider the audio settings to ensure an immersive gaming experience. By adjusting the audio settings, you can enhance the sound quality and tailor it to your preferences. Here’s how you can fine-tune the audio settings on your PSP:
1. Access the Settings menu: Turn on your PSP and navigate to the Settings menu. This can typically be found in the Home menu or by pressing the “Settings” icon.
2. Select Sound Settings: Within the Settings menu, locate and select “Sound Settings” or “Audio Settings.” This option allows you to customize various audio-related settings for your PSP.
3. Adjust the Sound Mode: In the Sound Settings menu, you will typically find options like “Stereo,” “Mono,” or “Surround Sound.” Choose the sound mode that suits your preferences and the capabilities of your audio setup.
4. Configure Equalizer Settings: Many PSP models offer the ability to adjust the equalizer settings to fine-tune the audio output. You will usually find preset options like “Normal,” “Bass Boost,” or “Treble Boost.” Select the equalizer preset that complements your preferred audio balance.
5. Set Volume Levels: Use the volume control in the Sound Settings menu to adjust the overall volume of your PSP. Find a comfortable and suitable volume level that provides clear and crisp audio without distortion.
6. Enable Sound Effects: Some PSP models include additional sound effects or audio enhancements. Explore these options in the Sound Settings menu and enable any effects that enhance the gaming experience for you, such as surround sound or virtual surround technologies.
7. Test and fine-tune the audio: Launch a game on your PSP and listen to the audio output through your TV’s speakers or your audio setup. Adjust the volume and sound settings as necessary until you achieve the desired audio quality.
8. Use external audio equipment (optional): If you have external audio equipment, such as speakers or headphones, you may want to connect them to your PSP for an enhanced audio experience. Refer to the user manual of your audio equipment for the appropriate connection method.
By adjusting the audio settings on your PSP, you can create a personalized audio experience that complements the visuals. Fine-tuning the sound mode, equalizer, and volume levels allows you to enjoy your games with clear, balanced, and immersive audio, enhancing the overall gaming experience on your TV.
Troubleshooting Common Issues
While connecting your PSP to your TV can enhance your gaming experience, you may encounter some common issues along the way. Knowing how to troubleshoot these issues can help you overcome any obstacles and ensure a smooth and enjoyable gaming session. Here are some common issues you may encounter when connecting your PSP to your TV and how to troubleshoot them:
1. No video or distorted video:
– Ensure that the cables or adapters are securely connected to both your PSP and the TV.
– Check that your TV is set to the correct input source and that the input settings on your PSP are properly configured.
– Try connecting your PSP to a different HDMI port or using a different cable or adapter if available.
2. No audio or low-quality audio:
– Verify that the audio cables or adapters are properly connected to both your PSP and the TV.
– Check that the audio output settings on your PSP are correctly configured.
– Test the audio on another device to ensure that the issue is not with your TV or audio equipment.
3. Lag or latency:
– Make sure that your TV is set to the “Game Mode” or a low-latency mode which reduces input lag.
– Check if there are any firmware updates available for your PSP that could potentially address any latency issues.
– Reduce any unnecessary background processes on your PSP that could affect performance.
4. Resolution mismatch:
– Adjust the display settings on your PSP to match the native resolution supported by your TV.
– If your TV supports upscaling, enable it to upscale the lower-resolution PSP games to the TV’s resolution.
– Check the TV’s settings to ensure that it is not overscanning the display, cutting off parts of the image.
5. No power or charging issues:
– Ensure that your PSP is properly charged or connected to a power source.
– Check that the power adapter or cable is not damaged, and try using another power outlet if available.
– If the issue persists, try resetting your PSP or contact the manufacturer for further assistance.
If you encounter any other issues, consult the user manual of your PSP or TV, or reach out to customer support for additional guidance. Troubleshooting these common issues can help you resolve technical difficulties and ensure a smooth and enjoyable gaming experience when connecting your PSP to your TV.
Additional Tips and Tricks
When connecting your PSP to your TV, there are some additional tips and tricks that can enhance your gaming experience and make the process smoother. Here are some helpful tips to consider:
1. Use a controller:
If you prefer a more console-like experience, consider connecting a compatible controller to your PSP. This allows you to enjoy your games with a more traditional controller setup rather than using the PSP’s built-in controls.
2. Utilize save states:
Take advantage of save states if your PSP model supports it. Save states allow you to save your progress at any point in a game, allowing you to easily resume from that exact point later on. This can be especially useful for longer games or challenging sections.
3. Connect external speakers or headphones:
For a more immersive audio experience, consider connecting external speakers or headphones to your TV or PSP. This can enhance the sound quality and help you fully immerse yourself in the gameplay.
4. Customize display settings:
Experiment with various display settings, such as brightness, contrast, and color temperature, to find the optimal visual experience for your personal preferences. Adjusting these settings can further enhance the graphics and make the games more visually appealing.
5. Connect to a home theater system:
If you have a home theater system, connect your PSP to it for a truly immersive gaming experience. Connecting to a surround sound system can enhance the audio quality and create a more dynamic and realistic soundstage.
6. Explore homebrew and emulators:
Consider exploring the world of homebrew and emulators on your PSP. Homebrew allows you to run unofficial software and games, while emulators let you play games from other consoles on your PSP. This expands your gaming library and offers a wider range of gaming experiences.
7. Keep your PSP updated:
Regularly check for system updates for your PSP. These updates may include bug fixes, performance enhancements, and new features that can improve your gaming experience.
8. Take breaks:
Remember to take breaks and give your eyes and hands some rest during extended gaming sessions. Playing for long periods without breaks can lead to eye fatigue and discomfort.
By implementing these additional tips and tricks, you can elevate your gaming experience when connecting your PSP to your TV. Whether it’s improving the audio, customizing the visuals, or exploring new gaming possibilities, these tips can help you make the most out of your PSP and enjoy your favorite games on the big screen.