
Can You Play Minecraft on a Chromebook?
One question commonly asked by Minecraft enthusiasts who own a Chromebook is whether they can play the game on their device. The answer is yes! While Chromebooks are known for their lightweight and web-focused nature, it is still possible to run Minecraft on them. However, it does require some additional steps to set up the necessary environment on your Chromebook.
By default, a Chromebook runs Chrome OS, which is not compatible with running Minecraft directly. Chrome OS is designed to work primarily with web applications. But don’t worry, there is a way to get around this limitation and enjoy Minecraft on your Chromebook.
The key to playing Minecraft on a Chromebook lies in installing Linux on your device. By setting up a Linux environment on your Chromebook, you can gain access to a wider range of applications, including Minecraft.
It is important to note that playing Minecraft on a Chromebook can be resource-intensive and may require a Chromebook with higher specifications. Additionally, the performance may not be as smooth as playing on a dedicated gaming device or a high-end computer. However, with the right setup and optimization, you can still have an enjoyable Minecraft experience on your Chromebook.
In the following sections, we will guide you through the process of preparing your Chromebook for Minecraft, installing Linux, setting up a Linux environment, installing Minecraft, adjusting graphics settings, and exploring Minecraft controls on a Chromebook. We will also provide troubleshooting tips and tricks to help you overcome any potential obstacles along the way.
Preparing Your Chromebook for Minecraft
Before you can start playing Minecraft on your Chromebook, there are a few steps you need to take to ensure everything runs smoothly. Here’s what you need to do:
Check the System Requirements: Minecraft is a relatively demanding game, so it’s important to ensure your Chromebook meets the minimum system requirements. Check the official Minecraft website or the Minecraft game page on the Chrome Web Store for the specific requirements.
Update Chrome OS: Make sure your Chromebook is running the latest version of Chrome OS. To do this, click on the system tray in the bottom right corner, then click on the gear icon for settings. Scroll down and select “About Chrome OS.” Click on the “Check for updates” button and let your Chromebook update if there are any available updates.
Free Up Storage Space: Minecraft requires a significant amount of storage space, so it’s important to free up some room on your Chromebook. Delete any unnecessary files or apps and consider moving files to cloud storage solutions like Google Drive or external storage devices.
Backup Important Files: Before making any changes to your Chromebook, it’s always a good idea to back up any important files or documents. This way, you can restore them if anything goes wrong during the setup process.
Enable Developer Mode: To install Linux on your Chromebook, you will need to enable Developer Mode. Keep in mind that enabling Developer Mode will erase all local data on your device, so make sure you have backed up your files beforehand.
Powerwash Your Chromebook: After enabling Developer Mode, a “powerwash” or factory reset is required to complete the process. This will erase all local data and restore your Chromebook to its factory state. During the setup process, you will be prompted to sign in with your Google account and set up your Chromebook again.
By following these steps, you can prepare your Chromebook for Minecraft and create a suitable environment to run the game. Once you have completed these preparations, you can move on to the next steps, which involve installing Linux, setting up a Linux environment, and installing Minecraft on your Chromebook.
Installing Linux on Your Chromebook
In order to play Minecraft on your Chromebook, you will need to install a Linux operating system. The process may vary slightly depending on the model of your Chromebook, but the overall steps are as follows:
1. Enable Developer Mode: To begin, you need to enable Developer Mode on your Chromebook. This step is necessary to gain access to system-level modifications.
2. Perform a Powerwash: Once Developer Mode is enabled, performing a powerwash or factory reset will be required. This ensures that your Chromebook is in a clean state before proceeding with the Linux installation.
3. Enter Developer Mode: After the powerwash, you will need to enter Developer Mode. This can usually be done by pressing a specific key combination during the boot-up process.
4. Enable Legacy Boot Mode: Next, you need to enable Legacy Boot Mode in the Chromebook’s BIOS settings. This allows you to boot from external media, such as a USB drive.
5. Create a Bootable Linux USB Drive: Download a Linux distribution of your choice and use a tool like Etcher or Rufus to create a bootable USB drive. This will be used to install the Linux operating system on your Chromebook.
6. Boot from the USB Drive: Insert the bootable USB drive into your Chromebook and reboot the device. Press the necessary key combination to access the boot menu and select the USB drive as the boot device.
7. Install Linux: Follow the on-screen prompts to install the Linux operating system on your Chromebook. This process may vary depending on the specific Linux distribution you are using.
8. Configure Linux: Once Linux is installed, you will need to configure it by setting up user accounts and updating any necessary drivers and software packages.
These steps should help you successfully install Linux on your Chromebook. Once the Linux operating system is up and running, you can proceed with setting up a Linux environment and installing Minecraft on your Chromebook. It’s important to note that the installation process may differ slightly depending on your Chromebook model, so it’s a good idea to consult the specific documentation or support resources for your device.
Enabling Developer Mode
To install Linux and play Minecraft on your Chromebook, you first need to enable Developer Mode. This mode allows you to make system-level modifications and gain more control over your device. Here’s how to enable Developer Mode on your Chromebook:
1. Power off your Chromebook: Make sure your Chromebook is turned off before proceeding.
2. Enter Recovery Mode: Press and hold the Esc and Refresh keys on your keyboard (the Refresh key is usually depicted as a circular arrow) and then press the power button to turn on your Chromebook. Keep holding the Esc and Refresh keys until you see a “Chrome OS is missing or damaged” screen.
3. Enable Developer Mode: On the “Chrome OS is missing or damaged” screen, press Ctrl+D. A warning message will appear informing you that enabling Developer Mode will delete all local data on your Chromebook. Press Enter to continue.
4. Verify Enablement: Your Chromebook will begin the process of enabling Developer Mode. This may take a few minutes. Once it’s complete, your Chromebook will reboot.
Note: While in Developer Mode, you will see a warning screen every time you turn on or restart your Chromebook. To proceed with booting into Chrome OS, press Ctrl+D at the warning screen.
5. Set up your Chromebook: After enabling Developer Mode, your Chromebook will prompt you to set it up again. Follow the on-screen instructions to sign in with your Google account and configure the initial settings.
6. Developer Mode is now enabled: Congratulations! You have successfully enabled Developer Mode on your Chromebook. You can now proceed with installing Linux and setting up a Linux environment.
It’s important to note that enabling Developer Mode will remove all local data from your Chromebook, so make sure to back up any important files before proceeding. Additionally, Chrome OS will display a warning screen during boot-up, indicating that Developer Mode is enabled. This is normal and part of the process.
Enabling Developer Mode may void your Chromebook’s warranty, so proceed with caution and ensure that you understand the risks involved. With Developer Mode enabled, you can now move on to the next steps of setting up a Linux environment and installing Minecraft on your Chromebook for an enhanced gaming experience.
Setting Up a Linux Environment on Your Chromebook
After enabling Developer Mode on your Chromebook, the next step in preparing to play Minecraft is to set up a Linux environment. This will allow you to install and run Linux applications, including Minecraft. Here’s how you can set up a Linux environment on your Chromebook:
1. Open the Linux (Beta) settings: On your Chromebook, click on the system tray in the bottom right corner of the screen. Click on the gear icon to open the settings menu. Scroll down and select “Linux (Beta)” from the left-hand side menu.
2. Enable Linux on your Chromebook: In the Linux (Beta) settings, click on the “Turn on” button to enable Linux on your Chromebook. This will start the installation process, which may take a few minutes.
3. Customize Linux settings: Once the installation is complete, you can customize the Linux settings. You can choose a different username or allocate more storage space for your Linux environment if desired.
4. Install required packages: After customizing the settings, you will have a Linux terminal window open. You can use this terminal to install any additional packages or dependencies required for Minecraft or other applications you wish to use.
5. Install Minecraft: To install Minecraft, you can download the Minecraft Linux version from the official Minecraft website or the Linux package manager. Follow the instructions provided by the Minecraft installer to complete the installation process.
6. Launch Minecraft: Once Minecraft is installed, you can launch the game from your Linux applications menu or by running the Minecraft command in the Linux terminal.
The Linux environment on your Chromebook provides a way to run Linux applications, including Minecraft, alongside Chrome OS. While in this Linux environment, you can freely navigate between Chrome OS and Linux, allowing for a versatile and seamless experience.
By following these steps and setting up a Linux environment on your Chromebook, you can now proceed to install and play Minecraft on your device. Enjoy your gaming adventures in the world of Minecraft on your Chromebook!
Installing Minecraft on a Chromebook
Now that you have set up a Linux environment on your Chromebook, you can proceed with installing Minecraft. Here’s how you can install Minecraft on your Chromebook:
1. Download the Minecraft installer: Go to the official Minecraft website and navigate to the download page. Select the Linux version of Minecraft and click on the download button to save the installer file to your Chromebook.
2. Open the Linux terminal: Open the Linux terminal on your Chromebook. You can do this by launching the Linux applications menu and searching for the terminal or using the keyboard shortcut Ctrl+Alt+T.
3. Navigate to the directory: Use the “cd” command to navigate to the directory where you saved the Minecraft installer. For example, if you saved the installer in the Downloads folder, you can type “cd Downloads” in the terminal and press Enter.
4. Make the installer executable: In the terminal, run the command “chmod +x minecraft-installer.sh” to make the Minecraft installer executable.
5. Run the installer: Run the Minecraft installer by typing “./minecraft-installer.sh” in the terminal and pressing Enter. This will start the installation process for Minecraft.
6. Follow the installation prompts: Follow the prompts provided by the Minecraft installer to complete the installation process. This may include accepting the Terms of Service and choosing the installation directory.
7. Launch Minecraft: Once the installation is complete, you can launch Minecraft from your Linux applications menu or by running the Minecraft command in the Linux terminal.
By following these steps, you can successfully install Minecraft on your Chromebook and start exploring the endless possibilities of the block-building game.
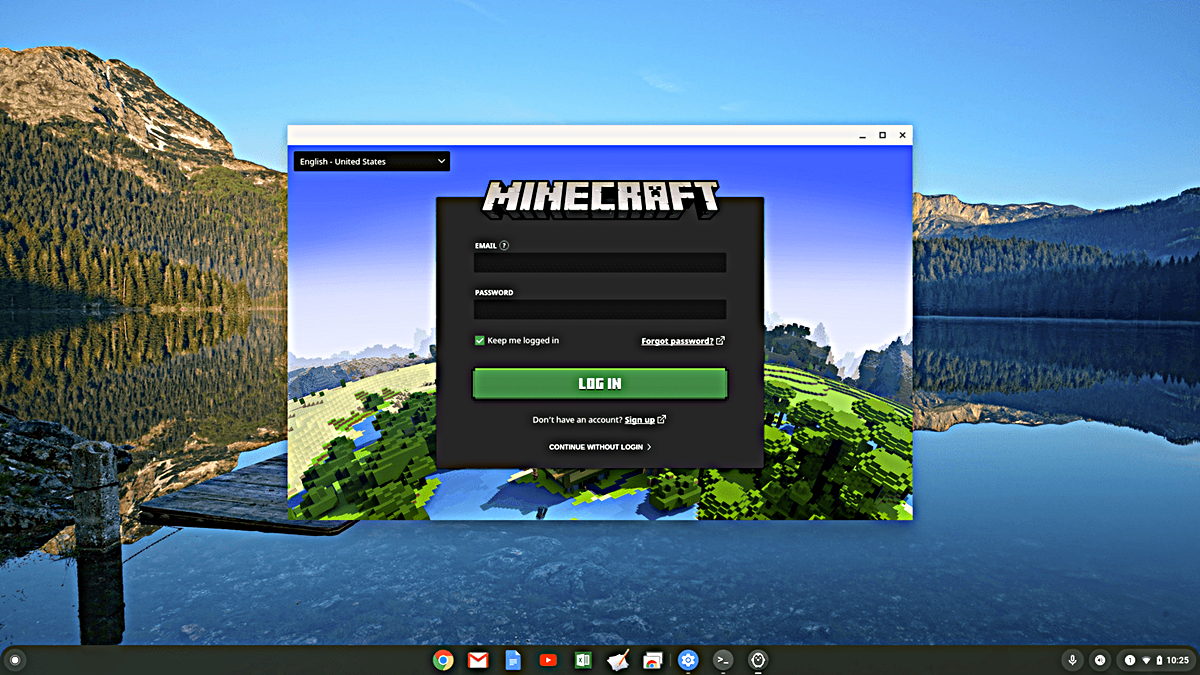
It’s important to note that you will need a valid Minecraft account to log in and play the game. If you don’t have an account, you will need to create one on the official Minecraft website before proceeding with the installation.
Enjoy your Minecraft adventure on your Chromebook and embark on exciting journeys in the vast virtual landscapes that await you!
Adjusting Minecraft’s Graphics Settings
After successfully installing Minecraft on your Chromebook, you may want to adjust the game’s graphics settings for optimal performance and visual quality. Here are some tips on adjusting Minecraft’s graphics settings:
1. Open Minecraft’s settings: Launch Minecraft on your Chromebook and navigate to the options menu. From there, click on “Settings” to access the graphics settings.
2. Adjust render distance: Render distance determines how far you can see in the game. Lowering the render distance can significantly improve performance, but it may also reduce the visible distance in the game world. Experiment with different settings to find a balance between performance and visual quality that suits your preference.
3. Enable fast graphics: Fast graphics mode disables certain graphical effects in Minecraft, which can help improve performance on lower-end Chromebook models. If you’re experiencing lag or low frame rates, enabling fast graphics mode can help alleviate these issues.
4. Adjust graphics quality: Minecraft offers different graphics quality presets, such as fast, fancy, and fancy + shaders. Choosing a lower-quality preset can improve performance, while higher-quality presets will provide better visual fidelity. Select the graphics quality that gives you the desired balance between performance and visual appeal.
5. Optimize advanced settings: Minecraft also allows you to further customize advanced graphics settings, such as particles, smooth lighting, clouds, and more. Tweaking these settings can help you achieve the desired balance between performance and visual effects. Experiment with different values to find what works best for your Chromebook.
6. Install OptiFine: OptiFine is a popular mod for Minecraft that enhances performance and adds advanced graphics options. Installing OptiFine can provide additional flexibility in adjusting Minecraft’s graphics settings and optimizing the game for your Chromebook. However, keep in mind that modding Minecraft may require additional steps and could potentially impact your game’s stability.
By adjusting Minecraft’s graphics settings according to your Chromebook’s capabilities, you can ensure a smoother and more enjoyable gaming experience. Keep in mind that the performance and visual quality may vary depending on the specifications of your Chromebook. It’s recommended to experiment with different settings to find the optimal balance for your specific device.
With the graphics settings optimized to your liking, you’re now ready to dive into the immersive world of Minecraft on your Chromebook and uncover the limitless possibilities that await you.
Exploring Minecraft Controls on a Chromebook
Once you have Minecraft installed and configured on your Chromebook, it’s time to dive into the game and start exploring the blocky world. Understanding the controls and navigation is crucial to fully enjoy your Minecraft experience. Here’s a guide to help you navigate Minecraft on your Chromebook:
Movement: Use the keyboard arrow keys or the WASD keys to move your character forward, backward, left, or right. Press the Spacebar to jump and hold the Shift key to crouch.
Interactions: To interact with the environment, use the left mouse button for breaking blocks, attacking creatures, or interacting with items. The right mouse button is used for placing blocks or using items in your hand.
Inventory: Press the E key to open your inventory, where you can manage your items, craft new ones, or equip armor and weapons. Use the number keys (1-9) to quickly select items from your hotbar.
Crafting: To craft items, open the crafting grid by pressing the 2×2 or 3×3 crafting button in the inventory. Place the required items in the grid to create new tools, weapons, armor, and more.
Chat and Commands: Press the T key to open the chat window, where you can communicate with other players in multiplayer or enter commands. Use the / key to type commands, such as teleporting, spawning items, or changing game modes.
View and Perspective: Use the mouse to look around and change your view in the game. You can switch between first-person view (looking through the eyes of your character) and third-person view (viewing your character from behind) by pressing the F5 key.
Other Actions: Use the Q key to drop items from your inventory, the B key to open the advancements menu, and the Esc key to pause the game and access the game menu.
These are just the basic controls to get you started in Minecraft. As you play the game, you’ll discover more actions, interactions, and shortcuts within the Minecraft world. Don’t be afraid to experiment and try out different combinations of keys to see what works best for you.
It’s worth noting that the controls on a Chromebook may differ slightly from other devices, so take some time to familiarize yourself with the specific controls for your Chromebook model.
With these controls at your fingertips, you’re now ready to embark on exciting adventures, build magnificent structures, and explore the vast landscapes of Minecraft on your Chromebook.
Customizing Minecraft on a Chromebook
One of the great aspects of Minecraft is the ability to customize the game to suit your preferences and personal style. Whether it’s changing the appearance of your character or adding exciting new features, customizing Minecraft on your Chromebook can enhance your gaming experience. Here are some ways to customize Minecraft:
1. Skins: Change the appearance of your character by applying a new skin. Skins allow you to transform your character into different creatures, famous characters, or even create your own unique design. You can find a variety of skins on Minecraft websites or create your own using image editing software.
2. Resource Packs: Resource packs modify the game’s textures, sounds, and even music. With resource packs, you can give Minecraft a completely different look and feel. Browse online for various resource packs that match your desired aesthetic or create your own to reflect your personal style.
3. Mods: Mods are modifications to the game that add new gameplay mechanics, items, or even entire dimensions. Installing mods can greatly expand the possibilities and features of Minecraft. Keep in mind that modding requires some technical knowledge and may impact the stability of the game. Make sure to install mods from trusted sources and follow installation instructions carefully.
4. Custom Maps: Minecraft has a vibrant community that creates custom maps with unique challenges, adventures, and creations. Explore different custom maps to diverge from the default Minecraft experience and discover new territories and stories.
5. Multiplayer Servers: Joining multiplayer servers allows you to interact and collaborate with other players online. You can join public servers with various game modes or create your own private server to play with friends. Multiplayer servers offer diverse experiences and opportunities to engage in cooperative or competitive gameplay.
6. Command Blocks: Command blocks allow you to execute complex commands within the game. With command blocks, you can create custom game rules, teleport players, spawn creatures, and more. They offer endless possibilities for customization and tailored gameplay experiences.
Remember to always take precautions when customizing Minecraft. Backup your game data before installing mods or resource packs, and be cautious when downloading files from unfamiliar sources. Ensure that any customization you make aligns with the terms of use for Minecraft and respects the rights of others.
No matter how you choose to customize your Minecraft experience on your Chromebook, embracing these customization options adds depth, creativity, and personalization to the game, making it truly yours.
Troubleshooting Common Issues
While setting up and playing Minecraft on your Chromebook can be an enjoyable experience, you may encounter some common issues along the way. Here are solutions to troubleshoot and resolve these issues:
1. Game Crashes: If Minecraft crashes or freezes during gameplay, try closing any other applications running in the background to free up system resources. Update your Chromebook’s software and graphics drivers to the latest versions. Lower the graphics settings in Minecraft to reduce the strain on your Chromebook’s hardware.
2. Lag or Low FPS: If you experience lag or low frame rates, try reducing the render distance and graphics settings in Minecraft. Close any unnecessary resource-intensive applications running on your Chromebook. Consider upgrading to a Chromebook model with higher specifications for better performance.
3. Installation Issues: If you encounter problems during the installation of Minecraft, ensure that you have downloaded the correct version of Minecraft compatible with your Chromebook’s operating system. Verify that your Chromebook has sufficient storage space for the installation. Try reinstalling Minecraft or seeking assistance from Minecraft’s official support channels.
4. Login or Authentication Errors: If you have trouble logging in or receive authentication errors, double-check that you are using the correct Minecraft account credentials. Ensure that you have a stable internet connection and try restarting your Chromebook. If the issue persists, contact Mojang’s customer support for further assistance.
5. Compatibility Issues: Some mods, resource packs, or custom maps may not be compatible with certain versions of Minecraft or specific Chromebook models. Always carefully read the compatibility information provided by the mod or map creator before installing. If an incompatibility issue arises, try using alternative mods or resource packs that are compatible with your setup.
6. Glitches or Bugs: If you encounter glitches or bugs while playing Minecraft, ensure that you are using the most recent version of Minecraft available. Check online forums or community support channels to see if others have experienced similar issues and if there are any known solutions or workarounds.
If you are unable to resolve an issue on your own, don’t hesitate to seek help from official Minecraft support channels or reach out to the Minecraft community for assistance. Remember to provide detailed information and any error messages received to expedite the troubleshooting process.
With the right troubleshooting steps and support, you can overcome common issues and enjoy a smooth and immersive Minecraft experience on your Chromebook.
Tips and Tricks for Playing Minecraft on a Chromebook
Playing Minecraft on a Chromebook can be a unique and enjoyable experience. To enhance your gameplay and make the most out of your Minecraft adventures, here are some helpful tips and tricks:
- Optimize System Performance: Close any unnecessary applications and tabs running in the background to free up system resources and improve Minecraft’s performance. Consider reducing the graphical settings in Minecraft to lessen strain on your Chromebook’s hardware.
- Back up Your Worlds: Regularly back up your Minecraft worlds to protect your progress and creations. Save a copy of your world to external storage or cloud storage solutions, ensuring you can easily recover it if needed.
- Experiment with Resource Packs: Resource packs can change the visual and audio aspects of Minecraft. Explore different resource packs to find one that suits your preferred aesthetic and enhances your gaming experience.
- Join Multiplayer Servers: Engage with the Minecraft community by joining multiplayer servers. Collaborate with other players, partake in exciting challenges, and embrace the social aspect of Minecraft. Just make sure to follow the server rules and be respectful towards other players.
- Discover Custom Maps and Mods: Expand your Minecraft experience by exploring custom maps and mods. Custom maps offer unique adventures, while mods add new gameplay mechanics and features. Take time to explore the vast variety of options available and find ones that align with your interests.
- Learn Redstone Mechanics: Redstone is a powerful resource in Minecraft that allows you to create intricate machinery, mechanisms, and contraptions. Take the time to learn and experiment with Redstone to automate processes and create complex systems.
- Utilize Crafting Recipes: Familiarize yourself with various crafting recipes to maximize your resource utilization. Knowing how to craft different items and tools efficiently will aid in your survival and advancement within the game.
- Join Minecraft Communities: Engage with the Minecraft community by joining forums, subreddits, or Discord servers. Interacting with other players can provide valuable insights, tips, and inspiration for your own Minecraft journey.
- Set Goals and Challenges: Minecraft offers infinite possibilities, but setting goals and challenges for yourself can provide structure and motivation. Whether it’s building an elaborate structure, defeating a difficult boss, or completing specific achievements, setting objectives adds excitement and purpose to your gameplay.
- Take Breaks and Rest: Don’t forget to take breaks and give yourself time to rest. Minecraft can be immersive and captivating, but it’s essential to maintain a healthy balance with other aspects of your life.
Remember, Minecraft is a sandbox game where creativity and exploration are key. Embrace your own unique playstyle, experiment with different strategies, and let your imagination run wild as you embark on exciting Minecraft adventures on your Chromebook.