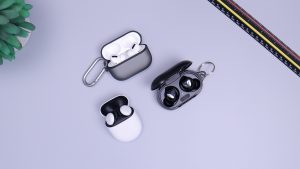
Benefits of Pairing Skullcandy Headphones
Pairing your Skullcandy headphones with your devices offers a multitude of benefits that enhance your audio experience. Whether you’re using Bluetooth or a wired connection, here are some advantages to consider:
- Wireless Convenience: Pairing your Skullcandy headphones via Bluetooth eliminates the need for messy cords and allows for greater freedom of movement. Whether you’re at the gym, going for a run, or simply lounging on the couch, you can enjoy your favorite tunes or podcasts without any tangled wires.
- Improved Sound Quality: Skullcandy headphones are renowned for their exceptional audio performance. Pairing them with your devices ensures that you experience their full potential, allowing you to immerse yourself in crisp and clear sound. Whether you’re listening to music, watching movies, or playing games, you’ll appreciate the rich and immersive audio experience.
- Multi-Device Flexibility: Pairing your Skullcandy headphones with multiple devices, such as your smartphone, tablet, or laptop, gives you the flexibility to switch seamlessly between them. Whether you want to answer a call on your phone or watch a movie on your tablet, your headphones will automatically connect to the desired device, ensuring you never miss a beat.
- Hands-Free Convenience: Many Skullcandy headphones come equipped with built-in microphones and control buttons. This allows you to effortlessly take calls, adjust volume levels, or skip tracks without needing to reach for your device. It’s an ideal feature for those on the go or when your hands are occupied with other tasks.
- Personalized Settings: Certain Skullcandy headphone models are equipped with companion apps that offer additional customization options. From equalizer settings to personalized sound profiles, these apps allow you to tailor the audio experience to your preferences, ensuring that every listening session is perfectly suited to your tastes.
Overall, pairing your Skullcandy headphones with your devices unlocks a range of benefits that enhance your audio experience. Whether it’s the convenience of a wireless connection, improved sound quality, or the flexibility to switch between multiple devices, you’ll enjoy a more immersive and convenient listening experience.
How to Pair Skullcandy Headphones with Bluetooth Devices
Pairing your Skullcandy headphones with Bluetooth devices is a straightforward process. By following these steps, you’ll be able to enjoy wireless audio in no time:
- Ensure Bluetooth is enabled: On the device you want to pair your Skullcandy headphones with, go to the settings menu and make sure that Bluetooth is turned on. This will allow your device to discover nearby Bluetooth devices, including your headphones.
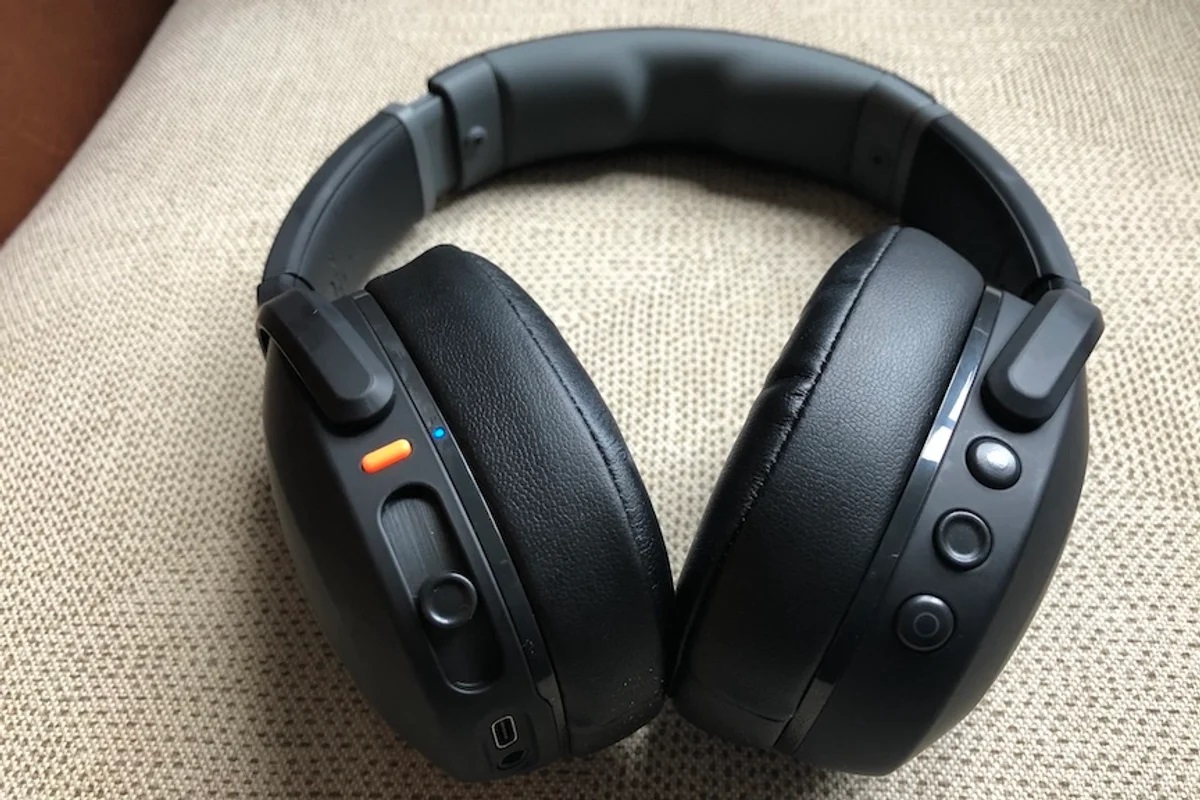
- Enter pairing mode: Put your Skullcandy headphones into pairing mode. The method for entering pairing mode varies depending on the model you have. Consult the headphone’s user manual for specific instructions. In most cases, you’ll need to press and hold the power button or a dedicated pairing button until the LED light starts flashing or changes color.
- Scan for devices: On your device, navigate to the Bluetooth settings menu and initiate a scan or search for nearby devices. Your Skullcandy headphones should appear in the list of available devices.
- Select your headphones: Once your headphones are visible on your device, tap or select them to initiate pairing. You may be prompted to enter a pairing code. If so, refer to your headphone’s user manual for the correct code or leave it blank if not specified.
- Complete the pairing process: After selecting your headphones, your device will start pairing with them. Once the pairing is successful, you’ll see a confirmation message on your device’s screen or hear a notification sound. The LED light on your Skullcandy headphones may also change color to indicate that they are connected.
- Test the connection: To ensure that the pairing is successful, play some audio on your device. If you hear the sound through your Skullcandy headphones, it means they are successfully paired and ready for use.
Remember, the exact pairing process may vary slightly depending on the Skullcandy headphone model and the device you’re using. If you encounter any difficulties, refer to the user manual or visit the Skullcandy website for troubleshooting tips.
Now that you know how to pair your Skullcandy headphones with Bluetooth devices, you can enjoy the freedom and convenience of wireless audio wherever you go.
How to Pair Skullcandy Headphones with Wired Devices
Pairing your Skullcandy headphones with wired devices is a simple process that allows you to enjoy high-quality audio without the need for Bluetooth connectivity. Follow these steps to pair your Skullcandy headphones with wired devices:
- Check headphone compatibility: Verify that your Skullcandy headphones have a wired connection option. Not all Skullcandy models support wired connectivity. If your headphones only have Bluetooth capabilities, you will not be able to pair them with wired devices.
- Gather the necessary cables: Depending on the device you want to pair your Skullcandy headphones with, you may need different cables. For devices with a 3.5mm headphone jack, a standard auxiliary cable is typically required. For devices with a USB-C or lightning port, you may need an adapter or a specific cable that matches your device’s port.
- Connect the cables: Plug one end of the auxiliary cable or adapter into the headphone’s audio input port, which is usually located on the bottom or side of the headphone. The other end should be connected to the appropriate port on your wired device. Make sure the connections are secure.
- Select the audio source: On your wired device, navigate to the audio output settings and select the appropriate audio source. This may involve selecting the headphone’s name or changing the output from built-in speakers to the headphone option.
- Test the connection: Play some audio on your wired device to ensure that the sound is coming through your Skullcandy headphones. Adjust the volume levels on both your device and headphones as needed for a comfortable listening experience.
If your Skullcandy headphones don’t produce sound or seem to have a weak connection, double-check that the cables are securely plugged in and that the audio output settings on your device are correctly configured.
Remember, wired pairing allows you to use your Skullcandy headphones with a wide range of devices that have a headphone jack or compatible ports. It’s a convenient option when Bluetooth connectivity is not available or preferred.
By following these simple steps, you can easily pair your Skullcandy headphones with wired devices and enjoy your favorite music, movies, or games with exceptional audio quality.
Troubleshooting Common Pairing Issues
While pairing your Skullcandy headphones with your devices is usually a smooth process, you may occasionally encounter some common issues. Here are some troubleshooting steps to help you resolve them:
- Ensure proper device compatibility: Make sure that your Skullcandy headphones are compatible with the device you are trying to pair them with. Check the headphone’s user manual or the Skullcandy website for a list of compatible devices.
- Check battery levels: If your Skullcandy headphones have a built-in battery, ensure that it has enough charge. Low battery levels can affect the pairing process or result in a weak connection. Charge your headphones if necessary before attempting to pair them.
- Reset the headphones: If you’re experiencing persistent pairing issues, try resetting your Skullcandy headphones. Refer to the user manual for specific instructions on how to reset your model. Typically, this involves holding down a specific button or a combination of buttons for a few seconds.
- Try different pairing methods: Some Skullcandy headphone models offer multiple pairing methods, such as Bluetooth, NFC, or wired connections. If you’re having trouble with one method, try using a different method to establish a connection with your devices.
- Remove previous pairings: If your headphones have been previously paired with other devices, they may still be trying to connect to those devices instead of the one you want to pair them with. Go to the Bluetooth settings on those devices and remove the previously paired headphones from the list.
- Update firmware: Check if there are any firmware updates available for your Skullcandy headphones. Updating the firmware can often fix bugs and improve the overall performance and compatibility of your headphones. Visit the Skullcandy website or use the dedicated companion app, if available, to check for updates.
- Reboot devices: Sometimes, a simple reboot of both the headphones and the paired device can help resolve pairing issues. Turn off both devices, wait a few seconds, and then turn them back on. Attempt to pair them again.
If you’ve tried all these troubleshooting steps and are still experiencing problems, reach out to Skullcandy customer support for further assistance.
Remember, patience and persistence are key when troubleshooting pairing issues. By following these steps, you can overcome common obstacles and enjoy seamless connectivity with your Skullcandy headphones.
How to Reset Skullcandy Headphones
If you’re experiencing connectivity or performance issues with your Skullcandy headphones, performing a reset can often resolve the problem. Resetting your headphones restores them to their default settings, eliminating any previous configurations or pairing information. Follow these steps to reset your Skullcandy headphones:
- Locate the reset button: Different Skullcandy headphone models may have different reset methods. Look for a small reset button on your headphones. It is usually located near the charging port or on the control panel. Refer to the user manual for precise instructions on where to find the reset button.
- Prepare your headphones for reset: Make sure your headphones are turned on and in pairing mode, if applicable. If your headphones have an active connection with any device, disconnect them before proceeding with the reset.
- Perform the reset: Press and hold the reset button for a few seconds. The LED lights on your headphones may flash or change colors during this process. Release the reset button once the reset is complete.
- Power cycle your headphones: Turn off your headphones and then turn them back on. This helps to ensure that the reset is fully applied.
- Re-pair your headphones: After resetting your Skullcandy headphones, you’ll need to re-pair them with your devices. Follow the pairing instructions specific to your headphone model and refer to the previous sections of this guide for detailed pairing instructions.
Keep in mind that resetting your headphones will erase any saved configurations, EQ settings, or paired devices. You will need to set up those preferences again after resetting.
If you’re still experiencing issues after resetting your headphones, consult the user manual or reach out to Skullcandy customer support for further assistance.
Resetting your Skullcandy headphones can often resolve connectivity or performance issues, providing you with a fresh start and a potentially better audio experience.
Tips for Maintaining a Strong Connection with Skullcandy Headphones
Ensuring a strong and uninterrupted connection with your Skullcandy headphones is essential for an optimal audio experience. Here are some helpful tips to maintain a reliable connection:
- Keep devices within range: Make sure your paired devices are within the recommended Bluetooth range of your Skullcandy headphones. Bluetooth ranges can vary, but typically it is best to keep the devices within 30 feet (10 meters) of each other for a stable connection.
- Avoid obstacles and interference: Bluetooth signals can be weakened by physical obstacles such as walls, furniture, or other electronic devices. Keep your paired devices and headphones clear of such obstructions to ensure a clear and uninterrupted signal.
- Charge your headphones: Low battery levels can affect the strength of the connection. Ensure that your Skullcandy headphones are sufficiently charged before using them. Regularly charging your headphones will help maintain a strong connection during use.
- Update firmware: Check for firmware updates for your Skullcandy headphones regularly. Updating the firmware can improve the connection stability and address any known connectivity issues. Visit the Skullcandy website or use the dedicated companion app, if available, to check for and install updates.
- Minimize wireless interference: Wireless signals from other devices, such as Wi-Fi routers or cordless phones, can interfere with the Bluetooth connection. Try to keep your devices away from sources of wireless interference to maintain a strong and uninterrupted connection.
- Restart your devices: If you’re experiencing connection issues, try restarting both your paired device and Skullcandy headphones. This can help clear any temporary glitches or conflicts that may be affecting the connection.
- Keep headphones firmware up to date: Check for any available firmware updates for your Skullcandy headphones. Updating the firmware can improve the overall performance and compatibility of your headphones, resulting in a stronger connection.
- Reset network settings: If you’re consistently experiencing connection issues, consider resetting the network settings on your paired device. This will remove any saved Bluetooth connections and settings, allowing you to start fresh and potentially resolve any connection-related problems.
Following these tips will help you maintain a strong and uninterrupted connection with your Skullcandy headphones, ensuring an enjoyable and immersive audio experience.
If you continue to experience connection issues despite applying these tips, refer to the user manual or contact Skullcandy customer support for further assistance.
Understanding the Different Pairing Modes of Skullcandy Headphones
Skullcandy headphones often have different pairing modes to accommodate various connection methods and devices. Understanding these different pairing modes will help you navigate the pairing process more effectively. Here are some common pairing modes you may encounter:
- Bluetooth Pairing Mode: This is the most common pairing mode for Skullcandy headphones. In this mode, the headphones are discoverable by nearby Bluetooth devices, allowing you to connect wirelessly. Enter the Bluetooth pairing mode by pressing and holding the designated button, typically the power or pairing button, until the LED light starts flashing or changes color.
- NFC Pairing Mode: Some Skullcandy headphones support NFC (Near Field Communication) pairing. NFC allows for quick and seamless pairing by simply tapping your NFC-enabled device to the designated area on the headphones. Activate NFC pairing mode on your headphones by placing them in pairing mode and bringing the NFC-enabled device close to the headphones.
- Auxiliary/Wired Pairing Mode: Skullcandy headphones with wired capabilities can be paired with devices through an auxiliary cable. In this mode, the headphones function as traditional wired headphones, bypassing Bluetooth connectivity. To initiate auxiliary/wired pairing mode, simply connect the headphones to the device using the appropriate cable, such as a 3.5mm auxiliary cable or a compatible adapter.
- Multi-Device Pairing Mode: Certain Skullcandy headphones support pairing with multiple devices simultaneously. In this mode, you can connect the headphones to multiple devices, such as a smartphone and a laptop, and seamlessly switch between them without the need for re-pairing. Refer to the user manual for your specific headphone model to learn how to activate and use multi-device pairing mode.
- Voice Assistant Pairing Mode: Some Skullcandy headphones offer dedicated pairing modes for voice assistants, such as Siri or Google Assistant. This allows you to seamlessly connect your headphones to your preferred voice assistant for hands-free control. The process for activating voice assistant pairing mode may vary depending on your headphone model. Consult the user manual for instructions on how to enable this feature.
Understanding the different pairing modes of your Skullcandy headphones will help you choose the appropriate method for connecting to your devices. Refer to the user manual or the Skullcandy website for detailed instructions specific to your headphone model.
Remember, the exact pairing modes available may vary depending on the specific Skullcandy headphone model you own. Consult the user manual or contact Skullcandy customer support if you have any questions or need further assistance with pairing modes.
Pairing Skullcandy Headphones with Multiple Devices
Skullcandy headphones that support multi-device pairing allow you to connect and switch seamlessly between multiple devices without the need for re-pairing. This feature provides convenience and flexibility, especially for users who frequently use their headphones with different devices. Here’s how to pair your Skullcandy headphones with multiple devices:
- Enter multi-device pairing mode: Activate the multi-device pairing mode on your Skullcandy headphones by following the specific instructions provided in the user manual. This typically involves pressing and holding a button or a combination of buttons until the LED light on the headphones starts flashing or changes color.
- Pair with the first device: On the first device you want to connect, navigate to the Bluetooth settings and look for the name of your Skullcandy headphones in the list of available devices. Select the headphones to initiate the pairing process.
- Pair with additional devices: Once the first device is successfully paired, repeat the pairing process on each additional device you want to connect. Follow the same steps of navigating to the Bluetooth settings and selecting your headphones from the available devices.
- Switch between devices: After successfully pairing your Skullcandy headphones with multiple devices, you can switch between them with ease. To switch, pause or disconnect the audio playback on the current device, and then play audio on the desired device. The headphones will automatically connect to the active device, allowing you to enjoy audio seamlessly without the need for re-pairing.
It’s important to note that not all Skullcandy headphone models support multi-device pairing, so be sure to check the specifications and user manual for your specific model. Additionally, the number of devices that can be paired simultaneously may vary between models.
If you encounter any difficulties during the pairing process or switching between devices, consult the user manual or contact Skullcandy customer support for assistance.
With multi-device pairing, you can effortlessly connect your Skullcandy headphones to multiple devices, such as smartphones, laptops, or tablets, and seamlessly switch between them, enhancing your listening experience with convenience and flexibility.
Pairing Skullcandy Headphones with Smart TVs and Gaming Consoles
Pairing your Skullcandy headphones with smart TVs and gaming consoles can provide an immersive audio experience, allowing you to enjoy movies, shows, and games with enhanced sound quality. While the pairing process may vary depending on the specific device, here are some general steps to help you connect your Skullcandy headphones:
- Check for headphone compatibility: Before attempting to pair your Skullcandy headphones, ensure that your smart TV or gaming console supports Bluetooth connectivity or has a compatible audio output option. Refer to the device’s user manual or specifications to determine if it can connect with Bluetooth headphones or if it requires a wired connection.
- Activate pairing mode on your headphones: Put your Skullcandy headphones into pairing mode by following the instructions in the user manual. This usually involves pressing and holding a designated button until the LED light on your headphones starts flashing or changes color.
- Enable Bluetooth on your smart TV or gaming console: Access the settings menu on your device and navigate to the Bluetooth section. Enable Bluetooth and initiate a search or scan for nearby devices.
- Select your headphones on the device: Once your Skullcandy headphones appear in the list of available devices on the smart TV or gaming console, select them to initiate the pairing process. You may be prompted to enter a passcode; consult your headphone’s user manual for the correct code or leave it blank if not specified.
- Complete the pairing process: After selecting your headphones, the smart TV or gaming console will establish a connection. You may see a confirmation message on the screen or hear a notification sound. The LED light on your Skullcandy headphones may also change color to indicate a successful pairing.
- Adjust audio settings: Depending on your device, you may need to adjust the audio settings to ensure that the sound is routed to your headphones. Navigate to the audio or sound settings on your smart TV or gaming console and select the option that directs the audio output to your Skullcandy headphones.
It’s important to note that not all smart TVs and gaming consoles have built-in Bluetooth support. In such cases, you may need to use a Bluetooth transmitter or a wired connection option, such as an auxiliary cable or audio adapter, to connect your Skullcandy headphones. Consult your device’s user manual or contact the manufacturer for guidance on the specific pairing methods available.
By following these steps and the instructions specific to your smart TV or gaming console, you can easily pair your Skullcandy headphones and enjoy a captivating audio experience while watching your favorite shows or playing games.
Syncing Skullcandy Headphones with Voice Assistants
Syncing your Skullcandy headphones with voice assistants, such as Siri or Google Assistant, adds an extra layer of convenience and hands-free control. By pairing your headphones with a compatible device, you can use voice commands to make calls, play music, get directions, and much more. Here’s how to sync your Skullcandy headphones with voice assistants:
- Check compatibility: Ensure that your Skullcandy headphones and the device you want to connect them to are both compatible with the desired voice assistant. Refer to the headphone’s user manual or the manufacturer’s website for information on supported voice assistants.
- Enable voice assistant on your device: Activate the voice assistant feature on your paired device. For example, on an iPhone, go to Settings > Siri & Search, and on an Android device, go to Settings > Google > Search, Assistant & Voice > Google Assistant. Follow the instructions to set up and enable the voice assistant.
- Put your headphones into pairing mode: Activate the pairing mode on your Skullcandy headphones by following the instructions provided in the user manual. This typically involves pressing and holding a button until the LED light starts flashing or changes color.
- Connect your headphones to the device: On your device, go to the Bluetooth settings and scan for available devices. Select your Skullcandy headphones from the list of discovered devices to initiate the pairing process.
- Authorize voice assistant access: During the pairing process, you may be prompted to grant permission for the voice assistant to access your headphones. Follow the on-screen instructions to authorize the necessary permissions.
- Test the connection: Once the pairing is complete, test the connection by using voice commands. For example, activate Siri by saying “Hey Siri” (on iOS) or “OK Google” (on Android), and then ask a question or give a command to see if your headphones respond accordingly.
It’s important to note that the specific steps and voice commands may vary depending on the device and voice assistant you are using. Consult the user manual or the manufacturer’s website for device-specific instructions on syncing your Skullcandy headphones with the desired voice assistant.
By syncing your Skullcandy headphones with voice assistants, you can enjoy a hands-free and seamless experience, allowing you to conveniently control your device using simple voice commands.
Pairing Skullcandy Headphones with Computers and Laptops
Pairing your Skullcandy headphones with your computer or laptop allows you to enjoy high-quality audio and a wireless listening experience while working, watching videos, or listening to music. Here’s how to pair your Skullcandy headphones with computers and laptops:
- Check for Bluetooth compatibility: Ensure that your computer or laptop has built-in Bluetooth capability or a Bluetooth dongle installed. Most modern devices come equipped with Bluetooth, but it’s always good to double-check.
- Activate pairing mode on your headphones: Put your Skullcandy headphones into pairing mode by following the instructions in the user manual. Usually, this involves pressing and holding a designated button until the LED light on your headphones begins to flash or changes color.
- Enable Bluetooth on your computer or laptop: Open the Bluetooth settings on your computer or laptop. This can typically be done through the system preferences or settings menu. Enable Bluetooth and initiate a search or scan for nearby devices.
- Select your headphones on the computer or laptop: Look for your Skullcandy headphones in the list of available devices on your computer or laptop’s Bluetooth settings. Select the headphones to initiate the pairing process. You may be prompted to enter a passcode, which can be found in the headphone’s user manual or specified during the pairing process.
- Complete the pairing process: After selecting your headphones, the computer or laptop will establish a connection. You may see a confirmation message on the screen or hear a notification sound. The LED light on your Skullcandy headphones may also change color to indicate a successful pairing.
- Test the connection: To ensure that the pairing is successful, play some audio on your computer or laptop. If you hear the sound through your Skullcandy headphones, it means they are successfully paired and ready for use.
If your computer or laptop doesn’t have built-in Bluetooth capabilities, you can use a Bluetooth dongle or adapter to add Bluetooth functionality. Simply plug the dongle into a USB port and follow the same pairing process described above.
Keep in mind that the exact pairing process may vary slightly depending on your computer or laptop’s operating system and version. For more detailed instructions, refer to the user manual for your specific device or visit the manufacturer’s website.
By following these steps, you can easily pair your Skullcandy headphones with computers and laptops, providing you with a wireless and convenient audio experience while using your device.
Updating Firmware for Skullcandy Headphones
Updating the firmware for your Skullcandy headphones is an important task that ensures you have the latest features, bug fixes, and performance improvements. Firmware updates can enhance the overall audio experience and address any issues or compatibility concerns. Here are the steps to update the firmware for your Skullcandy headphones:
- Check for firmware updates: Visit the Skullcandy website or check the user manual to see if there are any available firmware updates for your specific headphone model. Look for firmware release notes that detail the updates and improvements.
- Download the firmware update: If a firmware update is available, download it from the official Skullcandy website. Make sure to choose the correct firmware version for your specific headphone model.
- Prepare your headphones for the update: If your headphones are connected to any devices via Bluetooth, disconnect them to ensure a smooth update process. Ensure that your headphones have sufficient battery charge or are plugged into a power source during the update.
- Connect your headphones to a computer: Using a USB cable, connect your Skullcandy headphones to a computer or laptop. Ensure that the computer has a stable internet connection.
- Follow the update instructions: Open the downloaded firmware update file and follow the provided instructions to start the update process. This may involve running an executable file or using dedicated firmware update software provided by Skullcandy.
- Wait for the update to complete: During the firmware update process, it’s crucial to not disconnect your headphones or interrupt the update. Follow the on-screen instructions and wait patiently until the update is finished. This may take several minutes.
- Disconnect your headphones: After the firmware update is complete, safely disconnect your Skullcandy headphones from the computer.
- Test the updated headphones: Reconnect your Skullcandy headphones to your devices and test them to ensure that the update was successful. Pay attention to any new features, improved performance, or bug fixes mentioned in the firmware release notes.
Always ensure you are downloading the firmware update from the official Skullcandy website to avoid any potential security risks or compatibility issues. If you encounter any problems during the firmware update process, consult the user manual or reach out to Skullcandy customer support for assistance.
Regularly updating the firmware for your Skullcandy headphones will keep them up to date and provide you with the best possible audio experience.
Frequently Asked Questions about Pairing Skullcandy Headphones
Here are some frequently asked questions about pairing Skullcandy headphones to help you troubleshoot any common issues:
1. How do I know if my Skullcandy headphones are in pairing mode?
To put your Skullcandy headphones into pairing mode, refer to the user manual specific to your headphone model. Typically, a flashing or changing LED light indicates that the headphones are in pairing mode.
2. Why won’t my Skullcandy headphones pair with my device?
There could be several reasons. Make sure that Bluetooth is enabled on your device and that it is within range of the headphones. Ensure that the headphones are in pairing mode and that any previous pairings have been removed from your device’s Bluetooth settings. Restart both your headphones and your device, then attempt pairing again.
3. How do I switch between devices when using multi-device pairing?
To switch between devices, pause or disconnect audio playback on the current device and play audio on the desired device. The Skullcandy headphones will automatically connect to the active device.
4. How do I reset my Skullcandy headphones?
To reset your Skullcandy headphones, refer to the user manual for your specific model’s reset process. This may involve holding down a button or a combination of buttons for a few seconds.
5. Can I pair my Skullcandy headphones with multiple devices at the same time?
Some Skullcandy headphone models support multi-device pairing, allowing you to pair them with multiple devices simultaneously. However, the number of devices that can be paired at the same time may vary depending on the model. Refer to the user manual for your specific headphone model for more information.
6. Do Skullcandy headphones support wired connections?
Some Skullcandy headphones have wired capabilities and can be connected to devices via auxiliary cables or adapters. These headphones can be paired with devices that do not have Bluetooth capabilities or when a wired connection is preferred.
7. How often should I update the firmware for my Skullcandy headphones?
It’s recommended to check for firmware updates periodically, especially when Skullcandy releases new versions that offer improvements or bug fixes. Consult the Skullcandy website or user manual for instructions on how to update your specific headphone model’s firmware.
If you have additional questions or encounter any difficulties while pairing your Skullcandy headphones, consult the user manual or contact Skullcandy customer support for further assistance.