
Prerequisites to Pair Ledger Nano S to Android
Before you can pair your Ledger Nano S with your Android device, there are a few prerequisites you need to ensure are in place. These prerequisites will help to ensure a smooth and successful pairing process:
1. Ensure you have a Ledger Nano S: The Ledger Nano S is a popular hardware wallet used to securely store and manage your cryptocurrencies. Make sure you have a Ledger Nano S device.
2. Ensure your Android device is compatible: Check if your Android device supports the Ledger Live Mobile app and USB OTG (On-The-Go) functionality. Most recent Android devices support USB OTG, but it’s better to double-check.
3. Download and install Ledger Live Mobile app: Go to the Google Play Store on your Android device and search for “Ledger Live.” Download and install the app on your device. This app will serve as the bridge between your Ledger Nano S and your Android device.
4. Enable “USB Debugging” on your Android device: To enable USB debugging, go to the “Settings” app on your Android device, scroll down to the “About phone” section, tap on it, and locate the “Build number.” Tap on “Build number” multiple times until it enables developer mode. Once developer mode is enabled, go back to the main settings screen, scroll down to “Developer options,” and enable USB debugging.
5. Ensure your Ledger Nano S is initialized and updated: If you haven’t set up your Ledger Nano S yet, follow the manufacturer’s instructions to initialize the device and set your PIN. It’s also important to ensure that your Ledger Nano S has the latest firmware version installed. You can update the firmware using the Ledger Live desktop app on your computer before pairing with your Android device.
By meeting these prerequisites, you’ll be ready to proceed with the pairing process between your Ledger Nano S and your Android device. Keep in mind that the specific steps for pairing may vary slightly depending on the Android version and Ledger Live Mobile app version you are using. But with these prerequisites in place, you’ll be well-prepared for a successful pairing experience.
Step 1: Install Ledger Live Mobile App
To begin the process of pairing your Ledger Nano S with your Android device, you need to install the Ledger Live Mobile app. Follow the steps below to successfully install the app:
1. Open the Google Play Store on your Android device.
2. In the search bar, type “Ledger Live” and tap on the search icon.
3. Locate the official Ledger Live Mobile app in the search results and tap on it.
4. On the app page, tap on the “Install” button to start the download and installation process.
5. Wait for the app to download and install on your Android device. This may take a few moments depending on your internet connection speed.
6. Once the installation is complete, you will see the “Open” button. Tap on it to launch the Ledger Live Mobile app.
Now that you have successfully installed the Ledger Live Mobile app, you are one step closer to pairing your Ledger Nano S with your Android device. The app will serve as the interface for managing and accessing your cryptocurrencies securely.
It’s important to note that the Ledger Live Mobile app is regularly updated by the Ledger team to ensure optimal performance and security. It’s recommended to keep the app updated to the latest version to benefit from the latest features and enhancements.
With the Ledger Live Mobile app installed on your Android device, you can move on to the next step of the pairing process, which involves enabling “USB Debugging” on your Android device. This step will allow your Ledger Nano S to communicate with your Android device and establish a secure connection.
Step 2: Enable “USB Debugging” on Android
In order to successfully pair your Ledger Nano S with your Android device, you need to enable “USB Debugging” on your Android device. USB Debugging allows your device to communicate with external hardware such as the Ledger Nano S. Follow the steps below to enable USB Debugging:
1. Go to the “Settings” app on your Android device. You can usually find it in your app drawer or by swiping down from the top of your screen and tapping the gear icon.
2. Scroll down and tap on “About phone” or “About device” (the exact wording may vary depending on your device).
3. Look for the “Build number” or “Build version” entry and tap on it several times rapidly. This will enable Developer options on your device. You may see a message indicating that you are now a developer.
4. Go back to the main Settings screen and scroll down to find “Developer options.” Tap on it to access the Developer options menu.
5. In the Developer options menu, scroll down and locate the “USB debugging” option. It is usually under the “Debugging” section.
6. Toggle the switch next to “USB debugging” to enable it. You may see a warning message explaining the risks associated with enabling USB debugging. Read through it carefully and tap “OK” to proceed.
7. You have now successfully enabled USB debugging on your Android device. Your device is now ready to communicate with the Ledger Nano S.
Enabling USB debugging is an essential step as it allows your Android device to establish a secure connection with the Ledger Nano S. With USB debugging enabled, you can move on to the next step, which involves connecting your Ledger Nano S to your Android device.
Keep in mind that the steps to enable USB debugging may vary slightly depending on the version of Android and the manufacturer of your device. If you encounter any issues or have trouble finding the USB debugging option, refer to the device’s user manual or consult the manufacturer’s support resources.
Step 3: Connect the Ledger Nano S to Android
Now that you have installed the Ledger Live Mobile app and enabled USB debugging on your Android device, it’s time to connect your Ledger Nano S to your Android device. Follow the steps below to establish a physical connection:
1. Take the USB cable that came with your Ledger Nano S and plug one end into the USB port on your Ledger Nano S device.
2. Plug the other end of the USB cable into the USB port on your Android device. If your Android device has a USB-C port, you may need an adapter to connect the USB cable.
3. Once the cable is securely connected to both devices, you should see a message or notification on your Android device indicating that a USB device is connected. This indicates that your Ledger Nano S is successfully connected to your Android device.
4. If prompted, select the option that allows your Android device to communicate with the connected USB device. This is typically required for the Ledger Live Mobile app to detect and establish a secure connection with your Ledger Nano S.
By following these steps, you have successfully connected your Ledger Nano S to your Android device. Now, you can proceed to the next step of the pairing process, which involves opening the Ledger Live Mobile app on your Android device.
It’s important to ensure that the USB cable you are using is in good condition and provides a reliable connection. A faulty or damaged cable may result in connection issues and prevent the proper pairing of your Ledger Nano S with your Android device.
Make sure to handle the USB cable and the devices with care to avoid any accidental disconnections during the pairing process. Once you have successfully connected your Ledger Nano S to your Android device, you are ready to move on to the next steps of setting up and using your Ledger Nano S with the Ledger Live Mobile app.
Step 4: Open Ledger Live Mobile App
With your Ledger Nano S successfully connected to your Android device, it’s time to open the Ledger Live Mobile app. Follow the steps below to launch the app:
1. Locate the Ledger Live Mobile app on your Android device. You can usually find it on your home screen or in your app drawer.
2. Tap on the Ledger Live Mobile app icon to open it. The app will take a few moments to initialize and load.
3. Once the Ledger Live Mobile app is open, you will be greeted with a welcome screen or a login screen. If you have previously set up an account, enter your login credentials to access your Ledger Live account. If you are a new user, follow the prompts to create a new account.
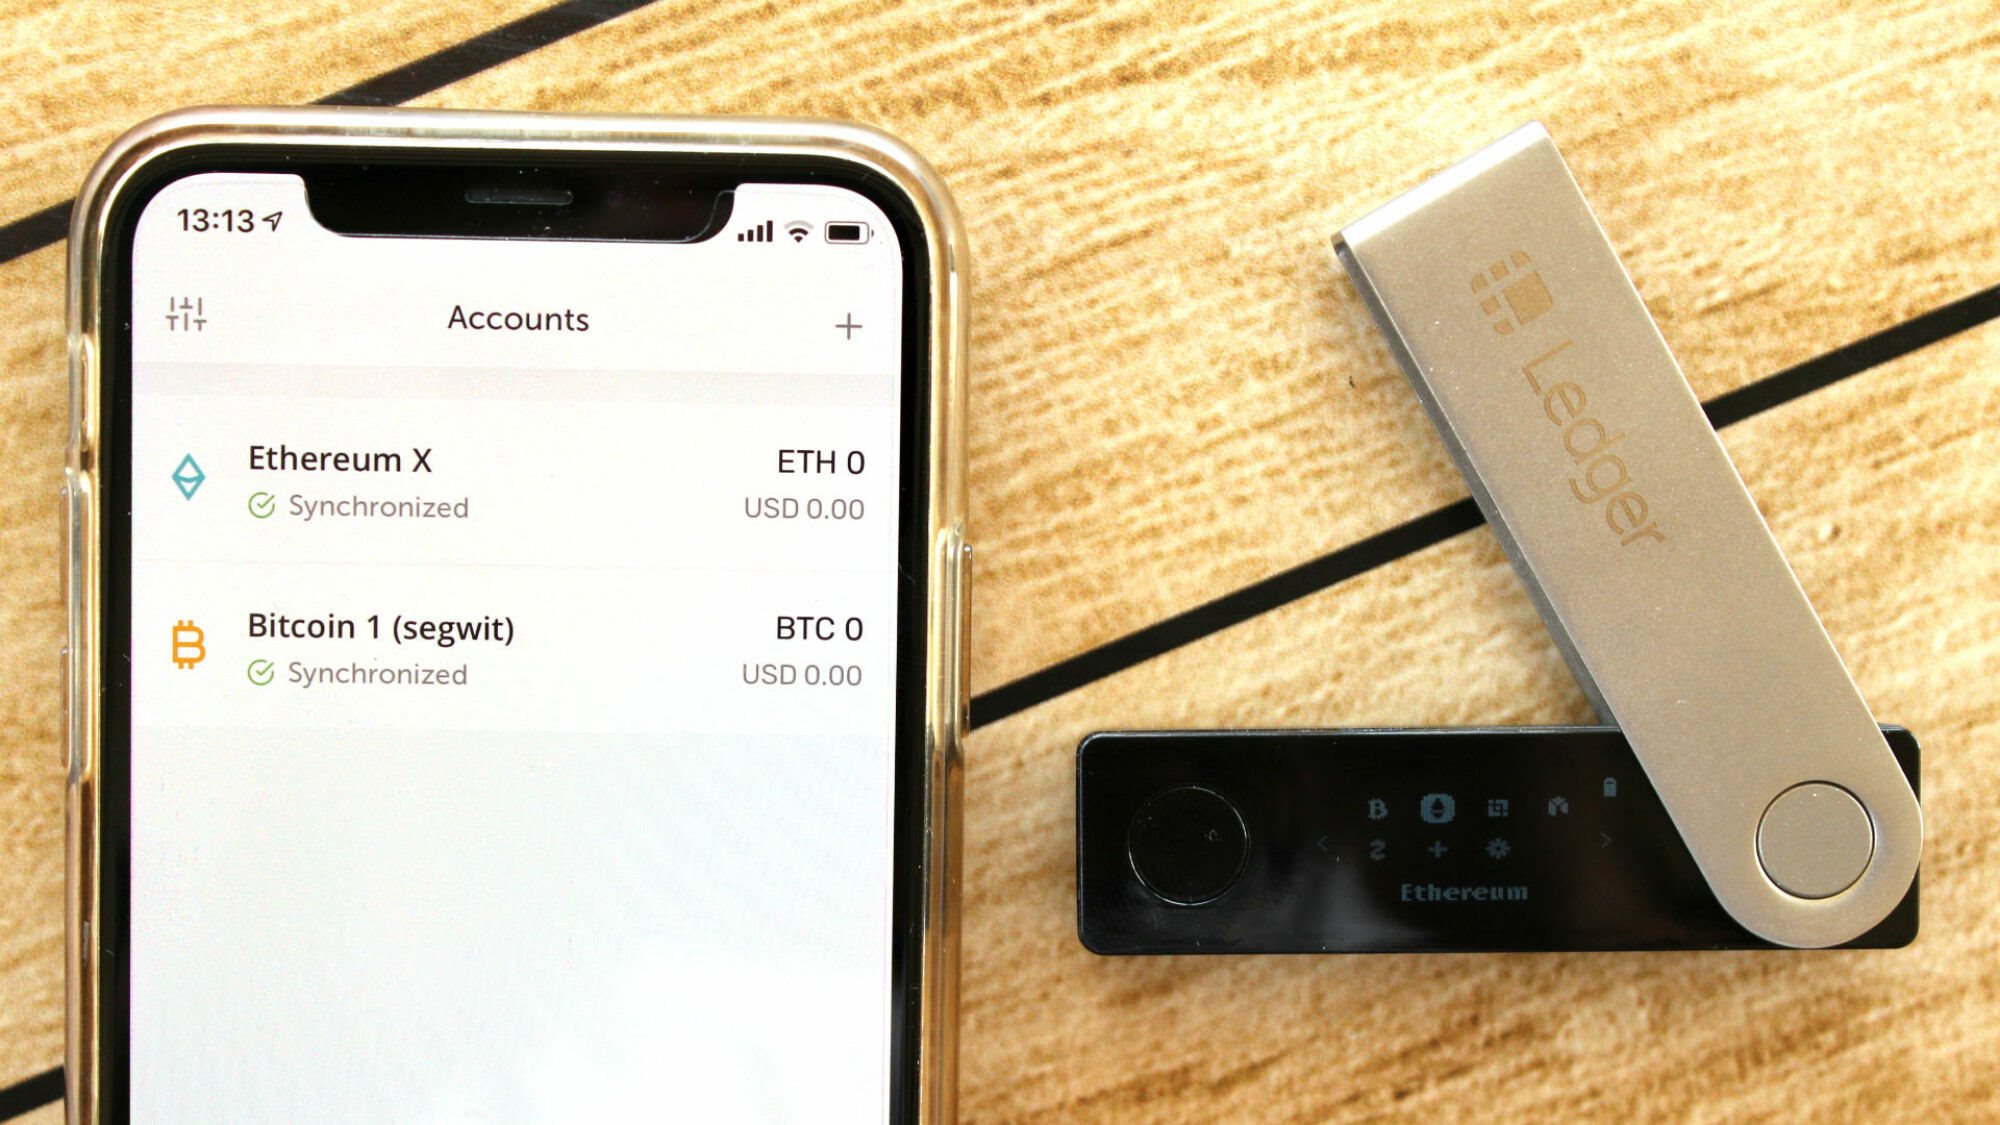
4. After you log in or create a new account, the app will present you with the main dashboard. This dashboard provides an overview of your cryptocurrency portfolio, transaction history, and other important information related to your Ledger Nano S.
By opening the Ledger Live Mobile app, you have successfully established a connection between your Ledger Nano S and your Android device. The Ledger Live app acts as the bridge between your device and the Ledger Nano S, allowing you to manage your cryptocurrencies securely.
Take some time to explore the Ledger Live Mobile app and familiarize yourself with its features. You can access various features like sending and receiving cryptocurrencies, checking your account balances, and managing your portfolio directly from the app.
Remember, it’s essential to keep your Ledger Live Mobile app up to date to ensure you have access to the latest security enhancements and features. The Ledger team regularly releases app updates to provide the best user experience and address any potential security vulnerabilities.
Now that you have opened the Ledger Live Mobile app on your Android device, you are ready to proceed to the next step, which involves setting up your Ledger Nano S on the app to start managing your cryptocurrencies.
Step 5: Set up Ledger Nano S on Ledger Live Mobile
Once you have opened the Ledger Live Mobile app on your Android device, it’s time to set up your Ledger Nano S on the app. Follow the steps below to complete the setup process:
1. On the Ledger Live Mobile app main dashboard, tap on the “Add Account” or “Get Started” button. This will initiate the setup process for your Ledger Nano S.
2. Select “Ledger Nano S” as the device you want to set up on the app. The app will guide you through the necessary steps to establish a secure connection with your Ledger Nano S.
3. On your Ledger Nano S device, you may be prompted to confirm the connection by verifying the displayed message. Use the buttons on the device to confirm and proceed.
4. The Ledger Live Mobile app will now search for your connected Ledger Nano S device. Once found, it will display a confirmation screen with a unique pairing code.
5. Compare the pairing code shown on your Android device with the one displayed on your Ledger Nano S. Make sure both codes match to confirm the authenticity of the connection.
6. If the pairing codes match, confirm the connection on your Ledger Nano S by pressing the right button. This will establish a secure link between your Ledger Nano S and the Ledger Live Mobile app.
7. After the connection is successfully established, you will be prompted to choose a PIN code for your Ledger Nano S. Follow the on-screen instructions to set up a secure PIN code.
8. Once your PIN is set up, the Ledger Live Mobile app will generate a recovery phrase. This phrase is a crucial backup mechanism for your Ledger Nano S. Make sure to write down the recovery phrase and store it in a safe place. Never share this phrase with anyone.
By setting up your Ledger Nano S on the Ledger Live Mobile app, you have ensured a secure connection and established control over your cryptocurrency assets. The app will now be able to interact with your Ledger Nano S to manage your transactions and access your funds securely.
Remember to keep your Ledger Nano S and recovery phrase safe. Losing the device or failing to protect the recovery phrase may result in permanent loss of your cryptocurrencies. It’s always a good practice to create a backup of your recovery phrase and store it in a separate, secure location.
Now that your Ledger Nano S is set up on the Ledger Live Mobile app, you can start exploring the various features and options available to manage your cryptocurrencies securely from your Android device.
Step 6: Verify Firmware Version on Ledger Nano S
After setting up your Ledger Nano S on the Ledger Live Mobile app, it’s important to verify that your device has the latest firmware version installed. The firmware is the software that runs on your Ledger Nano S and ensures its security and functionality. Follow the steps below to check the firmware version:
1. On the Ledger Live Mobile app, navigate to the main menu by tapping on the menu icon (usually represented by three horizontal lines) at the top left corner of the screen.
2. In the menu, select “Manager.” This will take you to the firmware management section of the app.
3. The Ledger Live Mobile app will now connect to your Ledger Nano S and retrieve information about the installed firmware. This process may take a few moments.
4. Once the firmware information is retrieved, the app will display the current firmware version on your Ledger Nano S. It will also indicate whether an update is available.
5. If your Ledger Nano S firmware is not up to date, the app will provide an option to update the firmware. Follow the prompts to initiate the update process. Ensure that your Ledger Nano S remains connected and has sufficient battery power during the update.
6. If your Ledger Nano S firmware is already up to date, you will see a confirmation message on the app. This indicates that your device is running the latest firmware version.
Verifying the firmware version on your Ledger Nano S is crucial for maintaining the device’s security and ensuring that you have access to the latest features and improvements. The Ledger team regularly releases firmware updates to address security vulnerabilities and enhance the overall user experience.
It’s highly recommended to keep your Ledger Nano S firmware up to date by installing the latest updates as they become available. Firmware updates not only enhance the device’s security but also provide compatibility with new cryptocurrencies and features introduced by Ledger.
By verifying and updating the firmware on your Ledger Nano S, you can ensure that your device is running the most secure and up-to-date software, providing you with peace of mind when managing your cryptocurrencies.
With the firmware verification complete, you are now ready to proceed with the next steps of using your Ledger Nano S with the Ledger Live Mobile app on your Android device.
Step 7: Link Ledger Nano S with Ledger Live Mobile
After verifying the firmware version on your Ledger Nano S, the next step is to link your device with the Ledger Live Mobile app. This linking process ensures that the app can securely manage your cryptocurrencies on your Ledger Nano S. Follow the steps below to link your Ledger Nano S with the app:
1. On the Ledger Live Mobile app, navigate to the main menu by tapping on the menu icon at the top left corner of the screen.
2. In the menu, select “Add Account” or “Get Started” to add your Ledger Nano S account to the app.
3. Choose the cryptocurrency account you want to link with your Ledger Nano S. Ledger Live Mobile supports a wide range of cryptocurrencies, so select the one you’d like to manage.
4. The app will then prompt you to connect your Ledger Nano S device. Make sure your Ledger Nano S is connected to your Android device via the USB cable.
5. If your Ledger Nano S has a screen, you may be asked to navigate to the correct account on the device by using the buttons and following the on-screen prompts.
6. Once the connection is successfully established, your Ledger Nano S account will be linked to the Ledger Live Mobile app. You will be able to view your balances, transactions, and manage your cryptocurrencies through the app.
7. Repeat the process for any other cryptocurrency accounts you want to link with your Ledger Live Mobile app and Ledger Nano S.
By linking your Ledger Nano S with the Ledger Live Mobile app, you gain full control over your cryptocurrencies while keeping them securely stored on your hardware wallet. The app provides a user-friendly interface to manage and monitor your account balances, transaction history, and other essential features in one place.
It’s important to note that each cryptocurrency account you link with your Ledger Nano S requires a separate setup process. You can add and manage multiple accounts directly from the Ledger Live Mobile app, providing you with flexibility and convenience.
With your Ledger Nano S successfully linked to the Ledger Live Mobile app, you are now ready to take full advantage of the features and functionalities offered by the app. You can safely send and receive cryptocurrencies, manage your portfolio, and explore various other options directly from your Android device.
Ensure that you keep your Ledger Nano S device and the recovery phrase in a safe place to prevent any unauthorized access to your cryptocurrencies. The Ledger Live Mobile app, combined with your Ledger Nano S, offers a highly secure and user-friendly solution for managing your digital assets.
Step 8: Start Using Ledger Nano S with Android
After successfully linking your Ledger Nano S with the Ledger Live Mobile app on your Android device, you are now ready to start using your hardware wallet to securely manage your cryptocurrencies. Follow these steps to get started:
1. Launch the Ledger Live Mobile app on your Android device. Make sure your Ledger Nano S is connected to your device via the USB cable.
2. On the app’s main dashboard, you will see an overview of your linked cryptocurrency accounts. Tap on a specific account to access its details, including the current balance and transaction history.
3. To initiate a transaction, tap on the “Send” or “Receive” button depending on whether you want to send or receive funds. Follow the prompts on the app to complete the transaction securely.
4. When sending funds, you will be asked to enter the recipient’s address and the amount you wish to send. The app will verify the transaction details, and you may need to confirm the transaction on your Ledger Nano S device by verifying and confirming the transaction details displayed on its screen.
5. For receiving funds, the app will generate a unique receiving address for the selected cryptocurrency. You can share this address with others to receive funds directly to your Ledger Nano S wallet.
6. Aside from transaction management, the Ledger Live Mobile app offers additional features such as portfolio tracking, account management, and cryptocurrency news updates. Explore the various sections of the app to take full advantage of its functionalities.
Always ensure that your Ledger Nano S remains securely stored when not in use. Additionally, keep the recovery phrase generated during the setup process in a safe place. This recovery phrase will be crucial in case you need to restore your wallet or access your funds from another device.
Regularly check for firmware and app updates to keep your Ledger Nano S and Ledger Live Mobile app up to date. These updates often include security enhancements and new features to enhance your cryptocurrency management experience.
By following these steps, you can confidently use your Ledger Nano S with your Android device to manage your cryptocurrencies securely. The combination of the Ledger Nano S’s state-of-the-art security features and the user-friendly Ledger Live Mobile app provides an excellent solution for safeguarding and controlling your digital assets.
Enjoy the convenience and peace of mind that comes with managing your cryptocurrencies with the Ledger Nano S and Ledger Live Mobile app on your Android device.
Troubleshooting Common Issues
While pairing and using your Ledger Nano S with your Android device using the Ledger Live Mobile app is generally a smooth process, you may encounter some common issues along the way. Here are a few troubleshooting tips to help you resolve these issues:
1. Connection Issues: If you’re having trouble connecting your Ledger Nano S to your Android device, make sure the USB cable is securely connected. Try using a different USB port or cable if the issue persists. Additionally, ensure that your Android device supports USB OTG functionality and that “USB Debugging” is enabled.
2. App Not Detecting Ledger Nano S: If the Ledger Live Mobile app is not detecting your Ledger Nano S, try closing and reopening the app. Make sure you have the latest version of the app installed on your Android device. If the issue persists, try disconnecting and reconnecting the Ledger Nano S or restart your Android device.
3. Updating Firmware: If you encounter any issues while updating the firmware on your Ledger Nano S, ensure that your device is connected and has sufficient battery power. Try restarting both your Ledger Nano S and your Android device and attempt the firmware update again. If the problem persists, check if there are any known issues or consult the Ledger Support website for further assistance.
4. Forgotten PIN or Lost Recovery Phrase: If you forget your PIN or misplace your recovery phrase, it can be challenging to regain access to your funds. It’s crucial to store your recovery phrase in a secure and accessible location. Ledger cannot recover or reset your PIN or recovery phrase, so ensure you have a backup in case of emergencies.
5. App Freezing or Crashing: If the Ledger Live Mobile app freezes or crashes, try closing the app completely and reopening it. Make sure you have the latest version of the app installed. Restarting your Android device can also help resolve app-related issues. If the problem persists, check for any app updates or contact Ledger Support for further assistance.
Remember to consult the Ledger Support Knowledge Base and community forums for additional troubleshooting tips and solutions to common issues. If you encounter a problem that you cannot resolve on your own, don’t hesitate to reach out to Ledger’s customer support for personalized assistance.
By addressing common issues and finding solutions, you can ensure a smooth and trouble-free experience when using your Ledger Nano S with your Android device. Embrace the power of secure cryptocurrency management and enjoy peace of mind knowing that your digital assets are protected.