
Display Settings Overview
Chromebook offers a range of display settings that allow you to personalize the visual experience of your device. From adjusting the screen brightness to customizing wallpapers and themes, these settings can enhance your productivity and make your Chromebook usage more enjoyable.
One essential display setting is adjusting the screen brightness. This allows you to make the display brighter or dimmer according to your preferences and the lighting conditions in your environment. By reducing the brightness in dimly lit areas, you can save battery life and prevent eye strain. Conversely, increasing the brightness in well-lit rooms ensures a clear and vibrant screen.
Another important display setting is changing the screen resolution. Chromebook allows you to modify the resolution to suit your needs. Lower resolutions can make text and icons appear larger, making it easier for users with visual impairments. Higher resolutions, on the other hand, provide crisper images and more screen real estate, which is beneficial for tasks that require precision and detail.
You can also modify the display orientation on your Chromebook. This feature comes in handy when using your device in different modes, such as tablet or tent mode. Switching the display orientation allows you to view content in portrait or landscape mode, ensuring optimal viewing and interaction with your Chromebook.
For those who frequently use their Chromebook during nighttime, the night mode feature is a valuable option. Enabling night mode adjusts the color temperature of the display to reduce blue light emission. This helps to minimize eye strain and improve sleep quality, especially when using the device for extended periods before bedtime.
In addition, Chromebook allows you to adjust the display scale, which impacts the size of text and other elements on the screen. Increasing the display scale makes content larger, making it easier to read for those who have difficulty viewing smaller text. Decreasing the scale, on the other hand, increases the amount of content visible on the screen at once.
If you require further customization, Chromebook enables you to change the screen zoom level. This feature is useful for individuals with visual impairments or those who prefer a more magnified view. Adjusting the zoom level allows you to enlarge specific areas of the screen for improved visibility and ease of use.
For users with multiple displays, Chromebook provides options to manage and extend your workspace. You can configure the layout of screens, choose the primary display, and arrange windows across different monitors to optimize your productivity and multitasking.
Lastly, personalizing your Chromebook includes customizing the wallpaper and themes. You can select from various wallpapers or even use your own images to add a personal touch to your device. Additionally, Chromebook offers a range of themes to change the appearance of the user interface, allowing you to tailor your experience to your preferences.
If you ever need to reset your display settings to their default values, Chromebook provides this option as well, allowing you to start fresh and revert any changes you have made.
With these display settings at your fingertips, you can tailor your Chromebook to suit your visual preferences and make the most out of your computing experience.
Adjusting Screen Brightness
One of the key display settings on your Chromebook is the ability to adjust the screen brightness. By making use of this feature, you can easily customize the display brightness according to your preferences and the lighting conditions in your environment.
To adjust the screen brightness on your Chromebook, you can follow these simple steps:
- Look for the brightness control keys on your Chromebook’s keyboard. Typically, these keys can be found with icons resembling a sun or a light bulb.
- Press the brightness control keys to increase or decrease the brightness level. The specific keys may vary depending on your Chromebook model, but they are usually located on the top row of your keyboard or integrated with the volume control keys.
- Alternatively, you can adjust the brightness through the settings menu. Click on the clock in the lower-right corner of your screen to open the system tray, and then click on the gear icon to access the Settings menu.
- In the Settings menu, scroll down and click on “Display”. Here, you will find the option to adjust the screen brightness using a slider.
- Drag the slider to the left to decrease the brightness, or to the right to increase it, until you achieve the desired level.
Adjusting the screen brightness is particularly beneficial in various scenarios. When using your Chromebook in a well-lit area or outdoors, increasing the brightness ensures that the display is easily visible. Conversely, when using your device in a dimly lit room or during nighttime, reducing the brightness not only helps conserve battery life but also reduces eye strain.
By finding the ideal brightness level for your Chromebook’s display, you can optimize your viewing experience and work comfortably without any unnecessary discomfort.
Changing Screen Resolution
One of the important display settings on your Chromebook is the ability to change the screen resolution. Adjusting the screen resolution allows you to customize the clarity and size of the content displayed on your Chromebook’s screen.
To change the screen resolution on your Chromebook, you can follow these steps:
- Click on the clock in the lower-right corner of your screen to open the system tray and then click on the gear icon to access the Settings menu.
- In the Settings menu, scroll down and click on “Display”. Here, you will find the option to select the screen resolution.
- Click on the drop-down menu under the “Screen resolution” section to view the available resolution options.
- Select the desired resolution from the list. If you’re not sure which resolution to choose, you can experiment with different options to find the one that suits your needs best.
- Your Chromebook will apply the new resolution, and you can see the changes on your screen. If you’re not satisfied with the new resolution, you can always go back to the Settings menu and select a different one.
Changing the screen resolution can have a significant impact on your Chromebook experience. Lower resolutions make text and icons appear larger, which can be beneficial for users with visual impairments or those who prefer a more magnified view. On the other hand, higher resolutions offer sharper images and more screen real estate, making it ideal for tasks that require precise detail and more content to be visible at once.
Keep in mind that higher resolutions may also require additional processing power and can affect battery life. Therefore, it’s important to strike a balance between the resolution that provides the best viewing experience and the performance of your Chromebook.
By adjusting the screen resolution on your Chromebook, you can personalize the visual experience and ensure that the content displayed on your screen is clear and comfortable to view.
Modifying Display Orientation
Your Chromebook offers the flexibility to modify the display orientation, allowing you to change how content is presented on your screen. This feature is particularly useful when using your Chromebook in different modes, such as tablet or tent mode, or if you prefer a specific orientation for optimal viewing and interaction.
To modify the display orientation on your Chromebook, follow these steps:
- Click on the clock in the lower-right corner of your screen to open the system tray, and then click on the gear icon to access the Settings menu.
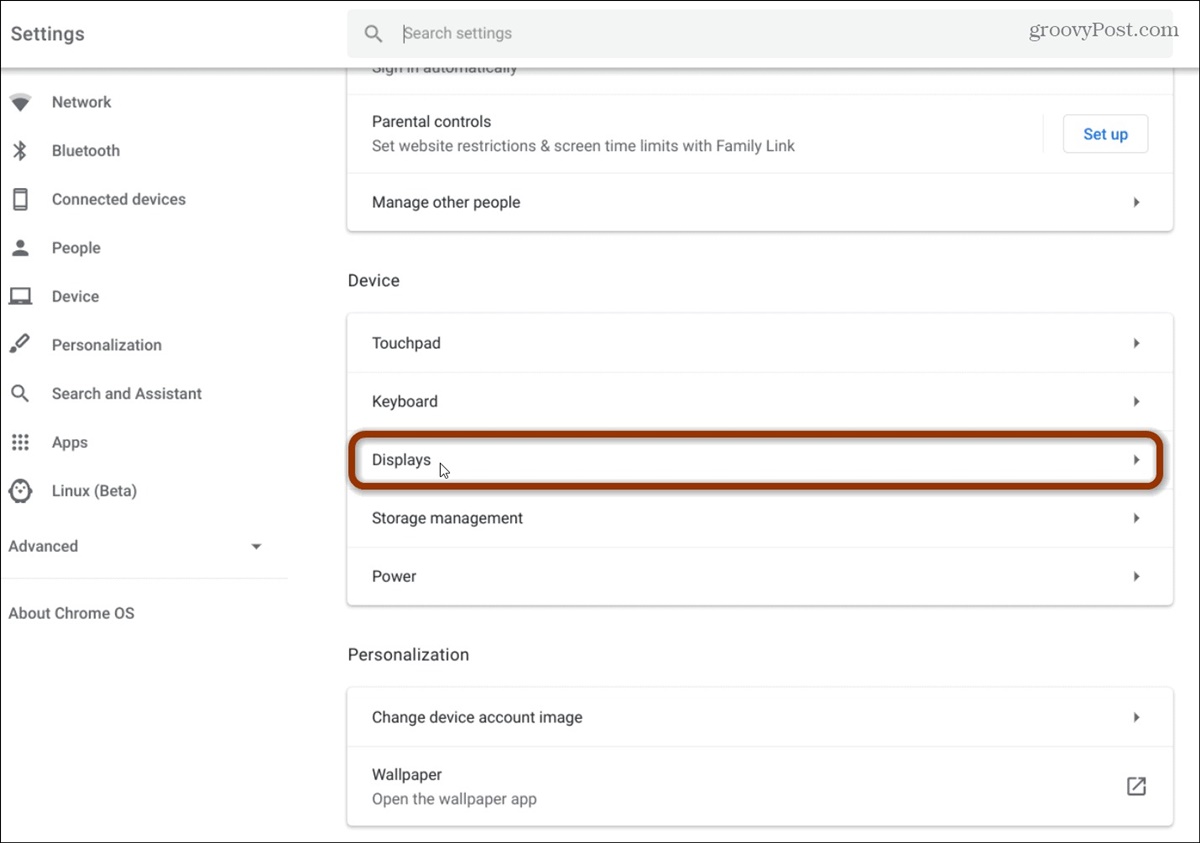
- In the Settings menu, scroll down and click on “Device”. Here, you will find the “Display” section where you can modify various display settings.
- Under the “Display” section, look for the “Orientation” dropdown menu.
- Select the desired display orientation from the available options, such as Landscape, Portrait, or the orientation specific to your device’s mode.
- Your Chromebook will apply the new display orientation, and you can see the changes on your screen. If you’re not satisfied with the new orientation, you can always go back to the Settings menu and select a different one.
Modifying the display orientation allows you to adapt your Chromebook to different usage scenarios. For example, if you’re using your Chromebook in tablet mode, switching to portrait orientation can make it easier to read and navigate content, especially when you’re holding the device vertically. On the other hand, landscape orientation is often preferred for tasks that require a wider view, such as watching videos or working with multiple windows side by side.
By having the ability to modify the display orientation, you can ensure that the content on your screen is presented in the most comfortable and intuitive way for your specific needs, enhancing your overall Chromebook experience.
Enabling Night Mode
Using your Chromebook late at night or in low-light environments can strain your eyes due to the blue light emitted by the screen. To alleviate this issue, Chromebook offers a night mode feature that reduces blue light emission, making your screen more comfortable to view and promoting better sleep quality.
To enable night mode on your Chromebook, follow these steps:
- Click on the clock in the lower-right corner of your screen to open the system tray and then click on the gear icon to access the Settings menu.
- In the Settings menu, scroll down and click on “Display”. Here, you will find the option to enable Night Light.
- Click on the toggle switch next to Night Light to turn it on.
- You can further customize the night mode settings by clicking on “Night Light settings”. Here, you can adjust the color temperature and schedule the night mode activation based on your preferences.
Once enabled, the night mode feature on your Chromebook will automatically adjust the color temperature of the display, shifting it towards warmer tones. This reduces the amount of blue light emitted, which is known to disrupt sleep patterns and cause eye strain.
By using night mode, you can make prolonged usage of your Chromebook in dimly lit environments more comfortable and help protect your eyes. Additionally, if you use your device before bedtime, enabling night mode can promote better sleep by minimizing the impact of blue light on your circadian rhythm.
Remember, you can always toggle night mode on and off based on your needs and preferences. Feel free to experiment with different settings to find what works best for you and ensures a pleasant viewing experience on your Chromebook, day or night.
Adjusting Display Scale
Customizing the display scale on your Chromebook allows you to modify the size of text, icons, and other elements on the screen. This feature can be particularly beneficial for users who have difficulty viewing smaller text or prefer a more magnified view for enhanced readability and usability.
To adjust the display scale on your Chromebook, follow these steps:
- Click on the clock in the lower-right corner of your screen to open the system tray and then click on the gear icon to access the Settings menu.
- In the Settings menu, scroll down and click on “Accessibility”. Here, you will find the option to adjust the display scale.
- Under the “Display” section, you can find the “Display size” slider.
- Drag the slider to the left to decrease the display scale, making text and icons smaller. Drag it to the right to increase the display scale, making them larger.
- As you adjust the display scale, you will see the changes reflected in real-time on your screen. This allows you to find the optimal setting that suits your visual needs.
Adjusting the display scale can make a significant difference in your Chromebook experience. Increasing the scale makes text, icons, and other elements appear larger, which can be beneficial for users with visual impairments or those who require a more prominent display. On the other hand, decreasing the scale allows you to fit more content on the screen, making it ideal for users who prefer a more compact view.
Keep in mind that adjusting the display scale may require some trial and error to find the perfect balance for your needs. It’s recommended to experiment with different scale settings until you achieve the desired display size that enhances your comfort and productivity.
By customizing the display scale on your Chromebook, you can ensure that the content on your screen is comfortably sized and easily legible to suit your unique visual preferences.
Changing Screen Zoom Level
Your Chromebook provides the option to change the screen zoom level, allowing you to enlarge specific areas of the screen for improved visibility and ease of use. This feature is particularly useful for individuals with visual impairments or those who prefer a more magnified view on their Chromebook.
To change the screen zoom level on your Chromebook, follow these steps:
- Click on the clock in the lower-right corner of your screen to open the system tray and then click on the gear icon to access the Settings menu.
- In the Settings menu, scroll down and click on “Accessibility”. Here, you will find the option to adjust the screen zoom level.
- Under the “Display” section, click on “Screen zoom”.
- Use the slider to increase or decrease the screen zoom level according to your preference.
- As you adjust the screen zoom level, you will see the changes reflected in real-time on your screen, allowing you to find the level that suits your needs best.
Changing the screen zoom level can greatly enhance your Chromebook experience, making text, images, and other content easier to read and interact with. Increasing the zoom level magnifies the content, making it larger and more accessible for those with visual impairments. On the other hand, decreasing the zoom level allows you to fit more content on the screen and view a wider area at once, enabling more efficient multitasking.
It’s important to note that adjusting the screen zoom level only affects the specific Chromebook window or application you’re currently using. It does not impact the overall system settings or alter the display specifications for other users on the device.
By utilizing the screen zoom level feature on your Chromebook, you can personalize your viewing experience and make the content on your screen more accessible and enjoyable, regardless of your visual needs.
Managing Multiple Displays
If you frequently use multiple displays with your Chromebook, you’ll be pleased to know that Chrome OS provides convenient features to manage and configure your workspace. This allows you to optimize your productivity and seamlessly extend your desktop across different screens.
Here’s how you can manage multiple displays on your Chromebook:
- Connect your external display(s) to your Chromebook using the appropriate cables, such as HDMI or DisplayPort.
- Once the external display is connected, your Chromebook will automatically detect it and extend your desktop to the new screen. You can customize the layout and settings for each display to suit your preferences.
- Click on the clock in the lower-right corner of your screen to open the system tray and then click on the gear icon to access the Settings menu.
- In the Settings menu, scroll down and click on “Device”. Here, you will find the “Displays” section where you can manage your multiple displays.
- Under the “Displays” section, you will see a visual representation of your displays. You can drag and arrange them to match their physical layout, allowing you to align the displays as required for a seamless transition between screens.
- You can also choose which display will be your primary display, where your taskbar and notifications will appear by default.
- Further, you have the option to adjust various display settings for each monitor individually, such as resolution, orientation, and scaling.
- To manage applications across multiple displays, simply drag and drop windows between screens to move them from one display to another. This enables effortless multitasking and efficient organization of your workspaces.
Managing multiple displays on your Chromebook provides the flexibility to extend your workspace, enhance multitasking capabilities, and tailor your setup to meet your unique needs. Whether you need to work on multiple documents simultaneously, compare content side by side, or simply enjoy an immersive multimedia experience on a larger screen, Chrome OS empowers you to make the most of your multi-display setup.
By utilizing the options and features for managing multiple displays, you can boost your productivity and seamlessly switch between different tasks and applications, expanding your Chromebook’s capabilities beyond a single screen.
Customizing Wallpaper and Themes
Chromebook offers a range of options to customize the appearance of your device, allowing you to express your personal style and make your Chromebook truly yours. You can customize the wallpaper, change themes, and add personal touches to create a visually pleasing and personalized experience.
To customize the wallpaper and themes on your Chromebook, follow these steps:
- Click on the clock in the lower-right corner of your screen to open the system tray and then click on the gear icon to access the Settings menu.
- In the Settings menu, scroll down and click on “Personalization”. Here, you will find various options to customize the appearance of your Chromebook.
- To change the wallpaper, click on “Wallpaper”. You can select from a variety of pre-installed wallpapers or use your own images. Simply choose the image you want and set it as your wallpaper.
- To change the theme, click on “Themes”. Chromebook provides a range of themes to choose from, which can change the colors, icons, and overall look and feel of your device’s user interface.
- Browse through the available themes and select the one that suits your taste. You can preview a theme before applying it to see how it will look on your Chromebook.
- Once you’ve chosen a wallpaper and theme, your Chromebook will immediately apply the changes, giving your device a fresh and personalized look.
Customizing the wallpaper and themes on your Chromebook not only adds a touch of personality but can also enhance your overall experience. Whether it’s using a beautiful landscape as your wallpaper or selecting a theme that resonates with your style, customizing your Chromebook allows you to make your device uniquely yours.
Additionally, customizing the appearance of your Chromebook can provide a positive impact on your mood and productivity. Choosing a wallpaper or theme that promotes a sense of calm or reflects your interests can create a more pleasant and engaging environment for your work or leisure activities.
By taking advantage of the options to customize the wallpaper and themes on your Chromebook, you can transform your device into a visually appealing and personalized companion that enhances your overall Chrome OS experience.
Resetting Display Settings
If you’ve made changes to your display settings on your Chromebook and want to revert them to their original configurations, you can easily reset the display settings. This can be useful if you’re experiencing display issues, want to start fresh, or simply want to restore the default settings.
To reset the display settings on your Chromebook, follow these steps:
- Click on the clock in the lower-right corner of your screen to open the system tray and then click on the gear icon to access the Settings menu.
- In the Settings menu, scroll down and click on “Display”. Here, you will find various display settings that can be modified.
- Scroll down to the bottom of the “Display” settings page and click on the “Reset” or “Restore default settings” button.
- A confirmation dialog box will appear, asking if you want to reset the display settings. Click on “Reset” or “Restore” to confirm.
- Your Chromebook will reset the display settings to their default values. Any customizations you made, such as screen resolution, brightness, orientation, or scale, will return to their original configurations.
Resetting the display settings can be helpful in situations where you encounter issues with your display or want to undo any changes you’ve made. It allows you to start with a clean slate and ensures that your Chromebook is set up with the optimal default display settings.
It’s worth noting that resetting the display settings will not affect any other settings or data on your Chromebook. It solely resets the display-related configurations to their defaults.
By being able to reset your display settings, you have the flexibility to troubleshoot display issues, restore a consistent visual experience, or experiment with different settings and easily revert back if needed.