
Choosing the Right Equipment
When it comes to creating your own videos for YouTube, selecting the right equipment is crucial. The type of equipment you choose will greatly impact the quality of your videos and the overall viewer experience. Here are some key considerations to keep in mind when making your equipment choices:
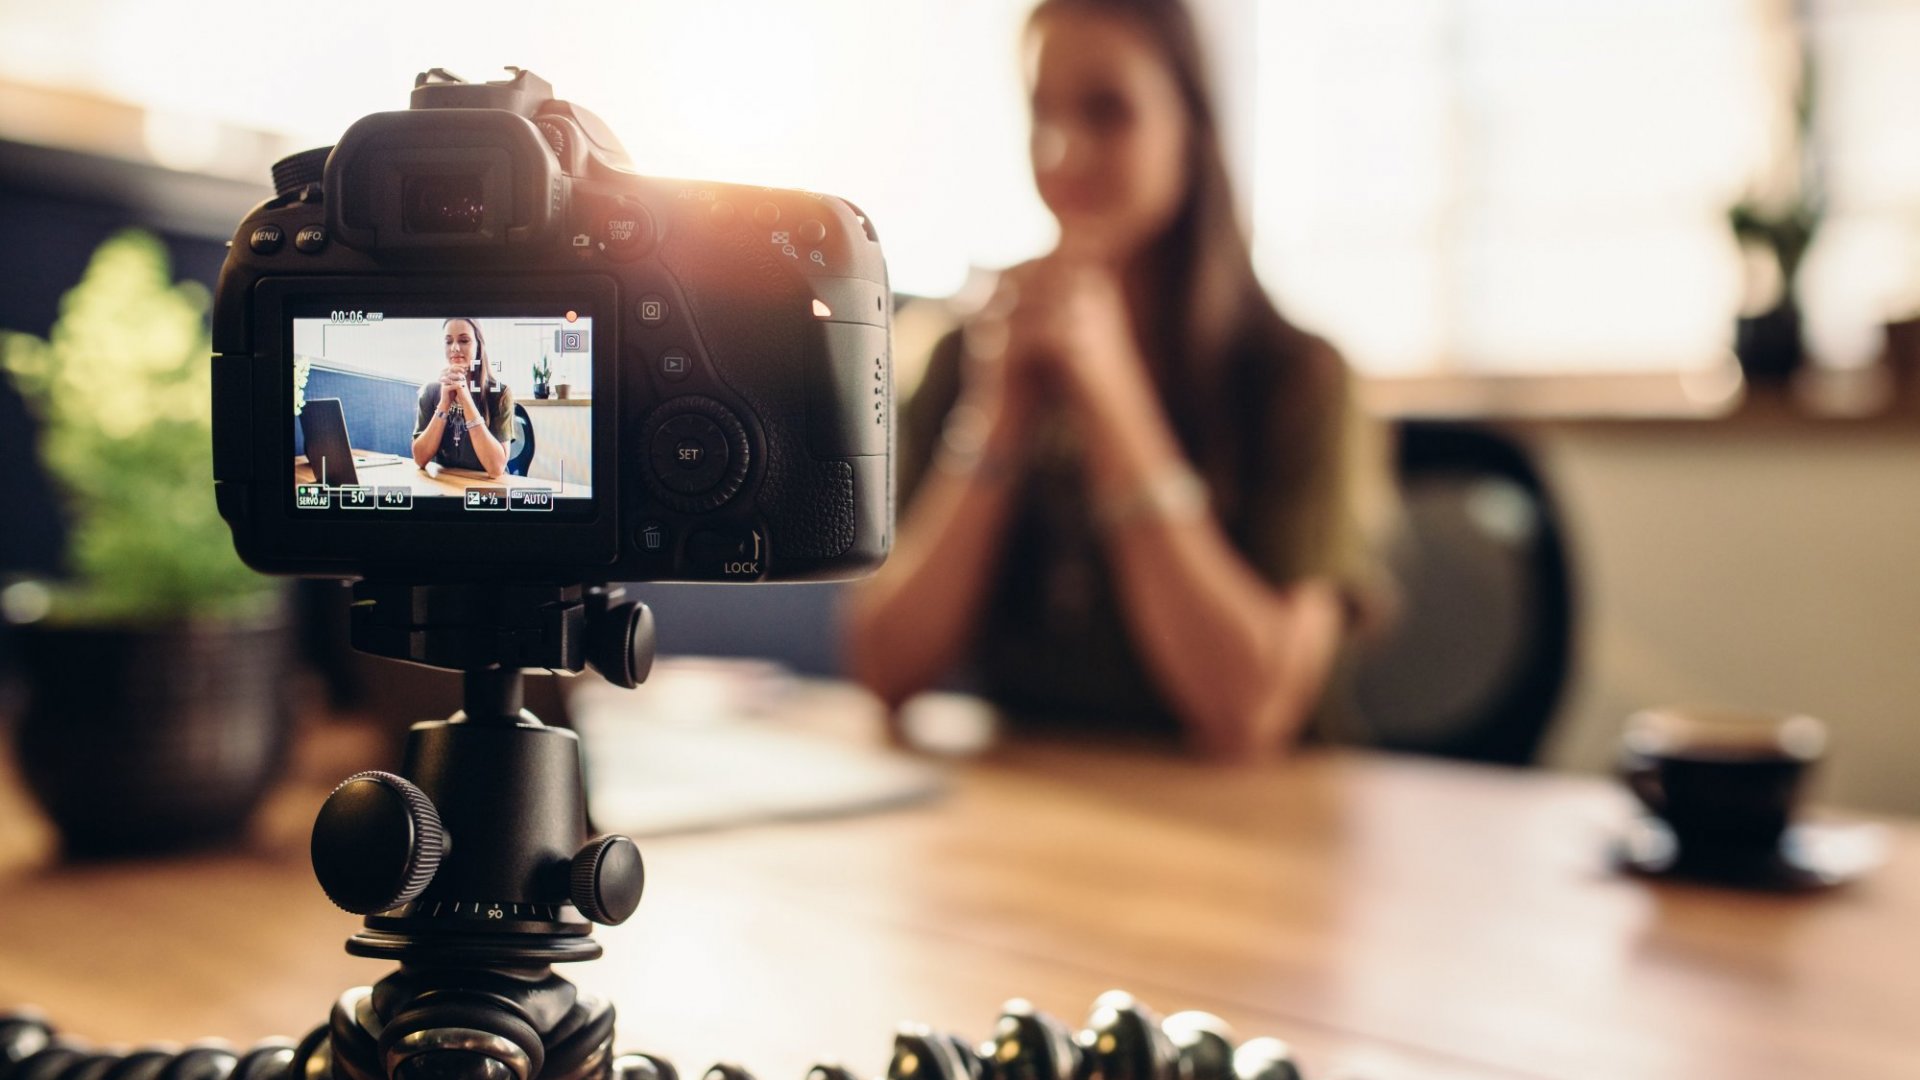
- Camera: Invest in a good quality camera that can record high-definition videos. While there are plenty of options available, DSLR cameras or mirrorless cameras are often preferred for their versatility and image quality.
- Microphone: Audio quality is just as important as video quality. Consider purchasing a separate microphone to ensure clear and crisp audio. There are various types of microphones available, such as shotgun microphones or lapel microphones, depending on your needs.
- Tripod or Stabilizer: To eliminate shaky footage, use a tripod or a stabilizer. This will help maintain a steady shot and give your videos a professional look.
- Lighting: Proper lighting can greatly enhance the visual appeal of your videos. Consider investing in softbox lights or ring lights to eliminate harsh shadows and provide even lighting.
- Backdrop and Set: Create a dedicated filming space by setting up a backdrop or creating a visually appealing set. This will help to create a cohesive and professional look for your videos.
- Editing Software: A reliable video editing software is essential for post-production. There are numerous options available, both free and paid, such as Adobe Premiere Pro, Final Cut Pro, or iMovie.
Remember, the equipment you choose should align with the type of content you plan to create and your budget. Prioritize investing in versatile and high-quality equipment that will serve you well in the long run.
Setting Up Your Filming Space
Creating a suitable filming space is essential for producing high-quality YouTube videos. Whether you have a dedicated room or a small corner in your house, here are some tips to set up your filming space:
- Clean and Declutter: Start by ensuring that your filming space is clean and free from any unnecessary clutter. A neat and organized space will create a more professional and engaging environment for your viewers.
- Backdrop: Choose a backdrop that complements your videos’ content and theme. Whether it’s a plain background, a branded backdrop, or a green screen, make sure it enhances the visual appeal of your videos without distracting from the main focus.
- Lighting: Use natural light whenever possible by positioning yourself facing a window. If natural light is not sufficient or consistent, invest in artificial lighting solutions. Place softbox lights or ring lights strategically to eliminate shadows and ensure even lighting across your face or subjects.
- Soundproofing: Consider soundproofing your filming space to minimize background noise. You can do this by using foam panels, curtains, or rugs to absorb echoes or outside disturbances.
- Furniture and Props: Arrange furniture and props in your filming space that align with your videos’ style and content. This can include chairs, tables, shelves, or any relevant items that enhance the visual storytelling of your videos.
- Positioning and Framing: Experiment with different camera angles and framing to find the most engaging and visually appealing setup. Make sure the camera is positioned at eye level or slightly above to avoid unflattering angles.
Remember, your filming space should reflect your brand or personal style while providing a comfortable and professional environment for recording your videos. Take the time to find the right balance of aesthetics and functionality to create a visually pleasing setup that resonates with your audience.
Understanding Lighting and Audio
Lighting and audio are two critical elements that can make or break the quality of your YouTube videos. By understanding and implementing proper lighting and audio techniques, you can greatly enhance the overall viewer experience. Here are some key considerations:
- Lighting: Good lighting can transform the look and feel of your videos. When setting up your lighting, aim for a soft and diffused light source to minimize harsh shadows. Avoid relying solely on overhead lights, as they can create unflattering shadows on your face. Experiment with natural light or invest in affordable lighting equipment like softbox lights or ring lights.
- White Balance: Pay attention to the white balance settings on your camera to ensure accurate color representation in your videos. Adjust the white balance based on your lighting conditions to prevent your footage from looking too warm or cool.
- Audio: Clear and high-quality audio is essential for video production. Invest in a good external microphone that suits your recording needs. A lapel microphone is ideal for solo talking head videos, while a shotgun microphone is better for capturing audio in larger spaces or outdoors. Position the microphone close to the audio source to minimize background noise and ensure clear sound.
- Room Acoustics: If you’re filming in a room with poor acoustics, echo and background noise can be problematic. To improve sound quality, consider using sound-absorbing materials like foam panels or curtains to minimize echo. Additionally, try to film in a quiet environment or use a noise reduction tool during post-production to eliminate unwanted noise.
- Levels and Monitoring: When recording audio, pay attention to the levels and avoid clipping or distortion. Use headphones to monitor the audio while filming to ensure everything sounds crisp and clear.
Both lighting and audio are essential for creating professional-looking and immersive videos. Take the time to experiment with different setups, lighting angles, and microphone positions to find the best combination that suits your content and enhances the overall quality of your productions.
Planning Your Video Content
Before diving into creating your YouTube videos, it’s essential to have a solid plan in place. Planning your video content will help you stay organized, deliver consistent content, and engage your audience effectively. Here’s how to effectively plan your video content:
- Know Your Audience: Understanding your target audience is crucial. Conduct research to identify their interests, preferences, and pain points. This will help you tailor your content to meet their needs and keep them engaged.
- Choose a Niche: Find your niche within the YouTube landscape. Select a specific topic or area of expertise that aligns with your passion and audience’s interests. This will help you stand out and attract a dedicated audience.
- Set Clear Goals: Determine the purpose and goals of your videos. Are you trying to entertain, educate, or inspire? Clearly define your objectives and create content that aligns with them.
- Create an Outline: Outline the key points and structure of your video. This will serve as a roadmap during the recording and editing process, ensuring that you cover all the necessary information in a logical and engaging manner.
- Brainstorm Ideas: Engage in brainstorming sessions to generate video ideas. Consider trending topics, frequently asked questions, or challenges faced by your target audience. Collaborate with others or seek inspiration from different sources to diversify your content.
- Plan a Series: Consider creating a series of videos on a specific theme or topic. This will help you maintain consistency and keep your audience coming back for more. Plan the episodes or installments in advance to ensure a smooth flow.
- Research Keywords: Keyword research is crucial for optimizing your videos for search engines. Use tools like Google Keyword Planner or TubeBuddy to identify relevant keywords and incorporate them naturally into your titles, descriptions, and tags.
- Call to Action: Determine the desired action you want viewers to take after watching your videos. Encourage them to subscribe, like, comment, or visit your website. Include clear and compelling calls to action to increase engagement and grow your subscriber base.
Remember, effective planning sets the foundation for successful YouTube videos. By knowing your audience, setting goals, and brainstorming ideas, you can create compelling content that resonates with your viewers and helps you achieve your desired outcomes.
Writing a Script
Having a well-crafted script is key to delivering clear, concise, and engaging content in your YouTube videos. Whether you’re planning a tutorial, a vlog, or a storytelling video, writing a script will help you stay on track and effectively convey your message. Here’s how to write an effective script:
- Define the Purpose: Clearly define the purpose of your video. Are you teaching a skill, sharing a personal experience, or reviewing a product? Understanding your purpose will help shape the structure and tone of your script.
- Start with an Attention-Grabbing Introduction: Capture your viewers’ attention from the beginning with a compelling introduction. Use a hook, ask a question, or share a relatable anecdote to draw them in and make them want to continue watching.
- Organize Your Content: Break down your main points or topics into sections. Organize them in a logical order that flows smoothly. Use bullet points or headings to structure your script and guide your delivery.
- Keep it Conversational: Write your script in a conversational tone, as if you’re speaking directly to your audience. Avoid using jargon or complex language that may confuse or alienate viewers. Keep sentences and paragraphs short to maintain clarity and engagement.
- Add Personality: Infuse your script with your own personality and unique style. Let your enthusiasm shine through and add humor, personal anecdotes, or relevant stories to make your content relatable and memorable.
- Include Transitions and Segues: Smooth transitions between sections or topics are important for maintaining a cohesive flow. Use transitional phrases or segues to gracefully move from one point to another, connecting the ideas and keeping the audience engaged.
- Use Visual and Auditory Cues: Incorporate cues in your script to guide your visuals and audio elements. Indicate when to show images, display text on-screen, or add sound effects. This will help you synchronize your visuals and narration for a seamless viewer experience.
- End with a Call to Action: Conclude your video with a strong call to action. Encourage viewers to subscribe, like, comment, or share your video. Prompt them to engage further with your content or visit your website for additional resources.
Remember, writing a script serves as a roadmap for your video. It helps you stay focused, deliver your message effectively, and engage your audience. Keep it conversational, organized, and infused with your personality to create videos that captivate and resonate with your viewers.
Filming Techniques and Tips
Mastering filming techniques is crucial for creating visually appealing and professional-looking YouTube videos. Whether you’re a beginner or experienced content creator, incorporating these techniques and tips into your filming process can greatly enhance the quality of your videos. Here’s what you need to know:
- Rule of Thirds: The rule of thirds is a classic composition technique that can add visual interest to your shots. Imagine dividing your frame into a 3×3 grid. Position your subject along the lines or at the intersection points to create a balanced and visually pleasing composition.
- Depth of Field: Experimenting with depth of field can add a professional touch to your videos. Use a wide aperture (low f-stop number) to create a shallow depth of field, blurring the background and drawing focus to your subject. This can help create cinematic or artistic shots.
- Stabilizing Shots: Minimize camera shake by using a tripod or stabilizer. Stability is essential for producing smooth and professional-looking footage. If a tripod is not available, tuck your elbows in and use your body as a stabilizing point while filming handheld.
- Varying Camera Angles: Experiment with different camera angles to add visual interest and highlight different aspects of your subject. Capture wide shots to establish the scene, close-ups for detail, and different perspectives to keep your viewers engaged.
- Proper Framing: Frame your shots carefully to capture the right elements and create a visually pleasing composition. Consider the rule of thirds, negative space, and leading lines to guide the viewer’s attention and create a balanced image.
- Mastering Lighting: Ensure your subject is well-lit and properly exposed. Utilize natural light or additional lighting equipment to achieve the desired lighting effect. Avoid harsh shadows and ensure even lighting across the frame for a polished look.
- Utilizing B-roll: B-roll footage adds depth and visual interest to your videos. Capture supplementary footage of relevant details, close-ups, or alternative angles to complement your main shots. This can enhance storytelling, provide context, or simply make your video more visually dynamic.
- Managing Audio: Pay attention to audio quality while filming. Use an external microphone close to the subject to capture clear and crisp sound. Monitor your audio levels and eliminate background noise to ensure a professional audio experience.
Remember, practice makes perfect. Experiment with different filming techniques, find your style, and continuously evolve your skills. By applying these techniques and tips, you’ll be well on your way to creating visually stunning and engaging YouTube videos.
Editing Your Video
The editing process plays a crucial role in refining your raw footage and transforming it into a polished and cohesive YouTube video. With the right editing techniques and tools, you can enhance the visual appeal, pacing, and overall storytelling of your content. Here’s how to effectively edit your videos:
- Organize Your Footage: Before diving into the editing process, organize your footage into folders or bins based on scenes or topics. This will make it easier to locate the clips you need and keep your editing workflow smooth.
- Trim and Arrange Clips: Begin by trimming any unnecessary or awkward moments from your clips. Focus on maintaining a tight and concise narrative. Arrange your clips in a logical order to create a smooth flow, ensuring a seamless transition between scenes.
- Add Transitions: Use transitions to smoothen the jump between clips. Common transitions include fades, cuts, dissolves, or wipes. Choose transitions that complement the tone and style of your video while avoiding excessive or distracting effects.
- Enhance Visuals: Adjust your video’s color, brightness, contrast, and saturation to achieve a visually pleasing look. Utilize color grading techniques to create a consistent tone throughout your video or to evoke a specific mood.
- Overlay Text and Graphics: Overlay text, titles, and graphics to provide additional information or engage your viewers. Include lower thirds to introduce yourself or highlight key points. Ensure that the text is clear, legible, and visually appealing.
- Add Music and Sound Effects: Select appropriate background music and sound effects to enhance the mood and pacing of your video. Choose tracks that fit the tone, intensity, and emotion of your content. Ensure that the audio levels are balanced and not overpowering the narration or dialogue.
- Cut Unnecessary Content: Be mindful of the video’s length and viewer attention span. Remove any parts that feel repetitive, drag the pace, or don’t contribute to the overall message or story. Optimize your video’s duration for maximum engagement.
- Apply Transitions and Effects: Utilize additional effects like slow motion, speed ramps, or visual filters to add style and impact to your video. However, use them sparingly and purposefully to avoid overwhelming the viewer or detracting from the content.
- Review and Refine: Once you’ve completed the initial edit, watch your video from start to finish. Take note of any areas that need refinement, including audio adjustments, visual inconsistencies, or pacing issues. Make necessary edits to achieve a polished final product.
The editing process is where your vision truly comes to life. Experiment with different editing techniques, refine your skills, and trust your artistic instincts to create engaging and visually appealing YouTube videos that captivate your audience.
Adding Music and Sound Effects
Music and sound effects are powerful tools that can greatly enhance the overall impact and engagement of your YouTube videos. By carefully selecting and adding the right music and sound effects, you can create a captivating audio experience that complements your visuals and elevates your content. Here’s how to effectively incorporate music and sound effects:
- Choose the Right Background Music: Select background music that aligns with the tone, mood, and theme of your video. Consider the emotions you want to evoke and the overall message you want to convey. Choose tracks that enhance the storytelling, build suspense, or create a specific atmosphere.
- Use Royalty-Free Music: Ensure you have the necessary rights to use the music in your videos by opting for royalty-free music. There are various platforms that offer a wide range of royalty-free music libraries, allowing you to find the perfect track without infringing copyright laws.
- Consider Sound Effects: Incorporate sound effects to enhance specific actions, events, or transitions in your video. Whether it’s a swoosh sound for a text reveal or a subtle background noise to create ambiance, sound effects can add depth and immersion to your content.
- Balance Audio Levels: Pay attention to the balance between your background music, sound effects, and dialogue. Ensure that the audio levels are well-adjusted and balanced, preventing any element from overpowering others. Use audio editing tools to adjust the volume and fine-tune the audio mix.
- Sync Audio and Visuals: Ensure that your music and sound effects are synchronized with the visuals. Coordinate key moments or actions in your video with appropriate audio cues. This synchronization can heighten the impact, emphasize the message, and create a more immersive viewing experience.
- Edit Music for Length: If necessary, edit the music to fit the desired duration of your video. Trim or loop the track to match the pacing and flow of the visuals. Be mindful of any abrupt transitions or noticeable edits that may distract or disrupt the viewer’s experience.
- Align with Copyright-Protected Content: Be cautious when using copyrighted music or sound effects in your videos to avoid any infringement. If you plan to use copyrighted material, explore licensing options or seek permission from the rightful owner to ensure you comply with legal requirements.
- Create Consistency: Establish a consistent audio identity across your videos by using similar music styles, genres, or sound effects. This can help build brand recognition and create a cohesive experience for your audience.
Adding music and sound effects can take your YouTube videos to the next level, enhancing the emotional impact, storytelling, and overall production value. Be intentional in your selections, consider the viewer’s experience, and enjoy the creative possibilities that audio elements can bring to your content.
Uploading and Publishing Your Video
Once you’ve completed the editing process, it’s time to upload and publish your video on YouTube. The way you upload and publish your video can significantly impact its visibility, discoverability, and overall success on the platform. Follow these steps to effectively upload and publish your video:
- Create a Captivating Title: Craft a title that is attention-grabbing, concise, and relevant to your video content. Consider incorporating keywords to improve your video’s searchability and ensure it accurately represents what viewers can expect.
- Write an Engaging Description: Compose a compelling video description that provides a brief overview of your content. Use keywords naturally to optimize discoverability. Include relevant links, timestamps, or additional information that can enhance the viewer’s understanding or engagement.
- Add Accurate Tags: Utilize relevant tags that accurately represent the content of your video. Tags can help YouTube categorize and recommend your video to users searching for related topics. Use a mix of broad and specific tags to maximize your video’s visibility.
- Choose an Eye-Catching Thumbnail: Select a visually appealing thumbnail that accurately represents your video and entices viewers to click. Customize your thumbnail to stand out from the crowd by adding text, engaging visuals, or expressions that capture attention.
- Select Proper Video Privacy Settings: Determine whether your video should be public, private, or unlisted. Public videos are accessible to everyone, private videos are only viewable by those with permission, and unlisted videos can be viewed by anyone with the video’s specific URL. Choose the setting that aligns with the purpose of your video.
- Upload in High Quality: Ensure your video is encoded and uploaded in high quality to provide viewers with the best possible visual experience. Use the recommended video formats and settings provided by YouTube to maintain clarity and sharpness.
- Add Closed Captions or Subtitles: Consider adding closed captions or subtitles to make your video accessible to a wider audience. This feature allows viewers with hearing impairments or those in noisy environments to follow along with your content.
- Preview and Optimize: Take advantage of YouTube’s video preview feature before hitting the publish button. Review your video for any errors, ensure the audio is clear, and check that the visuals are properly displayed. Take this opportunity to make any final edits or adjustments if needed.
- Promote and Share: Once your video is published, actively promote it through various channels. Share it on your social media platforms, embed it on your website or blog, and engage with your audience by responding to comments or messages. Encourage viewers to like, share, and subscribe to your channel.
Remember, uploading and publishing your video is not the end of the process. Be proactive in promoting your content and engaging with your audience to grow your channel and build a loyal following. Stay consistent with your uploads and continue to refine your content based on viewer feedback and analytics to ensure long-term success on YouTube.
Promoting Your Video on YouTube
After uploading your video to YouTube, promoting it effectively is crucial to increase visibility, attract viewers, and grow your channel. With millions of videos available on the platform, you need to actively promote your content to stand out from the crowd. Here are some effective strategies to promote your YouTube videos:
- Create Eye-Catching Thumbnails: Thumbnails play a critical role in attracting viewers to click on your video. Design visually appealing thumbnails that accurately represent the content and spark curiosity. Use bold text, vibrant colors, and compelling visuals to make your thumbnails stand out in search results and related video suggestions.
- Optimize Video Titles, Descriptions, and Tags: Optimize your video’s metadata to improve search visibility. Craft attention-grabbing titles that include relevant keywords. Write detailed and engaging descriptions that incorporate relevant tags and include timestamps to help viewers navigate your video. This will improve your video’s searchability and increase its chances of being discovered by potential viewers.
- Engage with Your Audience: Actively engage with your viewers by responding to comments and building a sense of community. Encourage viewers to comment, ask questions, and share their thoughts. Respond to comments promptly to foster a connection and create a loyal and engaged audience base.
- Collaborate with Other YouTubers: Collaborations with other creators in your niche can expose your content to new audiences. Consider reaching out to other YouTubers for collaboration opportunities, such as guest appearances, joint projects, or shoutouts. This cross-promotion can benefit both channels and attract new viewers.
- Share on Social Media: Leverage the power of social media to promote your YouTube videos. Share your videos on platforms like Facebook, Twitter, Instagram, and LinkedIn. Create engaging captions, use relevant hashtags, and encourage your followers to watch and share your content. Engage with your social media audience by responding to comments and fostering discussions around your videos.
- Embed Videos on Your Website or Blog: Extend the reach of your videos by embedding them on your website or blog. Create relevant blog posts and incorporate your videos to provide additional context or offer visual demonstrations. This allows your website visitors to discover and watch your videos directly from your own platform.
- Promote through Email Newsletters: If you have an email newsletter, include links to your latest videos in your newsletters. Encourage subscribers to watch and share your content by providing a brief description and a compelling call to action. This can help drive traffic to your videos and boost your viewership.
- Utilize YouTube End Screens and Cards: Make use of YouTube’s end screens and cards feature to promote your other videos or playlists. Direct viewers to related content, encourage them to subscribe, or suggest relevant playlists for them to explore. This can increase engagement within your channel and keep viewers watching more of your videos.
Remember, effective promotion is an ongoing process. Continuously explore new strategies, analyze your video analytics, and adapt your promotional efforts based on viewer feedback. By actively promoting your YouTube videos, you can increase your reach, gain more subscribers, and steadily grow your channel.