
Determine the Type of Internal Hard Drive
Before you can proceed with making an internal hard drive external, it is important to determine the type of internal hard drive you have. This is crucial because the process and tools required may vary depending on whether you have a SATA or IDE hard drive.
SATA (Serial ATA) is the more common and modern type of internal hard drive. It is characterized by a smaller, thinner connector and is widely used in newer computers. IDE (Integrated Drive Electronics) drives, on the other hand, have a larger, rectangular connector and are typically found in older computers.
To identify the type of internal hard drive you have, you can refer to the computer’s user manual or check the specifications of your computer online. If you are unsure, you can physically inspect the connectors on the drive. SATA connectors have a small L-shaped design, while IDE connectors have a wider, rectangular shape.
Once you have determined the type of internal hard drive, you can proceed with gathering the necessary tools and components to successfully turn it into an external hard drive.
Gathering the Necessary Tools
Now that you have identified the type of internal hard drive you have, it’s time to gather the necessary tools and components to successfully turn it into an external hard drive. Here are the key items you will need:
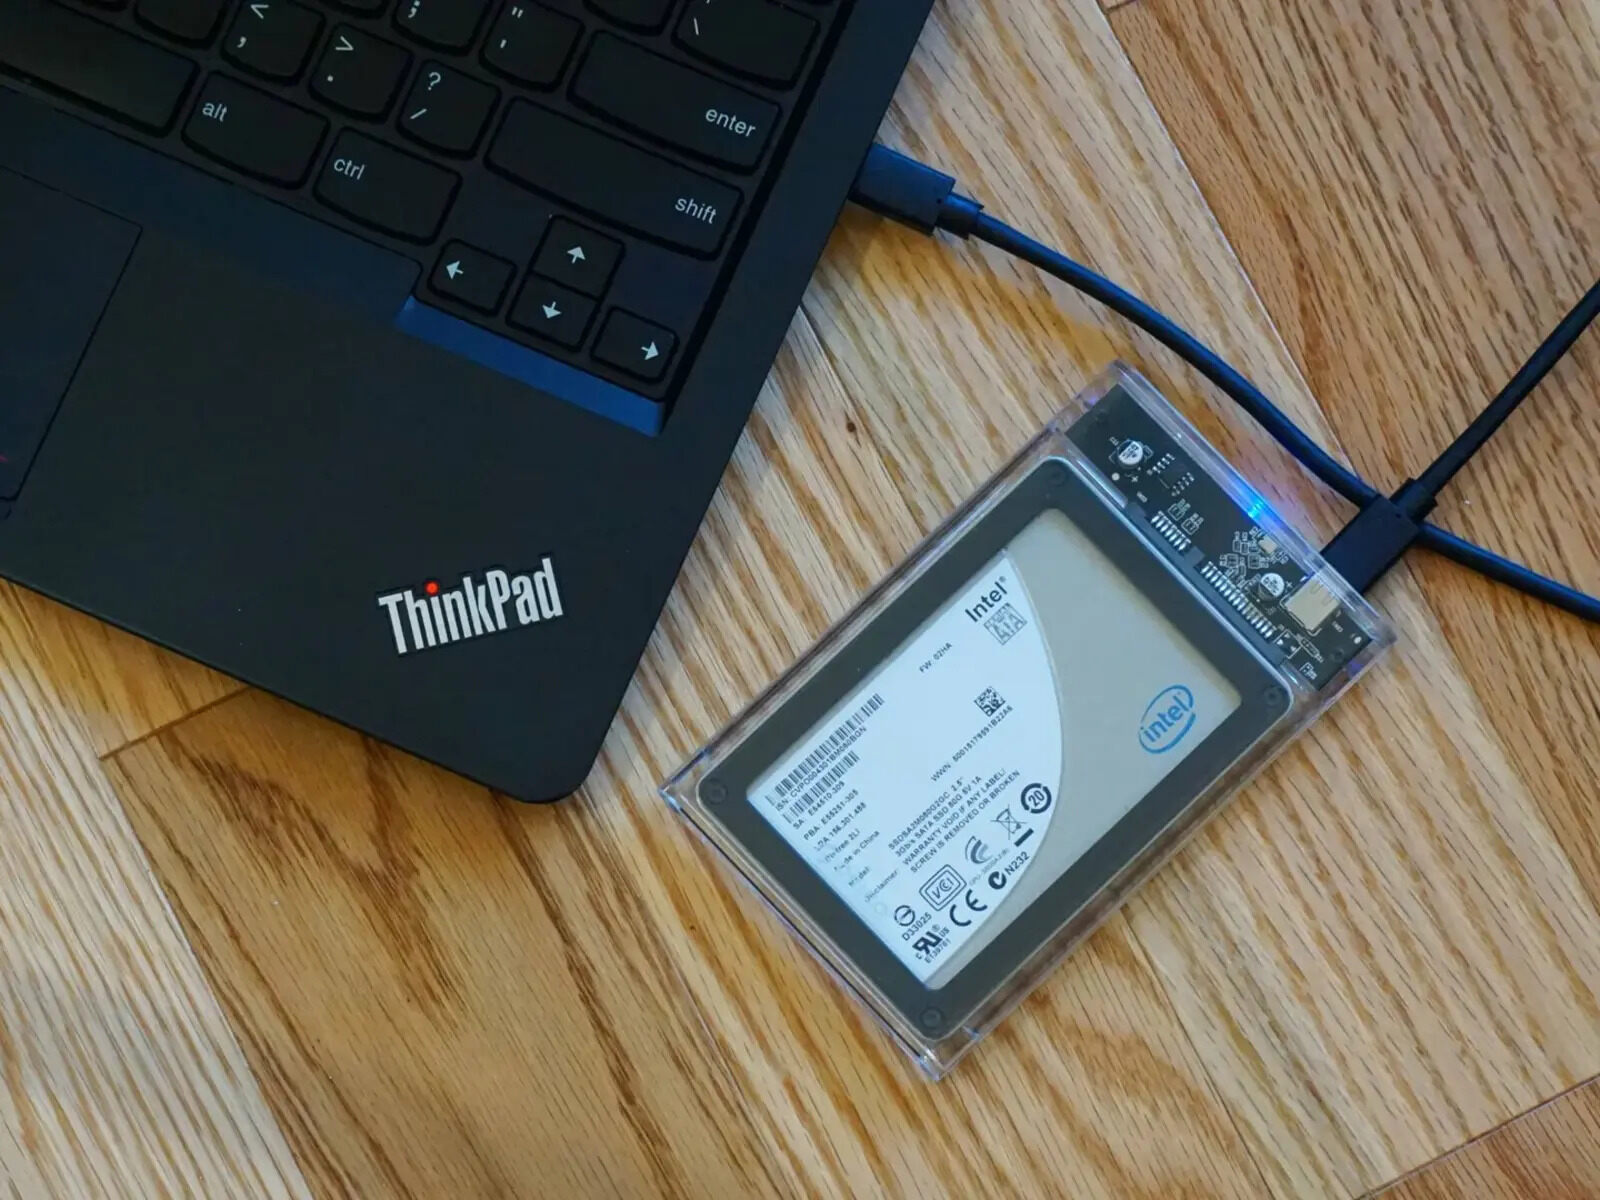
- External Hard Drive Enclosure: This is the most essential component. It is a device that houses the internal hard drive and allows it to connect externally. Make sure to choose an enclosure that is compatible with your specific type of hard drive (SATA or IDE).
- Screwdriver: You will need a screwdriver to open the enclosure and secure the internal hard drive in place. The size of the screwdriver will depend on the type of screws used in the enclosure.
- USB Cable: To connect the external hard drive enclosure to your computer, you will need a USB cable. Most modern enclosures use USB 3.0, which offers faster data transfer speeds, but make sure to check the specifications of your enclosure.
- Power Supply (if applicable): Some external hard drive enclosures require an additional power supply to operate. If your enclosure comes with one, make sure to gather it as well.
Additionally, it’s a good idea to have a clean and well-lit workspace. This will make it easier to handle the components and ensure that you can complete the process without any interruptions.
By gathering these tools and components, you are now ready to proceed with transforming your internal hard drive into an external one. The next step will be preparing the internal hard drive for installation into the enclosure.
Preparing the Internal Hard Drive
Now that you have gathered the necessary tools, it’s time to prepare the internal hard drive for installation into the external enclosure. Here are the steps to follow:
- Back up your data: Before proceeding with any modifications, it is crucial to back up any important data on the internal hard drive. This ensures that you don’t lose any valuable information during the process.
- Power off the computer: To ensure safe handling of the internal hard drive, power off your computer and unplug it from the power source. This will prevent any possible damage due to electrical current.
- Open the computer case: Depending on your computer model, you may need to open the computer case to access the internal hard drive. Refer to the computer’s user manual or research online for specific instructions.
- Remove the internal hard drive: Carefully disconnect the cables connected to the internal hard drive and gently remove it from its slot. Take note of the orientation and position of the drive for easy installation into the enclosure later on.
- Handle with care: Internal hard drives are delicate components, so it’s important to handle them with care. Avoid touching the exposed circuitry and hold the drive by its edges to prevent any static or physical damage.
- Inspect for damage: Before proceeding, inspect the internal hard drive for any signs of physical damage such as bent pins or cracks. If you notice any issues, it’s recommended to consult a professional before attempting to turn it into an external hard drive.
By following these steps, you have now properly prepared the internal hard drive for installation into the external enclosure. The next section will guide you through the process of connecting the necessary cables to complete the transformation.
Connecting the Necessary Cables
Now that you have prepared the internal hard drive, it’s time to connect the necessary cables to transform it into an external hard drive. Follow these steps to ensure a successful connection:
- Open the external hard drive enclosure: Use the screwdriver to remove any screws and open the external hard drive enclosure. This will provide access to the internal compartment where the hard drive will be installed.
- Insert the internal hard drive: Carefully align the internal hard drive with the connectors inside the enclosure. Gently slide it into place, ensuring that the connectors make a secure connection with the enclosure’s interface.
- Screw the enclosure: Once the hard drive is inserted, use the screwdriver to secure it in place. Tighten the screws to ensure that the hard drive is securely held within the enclosure.
- Connect the USB cable: Take the USB cable and connect one end to the USB port on the external hard drive enclosure. The other end should be plugged into an available USB port on your computer.
- Optional: Power supply: If your external hard drive enclosure requires an external power supply, connect it to a power source and plug the other end into the enclosure. Make sure the power supply is compatible with the enclosure.
- Power on the computer: Once all the cables are connected, power on your computer and ensure that it recognizes the external hard drive. You may need to install any necessary drivers or software provided with the enclosure for proper functioning.
By following these steps, you have successfully connected the necessary cables to turn your internal hard drive into an external one. The next section will cover the process of inserting the internal hard drive into the enclosure.
Inserting the Internal Hard Drive into an Enclosure
With the necessary cables connected, it’s time to insert the prepared internal hard drive into the external hard drive enclosure. Follow these steps to ensure a proper installation:
- Open the enclosure: Use a screwdriver to remove screws or any locking mechanisms that hold the external hard drive enclosure together. This will allow you to access the internal compartment where the hard drive will be installed.
- Align the hard drive: Carefully align the connectors on the internal hard drive with the corresponding ports inside the enclosure. Make sure they are properly aligned and avoid forcing the connection.
- Slide the hard drive: Once aligned, gently slide the internal hard drive into the enclosure until it fits snugly. Be cautious and avoid applying excessive force to prevent any damage to the components.
- Secure the enclosure: Once the hard drive is properly inserted, use the provided screws or locking mechanisms to secure the enclosure. Ensure that it is securely closed to protect the internal components.
It’s important to note that different enclosure models may have specific instructions for inserting the hard drive. Therefore, it is always a good idea to consult the enclosure’s user manual or manufacturer’s guidelines for any additional steps or specifications.
By carefully following these steps, you have successfully inserted the internal hard drive into the external hard drive enclosure. The next section will guide you through securing the enclosure to ensure the proper functioning of your new external hard drive.
Securing the Enclosure
After inserting the internal hard drive into the external hard drive enclosure, the next step is to securely fasten the enclosure to ensure the proper functioning of your new external hard drive. Follow these steps to secure the enclosure:
- Align the enclosure: Place the enclosure on a flat surface and ensure it is in the desired position. Make sure any ports or connectors on the enclosure are easily accessible.
- Fasten the screws or locking mechanisms: Using the screwdriver or the provided means of fastening, carefully tighten the screws or locking mechanisms to secure the enclosure. Start by lightly tightening each screw and then gradually tighten them evenly.
- Ensure a tight fit: Double-check that the enclosure is securely fastened and there are no loose or protruding parts. An adequately secured enclosure will prevent any vibrations or movements that could affect the internal hard drive.
It is worth noting that different enclosure models may have specific instructions for securing the enclosure. Therefore, it’s always a good idea to consult the enclosure’s user manual or manufacturer’s guidelines for any additional steps or specifications.
By securely fastening the enclosure, you have completed the process of preparing your internal hard drive to function as an external hard drive. The next section will cover testing the external hard drive to ensure it is working properly.
Testing the External Hard Drive
After securing the external hard drive enclosure, it’s important to test the functionality of your newly transformed external hard drive. Follow these steps to ensure it is working properly:
- Power on the computer: Start by powering on your computer and making sure it is fully operational. If necessary, log in to your user account.
- Connect the external hard drive: Take the USB cable connected to the external hard drive enclosure and plug it into an available USB port on your computer. Ensure it is securely inserted.
- Wait for the external hard drive to be recognized: Once connected, your computer should recognize the external hard drive and automatically install any necessary drivers or software. This may take a few moments.
- Check for drive visibility: Open the File Explorer (Windows) or Finder (Mac) and look for the external hard drive in the list of available drives. It should appear as a separate drive with its own label.
- Test read and write functionality: To ensure the external hard drive is fully functional, try accessing and transferring files to and from the drive. Copy a small file onto the external hard drive and verify that it is successfully saved. Similarly, try opening and copying files from the external hard drive back to your computer.
If you encounter any issues during the testing process, double-check the connections and ensure that the external hard drive enclosure is properly secured. If problems persist, consult the enclosure’s user manual or contact the manufacturer for further assistance.
By following these steps and successfully testing the external hard drive, you can now enjoy the added storage capacity and portability that an external hard drive offers.
Transferring Files to the New External Hard Drive
Now that you have successfully tested the functionality of your new external hard drive, it’s time to transfer files onto it. Follow these steps to transfer your files:
- Locate the files: Determine which files or folders you want to transfer to the external hard drive. These could include documents, photos, videos, or any other data you want to store.
- Open the file explorer: On your computer, open the file explorer (Windows) or Finder (Mac) to navigate to the location where your files are currently stored.
- Select the files: In the file explorer or Finder, select the files or folders that you want to transfer. You can do this by either clicking and dragging over the files or holding down the Ctrl/Command key while selecting multiple files.
- Copy or cut the files: Once the files are selected, right-click on them and choose either “Copy” or “Cut” from the context menu. “Copy” will create a duplicate of the files, while “Cut” will remove them from their original location.
- Navigate to the external hard drive: In the file explorer or Finder, navigate to the external hard drive where you want to transfer the files. It should be visible as a separate drive.
- Paste the files: Right-click on the destination folder within the external hard drive and select “Paste” from the context menu. This will initiate the transfer of the selected files from your computer to the external hard drive.
- Monitor the transfer progress: Depending on the number and size of the files being transferred, it may take some time to complete the process. Monitor the progress bar or file transfer status to ensure it is completed successfully.
- Verify the transferred files: Once the transfer is complete, navigate to the external hard drive and open the transferred files to ensure they are intact and accessible.
By following these steps, you have successfully transferred your files to the new external hard drive. Make sure to keep a backup of your files on another storage device to prevent data loss.
Congratulations! You can now enjoy the benefits of increased storage capacity and portability with your new external hard drive.