
Materials Needed
Before you embark on building an electronic stethoscope, it’s essential to gather all the necessary materials. These components will form the foundation of your device and enable it to capture and amplify heart sounds with precision. Here are the key items you will need to get started:
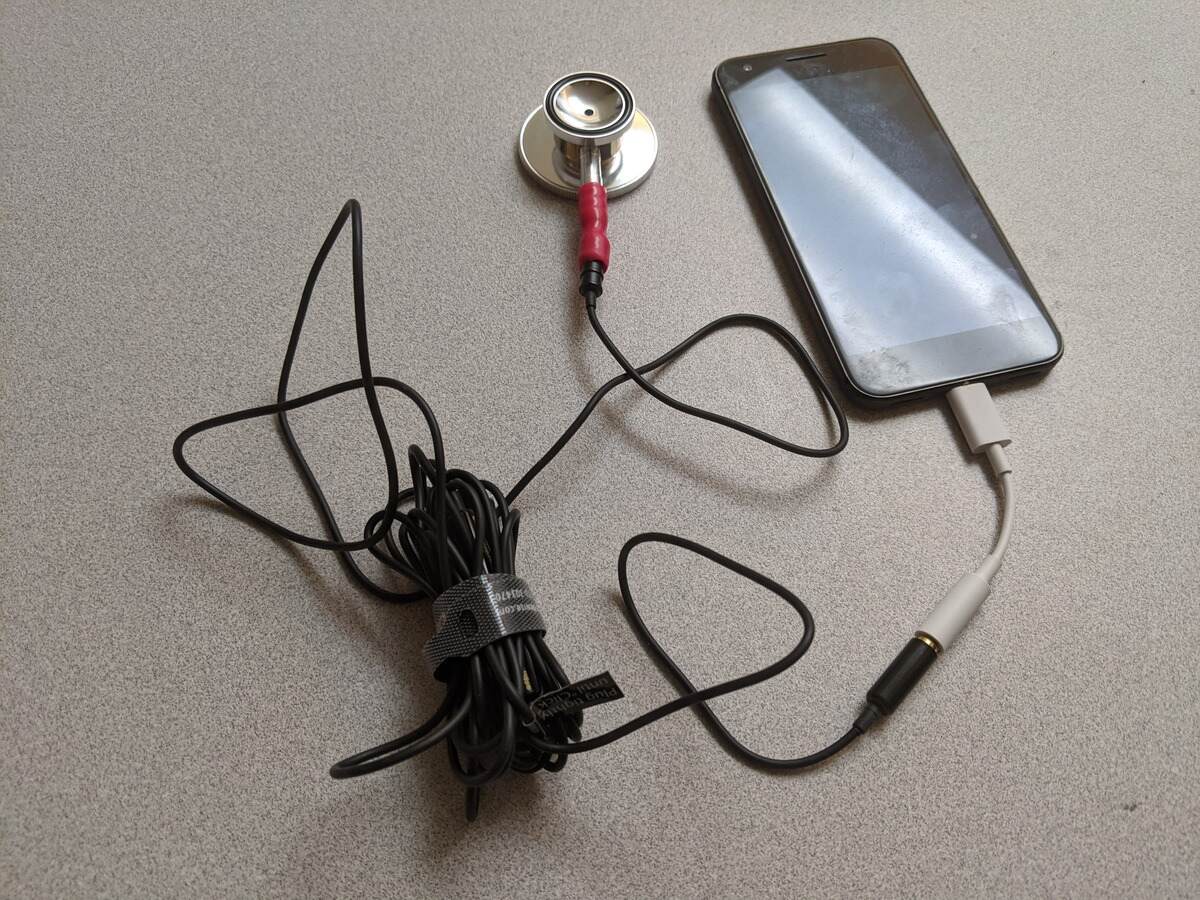
- Microphone: Choose a high-quality, sensitive microphone capable of picking up faint sounds. Look for a microphone with a frequency response tailored for medical applications.
- Amplifier: Select an audio amplifier that can amplify the weak signals from the microphone to audible levels. Ensure it has suitable gain and low noise characteristics.
- Headphone: Opt for a stereo headphone that provides clear sound reproduction, allowing you to listen to amplified heart sounds accurately.
- Wires and Connectors: Prepare suitable wires and connectors to establish connections between the microphone, amplifier, and headphone.
- Battery: Choose a reliable power source for your electronic stethoscope, such as a rechargeable battery or a compact portable power supply.
- Enclosure: Consider a durable and compact enclosure to house the electronic components and protect them from external factors.
- Tools: Ensure you have the necessary tools, such as a soldering iron, wire strippers, multimeter, and pliers, to assemble and test the electronic stethoscope.
By gathering these materials, you’ll be equipped to proceed with the construction of your electronic stethoscope. Make sure to choose high-quality components to ensure optimal performance and accuracy when capturing and amplifying heart sounds.
Step 1: Gathering the Components
Before you dive into the exciting process of building an electronic stethoscope, the first step is to gather all the necessary components. By ensuring you have everything you need, you can streamline the construction process and avoid any delays or last-minute trips to the store. Here’s how to successfully gather the required components:
- Create a Checklist: Start by creating a checklist of all the components you’ll need for your electronic stethoscope. This will help you stay organized and ensure you don’t miss anything during the gathering process.
- Research and Select the Components: Look for reputable suppliers or online stores that specialize in electronic components. Take the time to research and read reviews to ensure you choose high-quality components that will deliver accurate results.
- Microphone: Select a sensitive microphone designed specifically for medical applications. Look for one that has a wide frequency response range to capture both high and low-frequency sounds effectively.
- Amplifier: Choose an audio amplifier that has the appropriate gain and low noise characteristics. Consider the power requirements and ensure it is compatible with the microphone you’ve chosen.
- Headphone: Opt for a high-quality stereo headphone that provides clear and accurate sound reproduction. Look for headphones that are comfortable to wear for extended periods.
- Wires and Connectors: Gather the necessary wires and connectors to establish connections between the microphone, amplifier, and headphone. Ensure they are the appropriate length and type for your project.
- Battery: Depending on your preferences, select a suitable power source for your electronic stethoscope. Consider factors such as battery life, portability, and rechargeability.
- Enclosure: Choose a durable and suitable enclosure to house the electronic components. Consider factors such as size, material, and ease of assembly.
- Tools: Make sure you have the necessary tools to assemble and test your electronic stethoscope. These may include a soldering iron, wire strippers, multimeter, and pliers.
By following these steps, you’ll be well-prepared with all the components needed to proceed with the construction of your electronic stethoscope. Take the time to carefully select high-quality components to ensure optimal performance and accuracy when listening to heart sounds.
Step 2: Preparing the Microphone
Now that you have gathered all the necessary components, it’s time to move on to preparing the microphone for your electronic stethoscope. The microphone is a critical component as it captures the faint heart sounds and converts them into electrical signals. Here are the steps to effectively prepare the microphone:
- Inspect the Microphone: Carefully examine the microphone to ensure it is free from any physical damages or defects. Look for any loose connections or visible signs of wear and tear.
- Read the Instructions: If the microphone comes with an instruction manual, it’s essential to read it thoroughly. Familiarize yourself with the specific features, settings, and operating procedures of the microphone.
- Positioning Considerations: Take into account the ideal positioning of the microphone for capturing heart sounds effectively. The microphone should be close to the chest area and securely attached to the patient’s body.
- Adjust Sensitivity Settings: Depending on the microphone model, you may have the option to adjust the sensitivity settings. Experiment with different sensitivity levels to find the optimal setting for capturing clear and accurate heart sounds.
- Maintain Proper Hygiene: Ensure the microphone is clean and sanitized before each use. This is crucial to prevent cross-contamination and maintain a hygienic environment for both the patient and the medical professional.
- Secure the Microphone: Use medical adhesive tapes or specialized microphone clips to secure the microphone in place. This will prevent any unintended movement or dislodging during examination.
- Test the Microphone: Before proceeding to the next steps, perform a quick test to ensure the microphone is functioning correctly. Speak into the microphone and listen for clear and accurate sound reproduction.
By following these steps, you can ensure the microphone is properly prepared for use in your electronic stethoscope. Proper positioning, adjusting sensitivity settings, and maintaining hygiene are essential factors to consider to capture high-quality heart sounds. Taking the time to prepare the microphone will contribute to accurate and reliable results when using your electronic stethoscope.
Step 3: Assembling the Amplifier
With the microphone prepared, it’s time to move on to the next step: assembling the amplifier for your electronic stethoscope. The amplifier plays a crucial role in boosting the weak electrical signals received from the microphone. Here’s a step-by-step guide to help you assemble the amplifier:
- Gather the Components: Make sure you have all the necessary components for the amplifier assembly, including the amplifier board, resistors, capacitors, transistors, and other relevant components as specified in the amplifier circuit diagram.
- Prepare the Amplifier Board: Carefully inspect the amplifier board for any damages or loose connections. Ensure that it is clean and free from any dust or debris. Refer to the manufacturer’s instructions for any specific handling requirements.
- Identify the Components: Familiarize yourself with the different components and their specifications. Take note of the resistor values, capacitor types, and transistor types needed for the amplifier circuit.
- Soldering the Components: Use a soldering iron and solder to attach the components to the amplifier board according to the circuit diagram. Take care to ensure proper alignment and secure connections. Follow best practices for soldering, such as using the right amount of solder and avoiding excessive heat exposure.
- Test the Amplifier: Once the components are soldered, it’s time to test the amplifier. Connect a power source, such as a battery, to the amplifier and verify that it powers on without any issues. Use a multimeter to check for proper voltage levels and test functionality.
- Adjustment and Fine-Tuning: Depending on the amplifier circuit design, you may need to make adjustments or fine-tune certain settings. Refer to the circuit diagram and instructions for any specific calibration requirements.
- Enclosure Considerations: Keep in mind the enclosure design and measurements when assembling the amplifier. Ensure that the amplifier board and any associated wiring will fit securely within the enclosure.
By following these steps, you can assemble the amplifier for your electronic stethoscope successfully. Pay close attention to the circuit diagram, follow proper soldering techniques, and test the amplifier to ensure it functions as intended. The amplifier is a crucial component that will amplify the weak signals from the microphone, allowing you to listen to clear and accurate heart sounds.
Step 4: Connecting the Microphone and Amplifier
Now that you have assembled the amplifier, it’s time to move on to the next step: connecting the microphone and amplifier for your electronic stethoscope. This crucial step allows the amplified signals from the microphone to be processed and prepared for output. Follow these steps to successfully connect the microphone and amplifier:
- Identify Input and Output: Locate the input and output terminals on both the microphone and the amplifier. The input terminal on the amplifier is where you will connect the microphone, while the output terminal is where the amplified signal will be sent.
- Prepare the Wires: Cut the appropriate length of wires to connect the microphone and amplifier. Strip the insulation from the ends of the wires to expose the conductive metal.
- Connect the Microphone: Connect one end of the wire to the output terminal of the microphone. Ensure a secure connection by tightening any terminal screws or using suitable connectors.
- Connect the Amplifier: Take the other end of the wire and connect it to the input terminal of the amplifier. Again, ensure a secure connection is made. Refer to the amplifier’s manual or circuit diagram to determine the correct input terminal.
- Check Connectivity: Once the connections are made, use a multimeter to check the connectivity between the microphone and amplifier. Verify that there is a proper flow of electrical signals through the wires.
- Secure and Insulate: Once the connections have been tested and verified, secure the wires in place using cable ties or electrical tape. Make sure to insulate any exposed wires to prevent short circuits or interference.
- Test the Connection: Before proceeding to the next step, perform a quick test to ensure the microphone and amplifier are properly connected. Speak into the microphone and check if the amplified sound can be heard through the amplifier’s output.
By following these steps, you can successfully connect the microphone and amplifier for your electronic stethoscope. Pay close attention to the correct terminals, secure connections, and proper insulation to ensure optimal signal transfer between the microphone and amplifier. With this step complete, you are one step closer to enjoying the amplified heart sounds through your electronic stethoscope.
Step 5: Building the Headphone Output
Now that you have successfully connected the microphone and amplifier, it’s time to move on to the next step: building the headphone output for your electronic stethoscope. This step is crucial for delivering the amplified heart sounds to your ears. Follow these steps to build the headphone output:
- Gather the Components: Make sure you have all the necessary components for the headphone output, including resistors, capacitors, potentiometers, and audio jacks. Refer to the circuit diagram or instructions for the specific components required.
- Prepare the Connection Points: Identify the connection points on the amplifier board where you will be attaching the components for the headphone output. Ensure they are clean and free from any solder residue or debris.
- Attach the Resistors and Capacitors: Solder the resistors and capacitors at the designated locations on the amplifier board, as specified in the circuit diagram. Take care to follow the correct resistor values and capacitor types for the desired output.
- Connect the Potentiometer: Solder the potentiometer to the appropriate connection points on the amplifier board. The potentiometer will allow you to adjust the volume of the headphone output.
- Attach the Audio Jack: Connect the audio jack to the designated connection points on the amplifier board. This will serve as the interface for plugging in your headphones.
- Check for Proper Connection: Once the components are soldered, use a multimeter to check for proper connectivity and ensure there are no short circuits or loose connections.
- Test the Headphone Output: Before proceeding, perform a quick test to verify that the headphone output is working correctly. Plug in your headphones and listen for clear and amplified heart sounds.
By following these steps, you can successfully build the headphone output for your electronic stethoscope. Pay attention to the correct placement of components, proper soldering techniques, and ensuring a secure and functional audio jack. With this step complete, you are one step closer to experiencing amplified heart sounds through your headphones with your electronic stethoscope.
Step 6: Connecting the Headphone Output
After building the headphone output for your electronic stethoscope, it’s time to move on to the next step: connecting the headphone output. This step allows you to bridge the gap between the amplifier and your headphones, enabling you to listen to the amplified heart sounds with clarity. Follow these steps to effectively connect the headphone output:
- Identify the Headphone Jack: Locate the headphone jack on the amplifier board. This is where you will connect your headphones to the stethoscope.
- Prepare the Headphone Connector: Ensure that the headphone connector is compatible with the headphone jack on the amplifier board. Most headphone connectors are designed to fit standard audio jacks.
- Solder the Connector: Use a soldering iron and solder to attach the wires of the headphone connector to the corresponding terminals on the headphone jack of the amplifier board. Double-check the polarity to ensure a proper connection.
- Secure the Connection: Once soldered, use heat shrink tubing or electrical tape to secure the wires and provide insulation. This will prevent any accidental short circuits or wire damage.
- Test the Connection: Prior to using the electronic stethoscope, perform a quick test to ensure the connection between the headphone output and the headphones is secure. Plug in the headphones and listen for clear and amplified heart sounds.
- Ensure Comfort and Convenience: Consider the comfort and convenience of using the headphones. Make sure the wire length is suitable for your needs and that the headphones are comfortable to wear during examination.
- Arrange the Wiring: Properly organize and arrange the headphone wire, ensuring it does not interfere with the examination process or cause any inconvenience. Consider using wire clips or tape to secure the wire to your clothing for ease of use.
By following these steps, you can successfully connect the headphone output to your electronic stethoscope. Take care to solder the headphone connector correctly, secure the connection, and perform a test to ensure proper functionality. With this step completed, you are ready to listen to clear and amplified heart sounds using your electronic stethoscope and headphones.
Step 7: Testing the Electronic Stethoscope
Once you have completed the construction of your electronic stethoscope, it’s crucial to perform testing to ensure its functionality and accuracy. Testing allows you to verify that all components are working correctly and that you can hear clear and amplified heart sounds. Follow these steps to effectively test your electronic stethoscope:
- Prepare a Test Subject: Find a willing volunteer or patient to help you test the functionality of your electronic stethoscope. Ensure they are comfortable and willing to participate in the testing process.
- Properly Position the Microphone: Place the microphone on the patient’s chest in the appropriate location to capture heart sounds accurately. Secure it in place using medical adhesive tapes or specialized clips.
- Adjust Amplifier Settings: Depending on your amplifier design, adjust the volume, gain, and other settings to the desired levels. Start with a low volume and gradually increase it while listening for any interference or background noise.
- Listen for Heart Sounds: Place the headphones on your ears and carefully listen for amplified heart sounds. Pay attention to the clarity and accuracy of the sounds, ensuring that they are distinct and without any distortions.
- Check for Interference: Pay attention to any potential interference sources, such as external noise or electrical interference. Ensure that the amplified heart sounds are not affected by such factors and that the stethoscope functions as intended.
- Record and Analyze: If required, you can use audio recording equipment to capture the amplified heart sounds for further analysis or documentation. Listen back to the recordings and verify the clarity and quality of the recorded sounds.
- Solicit Feedback: Obtain feedback from the test subject regarding their experience and the overall performance of the electronic stethoscope. Address any concerns or issues that may arise during the testing process.
- Make Necessary Adjustments: Based on the testing results and feedback received, make any necessary adjustments or modifications to the electronic stethoscope. This may involve fine-tuning amplifier settings, repositioning the microphone, or enhancing the overall design.
By following these steps, you can effectively test the functionality of your electronic stethoscope. This process ensures that the device is working as intended and delivering clear and accurate amplified heart sounds. Through testing, you can identify and address any potential issues, ultimately enhancing the performance and reliability of your electronic stethoscope.
Step 8: Improving the Design
After testing the functionality of your electronic stethoscope, you may want to consider making improvements to the design. This step allows you to enhance the overall performance, user experience, and convenience of your stethoscope. Here are some key considerations to help you improve the design:
- Evaluate User Feedback: Review the feedback received from test subjects, medical professionals, or other users of the electronic stethoscope. Take note of any suggestions or concerns that were raised during the testing phase.
- Analyze Performance: Assess the performance of your electronic stethoscope based on the recorded heart sounds, feedback, and your own observations. Identify areas where the device may need improvement, such as amplification quality or background noise reduction.
- Address Ergonomics: Examine the ergonomics of your stethoscope design, including the comfort, size, and weight. Consider making adjustments to improve the overall user experience, ensuring that the stethoscope is comfortable and easy to handle during examinations.
- Refine Component Selection: Research and explore alternative components that may offer better performance or reliability. Look for microphone and amplifier options with improved sensitivity, noise reduction, or power efficiency.
- Optimize Circuitry: If you have the expertise, explore opportunities to optimize the circuitry of your electronic stethoscope. This may involve refining the amplifier configuration, adjusting gain levels, or enhancing filtering mechanisms for a clearer signal.
- Consider Portability: Evaluate the portability of your stethoscope design. Explore ways to make it more compact, lightweight, or battery-efficient, without compromising the quality of sound amplification.
- Enhance Durable and Protective Enclosure: Revisit the enclosure design and materials to ensure durability and protection for the internal components. Seek sturdy yet lightweight materials that can withstand the rigors of daily use in a medical environment.
- Seek Expert Advice: Consult with professionals in the field, such as experienced medical practitioners or engineers, to gather insights and recommendations for improving your stethoscope design. They can provide valuable expertise and guidance for enhancing the device.
By following these steps, you can iterate on your electronic stethoscope design and make significant improvements. Incorporating user feedback, optimizing circuitry, and addressing ergonomics and portability will contribute to a more effective and user-friendly stethoscope. Remember, continuous refinement and improvement are essential in achieving the best possible performance and satisfaction with your electronic stethoscope.