An automation clip is a powerful feature in FL Studio that allows you to control and modify various parameters of your music over time. It provides a way to automate changes such as volume, panning, pitch, effects, and more. By creating and editing automation clips, you can add dynamic and expressive elements to your music composition, giving it a professional touch.
Imagine a scenario where you want to gradually increase the volume of a specific instrument in your song or gradually fade it out. Manually adjusting the volume knob or fader throughout the entire track would be tedious and time-consuming. This is where automation clips come in handy. They allow you to set specific points in your music timeline, known as automation points, and define the desired values for the parameter at each point.
For example, let’s say you want to gradually increase the volume of a vocal track in your chorus section. By creating an automation clip for the volume parameter, you can easily set the initial volume level at the beginning of the chorus, add a few automation points in between, and set the final volume level at the end of the chorus. FL Studio will automatically adjust the volume according to your defined automation curve, creating a smooth and seamless transition.
Automation clips are not limited to volume changes. They can be used to automate a wide range of parameters, including panning (moving sound from left to right), pitch modulation, filter cutoff, resonance, and more. This level of control allows you to add intricate and dynamic effects to your music, making it more engaging and professional-sounding.
Overall, automation clips are an essential tool for music producers and composers. They add a layer of precision and control to your compositions, allowing you to create captivating and evolving music. In the following sections, we will explore how to create and edit automation clips, as well as some tips and tricks for working with them in FL Studio.
Creating an automation clip in FL Studio is a straightforward process that allows you to customize and automate various parameters of your music. Here’s how you can create an automation clip:
1. Select the track or channel you want to automate. This could be a specific instrument, effect, or mixer track.
2. Right-click on the parameter you want to automate. For example, if you want to automate the volume, right-click on the volume knob or fader.
3. From the context menu, select “Create automation clip.” FL Studio will generate a new automation clip and open it in the playlist editor.
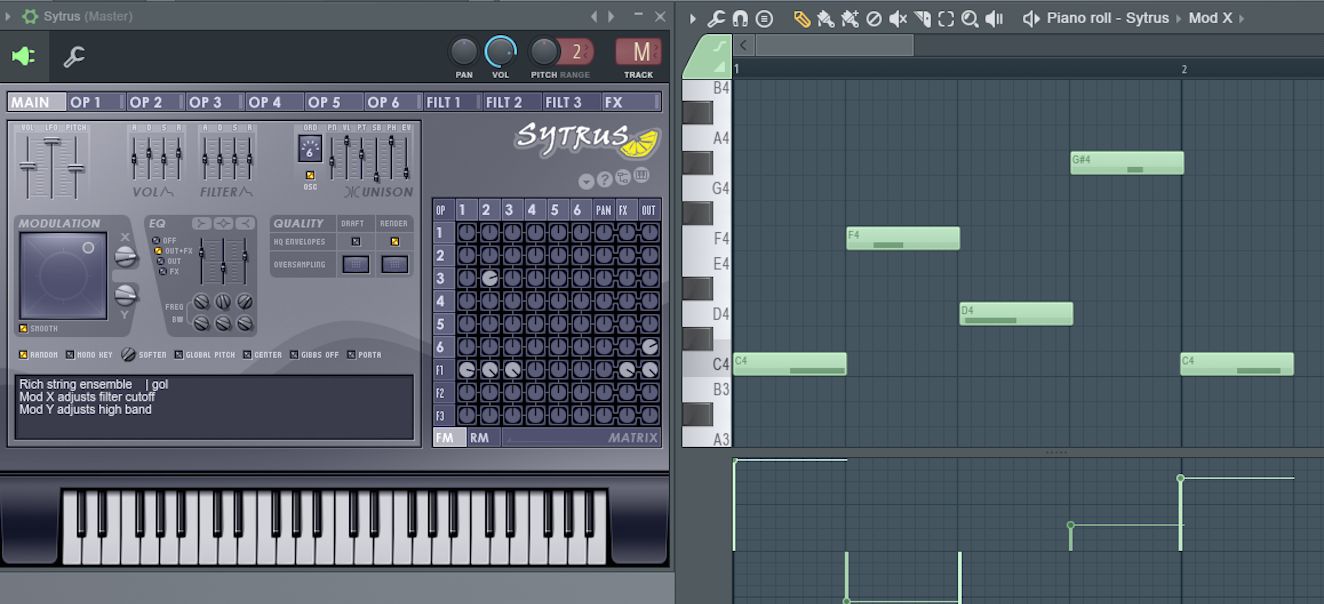
4. The automation clip will appear as a new track in the playlist editor, with the corresponding parameter name and range displayed on the left side.
5. To add automation points, simply click on the automation clip track at the desired time point. This will create a new point that you can drag up or down to define the value of the parameter at that specific moment.
6. Repeat the previous step to add more automation points and shape the automation curve according to your desired changes. This can be done by clicking and dragging the points to create smooth transitions or sudden changes in the parameter value.
7. To delete an automation point, simply select it and press the delete key on your keyboard.
8. Once you have created your automation curve, make sure to play your composition to hear the changes. You can also adjust the parameter’s range directly in the automation clip track by dragging the top and bottom edges.
By following these steps, you can create precise and customized automation clips for any parameter in FL Studio. Experiment with different automation points and curves to achieve the desired effects and dynamics in your music. In the next section, we will explore the interface and features of the automation clip in more detail.
When working with automation clips in FL Studio, it’s important to understand the different elements of the automation clip interface. Let’s take a closer look at each element:
1. Automation Clip Track: This is the track where the automation clip is displayed in the playlist editor. It shows the changes in the parameter value over time as an automation curve.
2. Parameter Display: On the left side of the automation clip track, you will find the name and the range of the parameter being automated. This helps you identify which parameter is controlled by the automation clip.
3. Automation Points: These are the points in the automation clip that represent the values of the parameter at specific time points. You can add, move, and delete these points to shape the automation curve.
4. Automation Curve: The lines connecting the automation points create the automation curve. This curve represents the gradual or sudden changes in the parameter value over time.
5. Value Display: When you hover your mouse over an automation point, a value display will appear. This shows the precise value of the parameter at that specific time point.
6. Time Ruler: The time ruler at the top of the playlist editor helps you navigate and set the timing for the automation points. It displays the duration of the project in bars, beats, and time units.
7. Automation Clip Controls: Located at the top left corner of the automation clip track, these controls allow you to adjust the behavior and appearance of the automation clip. You can change the color, display mode, and lock the automation clip to prevent accidental modifications.
8. Show/Hide Automation: To view and edit the automation clips, you can toggle the Show/Hide Automation button in the playlist editor. This allows you to focus on specific automation clips or hide them temporarily to declutter the workspace.
By familiarizing yourself with the automation clip interface, you can effectively navigate, edit, and control the automation clips in FL Studio. Understanding each element’s function enables you to create precise and expressive automation curves for your music. In the next section, we will delve into editing automation points to refine your automation curves further.
Editing automation points is a fundamental aspect of working with automation clips in FL Studio. By manipulating these points, you can refine and shape the automation curves to achieve the desired effects in your music. Here are some techniques for editing automation points:
1. Moving Automation Points: To move an automation point, simply click and drag it to a new position. This allows you to adjust the timing of the parameter change or make subtle adjustments to the curve shape. You can also use the arrow keys on your keyboard for precise movement.
2. Adding Automation Points: To add a new automation point, click on the automation curve at the desired time point. This creates a new point that you can then drag up or down to define the value of the parameter at that specific moment.
3. Deleting Automation Points: To remove an automation point, select it and press the delete key on your keyboard. This is useful if you want to remove a specific parameter change or start over with a section of the automation curve.
4. Adjusting Automation Point Values: To change the value of an automation point, click and drag it vertically to a new position. Alternatively, you can double-click on an automation point and enter a precise value in the input field that appears.
5. Bezier Handles: Bezier handles allow you to adjust the shape of the automation curve between two automation points. By clicking and dragging these handles, you can create smooth or sharp transitions in the curve, adding more subtlety and control to your parameter changes.
6. Selecting Multiple Automation Points: To make bulk changes to automation points, you can select multiple points by holding down the Shift or Ctrl key (Windows) or the Command key (Mac) while clicking on the desired points. This allows you to move, delete, or adjust the values of multiple points simultaneously.
By utilizing these techniques, you can exert precise control over your automation curves, ensuring they align with your artistic vision. Take the time to experiment and fine-tune your automation points to achieve the desired dynamic and expressive effects in your music. In the next section, we will explore how you can adjust automation curves to create unique and nuanced parameter changes.
Adjusting automation curves is a crucial aspect of working with automation clips in FL Studio. By shaping the curves, you can create unique and nuanced changes in parameter values over time. Here are some techniques for adjusting automation curves:
1. Bezier Curves: Bezier curves allow you to create smooth and natural transitions between automation points. By clicking and dragging the Bezier handles, you can control the shape and curvature of the curve. Adjusting the handles will alter the slope of the curve and create more gradual or abrupt changes in the parameter value.
2. Creating Break Points: Break points allow you to create sharp or sudden changes in the automation curve. To create a break point, simply right-click on the curve between two automation points and choose “Create Break Point.” This splits the curve into two segments, allowing you to independently adjust the values of each segment.
3. Curvature and Tension: FL Studio provides additional options for adjusting the curvature and tension of automation curves. By right-clicking on an automation point or selection of points, you can access a menu that allows you to change the curve type, curvature, tension, and other parameters. Experimenting with these options can give you more control over the shape and behavior of your automation curves.
4. Smoothing Curves: If you want to create smoother transitions between automation points, FL Studio offers a smoothing option. By selecting one or more automation points and right-clicking, you can choose “Smooth.” This will generate a smoother curve by automatically adjusting the position of the selected points.
5. Adding LFOs: LFOs, or low-frequency oscillators, can be used to modulate automation curves and create more intricate and dynamic effects. In FL Studio, you can use the LFO tool to apply automated modulation to automated parameters. This can add movement, texture, and rhythm to your automation curves.
By mastering the art of adjusting automation curves, you can bring your music to life with subtle and precise parameter changes. Take the time to experiment with different curve types, Bezier handles, and break points to achieve the desired musical expression and movement in your compositions. In the next section, we will explore how to automate various parameters using automation clips in FL Studio.
Automating parameters is the essence of using automation clips in FL Studio. From volume and panning to effects and filters, you can automate a wide range of parameters to create dynamic and evolving changes in your music. Here is how you can automate parameters using automation clips:
1. Select the parameter you want to automate. This can be done by right-clicking on the parameter knob, fader, or control within FL Studio.
2. Create an automation clip for the selected parameter. Right-click on the parameter and choose “Create automation clip” from the context menu. A new automation clip will be generated in the playlist editor.
3. Open the automation clip in the playlist editor by double-clicking on the automation clip track.
4. Set automation points along the timeline to define the values of the parameter at different time points. These points represent the desired changes in the parameter’s value.
5. Adjust the values of the automation points to control the parameter’s behavior over time. You can create smooth transitions, sudden jumps, or any other desired effect by manipulating the automation curve.
6. Play your composition to hear the changes made by the automation clip. Make adjustments to the automation points and curves as needed to achieve the desired musical expression.
7. Repeat the process for other parameters you wish to automate. With automation clips, you have the flexibility to automate multiple parameters simultaneously and create complex and intricate changes in your music.
By automating parameters, you can add movement, depth, and emotion to your music. Experiment with different parameter changes, such as volume fades, filter sweeps, and modulation effects, to create unique sonic textures and dynamics. Automation clips provide endless possibilities for expressing your artistic vision in your music compositions.
In the next section, we will explore how to copy and paste automation clips, allowing for efficient automation in your projects.
Copying and pasting automation clips can significantly streamline your workflow in FL Studio. It allows you to reuse automation data across different tracks or sections of your project. Here’s how you can copy and paste automation clips:
1. Select the automation clip you want to copy. You can do this by clicking on the automation clip track in the playlist editor.
2. Press Ctrl+C (Windows) or Command+C (Mac) to copy the selected automation clip.
3. Move the playhead to the desired location where you want to paste the automation clip.
4. Press Ctrl+V (Windows) or Command+V (Mac) to paste the copied automation clip at the current playhead position.
5. The pasted automation clip will appear as a new automation clip track in the playlist editor, with the same parameter data and settings as the original clip.
6. You can now modify and adjust the pasted automation clip as needed to fit the specific section or track where it was pasted.
You can also paste automation clips to different tracks by selecting the track you want to paste to before pressing Ctrl+V (Windows) or Command+V (Mac). This allows you to apply automation data to different parameters or effects, giving you greater control over your music composition.
Copying and pasting automation clips provide flexibility and efficiency in working with automation data. It saves time by avoiding the need to recreate automation curves manually and allows you to experiment with different automation settings on different tracks easily.
In the next section, we will explore how to use automation clips for effects and creative sound manipulation in FL Studio.
Automation clips in FL Studio can be a powerful tool for applying effects and creative sound manipulation to your music. By automating effect parameters, you can add depth, movement, and sonic character to your compositions. Here are some ways to use automation clips for effects:
1. Filter Sweeps: Automating the cutoff frequency of a filter can create sweeping and evolving movements in your sound. For example, you can start with a low-pass filter to create a muffled sound and gradually automate the cutoff frequency to reveal brighter and more harmonically rich elements.
2. Reverb and Delay Tail: You can use automation clips to control the decay time or wet/dry mix of reverb and delay effects. For a dramatic effect, you can automate a sudden increase in reverb decay at the end of a section, creating a spacious and immersive sound.
3. Modulation Effects: Effects such as tremolo, vibrato, or flanger can add unique textures and rhythms to your music. By automating the rate, depth, or mix of these effects, you can create dynamic and evolving patterns in your sound.
4. Distortion and Saturation: Automating the amount or intensity of distortion or saturation can add grit and warmth to specific sections of your music. You can gradually increase the distortion level during a chorus or automate it to emphasize certain musical elements.
5. Pan Automation: Manipulating the panning position of a sound can create a sense of space and movement. You can automate the pan parameter to make a sound travel from left to right or create interesting stereo effects.
6. Volume and Dynamics: Automating the volume of a track or specific instrument can shape the dynamics and bring certain elements to the forefront. You can use volume automation to create fade-ins, fade-outs, or even sudden volume jumps for added impact.
By experimenting with different effect parameters and automation curves, you can unleash your creativity and add unique sonic characteristics to your music composition. Automation clips offer a world of possibilities for creating innovative and memorable soundscapes.
In the next section, we will explore how to automate multiple parameters at once using automation clips in FL Studio.
Automating multiple parameters simultaneously can take your music to a whole new level of creativity and expressiveness. FL Studio allows you to automate multiple parameters at once using automation clips, giving you complete control over the evolving dynamics and effects in your compositions. Here is how you can automate multiple parameters:
1. Select the parameters you want to automate. This can be done by right-clicking and selecting the desired parameters within FL Studio, such as volume, panning, filter cutoff, and more.
2. Create an automation clip for the selected parameters. Right-click on any of the selected parameters, go to “Create automation clip,” and FL Studio will generate an automation clip that controls all the selected parameters.
3. Open the automation clip in the playlist editor by double-clicking on the automation clip track.
4. Set automation points along the timeline to define the values of the multiple parameters at different time points. You can create complex and intricate changes by manipulating the automation curve for each parameter.
5. Adjust the values of the automation points for each parameter to create the desired musical expression and movement. You can experiment with various combinations and curves to achieve the desired effects.
6. Play your composition to hear the changes made by the automation clip. Fine-tune the automation curves for each parameter as needed to achieve the desired balance and dynamics.
Automating multiple parameters allows for synchronized and intricate changes in various aspects of your music. You can create evolving textures, complex filter movements, and dynamic panning effects all within a single automation clip. This technique offers endless possibilities for sound manipulation and artistic expression.
Remember to use your creativity and experiment with different combinations of parameters for unique and captivating musical results. By automating multiple parameters at once, you can truly unlock the full potential of your music compositions.
In the next section, we will share some tips and tricks to enhance your workflow and make the most out of working with automation clips in FL Studio.
Working with automation clips in FL Studio can be a powerful and creative experience. To make the most out of automation and enhance your workflow, here are some tips and tricks:
1. Organize Your Automation Clips: As your project grows, it’s essential to keep your automation clips organized. Use color coding or naming conventions to easily identify and locate specific automation clips in the playlist editor.
2. Use Shortcuts for Efficiency: Learn and utilize keyboard shortcuts to speed up your automation workflow. FL Studio offers various shortcuts for adding, deleting, and navigating automation points and curves.
3. Snap Automation Points to Grid: Enable the snap feature to align your automation points with the grid. This ensures precise and consistent parameter changes and helps maintain a tight rhythm in your music.
4. Draw and Record Automation in Real-Time: Instead of manually placing each automation point, try using the pencil tool or recording automation in real-time. This allows for more organic and expressive parameter changes.
5. Create Templates with Common Automations: If you frequently use similar automation curves in your projects, consider creating automation templates. This saves time by allowing you to quickly apply predefined automation curves to new tracks or projects.
6. Experiment with Curves and Shapes: Automation in FL Studio is not just about straight lines. Explore different curve shapes and add Bezier handles to create smooth transitions and more complex movements in your automation curves.
7. Use Automation Clips for Live Performance: Automation clips can be triggered and controlled live in FL Studio. Use MIDI controllers or automation clips linked to performance parameters for dynamic and interactive live performances.
8. Use Automation as an Instrument: Think of automation as an additional instrument in your composition. By creatively automating parameters, you can create evolving melodies, rhythmic patterns, and unique soundscapes.
9. Save and Reuse Automation Patterns: If you create automation patterns that you like, save them for future use. This way, you can easily recall and apply them to different tracks or sections in your projects.
10. Embrace Automation Over Time: Remember that automation is most effective when it evolves and changes over time. Utilize slow builds, sudden drops, and unexpected twists to keep your music engaging and exciting for the listener.
By incorporating these tips and tricks into your automation workflow, you can achieve greater control, efficiency, and creativity when working with automation clips in FL Studio. Explore and experiment with different techniques and unleash your imagination to create captivating and expressive music.
Now that you have a solid understanding of automation clips, their creation, editing, and usage, you are well-equipped to enhance your music compositions and take them to new heights.