
What is an Amazon Echo Playlist?
An Amazon Echo playlist is a curated collection of songs that you can create and manage using your Amazon Echo device. With its built-in voice assistant, Alexa, the Amazon Echo allows you to not only play music but also organize your favorite songs into personalized playlists. Whether you’re in the mood for a relaxing evening or hosting a party, having a customized playlist on your Amazon Echo can enhance your listening experience.
Playlists are a convenient way to group together songs based on a specific theme, mood, or occasion. You can create playlists for genres like rock, pop, or classical, or create mood-based playlists like “chill-out” or “energetic”. Additionally, you can make playlists for special occasions such as a party, workout, or a road trip. The possibilities are endless!
Creating an Amazon Echo playlist allows you to have quick and easy access to your favorite songs without having to search for them individually. Once you have set up your playlist, you can simply ask Alexa to play your playlist by name, and the Amazon Echo will seamlessly stream the songs for you. It’s like having your personalized DJ at home!
Furthermore, your playlist can be customized and updated as per your preference. You can add or remove songs, rearrange the order, or even change the name of the playlist using simple voice commands. This flexibility allows you to have complete control over your music experience.
Whether you’re a music enthusiast or simply looking for a convenient way to enjoy your favorite tunes, creating an Amazon Echo playlist is a fantastic feature that enhances the functionality of your smart speaker and lets you immerse yourself in the world of music effortlessly.
Step 1: Setting Up Your Amazon Echo Device
Before you can start creating and enjoying your Amazon Echo playlist, you’ll need to set up your Echo device. Here are the steps to get you started:
- Choose a suitable location: Find a location in your home where the Echo device can be centrally placed for optimal sound and voice recognition. Avoid placing it near walls or other objects that could obstruct its audio output.
- Connect to power: Plug the power adapter into the Echo device and then into a power outlet. Wait for the device to power up.
- Download the Amazon Alexa app: Go to the app store on your mobile device and search for the Amazon Alexa app. Download and install the app.
- Launch the app: Open the Alexa app on your mobile device and sign in with your Amazon account. If you don’t have an Amazon account, you’ll need to create one.
- Add a device: Tap the “+” icon in the top left corner of the app to add a new device. Select “Amazon Echo” from the list of available devices.
- Follow the setup instructions: The app will guide you through the setup process. Make sure your Echo device is in setup mode by following the instructions provided in the app.
- Connect to Wi-Fi: During the setup process, you’ll be prompted to connect your Echo device to your home Wi-Fi network. Follow the on-screen instructions to complete the connection.
- Wait for the setup to complete: Once connected, the app will finalize the setup process, which may include updating the device’s software. This usually takes a few minutes.
- Set a wake word for Alexa: Choose a wake word that will activate the voice assistant. The default wake word is “Alexa,” but you can change it to “Amazon,” “Echo,” or “Computer” if you prefer.
Once you’ve completed these steps, your Amazon Echo device will be set up and ready to use. Now you can proceed to the next step of creating your playlist.
Step 2: Launching the Amazon Alexa App
After setting up your Amazon Echo device, the next step in creating your playlist is to launch the Amazon Alexa app on your mobile device. Here’s what you need to do:
- Locate the Amazon Alexa app: Find the Amazon Alexa app on your mobile device. It should have been installed during the setup process. If you can’t find it, you can download it from your app store.
- Open the app: Tap on the Amazon Alexa app icon to launch it. The app will load the main screen.
- Sign in with your Amazon account: If you haven’t already signed in, you’ll need to do so now. Enter your Amazon account credentials and tap on “Sign in.”
- Grant necessary permissions: The app may ask for certain permissions, such as access to your location or contacts. These permissions are required for certain features of the app to work properly. Follow the on-screen prompts to grant the necessary permissions.
- Set up your Echo device: If you haven’t finished setting up your Echo device, the app may prompt you to complete the setup process. Follow the instructions provided to finish setting up your Echo device.
- Explore the app: Once you’re logged in and your Echo device is set up, you can start exploring the Amazon Alexa app. Familiarize yourself with its various features and options.
The Amazon Alexa app serves as a control center for your Echo device. It allows you to manage settings, customize preferences, and access additional features and skills. It’s also where you can create, edit, and manage your Amazon Echo playlist.
Launching the Amazon Alexa app is an essential step in the process of creating your customized playlist. Make sure to have the app handy on your mobile device to take full advantage of the Echo’s capabilities.
Step 3: Navigating to the Music Section
Once you’ve launched the Amazon Alexa app, the next step in creating your playlist is to navigate to the Music section. Here’s how you can do it:
- Open the Amazon Alexa app: Locate the Amazon Alexa app on your mobile device and tap on its icon to open it. Make sure you are signed in with your Amazon account.
- Access the main menu: Look for the menu icon, usually located in the top left or top right corner of the app. It is represented by three horizontal lines or a hamburger symbol. Tap on the menu icon to access the main menu.
- Select “Music, Video, & Books”: In the main menu, you will see a list of options. Look for the option that says “Music, Video, & Books” or something similar. Tap on this option to proceed.
- Choose your music streaming service: Amazon Echo supports various music streaming services, such as Amazon Music, Spotify, Apple Music, and more. Select the music service you want to connect to your Echo device by tapping on its name.
- Follow the integration process: Once you’ve selected your music streaming service, the app will guide you through the process of integrating it with your Amazon Echo device. Follow the on-screen prompts and authorize the connection between your music streaming service and the Alexa app.
- Return to the main menu: After you have successfully connected your music streaming service, you can return to the main menu by tapping on the “back” or “menu” button, typically located in the top left or top right corner of the screen.
- Navigate to the music section: In the main menu, look for an option labeled “Music” or something similar. Tap on this option to access the music section of the Amazon Alexa app.
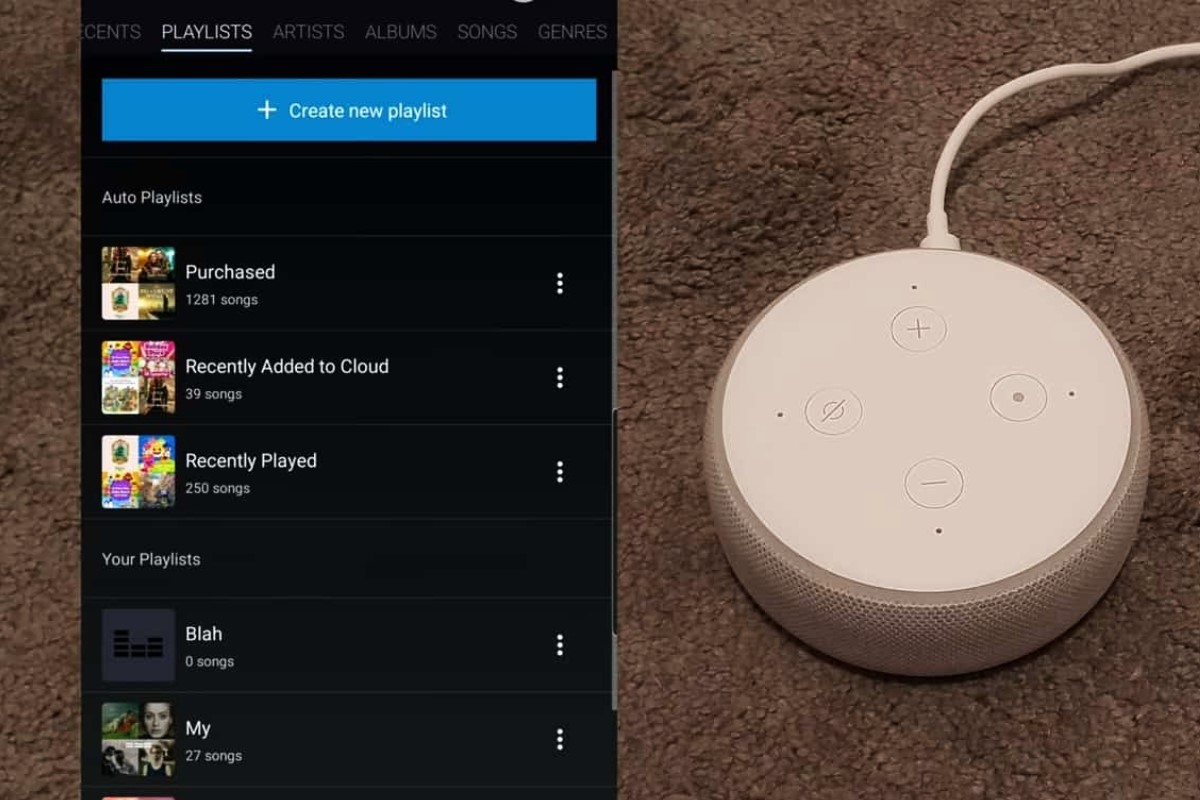
Once you’ve reached the music section, you’re one step closer to creating your desired playlist on your Amazon Echo device. The music section allows you to search for songs, albums, artists, and playlists, as well as manage your library and create personalized playlists.
Now that you know how to navigate to the music section, it’s time to move on to the next step – connecting your desired music streaming service to your Amazon Echo device.
Step 4: Connecting Your Music Streaming Service
To unlock a world of music possibilities on your Amazon Echo device and create your playlist, you need to connect your preferred music streaming service. Follow these steps to connect your desired music streaming service:
- Open the Amazon Alexa app: Launch the Amazon Alexa app on your mobile device, ensuring you are signed in with your Amazon account.
- Access the main menu: Look for the menu icon, typically represented by three horizontal lines or a hamburger symbol, located in the top left or top right corner of the app. Tap on the menu icon to open the main menu.
- Select “Music, Video, & Books”: In the main menu, find and tap on the option that says “Music, Video, & Books” or something similar.
- Choose your music streaming service: From the list of available options, select the music streaming service you want to connect to your Echo device by tapping on its name.
- Authorize the connection: The app will guide you through the process of authorizing the connection between your music streaming service and the Alexa app. Follow the on-screen prompts to grant the necessary permissions and sign in to your music streaming service account, if required.
- Sync your music library: Once the connection is established, the app will sync your music library and playlists from the selected music streaming service.
- Test the integration: To ensure a successful connection, ask Alexa to play a song or playlist from your connected music streaming service. If the music starts playing, it means the integration was successful.
- Repeat for additional services (optional): If you have more than one music streaming service, you can repeat the above steps to connect and authorize additional services. This allows you to have a wider selection of music to choose from when creating your playlist.
By connecting your preferred music streaming service to your Amazon Echo device, you expand your music library and gain access to personalized recommendations and playlists. This integration paves the way for a seamless music listening experience, allowing you to create and enjoy your customized playlist effortlessly.
Now that you have successfully connected your desired music streaming service, it’s time to move on to the next step – using voice commands to create a playlist on your Amazon Echo device.
Step 5: Using Voice Commands to Create a Playlist
Now that you have connected your preferred music streaming service to your Amazon Echo device, it’s time to start creating your playlist using simple voice commands. Follow these steps to create your personalized playlist:
- Wake your Amazon Echo: To activate your Amazon Echo device, say the wake word (e.g., “Alexa,” “Amazon,” “Echo,” or “Computer”). After the wake word, you will hear a chime, indicating that the device is ready to receive your command.
- Start creating your playlist: Once your device is awake, use the following voice command structure to create your playlist: “Alexa, create a playlist called [your playlist name].”
- Add songs to your playlist: To add songs to your playlist, simply say, “Alexa, add [song name] to my playlist.” You can add multiple songs by repeating this command.
- Customize your playlist: To edit your playlist, you can use voice commands like “Alexa, remove [song name] from my playlist,” or “Alexa, add [song name] to the beginning/end of my playlist.”
- Navigate between playlists: If you have multiple playlists, you can switch between them by saying, “Alexa, switch to my playlist” or “Alexa, play .” This allows you to access and manage different playlists effortlessly.
- Control playback: You can use voice commands like “Alexa, play,” “Alexa, pause,” and “Alexa, skip” to control the playback of your playlist. These commands enable you to have full control over your listening experience.
Using voice commands to create your playlist on the Amazon Echo device provides a hands-free and convenient way to curate your desired music collection. You can add songs, customize the order, and manage your playlist entirely through simple voice interactions.
Now that you have mastered the art of using voice commands to create your playlist, it’s time to explore the next step – editing and managing your playlist on the Amazon Echo device.
Step 6: Editing and Managing Your Playlist
Once you have created your playlist on your Amazon Echo device, you may want to make changes, add new songs, or reorganize the order. Managing and editing your playlist is a straightforward process. Follow these steps to efficiently edit and manage your playlist:
- Wake your Amazon Echo: To begin managing your playlist, wake your Amazon Echo device by saying the wake word (e.g., “Alexa,” “Amazon,” “Echo,” or “Computer”).
- Access your playlist: Once your device is awake, say “Alexa, open my playlist.” This will open the specific playlist you want to edit and manage.
- Remove songs: If you want to remove a song from your playlist, say “Alexa, remove [song name] from my playlist.” The song will be instantly removed from the playlist.
- Add songs: To add new songs to your playlist, simply say “Alexa, add [song name] to my playlist.” The song will be added to the end of your playlist.
- Change the playback order: If you want to change the order of songs in your playlist, say “Alexa, move [song name] to the beginning/end of my playlist.” This will rearrange the order of the songs as per your request.
- Rename your playlist: If you want to change the name of your playlist, say “Alexa, rename my [current playlist name] playlist to [new playlist name].” Your playlist will be updated with the new name.
- Create new playlists: To create a new playlist, say “Alexa, create a playlist called [new playlist name].” This will create a fresh playlist for you to add songs to.
- Delete playlists: If you want to delete a playlist, say “Alexa, delete my playlist.” Confirm the deletion when prompted, and the playlist will be removed from your library.
Managing and editing your playlist on your Amazon Echo device provides you with the flexibility to customize your listening experience. Whether it’s removing songs you no longer want, adding new tracks, or changing the order to suit your preferences, you have full control over the content of your playlist.
With these simple voice commands, you can effortlessly manage and edit your playlist on your Amazon Echo, ensuring that your music collection evolves alongside your changing tastes.
Now that you know how to edit and manage your playlist, it’s time to move on to the final step – playing your playlist on your Amazon Echo device.
Step 7: Playing Your Playlist on Amazon Echo
After creating and managing your playlist on your Amazon Echo device, it’s time to enjoy the fruits of your labor by playing your curated music collection. Follow these steps to play your playlist on your Amazon Echo:
- Wake your Amazon Echo: Start by waking your Amazon Echo device using the wake word you have set (e.g., “Alexa,” “Amazon,” “Echo,” or “Computer”).
- Access your playlist: Once your device is awake, say “Alexa, open my playlist” to open the specific playlist you want to play.
- Play your playlist: To start playing your playlist, simply say “Alexa, play” or “Alexa, shuffle play” after mentioning the name of your playlist. Alexa will immediately start playing the songs in your playlist.
- Control playback: While listening to your playlist, you can use voice commands to control playback. Say “Alexa, pause” to pause the music, “Alexa, resume” to resume playback, or “Alexa, stop” to stop the music altogether. You can also skip to the next song by saying “Alexa, next.”
- Adjust volume: If you want to adjust the volume, say “Alexa, set volume to [desired volume level].” Alexa will adjust the volume accordingly, ensuring a pleasant listening experience.
- Switch playlists: If you have multiple playlists, you can switch to a different playlist by saying “Alexa, switch to my playlist” or “Alexa, play .” Alexa will seamlessly transition to the requested playlist.
Playing your playlist on your Amazon Echo is a delightful experience that allows you to enjoy the music you love without any hassle. With simple voice commands, you can immerse yourself in your curated playlist and set the mood for any occasion.
Now that you know how to play your playlist on your Amazon Echo, you can relish in the joy of your personalized music collection whenever you desire. Get ready to enjoy a seamless music experience with your Amazon Echo device.