
Understanding Printer Ink
Printer ink is a vital component in the printing process, responsible for transferring text and images onto paper. It is a liquid substance that consists of pigments or dyes suspended in a carrier fluid. Understanding the properties and characteristics of printer ink is crucial for achieving high-quality printouts and ensuring the longevity of your printing equipment.
Printer ink comes in various types, with the most common being dye-based and pigment-based inks. Dye-based inks are composed of colorants dissolved in a liquid carrier, resulting in vibrant and vivid colors. They are ideal for producing photo prints and graphics. On the other hand, pigment-based inks contain microscopic solid particles of colorants suspended in a liquid carrier. They tend to offer better color accuracy and longer-lasting prints, making them suitable for documents that require longevity.
In addition to the base formula, printer inks may also contain additives such as dispersants, surfactants, and humectants. These additives help control ink flow, prevent clogging, and improve print quality. It is essential to understand the specific ink formulation recommended for your printer model to ensure optimal performance.
When purchasing ink, it is essential to consider the compatibility of the ink cartridges with your printer. Each printer model requires specific ink cartridges designed to fit and function correctly with the device. Using incompatible ink cartridges might lead to poor print quality, damage to the printer, and void the warranty.
Furthermore, it is worth noting that printer ink can be an expensive consumable. Original equipment manufacturer (OEM) ink cartridges tend to be more costly compared to third-party or compatible alternatives. However, using non-OEM ink cartridges may void your printer’s warranty and can sometimes yield inconsistent print quality.
Understanding the different types of printer ink and their properties allows you to make informed choices when it comes to purchasing ink cartridges for your printer. By selecting the right ink for your specific printing requirements, you can ensure optimal print results and prolong the life of your printer.
Identifying the Types of Printer Ink
When it comes to printer ink, it’s important to understand the different types available in the market. This knowledge will help you choose the right ink for your specific printing needs. Let’s take a closer look at the two main types of printer ink: dye-based and pigment-based.
Dye-based ink is the most common type of ink used in home printers. It consists of a liquid carrier that contains colorants in a dissolved state. Dye-based inks are known for producing vibrant and vivid colors, making them perfect for printing high-quality photos and graphics. They are designed to be absorbed by the paper quickly, resulting in fast-drying prints. However, one drawback of dye-based ink is that it tends to fade over time, especially if exposed to sunlight or harsh environmental conditions.
Pigment-based ink, on the other hand, contains microscopic solid particles of colorants suspended in a liquid carrier. These particles are more resistant to fading and provide better longevity compared to dye-based inks. Pigment-based inks are known for their excellent color accuracy and are often used in professional printing and archival applications. They are more suitable for printing documents, such as text and diagrams, that require long-term durability.
Both dye-based and pigment-based inks have their pros and cons. Dye-based inks offer vibrant colors and are more affordable compared to pigment-based inks. However, they may not be as durable and can be susceptible to fading. Pigment-based inks, on the other hand, provide better longevity and color accuracy but tend to be more expensive.
It’s worth noting that printer manufacturers often recommend a specific type of ink for their printers. Using the recommended ink ensures optimal print quality and prevents potential issues such as clogging or damage to the printer. Therefore, it’s advisable to check your printer’s documentation or manufacturer’s website to determine the type of ink that is compatible with your printer model.
When choosing between dye-based and pigment-based inks, consider your printing needs and preferences. If you primarily print photos and graphics and don’t require long-term durability, dye-based ink may be a suitable option. If, however, you need prints that will withstand the test of time, such as important documents or archival photos, then pigment-based ink is the way to go.
By understanding the differences between dye-based and pigment-based inks, you can make an informed decision and select the right ink type that aligns with your printing requirements.
Evaluating the Pros and Cons of Homemade Ink
Homemade ink, also known as DIY ink, has gained popularity among craft enthusiasts, artists, and individuals looking for a more affordable alternative to commercial printer ink. While making ink from scratch can be a creative and cost-effective option, it is essential to evaluate the pros and cons before diving into the world of homemade ink.
One of the significant advantages of homemade ink is the ability to customize colors. With homemade ink, you have the freedom to experiment and create unique shades and tones by adjusting the pigment concentrations. This level of customization allows artists to bring their visions to life and achieve personalized results.
Another advantage of homemade ink is the cost savings. Commercial printer ink cartridges can be expensive, especially for frequent printing or large-scale projects. By making your own ink, you can significantly reduce costs by sourcing affordable ingredients and reusing or repurposing materials. This budget-friendly option is particularly attractive for individuals on a tight budget or those who engage in intensive printing activities.
However, it is important to consider the potential drawbacks of homemade ink. One of the main disadvantages is the inconsistency in color reproduction and print quality. Unlike commercial inks that undergo rigorous testing and quality control, homemade ink recipes may not provide consistent color accuracy or produce prints that meet professional standards. Achieving consistent results may take trial and error and require adjustments in the ink formulation.
In addition, homemade ink may have limited stability and longevity. Commercial inks are designed to resist fading, water damage, and light exposure, ensuring prints that last for an extended period. Homemade ink, without the addition of stabilizers and additives found in commercial inks, may be more prone to fading and deterioration over time. If long-lasting prints are a priority, commercial ink might be a more suitable option.
Furthermore, the process of making homemade ink requires time, effort, and specialized tools. Creating ink from scratch involves sourcing the necessary ingredients, grinding pigments, and blending them with the right carrier fluid or binder. This process may not be feasible for individuals with limited time or those who prefer the convenience of ready-to-use ink cartridges.
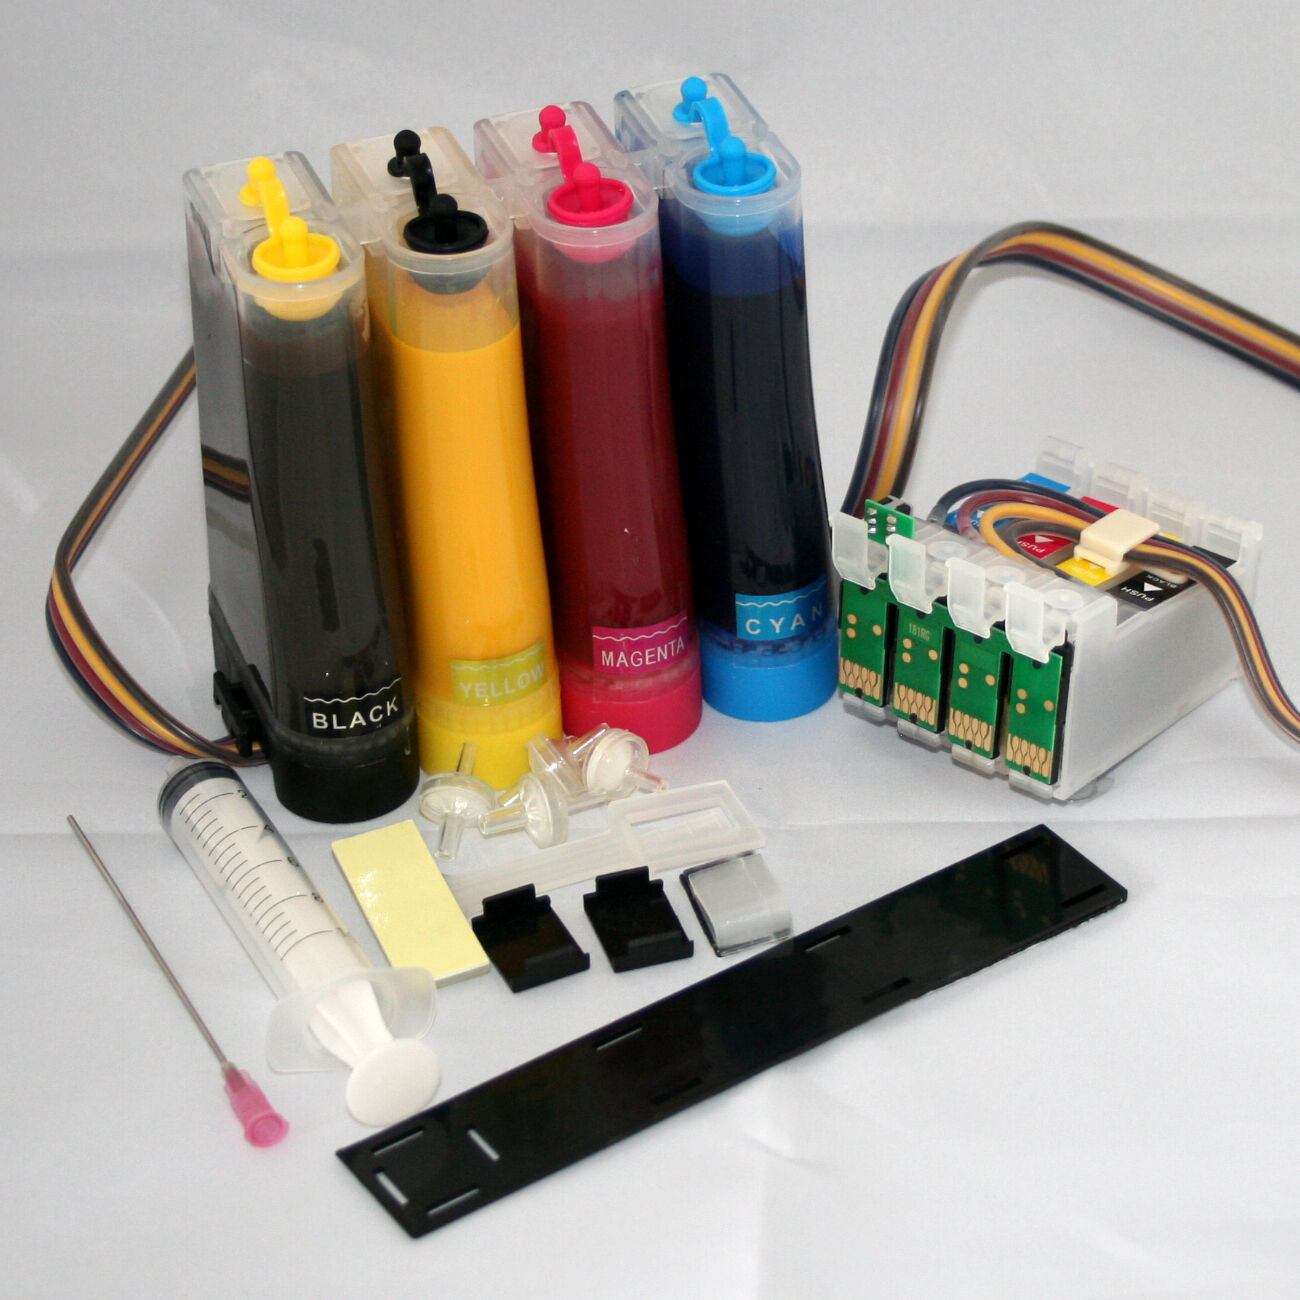
Gathering the Necessary Ingredients and Tools
Before you can start making homemade ink, it is crucial to gather the necessary ingredients and tools. Having everything prepared and readily available will streamline the ink-making process and ensure successful results. Here is a list of the essential ingredients and tools you will need:
1. Pigments: Pigments are the colorants that give ink its hue. They can be sourced from various natural or synthetic sources, such as herbs, berries, flowers, or minerals. Common pigments used in homemade ink include carbon black, ochre, indigo, and turmeric. Select pigments based on the colors you want to achieve.
2. Binders: Binders are substances that help hold the pigments together and adhere them to the paper. Options for binders include gum arabic, agar-agar, or cornstarch. The binder provides the necessary consistency and ensures the pigments stay suspended in the liquid carrier.
3. Liquid Carriers: Liquid carriers are the fluids that dissolve the pigments and binders, creating the ink solution. Common liquid carriers for homemade ink are distilled water, rubbing alcohol, or vinegar. Each fluid has different properties and can affect the overall performance of the ink.
4. Grinding Tools: To properly disperse pigments and achieve a smooth ink consistency, you will need suitable grinding tools. Mortar and pestle, a glass muller, or a small grinding stone are some options to consider. These tools help break down pigments and mix them evenly with the binders and liquid carriers.
5. Containers: You will require airtight containers to store the prepared ink. Glass or plastic jars with lids are ideal for this purpose. Ensure the containers are clean and sterile to prevent contamination and preserve the ink’s quality.
6. Mixing Tools: You will need various mixing tools to blend the pigments, binders, and liquid carriers effectively. Consider using glass or metal stirring rods, small brushes, or palette knives. These tools allow you to mix the ingredients thoroughly and ensure a uniform distribution of pigments.
7. Protective Gear: When handling pigments or mixing ingredients, it is essential to protect yourself. Wear gloves to prevent direct contact with the pigments, especially if they can cause skin irritations. Additionally, consider using goggles or a mask to protect your eyes and lungs from any potential airborne particles.
8. Workspace Preparation: Set up a clean and well-ventilated workspace dedicated to your ink-making process. Ensure the area is free from any contaminants that might compromise the quality of the ink. Lay down protective materials, such as plastic sheets or newspaper, to prevent staining surfaces.
Before you start making homemade ink, carefully read and understand the instructions for each recipe you plan to follow. Follow food safety practices and adhere to any specific storage or handling guidelines mentioned in the recipes.
Gathering the necessary ingredients and tools beforehand will make the ink-making process more efficient and enjoyable. With all the elements prepared, you’re ready to embark on your homemade ink adventure!
Creating a Black Printer Ink
Creating your own black printer ink can be a rewarding and cost-effective endeavor. Whether you’re an artist in need of a specific shade of black or simply looking to refill your printer cartridge, making homemade ink allows you to have control over the process. Here’s a step-by-step guide on how to create black printer ink:
1. Gather the Ingredients: For black ink, the main pigment you’ll need is carbon black. You can find carbon black powder at art supply stores, online retailers, or by crushing charred materials like charcoals. It’s important to make sure the carbon black powder is finely ground and free from impurities.
2. Prepare the Liquid Carrier: In a clean container, mix distilled water with a binder of your choice. Gum arabic or agar-agar are commonly used binders to give the ink the desired consistency. The ratio of water to binder may vary depending on your preferred ink consistency.
3. Add the Carbon Black Pigment: Gradually add the carbon black powder to the liquid carrier while stirring continuously. Start with a small amount and increase until you achieve the desired intensity. Mix thoroughly to ensure the pigment is evenly distributed in the liquid carrier.
4. Test and Adjust: Take a small sample of the ink and test it on paper. Observe the color intensity and consistency. If the ink appears too light, add more carbon black powder. If it appears too thick, add a small amount of water. Continuously test and adjust until you are satisfied with the results.
5. Strain (Optional): If you want to ensure a smoother ink texture, you can strain the ink through a fine mesh screen or cheesecloth to remove any clumps or impurities. This step is optional but can help improve the ink’s performance.
6. Store the Ink: Transfer the homemade black ink into a clean, airtight container for storage. Label the container with the date and the ink type for future reference. Store the ink in a cool, dark place to prolong its shelf life.
It’s important to note that homemade black ink may have different properties compared to commercial ink. The drying time, water resistance, and compatibility with different printer models may vary. It’s recommended to test the ink on a small scale before using it for important print jobs.
Making your own black printer ink allows you to tailor the ink to your specific needs and preferences. Experiment with different ratios of carbon black powder and binders to achieve the desired intensity and consistency of black ink. With a little practice and experimentation, you’ll be able to create homemade black ink that meets your printing requirements.
Making Cyan Printer Ink
If you’re looking to create your own cyan printer ink, you’re in luck. Cyan is a primary color widely used in printing to produce vibrant blue and green hues. By making your own cyan ink, you can customize the shade and save money in the process. Here’s a step-by-step guide on how to make cyan printer ink:
1. Gather the Ingredients: To create cyan ink, you will need a blue pigment and a green pigment. Cyan is achieved by mixing these two primary colors. Common blue pigments include phthalo blue or ultramarine blue, while phthalo green or viridian green can be used as the green pigment. Make sure the pigments are finely ground and free from impurities.
2. Prepare the Liquid Carrier: In a clean container, mix distilled water with a binder of your choice. Gum arabic or agar-agar are commonly used binders to give the ink the desired consistency. The ratio of water to binder may vary depending on your preferred ink consistency.
3. Mix the Pigments: Gradually add the blue pigment to the liquid carrier while stirring continuously. Start with a small amount and increase until you achieve the desired shade of blue. Mix thoroughly to ensure the pigment is evenly distributed. Repeat the process with the green pigment, gradually adding it to the mixture, until you achieve the desired cyan color.
4. Test and Adjust: Take a small sample of the ink and test it on paper. Observe the color intensity and consistency. If the ink appears too light, add more pigment. If it appears too thick, add a small amount of water. Continuously test and adjust until you are satisfied with the results.
5. Strain (Optional): If you want to ensure a smoother ink texture, you can strain the ink through a fine mesh screen or cheesecloth to remove any clumps or impurities. This step is optional but can help improve the ink’s performance.
6. Store the Ink: Transfer the homemade cyan ink into a clean, airtight container for storage. Label the container with the date and the ink type for future reference. Store the ink in a cool, dark place to prolong its shelf life.
It’s worth mentioning that homemade cyan ink may have different properties compared to commercial ink. The drying time, color accuracy, and compatibility with different printer models may vary. It’s recommended to test the ink on a small scale before using it for important print jobs.
Experiment with different ratios of blue and green pigments to achieve various shades of cyan. By making your own cyan printer ink, you can have more control over the color and customize it to suit your specific printing needs. With some practice and experimentation, you’ll be able to create homemade cyan ink that delivers the vibrant and captivating hues you desire.
Mixing Yellow Printer Ink
Yellow ink is an essential component in printing, known for producing vibrant and warm colors. By mixing your own yellow printer ink, you have the flexibility to customize the shade and achieve the desired color intensity. Here’s a step-by-step guide on how to mix yellow printer ink:
1. Gather the Ingredients: To create yellow ink, you will need a yellow pigment. Yellow ochre, cadmium yellow, or Indian yellow are popular choices for yellow pigments. Ensure that the pigment is finely ground and free from impurities.
2. Prepare the Liquid Carrier: In a clean container, mix distilled water with a binder of your choice. Gum arabic or agar-agar are often used as binders to give the ink the desired consistency. The ratio of water to binder may vary depending on your preferred ink consistency.
3. Add the Yellow Pigment: Gradually add the yellow pigment to the liquid carrier while stirring continuously. Start with a small amount and increase until you achieve the desired shade of yellow. Ensure that the pigment is evenly distributed throughout the mixture.
4. Test and Adjust: Take a small sample of the ink and test it on paper. Observe the color intensity and consistency. If the ink appears too light, add more pigment. If it appears too thick, add a small amount of water. Continuously test and adjust until you are satisfied with the results.
5. Strain (Optional): To ensure a smoother texture and eliminate any clumps or impurities, you can strain the ink through a fine mesh screen or cheesecloth. This step is optional but can improve the overall performance of the ink.
6. Store the Ink: Transfer the homemade yellow ink into a clean, airtight container for storage. Label the container with the date and the ink type for future reference. Store the ink in a cool, dark place to prolong its shelf life.
It’s important to note that homemade yellow ink may have different properties compared to commercial ink. The drying time, color accuracy, and compatibility with different printer models may vary. It’s recommended to test the ink on a small scale before using it for important print jobs.
Experiment with different ratios of yellow pigments and binders to achieve various shades of yellow. By mixing your own yellow printer ink, you have the freedom to customize the color and intensity according to your specific printing needs. With some practice and experimentation, you’ll be able to create homemade yellow ink that delivers vivid and striking results.
Blending Magenta Printer Ink
Magenta ink plays a vital role in printing, known for its rich and vibrant red-pink tones. By blending your own magenta printer ink, you can achieve custom shades and tailor the color to your specific needs. Here is a step-by-step guide on how to blend magenta printer ink:
1. Gather the Ingredients: To create magenta ink, you will need a red pigment and a blue pigment. Magenta is achieved by mixing these two primary colors. Popular red pigments for magenta ink include quinacridone red or alizarin crimson, while phthalo blue or ultramarine blue can be used as the blue pigment. Ensure that the pigments are finely ground and free from impurities.
2. Prepare the Liquid Carrier: In a clean container, mix distilled water with a binder of your choice. Gum arabic or agar-agar are commonly used binders that help give the ink the desired consistency. The ratio of water to binder may vary depending on your preferred ink thickness.
3. Mix the Pigments: Gradually add the red pigment to the liquid carrier while stirring continuously. Start with a small amount and increase it until you achieve the desired red shade. Mix it thoroughly to ensure the pigment is evenly distributed in the liquid carrier. Repeat the process with the blue pigment, adding it gradually until you achieve the desired magenta color.
4. Test and Adjust: Take a small sample of the ink and test it on paper. Observe the color intensity and consistency. If the ink appears too light, add more red pigment. If it appears too thick, add a small amount of water. Continuously test and adjust until you are satisfied with the results.
5. Strain (Optional): For a smoother texture and to remove any clumps or impurities, you can strain the ink through a fine mesh screen or cheesecloth. This step is optional but can help improve the overall performance of the ink.
6. Store the Ink: Transfer the homemade magenta ink into a clean, airtight container for storage. Label the container with the date and the ink type for future reference. Store the ink in a cool, dark place to prolong its shelf life.
It’s important to note that homemade magenta ink may have different properties compared to commercial ink. The drying time, color accuracy, and compatibility with different printer models may vary. It’s recommended to test the ink on a small scale before using it for important print jobs.
Experiment with different ratios of red and blue pigments to achieve various shades of magenta. By blending your own magenta printer ink, you have creative control over the color and can customize it to suit your specific printing needs. With practice and experimentation, you’ll be able to create homemade magenta ink that delivers stunning and striking results.
Adjusting Ink Consistency
When creating homemade printer ink, achieving the right consistency is crucial for optimal performance. The ink consistency affects its flow, drying time, and ability to adhere to the paper. Adjusting the ink consistency allows you to optimize its performance for your specific printing needs. Here are some tips for adjusting ink consistency:
1. Adding Liquid Carriers: If the ink is too thick or viscous, you can adjust the consistency by adding more liquid carrier, such as distilled water or a suitable solvent. Gradually add small amounts of the liquid carrier and mix thoroughly until you achieve the desired consistency. Be careful not to add too much, as it can affect the color intensity and might cause the ink to be too runny.
2. Incorporating Binders: If the ink is too thin or watery, you can adjust the consistency by adding a binder, such as gum arabic or agar-agar. These binders help thicken and provide structure to the ink. Gradually add small amounts of the binder while stirring continuously until the desired consistency is achieved. Keep in mind that adding too much binder can affect the drying time and might cause the ink to become too tacky.
3. Grinding Pigments: If the ink has uneven particles or clumps, the consistency may be affected. To address this, you can regrind the pigments using a mortar and pestle or other suitable grinding tools. This process helps break down any clumps and ensures a smoother texture. Once properly ground, the pigments can be mixed with the liquid carrier and other components to achieve a consistent ink consistency.
4. Straining the Ink: If the ink has impurities or particles that affect the consistency, straining the ink through a fine mesh screen or cheesecloth can help remove these impurities. This step is especially useful when working with homemade ink containing natural pigments or materials that may have slight variations in texture or granules. Straining the ink will result in a smoother consistency and improve overall performance.
5. Testing and Adjusting: It’s important to continuously test the ink’s consistency throughout the adjusting process. Take small samples of the ink and test it on paper. Note the flow, coverage, and drying time. If necessary, make additional adjustments by adding small amounts of liquid carrier or binder until you achieve the desired consistency.
Keep in mind that the optimal ink consistency may vary depending on the printing method and paper type you intend to use. It’s advisable to test the adjusted ink on a small scale before using it for important projects or larger print jobs.
By assessing and adjusting the ink consistency, you can optimize the performance of your homemade printer ink and ensure that it flows smoothly, adheres properly, and produces high-quality prints.
Storing Homemade Printer Ink Properly
Proper storage of homemade printer ink is essential to maintain its quality, prevent spoilage, and ensure its longevity. Here are some guidelines to follow for storing homemade printer ink:
1. Use Airtight Containers: Transfer the ink into clean, airtight containers that are specifically designated for ink storage. Glass or plastic jars with tight-fitting lids are ideal for this purpose. Ensure that the containers are thoroughly cleaned and dried before pouring the ink to prevent contamination.
2. Label the Containers: Label the containers with the type of ink, creation date, and any other relevant information. This will help you keep track of the ink’s age and formulation. It’s also important to note any special instructions or precautions, such as proper shaking or stirring before use.
3. Protect from Light and Heat: Store the ink in a cool, dark place away from direct sunlight and heat sources. Exposure to light and heat can degrade the ink’s quality and composition, affecting its performance. Find a storage space that maintains a moderate temperature, free from extreme fluctuations.
4. Avoid Air Exposure: Oxygen exposure can cause the ink to dry out or thicken over time. Ensure that the containers are tightly sealed and minimize unnecessary opening. When using the ink, pour only the amount needed to minimize unnecessary exposure to air. Re-seal the container promptly after use.
5. Shake or Stir Before Use: Over time, the constituents of homemade ink may settle or separate. Before using the ink, gently shake or stir it to remix and distribute the pigments, binders, and liquid carriers. This helps ensure uniform consistency and color distribution.
6. Regularly Check for Contamination: Inspect the stored ink periodically for any signs of contamination, such as mold growth, discoloration, or unusual odors. If any contamination is detected, discard the ink immediately, as it may not be safe or suitable for printing.
7. Avoid Mixing Old and New Ink: If you plan to refill a printer cartridge or mix the homemade ink with commercial ink, avoid combining old and new ink. The quality and compatibility of different ink batches may vary, potentially causing clogging or other issues. It’s recommended to use each batch of homemade ink separately or with caution.
Following these guidelines will help you store homemade printer ink properly. By protecting it from light, heat, air exposure, and contamination, you can maximize the ink’s longevity and maintain its quality for future use. Proper storage helps ensure that your homemade ink continues to deliver consistent, high-quality prints.
Testing and Troubleshooting Homemade Ink
After creating homemade ink, it’s important to test it to ensure its quality and performance. Testing allows you to identify any issues or areas that may need adjustment. Here are some methods for testing and troubleshooting homemade ink:
1. Sample Prints: Print small sample documents or images using the homemade ink. Observe the print quality, color accuracy, and consistency. Look for any streaks, smudging, or uneven coverage. Assess whether the ink performs as expected and meets your desired standards.
2. Drying Time: Pay attention to the drying time of the printed documents. The ink should dry within a reasonable timeframe and not smudge when touched. If the ink takes too long to dry or remains tacky, consider adjusting the ink formulation by adding a binder or reducing the pigment concentration.
3. Color Accuracy: Compare the color accuracy of the printed output with your desired color expectations. If the color doesn’t match, you may need to adjust the pigment ratios or consider using different pigments. Keep in mind that achieving precise color reproduction can be challenging with homemade ink, so experimentation and fine-tuning may be necessary.
4. Compatibility: Test the compatibility of the homemade ink with your printer model. Ensure that the ink flows smoothly through the ink cartridges and doesn’t cause clogging or other printing issues. If compatibility problems arise, consult the printer manufacturer’s recommendations or seek alternative homemade ink recipes specifically formulated for your printer model.
5. Print Longevity: Assess the durability and longevity of the prints created with homemade ink. Observe how well the prints resist fading over time, exposure to light, or other environmental factors. If the prints fade significantly or aren’t as durable as expected, consider adding stabilizers or other additives to improve the ink’s longevity.
6. Troubleshooting: If you encounter issues with the homemade ink during testing, troubleshoot the problem systematically. Evaluate each component of the ink formulation – the pigment, binder, and liquid carrier – to identify potential factors contributing to the issue. Make small adjustments, such as altering pigment ratios or adding a different binder, to address the problem. Continue testing and adjusting until the desired results are achieved.
Through careful testing and troubleshooting, you can identify and address any issues with your homemade ink. Keep detailed records of the adjustments made during the troubleshooting process to refine your ink formulation over time. Remember that producing consistent and high-quality homemade ink may require experimentation and fine-tuning to find the perfect balance for your specific printing needs.
Exploring Other DIY Ink Recipes
Creating homemade ink allows for experimentation and customization, opening up a world of possibilities beyond the traditional printer ink colors. If you’re feeling adventurous or want to explore alternative ink options, here are a few other DIY ink recipes worth considering:
1. Sepia Ink: Sepia ink provides a warm, vintage look and is commonly used for art and calligraphy. To make sepia ink, combine a brown pigment, such as burnt umber or raw sienna, with a liquid carrier and binder. Adjust the pigment ratios to achieve the desired shade of sepia.
2. Metallic Ink: Give your prints a touch of metallic shimmer using homemade metallic ink. Mix metallic powders, such as mica or bronze, with a clear liquid carrier and binder. Experiment with different metallic ratios to create various shades, from gold and silver to copper or bronze.
3. White Ink: White ink can be useful for highlighting or adding accents to printed materials. Mix titanium white pigment with a liquid carrier and binder to create white ink. Keep in mind that achieving a truly opaque white ink can be challenging, so experimentation and multiple layers may be necessary.
4. Neon Ink: Create eye-catching and vibrant prints with homemade neon ink. Mix fluorescent pigments, available in various colors, with a liquid carrier and binder. Keep in mind that fluorescent pigments may have different properties than traditional pigments, so testing and adjustments may be necessary to achieve desired results.
5. Invisible Ink: Explore the world of secret messages and hidden designs with homemade invisible ink. To make invisible ink, use substances like lemon juice, milk, or baking soda mixed with water as the liquid carrier. When the ink dries, it becomes virtually invisible. To reveal the hidden message, apply heat, hold the paper near a flame, or use a suitable chemical reagent to make the ink visible again.
6. Custom Color Blends: Mix different pigments together to create unique custom colors. Be bold in your experimentation, combining primary colors to produce secondary colors or mixing complementary colors for dynamic contrasts. Keep track of the pigment ratios and the process used, allowing you to reproduce favorite blends in the future.
Remember, each DIY ink recipe may require its own adjustments and testing. Factors such as pigment concentration, binder type, and liquid carrier composition can significantly impact the performance of the ink. Take notes, learn from each experiment, and refine your recipes to achieve the desired results.
Keep in mind that homemade ink may have different properties and limitations compared to commercial ink. It’s important to test and understand the characteristics of each DIY ink before using it for important projects or in commercial printers. With creativity and exploration, you can unlock a world of possibilities and unique printing experiences with your own DIY ink recipes.