
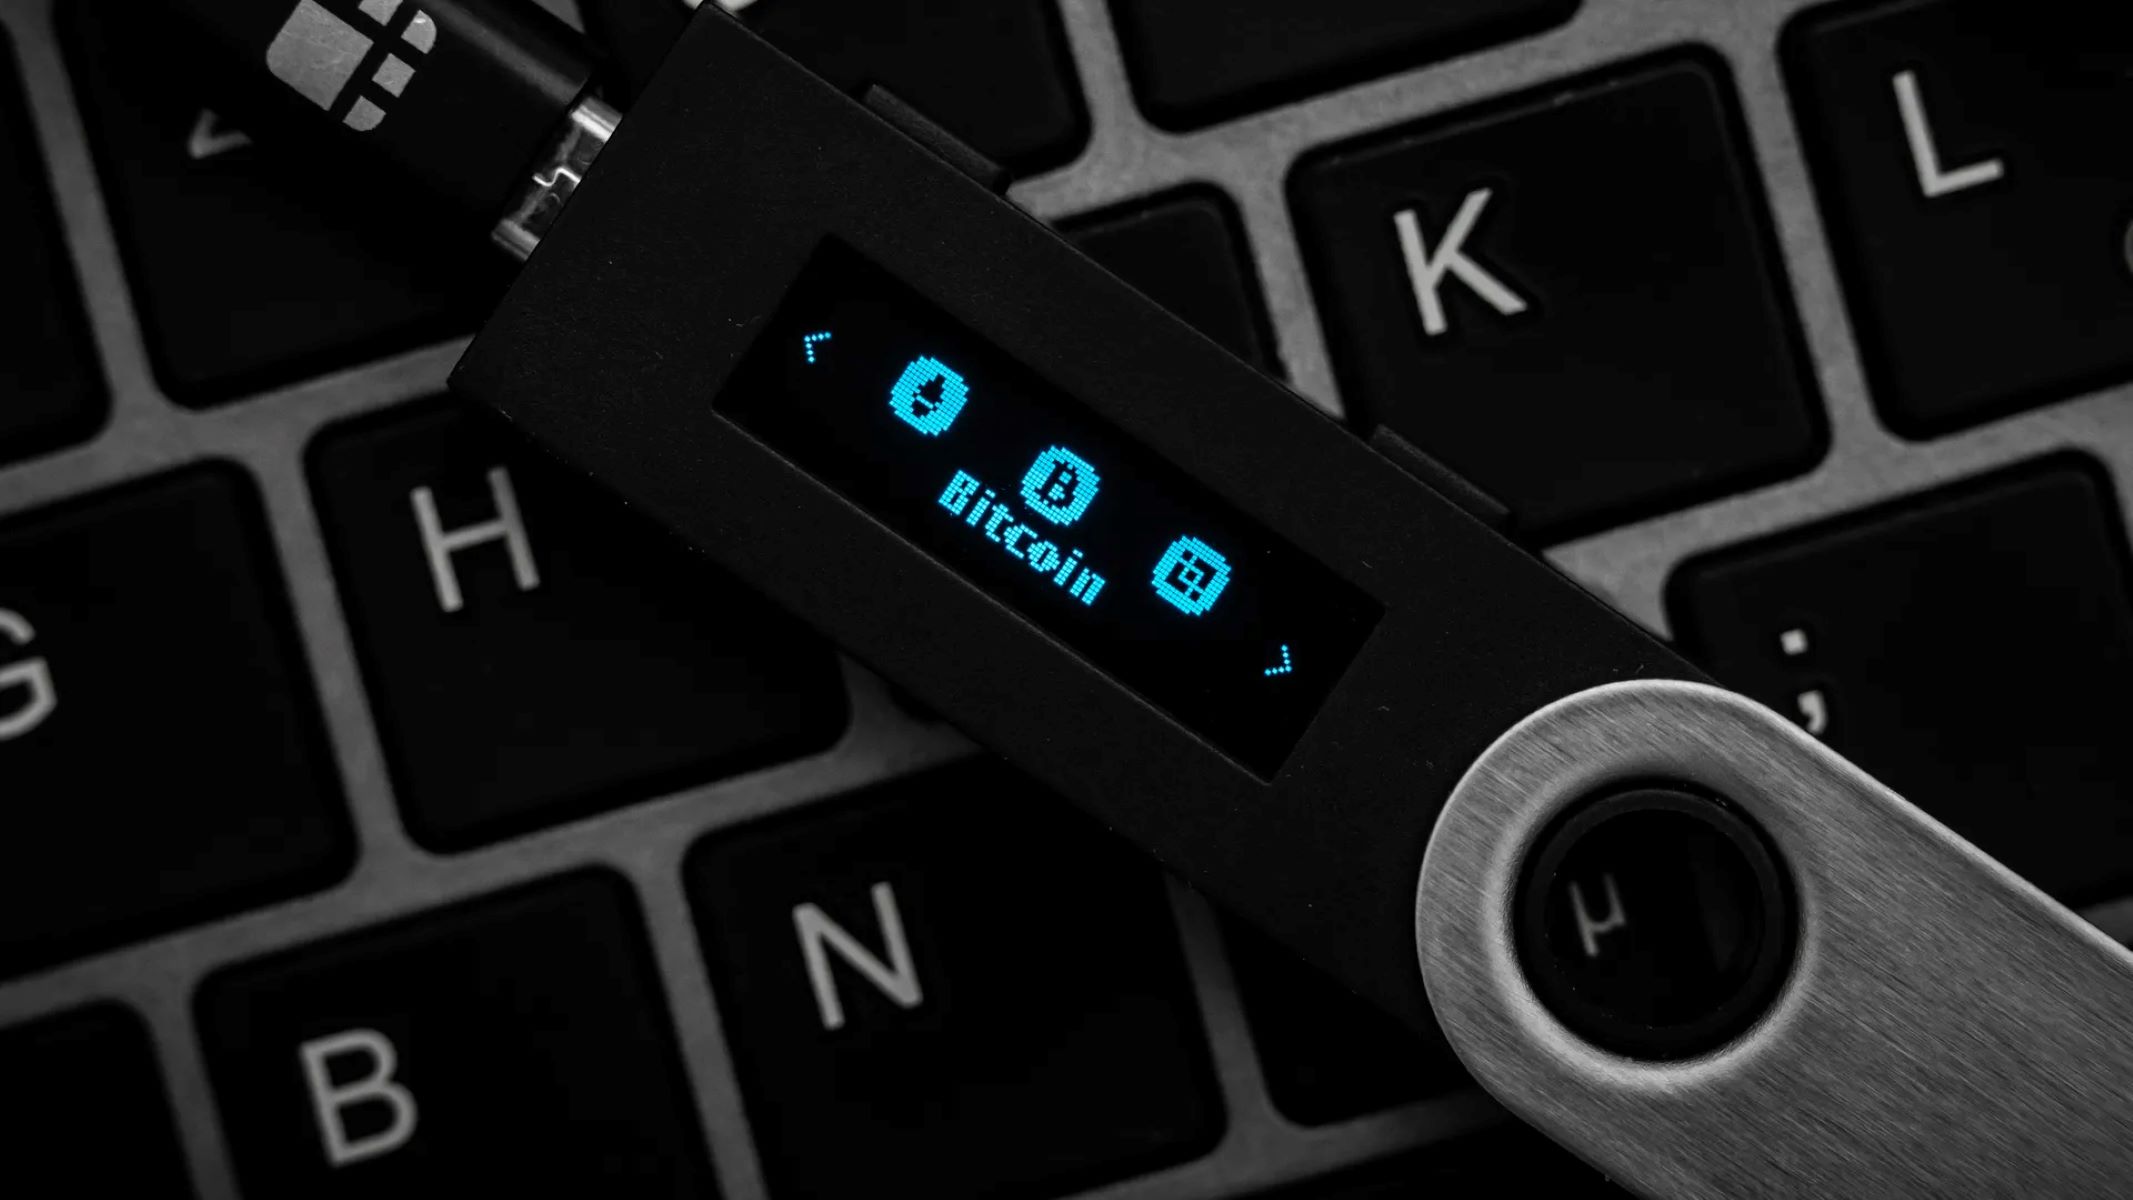
What is a Hardware Wallet?
A hardware wallet is a specialized device designed to securely store cryptocurrencies. It offers a higher level of security compared to software wallets, as it keeps the private keys offline, away from potential cyber threats. This physical device acts as a wallet to store the private keys required to access and manage your digital assets.
Unlike software wallets, which are often connected to the internet, hardware wallets provide an added layer of protection against hacking and malware attacks. By keeping your private keys offline, they eliminate the risk of your cryptocurrency holdings being accessed remotely. This makes them an ideal choice for long-term investors and anyone concerned about the security of their digital assets.
Hardware wallets typically come in the form of a USB stick or a small device with a display and buttons. They are often encrypted and require a PIN or a password to access and authorize transactions. Some hardware wallets also have the capability to generate secure offline transactions, adding an extra layer of protection.
One of the key features of a hardware wallet is its compatibility with multiple cryptocurrencies. Most hardware wallets support a wide range of popular cryptocurrencies, including Bitcoin, Ethereum, Litecoin, and many others. This versatility allows users to manage different digital assets in one convenient device.
It is important to note that while hardware wallets offer an excellent level of security, they are not entirely risk-free. Users must take additional measures to ensure the integrity and safety of their hardware wallet. This includes setting strong passwords, regularly updating firmware, and keeping the device away from physical damage or unauthorized access.
Benefits of Using a Hardware Wallet
Using a hardware wallet to secure your cryptocurrencies comes with a range of benefits that make it an attractive option for investors and enthusiasts alike:
- Enhanced Security: Hardware wallets provide a highly secure way to store your private keys. By keeping the keys offline and protected within the device, they are immune to online threats like hacking and malware attacks. This significantly reduces the risk of unauthorized access to your digital assets.
- Protection Against Physical Theft: Since a hardware wallet is a physical device, it offers protection against physical theft. As long as you keep the device in a safe place and follow security measures, it becomes much harder for thieves to steal your cryptocurrencies compared to online wallets or exchanges.
- User-Friendly: Hardware wallets are designed to be user-friendly, even for those with limited technical knowledge. With a simple interface, clear instructions, and intuitive buttons, managing your cryptocurrencies becomes hassle-free.
- Multi-Currency Support: Most hardware wallets support a wide range of cryptocurrencies, allowing you to conveniently manage multiple digital assets within a single device. This eliminates the need for separate wallets for each cryptocurrency, streamlining your portfolio management.
- Offline Transaction Signing: Hardware wallets often come with the capability to generate and sign transactions offline. This means that even when you authorize a transaction, the private keys never leave the device, keeping them secure from online threats. This feature adds an additional layer of protection when making transactions.
- Backup and Recovery: Hardware wallets typically provide users with a recovery phrase or seed. This allows you to back up your wallet and restore access to your funds in case the device gets lost, damaged, or stolen. By safely storing the recovery phrase, you can ensure that your cryptocurrencies are always recoverable.
Overall, a hardware wallet offers peace of mind, knowing that your digital assets are well-protected against both online and physical threats. Its user-friendly interface and secure features make it an essential tool for anyone serious about owning and managing cryptocurrencies.
Tools and Materials Needed
Before you embark on creating your own hardware wallet using a USB stick, it’s important to gather the necessary tools and materials. Here’s what you’ll need:
- USB Stick: Select a high-quality USB stick with ample storage capacity. It’s crucial to choose a reputable brand to ensure reliability and security.
- Computer: You’ll need a computer to perform the necessary steps to set up the hardware wallet. Make sure your computer is in good working condition and has the required specifications.
- Operating System: Depending on the hardware wallet software you plan to use, you may need to install a specific operating system. Ensure that your computer has a compatible operating system installed or be prepared to install one.
- Wallet Software: Choose a trusted and secure wallet software that is compatible with your preferred cryptocurrencies. Research and select one that meets your specific needs and preferences.
- Internet Connection: A stable internet connection is necessary for downloading the required software and updates. Ensure that you have a reliable internet connection to avoid interruptions during the setup process.
- Power Source: Make sure your computer is connected to a reliable power source to prevent any unexpected shutdowns that could disrupt the process of creating your hardware wallet.
- Secure Environment: Find a quiet and secure environment where you can safely carry out the steps to create your hardware wallet. Avoid public Wi-Fi networks and ensure that you’re not being observed or monitored by others.
Remember to handle all the tools and materials with care to avoid any damage or data loss. Follow the instructions provided by the manufacturer of the USB stick and other components to ensure a smooth and successful setup process.
By gathering these tools and materials, you’ll be ready to proceed with the steps required to create your hardware wallet and secure your cryptocurrencies.
Step 1: Formatting the USB Stick
Formatting the USB stick is the first crucial step in creating your hardware wallet. By formatting the USB stick, you ensure that it is ready to be used exclusively for storing your cryptocurrency private keys. Follow these steps to format the USB stick:
- Backup Data: Before formatting the USB stick, ensure that you have backed up any important data stored on it. Formatting will erase all existing data on the USB stick, so it’s essential to have a backup to avoid losing any valuable information.
- Insert the USB Stick: Insert the USB stick into an available USB port on your computer. Make sure the computer recognizes and detects the USB stick correctly.
- Open Disk Management: On Windows, you can open Disk Management by right-clicking the Start button, selecting “Disk Management” from the menu, and finding the USB stick in the list of available drives. On macOS, you can open Disk Utility by going to “Applications” > “Utilities” > “Disk Utility.”
- Select the USB Stick: In Disk Management or Disk Utility, locate the USB stick and select it. Be careful not to select any other drive or partition to avoid accidental formatting.
- Format the USB Stick: Right-click on the USB stick (Windows) or click on the “Erase” tab (macOS) to access the formatting options. Choose the file system format that is compatible with your operating system and the hardware wallet software you plan to use.
- Assign a New Name: You can assign a new name to the USB stick, making it easier to identify later. Choose a name that is descriptive and memorable.
- Confirm and Format: Double-check the formatting options you have chosen and click the “Format” button to start the formatting process. Confirm any prompts or warnings that may appear.
- Wait for Completion: The formatting process may take a few moments to complete. Wait for the process to finish, and do not remove the USB stick until it is done.
- Verify the Formatting: Once the formatting is complete, verify that the USB stick is now formatted correctly. It should be ready for the next steps in creating your hardware wallet.
By following these steps and properly formatting your USB stick, you have set the foundation for creating your hardware wallet and ensuring its compatibility with your computer and wallet software.
Step 2: Setting Up the Operating System
Setting up the operating system is a crucial step in creating your hardware wallet. Depending on the wallet software you plan to use, you may need to install a specific operating system. Follow these steps to set up the operating system:
- Research and Choose an Operating System: Research and identify the operating system that best suits your hardware wallet software. Check the system requirements and compatibility to ensure a smooth installation process.
- Download the Operating System Install Image: Visit the official website of the operating system and download the install image file. Make sure to select the version that matches your computer’s architecture (32-bit or 64-bit).
- Create a Bootable Drive: Depending on the operating system, you may need to create a bootable drive to install it on your computer. Use a tool like Rufus (Windows) or Etcher (macOS) to create the bootable drive from the downloaded install image.
- Insert the Bootable Drive: Insert the bootable drive into a USB port on your computer. Restart the computer and access the boot menu by pressing the designated key (usually F12 or Esc) during startup. Select the bootable drive as the primary boot device.
- Follow the Installation Instructions: The installation process may vary depending on the operating system you have chosen. Follow the on-screen instructions to install the operating system on your computer. Make sure to select the appropriate options for language, keyboard layout, and disk partitioning.
- Complete the Installation: Once the installation is complete, restart your computer. Remove the bootable drive from the USB port and allow the computer to boot from the newly installed operating system.
- Update and Configure the Operating System: After the installation, make sure to update the operating system to the latest version. Install any necessary drivers or software updates to ensure compatibility with your hardware wallet software. Configure any additional settings based on your preferences.
- Verify the Operating System: Confirm that the operating system is installed and functioning properly. Check that all necessary drivers are installed and all hardware components are detected correctly.
By properly setting up the operating system, you ensure that your computer is ready to support your hardware wallet and the subsequent steps of creating and using it.
Step 3: Creating a Bootable Drive
Creating a bootable drive is an important step in preparing your computer to install the operating system required for your hardware wallet. By following these steps, you can create a bootable drive and ensure a smooth installation process:
- Select a Tool: Choose a reliable and user-friendly tool that allows you to create a bootable drive. Popular options include Rufus for Windows and Etcher for macOS.
- Download the Install Image: Visit the official website of the operating system you intend to install and download the installation image file. Ensure that you select the correct version based on your computer’s architecture (32-bit or 64-bit).
- Insert the USB Drive: Insert a USB drive with sufficient storage capacity into an available USB port on your computer. It is recommended to use a USB drive that is at least 8GB in size.
- Open the Bootable Drive Creation Tool: Open the bootable drive creation tool you have selected on your computer.
- Select the USB Drive: In the bootable drive creation tool, select the USB drive you inserted in step 3. Ensure that you have selected the correct drive and that there is no important data on it as it will be erased in the process.
- Choose the Installation Image: Locate and select the installation image file you downloaded in step 2. The bootable drive creation tool will use this file to create the bootable drive.
- Start the Creation Process: Once you have selected the USB drive and the installation image, start the creation process by clicking the appropriate button in the bootable drive creation tool. The tool will format the USB drive and copy the installation image to it, making it bootable.
- Wait for the Process to Complete: The creation process may take a few minutes to complete. Avoid removing the USB drive or interrupting the process to ensure a successful creation of the bootable drive.
- Verify the Bootable Drive: Once the process is complete, eject the USB drive from your computer and reinsert it to verify that it is now a bootable drive. You can check if the USB drive displays as a bootable option in your computer’s boot menu.
By successfully creating a bootable drive, you have prepared the necessary tool to install the operating system required for your hardware wallet. This will enable you to proceed with the next steps in the hardware wallet creation process.
Step 4: Installing the Wallet Software
Installing the wallet software is a vital step in creating your hardware wallet. This software allows you to securely manage and access your cryptocurrencies. Follow these steps to install the wallet software:
- Research and Choose a Wallet Software: Research and choose a wallet software that is compatible with your hardware wallet and supports the cryptocurrencies you plan to store. Look for reputable and trusted wallet software options.
- Download the Wallet Software: Visit the official website of the wallet software and download the installation file. Make sure to download it from the official source to avoid any security risks or potential malware.
- Open the Installation File: Locate the downloaded installation file on your computer and open it. Follow any on-screen prompts or instructions to begin the installation process.
- Read and Accept the License Agreement: Review the terms and conditions of the wallet software’s license agreement. If you agree to the terms, click on the “Accept” or “Agree” button to proceed with the installation.
- Choose the Installation Location: Select the location where you want the wallet software to be installed on your computer. You can choose the default location or specify a different directory if preferred.
- Configure Additional Preferences: During the installation process, the wallet software may provide additional preferences or options for customization. Configure these preferences based on your preferences or leave them as default.
- Wait for the Installation to Complete: The installation process may take a few moments to complete. It is important to wait until the installation is finished before proceeding.
- Launch the Wallet Software: Once the installation is successfully completed, launch the wallet software. Follow any initial setup instructions or prompts that the software provides.
- Create a New Wallet: In the wallet software, create a new wallet. This usually involves providing a secure password or passphrase to protect your wallet. Make sure to choose a strong and unique password.
- Generate and Backup Your Wallet Recovery Phrase: The wallet software may generate a recovery phrase or seed that can be used to recover your wallet in case of loss or damage. Make sure to write down and securely store this recovery phrase. Avoid sharing it with anyone or storing it in a location susceptible to unauthorized access.
By successfully installing the wallet software, you now have the necessary tool to manage and secure your cryptocurrencies using your hardware wallet. Ensure that you keep your wallet software up to date and follow any security recommendations provided by the software provider.
Step 5: Adding Security Measures
Once you have installed the wallet software for your hardware wallet, it’s essential to implement additional security measures to safeguard your digital assets. Follow these steps to enhance the security of your hardware wallet:
- Enable Two-Factor Authentication (2FA): Activate two-factor authentication for your wallet software. This adds an extra layer of security by requiring a second verification step, usually through a mobile app or SMS code, when accessing your wallet.
- Create a Strong Password: Set a strong and unique password for your wallet software. Use a combination of uppercase and lowercase letters, numbers, and special characters. Avoid using easily guessable passwords and refrain from sharing it with anyone.
- Update Your Wallet Software: Stay up to date with the latest version of the wallet software. Regularly check for updates and install them promptly to benefit from bug fixes and security enhancements provided by the developers.
- Enable Automatic Wallet Lock: Configure your wallet software to automatically lock after a certain period of inactivity. This ensures that even if you leave your computer unattended, unauthorized individuals won’t be able to access your wallet without the password.
- Use a Dedicated Computer: Consider using a separate computer or operating system solely for managing your hardware wallet. By minimizing your exposure to external threats and potential security breaches, you can enhance the overall security of your wallet.
- Avoid Phishing Attempts: Be vigilant against phishing attempts and never share your wallet password or recovery phrase with anyone. Always verify the authenticity of any communication related to your wallet and double-check website URLs before entering any sensitive information.
- Keep Your Recovery Phrase Secure: Store your recovery phrase in a secure location, ideally offline. Avoid saving it digitally or sharing it with others. Consider using a hardware device, such as a safe or a lockbox, to protect the physical copy of the recovery phrase.
- Regularly Backup Your Wallet: Create regular backups of your wallet data, including the wallet file and any necessary encryption keys. Store these backups in separate secure locations to mitigate the risk of data loss.
- Practice Safe Internet Browsing: Avoid downloading files or clicking on links from untrusted sources. Be cautious of phishing attempts, malicious websites, and suspicious email attachments that may compromise the security of your wallet.
- Stay Informed About Security Best Practices: Stay updated on security best practices for managing and securing hardware wallets. Subscribe to reputable cryptocurrency news sources and forums to stay informed about the latest security threats and recommended countermeasures.
By implementing these security measures, you can significantly enhance the safety of your hardware wallet and protect your valuable digital assets from potential threats.
Step 6: Transferring Funds to the Hardware Wallet
Now that you have set up your hardware wallet and implemented necessary security measures, it’s time to transfer your funds to the wallet for secure storage. Follow these steps to transfer funds to your hardware wallet:
- Open Your Wallet Software: Launch your wallet software on your computer and ensure it is connected to the internet.
- Access Your Wallet: Enter your wallet password or use any other specified authentication method to gain access to your wallet.
- Locate Your Receiving Address: In your wallet software, find the option to generate a receiving address. This address is unique to your wallet and serves as the destination for the funds you want to transfer.
- Copy the Receiving Address: Copy the receiving address provided by your wallet software. Ensure that you accurately copy the entire address to avoid any errors.
- Access Your Existing Wallet: If you are transferring funds from an existing software wallet or exchange, log in to the platform and navigate to the withdrawal or send funds option.
- Enter the Receiving Address: Paste the receiving address you copied from your hardware wallet into the required field on your existing wallet or exchange platform.
- Specify the Amount and Confirm: Enter the amount of funds you want to transfer to your hardware wallet. Carefully review the transaction details and ensure the accuracy of the entered amount.
- Initiate the Transfer: Follow the instructions provided by your existing wallet or exchange platform to initiate the transfer. Confirm the transaction and any applicable fees.
- Wait for Confirmation: Depending on the cryptocurrency network, the confirmation process may take some time. Monitor the transaction status in your wallet software until it is confirmed.
- Verify the Funds: Once the transaction is confirmed, the transferred funds will appear in your hardware wallet’s balance. Check your wallet software to ensure that the funds have been successfully transferred.
Remember to double-check the accuracy of the receiving address to avoid any potential loss of funds. It is recommended to start with a small amount for your first transfer to ensure that the process goes smoothly before transferring larger amounts.
By following these steps, you can confidently transfer your funds to your hardware wallet, ensuring their secure storage and protection against potential cyber threats.
Step 7: Practice Safe Storage and Backup
After transferring your funds to your hardware wallet, it’s crucial to practice safe storage and backup procedures to ensure the long-term security of your digital assets. Follow these steps to keep your funds safe:
- Keep Your Hardware Wallet Secure: Store your hardware wallet in a secure location, preferably in a physical safe or a locked drawer. Protect it from potential theft, physical damage, or loss.
- Create a Backup of your Wallet: Most hardware wallets provide you with a recovery phrase or seed. Write down this recovery phrase and store it in a safe and separate location from your hardware wallet. Consider using a fireproof and waterproof container for added protection.
- Test the Recovery Process: Practice the recovery process with your hardware wallet and the backup recovery phrase. Ensure you are comfortable and confident in restoring your wallet in case of an emergency.
- Regularly Backup Your Wallet: Routinely create backups of your wallet data, including the wallet file and recovery phrase. Store these backups securely, preferably using encrypted storage or offline mediums.
- Update Firmware and Software: Stay up to date with the latest firmware and wallet software updates provided by the manufacturer. These updates often include security patches and other improvements to enhance the overall security of your hardware wallet.
- Avoid Public Wi-Fi: When accessing your hardware wallet or wallet software, avoid using public Wi-Fi networks. Public networks can be susceptible to hacking and eavesdropping, potentially compromising the security of your wallet.
- Be Wary of Phishing Attempts: Stay vigilant against phishing attempts aimed at tricking you into revealing your wallet information. Double-check the authenticity of any communication related to your wallet and be cautious of clicking on suspicious links or downloading unknown files.
- Use Strong Encryption for Digital Backups: If you choose to create digital backups of your wallet data, ensure they are encrypted. Use strong and unique passwords or encryption methods to protect these backups from unauthorized access.
- Inform Trusted Family Members or Heirs: If something were to happen to you, make sure trusted family members or heirs know about your hardware wallet and the necessary steps to access your funds or recovery phrase.
- Regularly Review and Update Security Measures: Stay informed about the latest security best practices and recommended measures for hardware wallet storage and backup. Regularly review and update your security practices to adapt to evolving threats.
By practicing safe storage and backup procedures, you can effectively safeguard your digital assets and have peace of mind knowing that your funds are securely stored.
Step 8: Making Transactions with the Hardware Wallet
Once your funds are securely stored in your hardware wallet, you can utilize it to make transactions with your cryptocurrencies. Here is a step-by-step guide on how to make transactions with your hardware wallet:
- Open Your Wallet Software: Launch your wallet software on your computer and ensure it is connected to the internet.
- Access Your Wallet: Enter your wallet password or use any other specified authentication method to gain access to your wallet.
- Connect Your Hardware Wallet: Use the provided USB cable to connect your hardware wallet to your computer. Ensure that the connection is secure and the wallet is properly recognized by the wallet software.
- Choose the Cryptocurrency: Select the cryptocurrency you wish to transact with from the wallet software’s interface. Ensure you have a sufficient balance of that particular cryptocurrency in your hardware wallet.
- Specify the Transaction Details: Enter the recipient’s wallet address and the amount you want to send. Double-check the accuracy of the recipient’s address to avoid any errors or potential loss of funds.
- Review the Transaction Fees: The wallet software may display the transaction fees associated with the transfer. Review the fees and, if necessary, adjust them based on your preferences and the urgency of the transaction.
- Confirm the Transaction: Carefully review all the transaction details, including the recipient’s address, the amount, and the fees. Once you are satisfied with the details, confirm the transaction on your hardware wallet by following the specified prompts.
- Verify the Transaction: After confirming the transaction on your hardware wallet, wait for the confirmation process to complete. The time required for confirmation may vary depending on the specific cryptocurrency and network congestion.
- Monitor the Transaction Status: Keep an eye on the transaction status in your wallet software. Once the transaction is confirmed and included in a block, it is considered to be successfully processed.
- Verify the Updated Balance: Check your hardware wallet’s balance and the recipient’s wallet to ensure that the transaction has been successfully completed. It may take some time for the recipient’s wallet to reflect the transferred funds.
By following these steps, you can confidently make transactions with your hardware wallet, ensuring the secure transfer of your cryptocurrencies while maintaining control over your private keys.