
Benefits of Linking a Credit Card to a Magic Band
Linking a credit card to a Magic Band can greatly enhance your experience when visiting Disney World. With this convenient and secure payment method, you can enjoy a range of benefits during your stay. Here are some key advantages of linking your credit card to your Magic Band:
- Seamless Convenience: By linking your credit card to your Magic Band, you eliminate the need to carry cash or credit cards while exploring the parks. Your Magic Band becomes your all-in-one ticket, room key, and payment device. This means you can easily make purchases without fumbling for your wallet or worrying about losing your cards.
- Quick and Efficient Transactions: With the tap of your Magic Band, you can breeze through payments at various locations within Disney World. Whether it’s enjoying a meal at a restaurant, shopping for souvenirs, or grabbing a snack, the process is smooth and hassle-free. You can save time and avoid long lines that often occur during peak seasons.
- Enhanced Security: Disney takes guest security seriously, and linking your credit card to your Magic Band adds an extra layer of protection. Each band is personalized and can only be accessed using a unique PIN or fingerprint. This reduces the risk of unauthorized transactions and ensures that your financial information remains secure.
- Easier Budgeting: When you link your credit card to your Magic Band, you gain easy access to your spending information. Disney’s online portal allows you to track and manage your expenses, providing you with a clear overview of your purchases. This feature can help you stick to your budget and keep your spending in check during your Disney World adventure.
- Convenient Room Charging: If you are staying at a Disney Resort hotel, linking your credit card to your Magic Band allows you to conveniently charge expenses to your room. This means you can simply use your Magic Band for everything from dining to merchandise, and settle your bill at the end of your stay. It eliminates the need to carry cash or constantly provide your credit card information.
By taking advantage of these benefits, linking your credit card to your Magic Band not only enhances your overall experience at Disney World but also makes your vacation more enjoyable and stress-free.
Step-by-Step Guide to Linking a Credit Card to a Magic Band
If you’re looking to link a credit card to your Magic Band at Disney World, follow this step-by-step guide to make the process as seamless as possible:
- Step 1: Set up a My Disney Experience account: Before you can link your credit card to your Magic Band, you’ll need to create a My Disney Experience account. Visit the official Disney website or download the My Disney Experience app to get started. Provide the necessary information and create your account.
- Step 2: Add your credit card information to your account: Once your account is set up, log in and navigate to the “Payments” section. Here, you’ll have the option to add your credit card information securely. Follow the prompts and input the required details, including your card number, expiration date, and billing address.
- Step 3: Link your Magic Band to your account: If you haven’t already linked your Magic Band to your account, go to the “MagicBands & Cards” section and follow the instructions to associate your Magic Band with your My Disney Experience account. This will ensure that your band is ready for charging privileges.
- Step 4: Enable charging privileges for your Magic Band: Now that your Magic Band and credit card are linked to your account, you’ll need to enable charging privileges. Head to the “My Profile” section or the “MagicBands & Cards” section and toggle on the option to allow charging to your Magic Band. You may be required to enter your account password or re-enter your credit card details for security purposes.
- Step 5: Test your linked credit card and Magic Band: Before you start making purchases, it’s a good idea to test the functionality of your linked credit card and Magic Band. Visit a merchandise location or quick-service restaurant within the Disney parks or resorts and make a small purchase. Verify that your Magic Band successfully processes the transaction and that the correct amount is charged to your credit card.
By following these steps, you’ll be able to link your credit card to your Magic Band and enjoy the convenience of seamless payments throughout your Disney World adventure.
Step 1: Set up a My Disney Experience Account
To begin the process of linking your credit card to a Magic Band at Disney World, you’ll first need to set up a My Disney Experience account. This account serves as your central hub for managing all aspects of your Disney World vacation. Follow the steps below to create your account:
- Visit the official Disney website or download the My Disney Experience app: To get started, visit the official Disney website or download the My Disney Experience app on your smartphone or tablet. Both options will allow you to create an account, so choose the option that is most convenient for you.
- Provide the necessary information: Once you’re on the website or app, you’ll be prompted to provide the necessary information to create your account. This may include details such as your email address, name, password, and birthdate. Ensure that you enter accurate and up-to-date information to avoid any issues later on.
- Verify your email address: After providing your information, you will receive an email from Disney to verify your account. Click on the verification link provided in the email to confirm your email address and activate your account. This is an important step to ensure the security of your account.
- Personalize your account: Once your account is confirmed, you can personalize it by adding a profile picture and setting your preferences. This will help Disney tailor your experience and provide you with relevant recommendations and updates based on your interests.
- Take advantage of additional features: With your My Disney Experience account, you can unlock additional features and benefits. These include the ability to make FastPass+ selections, reserve dining experiences, and access exclusive discounts and offers. Explore the different sections of your account to make the most out of your Disney World vacation.
Setting up a My Disney Experience account is the first step towards linking your credit card to a Magic Band. This account will serve as the foundation for managing all aspects of your visit to Disney World, from ticket and hotel reservations to FastPass+ selections and more. Ensure that you have a valid and active account before moving on to the next steps.
Step 2: Add Your Credit Card Information to Your Account
Once you have set up your My Disney Experience account, the next step to linking your credit card to a Magic Band at Disney World is to add your credit card information to your account. This will allow you to make purchases using your Magic Band throughout your visit. Follow the steps below to add your credit card details:
- Log in to your My Disney Experience account: Visit the official Disney website or open the My Disney Experience app on your device. Log in to your account using the same credentials you used to create the account.
- Navigate to the “Payments” section: Once you are logged in, look for the “Payments” section in your account settings. This is usually located under the “My Profile” or “My Account” tab. Click on it to access the payment options.
- Add your credit card information: In the “Payments” section, you will find an option to add a new credit card or update your existing card details. Click on the appropriate button to enter your credit card information. Make sure to provide accurate and up-to-date details, including your card number, expiration date, and the billing address associated with the card.
- Confirm and save your changes: Once you have entered your credit card information, review the details to ensure everything is correct. Double-check the card number, expiration date, and billing address before saving your changes. Click on the “Save” or “Submit” button to store your credit card information securely in your account.
- Verify your credit card: To ensure the security of your account, Disney may ask you to verify your credit card. This can be done by making a small charge to your card and providing the amount charged on the website or app. Follow the instructions provided to complete the verification process.
By adding your credit card information to your My Disney Experience account, you will be able to link it to your Magic Band and use it for seamless payments throughout your Disney World experience. Make sure to provide accurate and up-to-date information to avoid any issues during the payment process.
Step 3: Link Your Magic Band to Your Account
Once you have set up your My Disney Experience account and added your credit card information, the next step to linking a credit card to a Magic Band at Disney World is to associate your Magic Band with your account. This will ensure that your Magic Band is ready for charging privileges. Follow the steps below to link your Magic Band to your account:
- Log in to your My Disney Experience account: Visit the official Disney website or open the My Disney Experience app on your device. Log in to your account using the same credentials you used to create the account.
- Go to the “MagicBands & Cards” section: Once you are logged in, look for the “MagicBands & Cards” section in your account settings. This section is usually located under the “My Profile” or “My Account” tab. Click on it to access the Magic Band management options.
- Check for the availability of your Magic Band: In the “MagicBands & Cards” section, you will see the status of your Magic Band. If you have already received your Magic Band, it should be listed here. Make sure it is active and ready to be linked.
- Link your Magic Band to your account: If your Magic Band is listed as available, click on the “Link” or “Assign” button to link it to your account. Follow the prompts and select your Magic Band from the available options. This will associate your Magic Band with your My Disney Experience account.
- Test the functionality of your Magic Band: To ensure that your Magic Band is properly linked, perform a quick test. Visit a merchandise location or quick-service restaurant within the Disney parks or resorts and ask the Cast Member to help you test your Magic Band. They will guide you through a transaction, and you can verify that your Magic Band is working seamlessly.
By linking your Magic Band to your My Disney Experience account, you can start enjoying the convenience of using your Magic Band as a payment method. Make sure to follow the steps carefully and verify that your Magic Band is successfully associated with your account before proceeding to the next step.
Step 4: Enable Charging Privileges for Your Magic Band
After linking your Magic Band to your My Disney Experience account, the next step to linking a credit card to a Magic Band at Disney World is to enable charging privileges. This will allow you to use your Magic Band for purchases throughout the parks and resorts. Follow the steps below to enable charging privileges for your Magic Band:
- Log in to your My Disney Experience account: Visit the official Disney website or open the My Disney Experience app on your device. Log in to your account using the same credentials you used to create the account.
- Go to the “My Profile” or “MagicBands & Cards” section: Once you are logged in, navigate to either the “My Profile” or “MagicBands & Cards” section in your account settings. These sections can usually be found under the “My Account” or “My Disney Experience” tabs.
- Toggle on the charging privileges feature: In the “My Profile” or “MagicBands & Cards” section, look for an option related to charging privileges for your Magic Band. This feature may be called “Enable Charging” or something similar. Toggle the switch to the “on” position to activate charging privileges for your Magic Band.
- Confirm your action: After enabling charging privileges, you may be prompted to re-enter your account password or verify your credit card details for security purposes. Follow the prompts and provide the necessary information to confirm your action.
- Review your settings: Once charging privileges are enabled, review your settings to ensure that everything is set up correctly. Double-check that your Magic Band is listed as linked and that your credit card information is accurately reflected. If any changes need to be made, follow the appropriate steps to update your settings.
By enabling charging privileges for your Magic Band, you are now ready to use it as a payment method at various locations within Disney World. Double-check that the feature is activated in your My Disney Experience account to ensure a seamless payment experience throughout your magical adventure.
Step 5: Test Your Linked Credit Card and Magic Band
After linking your credit card to your Magic Band and enabling charging privileges, it’s essential to perform a test to ensure that both your linked credit card and Magic Band are functioning correctly. By conducting this test, you can verify that your transactions are being processed accurately and that your experience will be hassle-free. Follow the steps below to test your linked credit card and Magic Band:
- Visit a merchandise location or quick-service restaurant: Head to a merchandise location or quick-service restaurant within the Disney parks or resorts. These locations are typically equipped with the necessary equipment to process Magic Band payments.
- Select your items or order your food: Browse the merchandise or choose the food items you wish to purchase. If you are at a quick-service restaurant, place your food order with the Cast Member at the counter.
- Inform the Cast Member about using your Magic Band: Let the Cast Member assisting you know that you would like to use your Magic Band for payment. They will guide you through the process and provide you with instructions specific to the location.
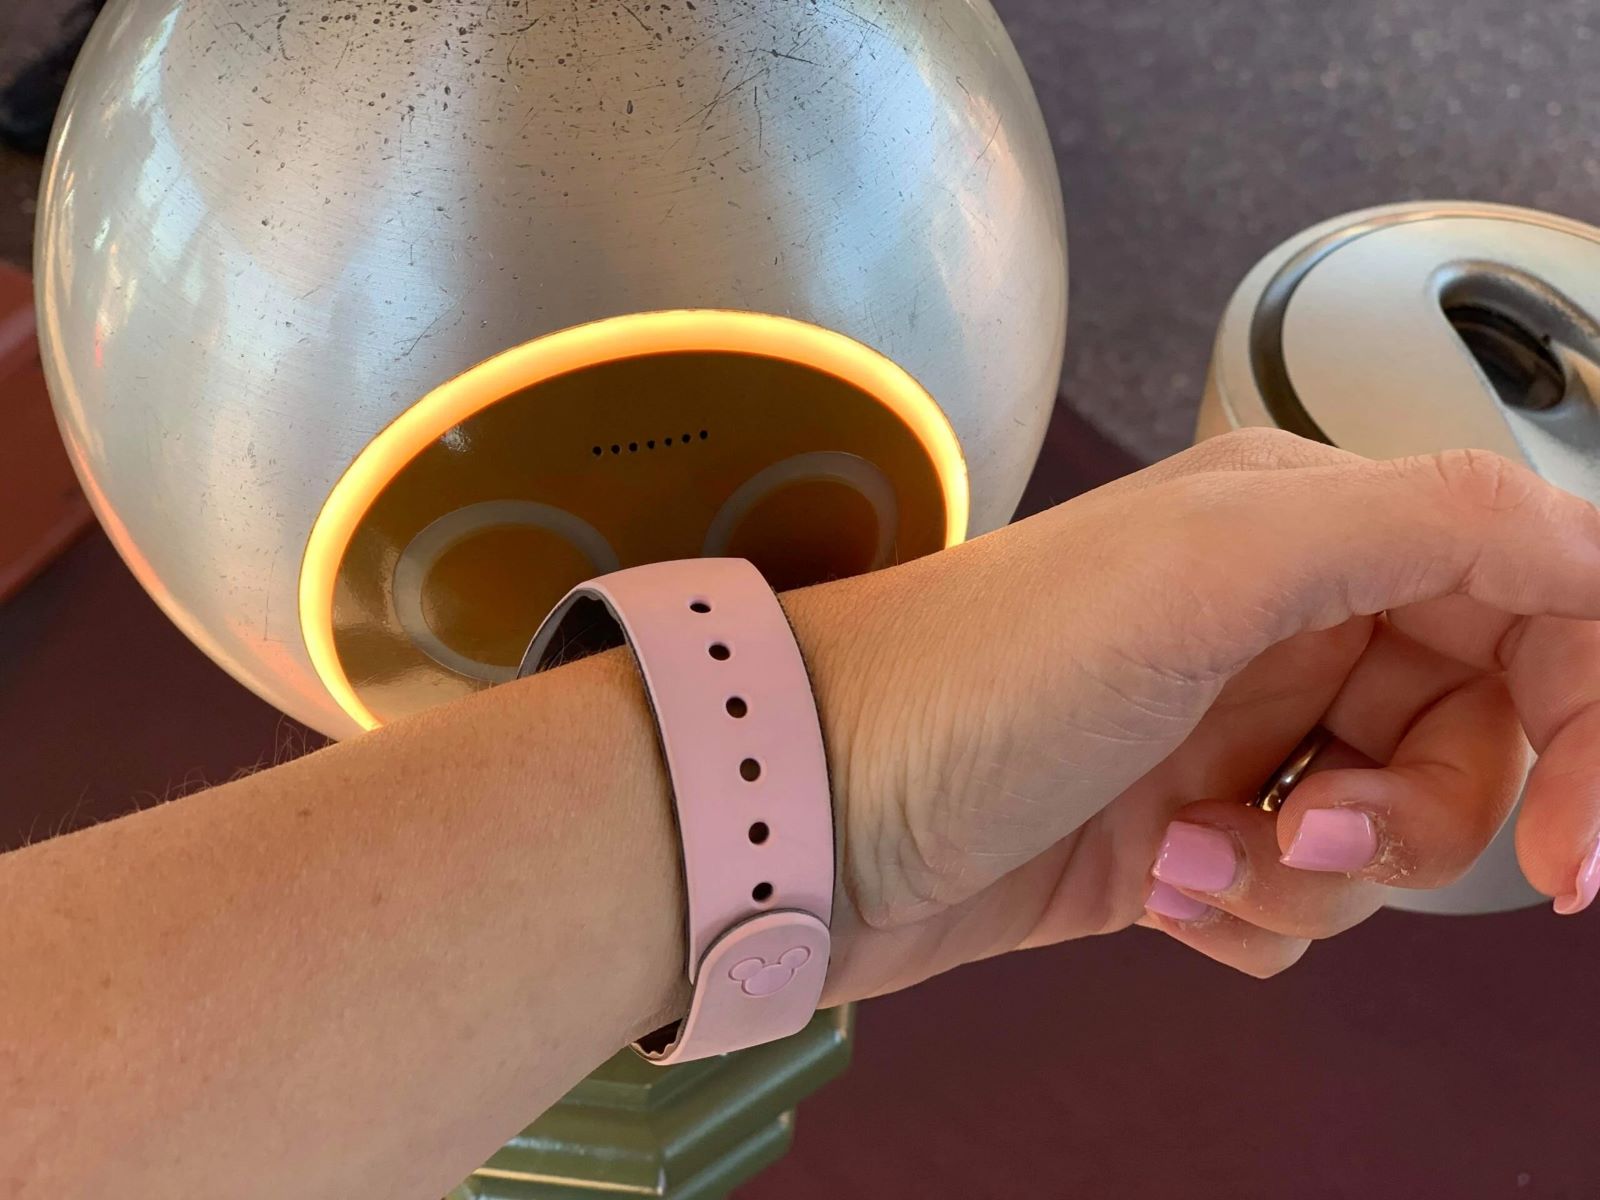
- Tap your Magic Band: When instructed by the Cast Member, tap your Magic Band on the designated payment terminal. Ensure that you tap the Mickey symbol on your Magic Band to initiate the payment process.
- Verify the transaction: Look at the terminal display to confirm that your Magic Band has been recognized and that the correct amount is displayed. If needed, you may be asked to provide additional confirmation, such as a PIN or fingerprint.
- Monitor your credit card statement: After a successful transaction, keep an eye on your credit card statement in the following days to ensure that the charges appear accurately and that there are no unexpected transactions.
By testing your linked credit card and Magic Band, you can gain confidence that your payments will be processed smoothly during your Disney World experience. If any issues arise during the test, reach out to a Cast Member for assistance, and they will be happy to help resolve any concerns.
Frequently Asked Questions about Linking a Credit Card to a Magic Band
Linking a credit card to a Magic Band at Disney World can be a convenient payment option during your visit. However, you may have some questions about the process and how it works. Here are some frequently asked questions to provide you with more information:
- Can I link multiple credit cards to my Magic Band?
Yes, you can link multiple credit cards to your Magic Band. This can be useful if you want to have different payment options or if you are traveling with others who want to use their own credit cards. You can manage your linked credit cards through your My Disney Experience account. - Is it safe to link my credit card to a Magic Band?
Disney takes guest security seriously. When you link your credit card to a Magic Band, your information is encrypted and protected. The use of a unique PIN or fingerprint authentication adds an extra layer of security. However, as with any payment method, it is important to monitor your transactions and report any suspicious activity immediately. - Can I still use cash or another form of payment if my credit card is linked to my Magic Band?
Yes, even if your credit card is linked to your Magic Band, you can still use cash or another form of payment if you prefer. Disney World accepts multiple payment methods, including cash, credit cards, debit cards, and Disney Gift Cards. Simply let the Cast Member know your preferred payment method at the time of purchase. - Are there any additional fees for using a credit card with a Magic Band?
There are no additional fees for using a credit card with a Magic Band for purchases at Disney World. However, keep in mind that normal credit card charges and fees may apply, such as interest charges or foreign transaction fees depending on your credit card terms and conditions. Review your credit card agreement or contact your credit card provider for specific details. - What happens if I lose my Magic Band?
If you lose your Magic Band, report it immediately to a Cast Member or through the My Disney Experience app. Your linked credit card information is protected, as it requires a PIN or fingerprint for any purchases. However, it is still important to report the loss to prevent unauthorized use. Disney can deactivate the lost Magic Band and issue you a replacement if needed.
These frequently asked questions should give you a better understanding of the process of linking a credit card to a Magic Band at Disney World. If you have further questions or need assistance, feel free to consult a Cast Member or visit the official Disney website for more information.
Tips for Using Your Linked Credit Card and Magic Band at Disney World
When utilizing your linked credit card and Magic Band at Disney World, there are several tips to keep in mind to ensure a smooth and enjoyable experience throughout your visit. Consider the following recommendations:
- Monitor your spending: Keep track of your purchases and regularly check your My Disney Experience account or the official Disney app to review your transaction history. This will help you stay within your budget and avoid any surprises when settling your bill.
- Set a PIN for your Magic Band: Add an extra layer of security by setting a unique PIN for your Magic Band. This will prevent unauthorized use of your band if it gets misplaced or stolen. Choose a PIN that is easy for you to remember but not obvious to others.
- Link multiple forms of payment: Consider linking multiple forms of payment, such as a credit card and a Disney Gift Card. Having multiple options can be beneficial if you want to divide expenses or if one payment method encounters any issues.
- Keep your Magic Band secure: Treat your Magic Band like you would your wallet or credit card. Keep it secure and avoid sharing it with others. If you are staying at a Disney Resort hotel, utilize the safe in your room to store your Magic Band when not in use.
- Ensure your Magic Band is properly charged: If your Magic Band runs out of battery, you may temporarily lose the ability to make purchases with it. To avoid this, charge your Magic Band regularly using the charging station provided at your Disney Resort hotel or using a portable charging device.
- Take advantage of Mobile Order: Utilize the Mobile Order feature on the My Disney Experience app for quick-service restaurants. This allows you to order and pay for your food in advance, reducing wait times and eliminating the need to carry your Magic Band or credit card while dining.
- Check for discounts: Keep an eye out for any discounts or offers specifically for using your linked credit card or Magic Band. Disney occasionally offers special promotions or perks for guests utilizing these payment methods, so be sure to take advantage of any available discounts.
By following these tips, you can make the most of your linked credit card and Magic Band at Disney World. Remember to keep your information secure, stay within your budget, and take advantage of the convenient features that Disney has to offer.
Security Measures to Protect Your Credit Card Information
When linking your credit card to a Magic Band at Disney World, it’s important to prioritize the security of your personal and financial information. Disney has implemented several measures to protect your credit card information, but it’s always wise to take additional precautions. Here are some security measures to consider:
- Create a strong account password: When setting up your My Disney Experience account, choose a strong and unique password. Avoid using easily guessable passwords and consider using a combination of letters, numbers, and symbols to enhance security.
- Enable two-factor authentication: Take advantage of the two-factor authentication feature offered by Disney. This adds an extra layer of security by requiring a secondary form of verification, such as a code sent to your email or a fingerprint scan, when accessing your account.
- Keep your login credentials confidential: Never share your My Disney Experience account login credentials with others. This includes your username, password, and any additional authentication methods. Keep this information confidential to ensure that only you have access to your account.
- Protect your Magic Band: Treat your Magic Band like you would your credit card or cash. Keep it secure and don’t leave it unattended. This will reduce the risk of unauthorized use and protect your linked credit card information.
- Regularly monitor your account activity: Stay vigilant by monitoring your credit card statements and transaction history through your My Disney Experience account or your credit card provider’s online portal. Report any suspicious activity or unauthorized charges immediately.
- Update your account and device security: Keep your operating system, web browser, and antivirus software up to date. Regularly install security patches and updates to ensure that your devices are protected against potential vulnerabilities.
- Avoid using public Wi-Fi for sensitive transactions: When accessing your My Disney Experience account or making transactions involving your linked credit card, avoid using public Wi-Fi networks. Public Wi-Fi networks can be insecure, making it easier for hackers to intercept your data.
- Be cautious of phishing attempts: Be wary of any suspicious emails, messages, or phone calls requesting your account information or credit card details. Disney will never ask you to provide sensitive information through unsolicited communication. To verify the legitimacy of a request, contact Disney directly through their official channels.
By implementing these security measures, you can help protect your credit card information and ensure a safe and secure experience when using your linked credit card and Magic Band at Disney World. Stay vigilant, report any issues promptly, and enjoy your magical adventure with peace of mind.