
Checking the Charging Indicator
One of the easiest ways to determine if your Fitbit Charge HR is charging is to check the charging indicator on the device itself. The charging indicator is a small LED light located on the side of the tracker. When your device is connected to a power source, the LED will display a series of lights to indicate the charging status.
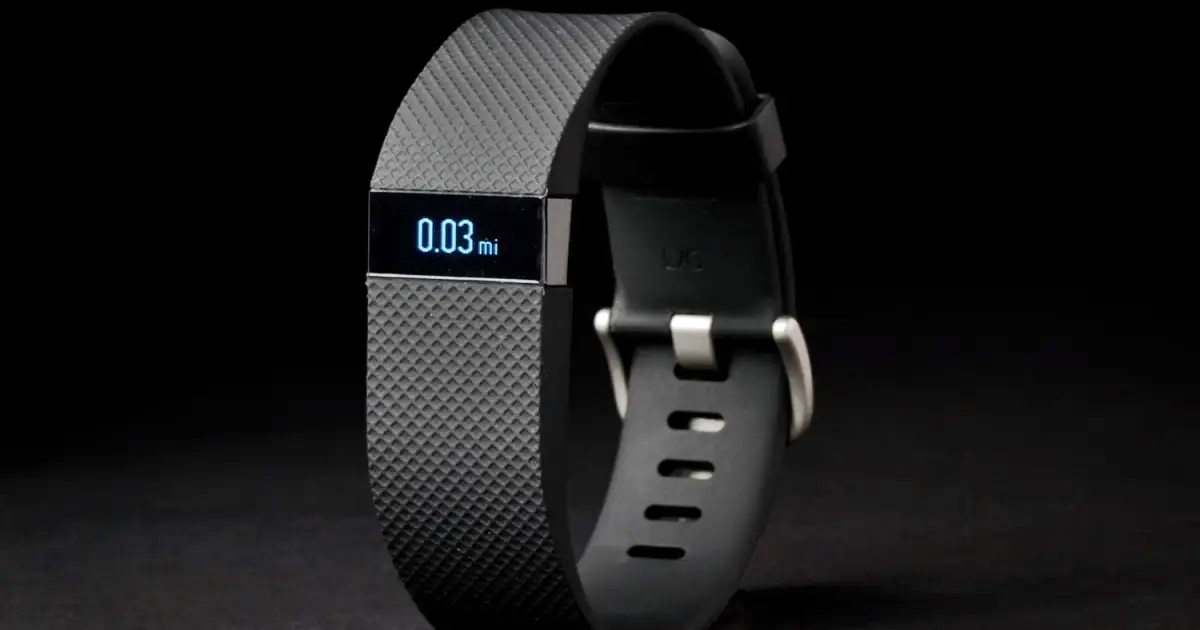
To check the charging indicator, simply connect the charging cable to your Fitbit Charge HR and plug the other end into a power source. You should see a battery symbol on the display, along with the charging indicator light. If the charging indicator light is flashing, it means that your device is charging. If the light is not flashing, try adjusting the cable to ensure it is securely connected.
In some cases, the charging indicator light may not be visible or may not function properly. If this is the case, you can also check the charging status on the Fitbit app or the Fitbit dashboard on your computer.
It’s important to note that the charging time for the Fitbit Charge HR can vary depending on the battery level and the charging source. On average, it takes about 1 to 2 hours to fully charge the device.
By regularly checking the charging indicator, you can ensure that your Fitbit Charge HR is being properly charged and will have enough power to track your activities throughout the day.
Making Sure the Charger is Properly Connected
If you’re having trouble charging your Fitbit Charge HR, it’s important to ensure that the charger is properly connected to both the device and the power source. Sometimes, a loose or faulty connection can prevent the tracker from charging effectively.
Here are a few steps you can take to make sure the charger is properly connected:
- Inspect the charging cable: Start by examining the charging cable for any signs of damage. Look for frayed wires or bent connectors that could be causing a poor connection. If you notice any issues, it may be necessary to replace the charging cable.
- Clean the charging port: Over time, dust, dirt, and debris can accumulate in the charging port of both the device and the charger. Use a soft, dry cloth or a small brush to gently clean the charging port. Be careful not to insert anything sharp or wet into the port, as this could cause damage.
- Ensure a secure connection: When connecting the charger to your Fitbit Charge HR, make sure it is inserted firmly and securely. You should feel a slight click or snap when the charger is properly connected. If the charger feels loose or does not stay in place, try adjusting it or using a different charging cable.
- Use a different power source: If you’re still having trouble, try plugging the charger into a different power source. It’s possible that the problem lies with the outlet or the power adapter. You can also try using a different USB port on your computer or a different wall adapter.
By ensuring that the charger is properly connected, you can eliminate any potential issues that may be preventing your Fitbit Charge HR from charging properly. Sometimes, a simple adjustment or cleaning is all that’s needed to get your device charging again.
Checking the Battery Icon on the Display
Another way to determine the charging status of your Fitbit Charge HR is by checking the battery icon on the display. The battery icon is a small symbol that indicates the remaining battery life of your device.
To check the battery icon, press the button on the side of your Fitbit Charge HR to wake up the display. Look for the battery icon, which typically appears as a small battery shape with a level indicator inside. The level indicator may be represented with bars or a percentage.
If the battery icon is empty or shows a low battery level, it means that your device needs to be charged. Connect the charging cable to your Fitbit Charge HR and plug the other end into a power source to begin charging.
While your device is charging, the battery icon may display a charging symbol such as a lightning bolt or a plug. This indicates that the device is actively receiving power.
Once the battery icon is fully filled or shows a high battery level, it means that your Fitbit Charge HR is fully charged and ready for use.
It’s worth noting that the battery life of your Fitbit Charge HR can vary depending on various factors such as usage, notifications, and settings. Regularly checking the battery icon can help you stay aware of your device’s battery level and ensure that it has enough power to last throughout the day.
Restarting Your Fitbit Charge HR
If your Fitbit Charge HR is not responding or not charging properly, restarting the device can often help resolve any temporary issues or glitches that may be causing the problem. Restarting your Fitbit Charge HR is a simple process that can be done in a few steps:
- Plug your Fitbit Charge HR into the charger and connect it to a power source.
- Ensure that the device is properly connected and charging.
- Press and hold the button on the side of the tracker for approximately 10-15 seconds.
- Release the button once you see the Fitbit logo appear on the display.
After the restart, the device should automatically power on and you can detach it from the charger. The Fitbit Charge HR will now be in operational mode and you can check if the charging issue has been resolved.
Restarting your Fitbit Charge HR can help resolve issues related to battery drainage, frozen screens, syncing problems, or unresponsive buttons. It essentially gives the device a fresh start and can often clear any temporary software glitches that may be causing the problem.
If restarting the device does not fix the issue and your Fitbit Charge HR is still not charging or functioning properly, you may need to consider other troubleshooting options such as resetting the device, contacting Fitbit support, or seeking assistance with a professional technician.
Connecting to the Fitbit App to Check the Battery Status
The Fitbit app provides a convenient way to monitor the battery status of your Fitbit Charge HR. By connecting your device to the app, you can easily check the current battery level and ensure that your tracker is charging properly.
To check the battery status using the Fitbit app, follow these steps:
- Ensure that your Fitbit Charge HR is paired with your smartphone or tablet through the Fitbit app. If you haven’t done so already, download the Fitbit app from the App Store or Google Play Store, create an account, and follow the on-screen instructions to pair your device.
- Open the Fitbit app on your mobile device and navigate to the Dashboard or Home screen.
- Locate the tile or widget that displays your Fitbit Charge HR and tap on it.
- Scroll down to find the battery status section, which typically shows the current battery level as a percentage.
The app will give you a real-time update on the battery level of your Fitbit Charge HR. If the battery level is low, it’s time to connect your device to a power source for charging. Conversely, if the battery level is high, your device is likely already fully charged.
In addition to checking the battery status, the Fitbit app also provides valuable insights into your overall fitness and health data. You can track your daily activity, monitor your sleep patterns, set goals, and access other features designed to improve your well-being.
By regularly connecting your Fitbit Charge HR to the Fitbit app, you can stay informed about the battery status and maximize the performance of your device.
Checking the Battery Health in the Fitbit Dashboard
The Fitbit Dashboard is a comprehensive online platform where you can access detailed information about your Fitbit Charge HR, including the battery health. Checking the battery health can give you insights into the overall condition and performance of your device’s battery.
To check the battery health in the Fitbit Dashboard, follow these steps:
- Open a web browser and navigate to the Fitbit website.
- Sign in to your Fitbit account using your credentials.
- Click on the “Dashboard” tab or navigate to your Fitbit Charge HR’s specific page.
- Look for the battery health section, which will provide you with information about the current state of your device’s battery.
The battery health section may display details such as the charging history, average battery life, and estimated battery longevity. It can also provide you with recommendations and tips for optimizing the battery performance of your Fitbit Charge HR.
In general, maintaining a healthy battery is essential for the proper functioning of your device. If the battery health section indicates any issues or a decline in battery performance, it may be necessary to take steps to extend the battery life or seek support from Fitbit customer service.
Regularly checking the battery health in the Fitbit Dashboard will help you stay aware of any potential battery-related issues and ensure that your Fitbit Charge HR remains in optimal condition.
Cleaning the Charging Port and Connector
Over time, dirt, debris, and sweat can accumulate in the charging port and connector of your Fitbit Charge HR, which can hinder proper charging. Cleaning the charging port and connector can help ensure a secure connection and improve the charging efficiency of your device.
Here’s how you can clean the charging port and connector:
- Remove your Fitbit Charge HR from the charger and power it off.
- Inspect the charging port and connector for any visible dirt or debris. Use a soft, dry cloth or a small brush to gently remove any particles from the charging port and connector.
- Be cautious not to use any sharp or abrasive objects that could cause damage to the charging port.
- If necessary, dampen the cloth with a small amount of water or a mild cleaning solution. Ensure that the cloth is not dripping wet to avoid any liquid damage to your device.
- Gently wipe the charging port and connector with the damp cloth, making sure to remove any stubborn dirt or residue.
- Allow the charging port and connector to fully dry before reconnecting your Fitbit Charge HR to the charger.
Regularly cleaning the charging port and connector can help maintain a proper and reliable connection, ensuring that your Fitbit Charge HR charges effectively without any interruptions. It is recommended to clean the charging port and connector at least once a month or as needed.
In addition to regular cleaning, it’s essential to handle the charging cable with care and avoid excessive bending or twisting, as this can lead to cable damage and affect the charging performance.
By incorporating these cleaning practices into your routine, you can optimize the charging efficiency and overall performance of your Fitbit Charge HR.