
Checking the Battery Indicator
The battery indicator on an electric scooter is a helpful tool to determine whether the scooter is charging or not. Most electric scooters have a display panel or LED lights that indicate the battery level and charging status. Here’s how to check the battery indicator to determine if your electric scooter is charging:
1. Look for the battery level icon or LED lights on the scooter’s display panel. The battery level icon is typically represented by bars or a percentage value. If the battery indicator shows a low level or empty battery, it suggests that the scooter needs charging.
2. Connect the charger to the scooter and plug it into a power outlet. Ensure that the charger is securely connected to the scooter’s charging port.
3. Observe the battery indicator. If the charging process has started, the battery level indicator should show an indication of charging. This could be an animated icon, a flashing light, or a gradual increase in the battery level.
4. Wait for some time and periodically check the battery indicator. If the battery level increases over time, it confirms that the electric scooter is indeed charging. If the battery level remains the same or continues to decrease, there may be an issue with the charging process.
5. Be patient during the charging process. Depending on the scooter model and battery capacity, it may take several hours to fully charge the battery. Refer to your scooter’s manual for the recommended charging time.
By checking the battery indicator, you can easily determine if your electric scooter is charging. It’s important to keep an eye on the battery indicator and ensure that the charging process is progressing properly. If you encounter any issues with the charging or notice any unusual behavior, it is recommended to consult the scooter’s manual or contact the manufacturer for assistance.
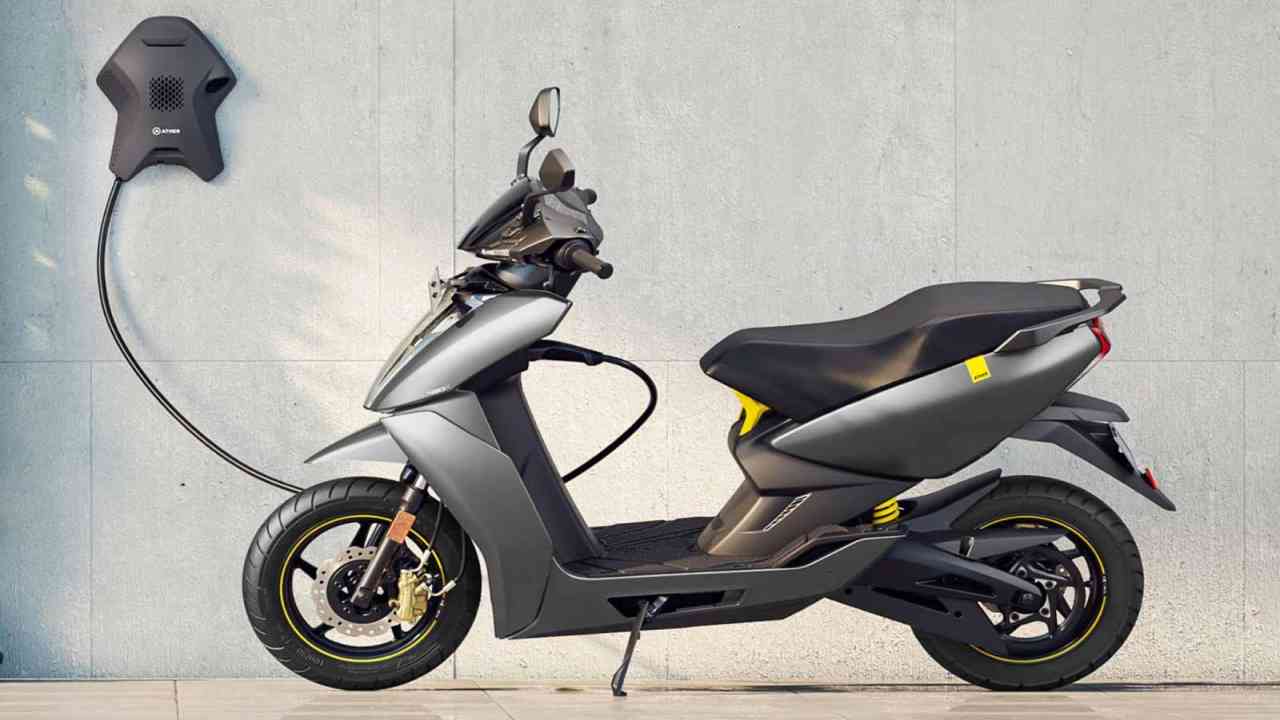
Observing the Charging Cable Connection
One of the key factors in determining whether an electric scooter is charging is to observe the charging cable connection. A secure and properly connected charging cable is essential for a successful charging process. Here are the steps to follow when observing the charging cable connection:
1. Inspect the charging cable for any visible damage or wear. Check for frayed wires, bent prongs, or other signs of wear and tear. If you notice any damage, do not attempt to use the cable, as it may pose a safety risk. Instead, replace it with a new and compatible charging cable.
2. Locate the charging port on the electric scooter. Typically, the charging port is located near the rear wheel or under the foot deck. Refer to the scooter’s manual if you’re unsure about the exact location.
3. Align the charging cable with the charging port and insert it firmly. Make sure that the charging cable is securely plugged in and that there are no loose connections. A loose or unstable connection may result in a failed charging process.
4. Once the cable is plugged in, check for any indicator lights or sounds that confirm the connection. Some scooters have LED lights near the charging port that illuminate when it is successfully connected. Additionally, you may hear a subtle click or a charging sound indicating a secure connection.
5. While the scooter is charging, periodically check the charging cable connection to ensure that it remains intact. If you accidentally bump the scooter or the cable during the charging process, it’s essential to confirm that the connection has not been disrupted.
By observing and confirming the charging cable connection, you can ensure that your electric scooter is receiving the necessary power for charging. Remember to handle the charging cable with care and always use a compatible cable provided by the scooter manufacturer. If you encounter any difficulties or inconsistencies with the charging cable connection, it is advised to consult the scooter’s manual or contact the manufacturer for further assistance.
Listening for a Charging Sound
Listening for a charging sound is another effective way to determine if an electric scooter is charging or not. While not all scooters produce audible sounds during the charging process, some models may emit a faint hum or a subtle charging sound. Here’s how you can listen for a charging sound:
1. Find a quiet location where you can concentrate and listen carefully. A noise-free environment will allow you to focus on any potential charging sounds that may be produced by the scooter.
2. Connect the charger to the scooter and plug it into a power outlet. Ensure that the charger is securely connected to the scooter’s charging port.
3. Once the charging cable is plugged in, listen closely near the scooter’s charging port. Pay attention for any faint humming sound or the subtle buzzing that may indicate the flow of electricity during the charging process.
4. If you don’t hear any distinct charging sound, that doesn’t necessarily mean the scooter isn’t charging. Not all electric scooters produce audible sounds while charging, especially on models with silent motors or efficient charging systems. In such cases, rely on other methods, such as monitoring the battery indicator or checking the charging time.
5. Keep in mind that the absence of a charging sound doesn’t necessarily indicate a problem with the scooter’s charging process. However, if you notice any strange or loud noises, it is recommended to consult the scooter’s manual or contact the manufacturer for further assistance.
Listening for a charging sound can provide additional confirmation that your electric scooter is charging. While not all scooters emit audible sounds during charging, being attentive to any potential noise can offer peace of mind. Remember to consider other indicators, such as the battery level and charging time, to ensure that your scooter is charging properly.
Monitoring the Charging Time
Monitoring the charging time is an essential aspect of determining if an electric scooter is charging. The duration it takes for the scooter’s battery to reach full charge varies depending on its capacity and the charging system. Here’s how you can effectively monitor the charging time:
1. Refer to the scooter’s manual or manufacturer’s guidelines to determine the recommended charging time. Different scooter models have varying charging times, typically ranging from a few hours to overnight.
2. Connect the charger to the scooter and plug it into a power outlet. Ensure that the charger is securely connected to the scooter’s charging port.
3. Once the charging process begins, note the time or set a timer to keep track of the charging duration.
4. Periodically check the battery indicator during the charging process. The battery level should gradually increase over time. If the battery level remains the same or decreases, there may be an issue with the charging process that requires further investigation.
5. Be patient and allow sufficient time for the scooter to charge fully. It is important not to interrupt the charging process prematurely, as it could result in a partially charged battery.
6. Once the recommended charging time has elapsed, unplug the charger from the scooter and power outlet.
By monitoring the charging time, you can ensure that your electric scooter receives the necessary charging duration for optimal battery performance. If you notice any significant deviations from the recommended charging time or encounter any issues during the process, consult the scooter’s manual or contact the manufacturer for assistance.
Feeling the Scooter for Heat
Feeling the scooter for heat is a practical method to determine if an electric scooter is charging. When the scooter is actively charging, it can generate a small amount of heat due to the electrical current flowing through the components. Here’s how you can feel the scooter for heat:
1. Before you start, make sure to turn off the scooter and disconnect the charger if it’s plugged in. Safety is paramount, and you want to avoid any potential electric shocks or accidents during this process.
2. Once the scooter is safely turned off and disconnected from the charger, allow some time for it to cool down if you have recently been riding it. You want to ensure that any residual heat from usage dissipates before proceeding.
3. With clean and dry hands, gently touch different parts of the scooter, such as the handlebars, the deck, or the motor housing. Pay attention to any areas that typically generate heat during operation.
4. If you feel a noticeable warmth on these components, it could indicate that the scooter was recently used or that the battery is currently charging. It is important to note that a slight warmth is normal, especially near the motor or the charging port, as this signifies the flow of electrical current. However, excessive heat or burning sensations could be a sign of a malfunctioning component and should be investigated further.
5. If you don’t feel any significant heat or if the scooter feels cool to the touch, it could indicate that the battery is not charging or that the scooter is fully charged. In such cases, it is essential to check other indicators such as the battery level or the charging time to confirm the status of the charging process.
Remember that the scooter’s components may vary in terms of heat generation, so if you are unsure or have specific concerns, consult the scooter’s manual or contact the manufacturer for further guidance. Feeling the scooter for heat can provide a practical indication of whether it is actively charging or not, but it is always recommended to rely on other methods such as checking the battery indicator or monitoring the charging time for a comprehensive assessment.
Examining the Charging Port and Plug
Examining the charging port and plug is crucial when determining if an electric scooter is charging. The charging port and plug are essential components that facilitate the flow of electricity from the charger to the scooter’s battery. Here’s how you can effectively examine the charging port and plug:
1. Start by locating the charging port on your electric scooter. The charging port is typically located near the rear wheel or under the foot deck. Refer to the scooter’s manual if you’re unsure about the exact location.
2. Inspect the charging port for any visible damage, dust, or debris. Ensure that the port is clean and free from any obstructions that could impede the connection between the charger and the scooter. You can use a soft cloth or a can of compressed air to remove any dirt or particles gently.
3. Check the charging plug for any signs of damage, such as bent prongs, frayed wires, or loose connections. A damaged or faulty plug may disrupt the charging process or pose a safety hazard. If you notice any damage, it is essential to replace the charging plug with a new and compatible one.
4. Align the charging plug with the charging port and ensure a secure connection. Insert the plug firmly into the port and verify that it is locked in place. A loose or unstable connection can result in a failed charging process or intermittent charging.
5. Once the charging cable is securely connected, observe the battery indicator on the scooter or listen for any charging sounds to confirm that the charging process has started successfully.
6. Periodically inspect the charging port and plug during the charging process. If you notice any unusual heat or burning smells emanating from the charging port or plug, it may indicate a malfunction that requires immediate attention. In such cases, disconnect the charger and consult the scooter’s manual or contact the manufacturer for further assistance.
By thoroughly examining the charging port and plug, you can ensure a reliable and efficient charging process for your electric scooter. Regular inspections and maintenance of these components will contribute to the longevity and optimal performance of your scooter’s battery. If you have any doubts or concerns regarding the charging port or plug, it is always recommended to consult the scooter’s manual or reach out to the manufacturer for professional guidance.