
Choosing the Right SSD for Your Laptop
When it comes to upgrading your laptop’s storage, selecting the right SSD is crucial for optimal performance and compatibility. Solid-state drives (SSDs) offer faster speeds and improved reliability compared to traditional hard disk drives (HDDs). Here are some key factors to consider when choosing an SSD for your laptop.
1. Capacity: Determine how much storage space you require. SSDs come in various capacities ranging from 120GB to 4TB or more. Consider your needs, such as the number of files, applications, and media you plan to store on your laptop.
2. Form Factor: Pay attention to the form factor of the SSD to ensure compatibility with your laptop. Common form factors for laptop SSDs include the M.2, SATA, and PCIe. Check your laptop’s specifications or consult the manufacturer’s guidelines to determine which form factor you need.
3. Read/Write Speeds: SSDs offer significantly faster read and write speeds compared to HDDs. Look for SSDs with high read and write speeds to enjoy faster boot times, faster file transfers, and seamless multitasking.
4. Interface: SSDs use different interfaces to connect to your laptop. The most common interfaces are SATA and PCIe. SATA SSDs are compatible with most laptops and offer decent performance. On the other hand, PCIe SSDs provide faster speeds but may require specific motherboard compatibility.
5. Budget: Consider your budget when selecting an SSD for your laptop. SSD prices have become more affordable over the years, but higher capacities and faster speeds can come with a higher price tag. Decide on a budget that suits your requirements and find the best SSD within that range.
6. Brand and Warranty: Stick to reputable brands that have a proven track record in producing reliable SSDs. Look for SSDs that come with a decent warranty to protect your investment.
By considering these factors, you can choose the right SSD that matches your laptop’s requirements and offers enhanced performance and storage capabilities. Once you’ve made your selection, it’s time to move on to the next step of the installation process.
Backing Up Your Data
Before proceeding with the installation of a new SSD in your laptop, it is crucial to back up your important data to prevent any loss or corruption during the process. Here’s what you need to do:
1. Identify Critical Data: Determine the data that you cannot afford to lose, such as documents, photos, videos, and important files. Make a list and prioritize what needs to be backed up.
2. Choose a Backup Method: There are several backup methods available, such as using an external hard drive, cloud storage, or a dedicated backup software. Select the method that best suits your needs and preferences.
3. External Hard Drive: If you have an external hard drive, connect it to your laptop and transfer the critical files to the drive. Ensure that you have enough storage space on the external hard drive to accommodate all your important data.
4. Cloud Storage Services: Utilize popular cloud storage services like Google Drive, Dropbox, or OneDrive to upload your files. These services offer a certain amount of free storage, and you can purchase additional space if needed.
5. Backup Software: Consider using dedicated backup software, such as Acronis True Image or Macrium Reflect, which allows you to create full system backups or specific file backups. These tools often offer advanced features and automatic scheduling for convenience.
6. Verify the Backup: After completing the backup, double-check that all your important files have been successfully transferred and stored in the chosen backup location. This step ensures that you can recover your data without any hassle in case something goes wrong during the SSD installation process.
Remember, backing up your data is a crucial step to avoid any potential data loss. It provides peace of mind and safeguards your important files and documents. Now that you have successfully backed up your data, you’re ready to move on to the next step of the SSD installation process.
Gathering the Necessary Tools
Before you begin the process of installing an SSD in your laptop, it’s important to gather the necessary tools to ensure a smooth and efficient installation. Here are the tools you will need:
1. Screwdriver: Most laptops require a Phillips or Torx screwdriver to remove the screws that secure the laptop’s casing or the storage drive itself. Check your laptop’s user manual or do a quick online search to determine the type and size of screwdriver you need.
2. Antistatic Wrist Strap: An antistatic wrist strap is essential to protect the sensitive electronic components inside your laptop from static electricity. It helps prevent electrostatic discharge, which can damage or destroy your laptop’s internal parts.
3. Microfiber Cloth: A microfiber cloth is handy for cleaning the laptop’s exterior and removing any dust or debris. Keeping your laptop clean and free from dirt ensures a better working environment for the installation process.
4. External Hard Drive Dock: If you have an external hard drive dock, it can be useful for transferring data from your old storage drive to the new SSD. This tool allows you to connect both drives simultaneously for easy data transfer.
5. USB to SATA Adapter: A USB to SATA adapter is an alternative option for transferring data from your old storage drive to the new SSD if you don’t have an external hard drive dock. This adapter allows you to connect the storage drive externally via USB.
6. Labels and Pen: To keep things organized during the installation process, use labels and a pen to mark the cables, screws, and other components that you remove. This ensures that you can easily identify and reassemble everything correctly later on.
7. User Manual or Online Guide: Make sure to have the user manual or an online guide specific to your laptop’s model and brand. These resources provide step-by-step instructions and illustrations that can be helpful throughout the installation process.
By gathering these necessary tools beforehand, you’ll be well-prepared to tackle the installation of the SSD in your laptop. Once you have everything you need, you can proceed confidently to the disassembly of your laptop in the next step.
Disassembling Your Laptop
Before you can install your new SSD, you’ll need to carefully disassemble your laptop to access the storage drive. While the process may vary slightly depending on the make and model of your laptop, here are some general steps to follow:
1. Power Off and Disconnect: Power down your laptop completely and unplug it from any power source. This step ensures your safety and prevents any data corruption or damage to the internal components.
2. Remove the Battery: If your laptop has a removable battery, take it out before proceeding further. This step ensures there is no residual power running through the system as you disassemble it.
3. Ground Yourself: Ground yourself by wearing an antistatic wrist strap or by touching a grounded metal surface. This helps discharge any static electricity and prevents accidental damage to the laptop’s sensitive components.
4. Locate Screw Covers: Look for screw covers on the bottom of your laptop. These covers may be circular or rectangular and are designed to conceal screws. Use a small tool or your fingernail to carefully remove these covers.
5. Remove Screws: Use the appropriate screwdriver to remove the screws that secure the bottom panel of your laptop. Keep these screws in a safe place or attach them to a labeled piece of tape to avoid misplacing them.
6. Separate the Bottom Panel: Once the screws are removed, gently pry open the bottom panel using a plastic opening tool or a guitar pick. Be cautious and take your time to avoid damaging any internal components.
7. Locate the Storage Drive: The storage drive is typically located in a designated bay or slot. Consult your laptop’s user manual or an online guide to locate and identify the storage drive.
8. Disconnect Cables: Carefully disconnect any cables or connectors that are attached to the storage drive. Some connectors may have latches that need to be released before removing the cable.
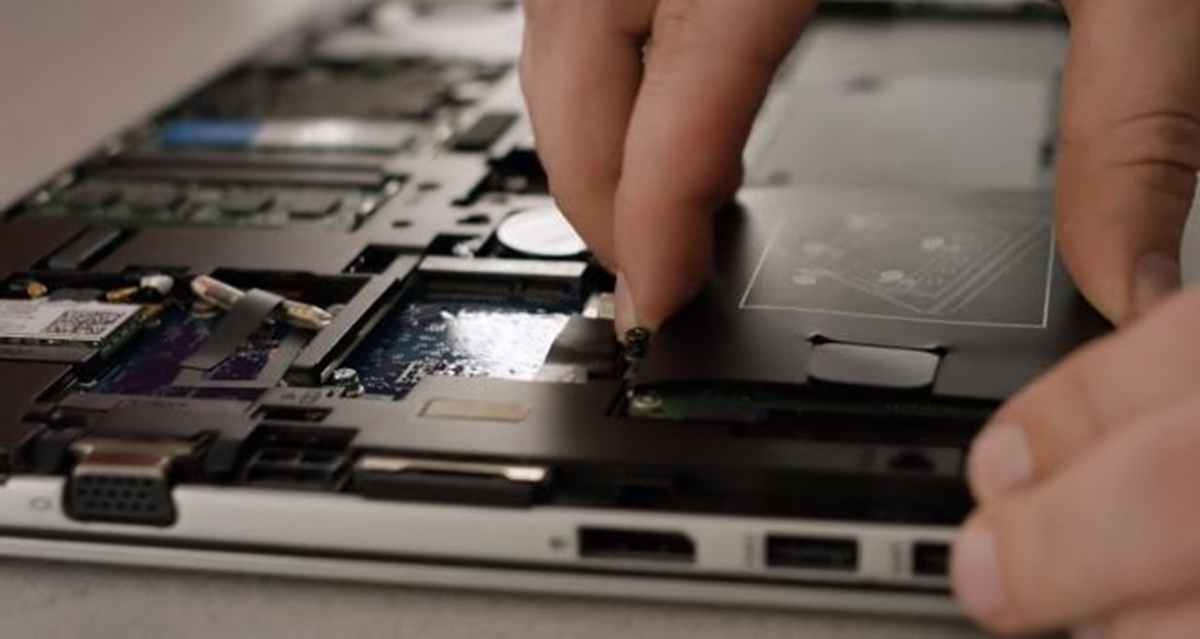
9. Remove the Storage Drive: Once the cables are disconnected, gently slide or lift the storage drive out of its slot or bay. Handle it with care and avoid touching the sensitive components.
10. Set Aside the Old Storage Drive: Set aside the old storage drive in a safe place. If you plan on reusing it or need to recover any data from it, store it in an antistatic bag to prevent damage.
By following these steps, you’ll be able to successfully disassemble your laptop and gain access to the storage drive. Make sure to keep track of the screws and components you remove and proceed to the next steps for installing your new SSD.
Locating the Storage Drive
Before you can replace the storage drive in your laptop with a new SSD, you need to locate the current storage drive. The exact location may differ depending on the make and model of your laptop, but here are some general guidelines to help you find it:
1. Consult the User Manual: The user manual for your laptop is a valuable resource that provides detailed information on the internal components and their locations. If you have access to the manual, refer to it for specific instructions on finding the storage drive.
2. Online Guides and Tutorials: In addition to the user manual, you can find helpful online guides and tutorials specific to your laptop’s make and model. These guides often include step-by-step instructions and illustrations to assist you in locating the storage drive.
3. Check the Bottom Panel: Start by removing the bottom panel of your laptop. Look for any labeled components or removable bays. In many cases, the storage drive is easily visible and accessible once the bottom panel is removed.
4. Look for Drive Labels: On your laptop’s motherboard, you may find drive labels or indicators that help identify the storage drive. These labels may be in the form of text or icons, such as “HDD” or “SSD,” and can assist you in pinpointing the location.
5. Follow the Cables: Trace the cables connected to the bottom or side of your laptop to determine their endpoint. In some cases, the cables will lead you directly to the storage drive. Be cautious when handling the cables to avoid accidentally disconnecting other components.
6. Consider the Size and Shape: The storage drive is usually a rectangular or square-shaped device that resembles a small circuit board. It will typically be smaller and flatter compared to other components within your laptop.
7. Ask for Professional Assistance: If you’re unsure about locating the storage drive or encounter difficulties during the process, it’s best to seek assistance from a professional technician. They have the expertise to guide you and ensure a successful drive replacement.
By following these general guidelines and utilizing available resources, you should be able to locate the storage drive in your laptop. Once you have identified the drive, you can proceed with the necessary steps to remove it and prepare for the installation of your new SSD.
Removing the Old Storage Drive
Now that you have located the storage drive in your laptop, it’s time to remove the old drive in preparation for installing your new SSD. Follow these steps to safely remove the old storage drive:
1. Ensure Proper Safety Measures: Before proceeding, power off your laptop and disconnect it from any power sources. Put on an antistatic wrist strap or touch a grounded metal surface to discharge any static electricity.
2. Disconnect Cables: Identify the cables connected to the old storage drive. These cables may include the data cable (usually a SATA cable) and the power cable. Gently unplug these cables from the drive, ensuring not to pull on them forcefully.
3. Remove Mounting Screws: Look for any screws or brackets securing the old storage drive in place. Use a screwdriver to carefully remove these screws, setting them aside in a safe location. Make sure to note which screws correspond to the drive for easier reassembly later.
4. Slide or Lift Out the Drive: Once the cables and mounting screws are disconnected, you can slide or lift the old storage drive out of its slot or bay. Be gentle and avoid excessive force, as the drive may be held in place by small clips or brackets.
5. Set Aside the Old Storage Drive: After removing the old storage drive, set it aside in a safe location. If you plan to reuse it or extract data from it later, store it in an antistatic bag to protect it from electrostatic damage.
6. Inspect the Drive Bay: Take a moment to inspect the drive bay or slot where the old storage drive was located. Ensure that there is no debris or dust present that could impede the installation of the new SSD.
By following these steps carefully, you can successfully remove the old storage drive from your laptop. With the old drive out of the way, you’re now ready to prepare the new SSD for installation.
Preparing the New SSD
With the old storage drive removed from your laptop, it’s time to prepare the new SSD for installation. Here are the essential steps to follow in preparing the new SSD:
1. Check Compatibility: Ensure that the new SSD is compatible with your laptop by verifying the form factor, interface, and capacity. Refer to your laptop’s specifications or user manual to confirm compatibility requirements.
2. Read the Manufacturer’s Instructions: Review the manufacturer’s instructions that come with the SSD. This will provide specific information on any preparation steps or precautions you need to take before installation.
3. Format the SSD (if required): In some cases, the new SSD may need to be formatted before use. Check the instructions or manufacturer’s website for guidance on formatting the drive using your operating system (such as Windows or macOS).
4. Update SSD Firmware (if necessary): It’s a good idea to check if there are any firmware updates available for the new SSD. Visit the manufacturer’s website or use their software tool to download and install any firmware updates to ensure optimum performance and compatibility.
5. Handle the SSD With Care: SSDs are sensitive to static electricity, moisture, and physical damage. Handle the SSD with caution and avoid touching the gold connectors or exposing it to excessive moisture or heat.
6. Remove any Protective Covers or Stickers: Check the SSD for any protective covers or stickers. If present, carefully remove them before proceeding with the installation. These covers are typically used to protect the connectors or prevent static buildup during shipping.
7. Store the Hard Drive in a Safe Place: If you plan to store the old storage drive as a backup or for data retrieval, place it in an antistatic bag and store it in a safe, dry location to prevent any damage or data loss.
By following these steps, you can properly prepare your new SSD for installation. Once the SSD is prepared, you can move on to the next phase of the installation process, which is installing the new SSD into your laptop.
Installing the New SSD in Your Laptop
Now that you have prepared the new SSD, it’s time to install it into your laptop. Follow these steps to ensure a successful and secure installation:
1. Insert the SSD into the Drive Bay: Align the new SSD with the drive bay or slot in your laptop. Gently slide the SSD into place, ensuring that it makes a firm and secure connection.
2. Secure the SSD with Mounting Screws: If there are mounting screw holes on the SSD and in the drive bay, use the appropriate screws to secure the SSD in place. Tighten the screws, but be cautious not to overtighten, as this can damage the drive.
3. Connect the SATA and Power Cables: Connect the SATA data cable and power cable to the corresponding ports on the SSD. Ensure that the connectors are properly aligned and securely attached.
4. Replace the Bottom Panel: Carefully align the bottom panel of your laptop and gently press it back into place. Ensure that all the edges align properly and that there are no gaps or loose connections.
5. Insert and Secure the Screws: Use the appropriate screwdriver to insert and secure the screws in the bottom panel of your laptop. Tighten them firmly but avoid overtightening to prevent damage to the screws or the laptop’s casing.
6. Reinsert the Battery (if applicable): If you had removed the battery earlier, reinsert it back into its compartment and ensure that it is securely in place.
7. Power On and Verify the SSD: Power on your laptop and enter the BIOS/UEFI settings to confirm that the new SSD is detected. If the SSD is properly installed, it should be recognized as a storage device in the system settings.
8. Install Operating System (if necessary): If you have replaced the main storage drive and want to install a fresh operating system, follow the instructions provided by your operating system (such as Windows or macOS).
By following these steps carefully, you can successfully install the new SSD into your laptop. This upgrade will provide you with improved storage performance and allow you to take full advantage of the benefits that SSDs offer.
Reassembling Your Laptop
After successfully installing the new SSD in your laptop, it’s time to reassemble all the components and put your laptop back together. Follow these steps to ensure a proper reassembly:
1. Gather All Removed Components: Collect all the components, screws, and cables that you removed during the disassembly process. Ensure that you have everything before proceeding.
2. Align and Attach the Bottom Panel: Carefully align the bottom panel with the laptop’s casing. Press it down gently to snap it back into place. Ensure that all the edges align properly and that there are no gaps.
3. Insert and Secure the Screws: Use your screwdriver to insert and secure the screws in their respective positions on the bottom panel. Tighten them firmly but do not overtighten to avoid damaging the laptop’s casing.
4. Reconnect Cables and Connectors: Reattach any cables and connectors that were disconnected earlier. Refer to labels or notes made during the disassembly process to ensure the correct connections are made.
5. Reinsert the Battery: If you had removed the battery, reinsert it back into its compartment and ensure that it is securely in place.
6. Power On and Test: Power on your laptop to ensure that all the components are functioning as intended. Verify that the new SSD is being detected properly and that the laptop boots up correctly.
7. Update Drivers and Software: After the reassembly, it’s a good idea to update any drivers or software related to your laptop’s hardware components. Check the manufacturer’s website for the latest updates.
8. Perform a Test Run: Use your laptop for a test run to verify that everything is working smoothly. Test the new SSD by accessing files, running applications, and performing various tasks to ensure optimal performance.
By following these steps carefully, you can successfully reassemble your laptop after installing the new SSD. Take your time and be mindful of the connections and alignment of components to ensure a seamless reassembly process.
Booting Up Your Laptop with the SSD
Now that you have completed the installation and reassembly of your laptop with the new SSD, it’s time to boot up your laptop and experience the benefits of improved storage performance. Follow these steps to ensure a smooth and successful boot-up:
1. Power on Your Laptop: Press the power button to turn on your laptop. Depending on your laptop’s model, you may need to press a specific key (such as F2 or Del) to access the BIOS/UEFI settings.
2. Enter the BIOS/UEFI Settings: During the booting process, look for on-screen instructions or refer to your laptop’s manual to determine the key to access the BIOS/UEFI settings. Press the designated key before the operating system starts to load.
3. Check SSD Recognition: Navigate to the storage or drive configuration section in the BIOS/UEFI settings. Verify that the new SSD is detected and recognized as a storage device. If the SSD is not detected, double-check the connections and ensure that it is properly seated in the drive bay.
4. Configure Boot Order: Adjust the boot order in the BIOS/UEFI settings to prioritize the new SSD as the primary boot device. This ensures that your laptop will boot up from the SSD instead of the old storage drive or any other connected devices.
5. Save and Exit: Once you have made the necessary changes in the BIOS/UEFI settings, save the changes and exit. Your laptop will restart, and the operating system should load from the new SSD.
6. Verify Successful Boot-up: After the restart, your laptop should boot up from the new SSD. You can check the performance improvement by observing faster boot times, quicker access to files and applications, and overall improved system responsiveness.
7. Install Operating System (if necessary): If you haven’t already installed the operating system on the new SSD, you may need to proceed with the installation process. Follow the instructions provided by your operating system (such as Windows or macOS) to install the operating system on the SSD.
By following these steps, you can successfully boot up your laptop using the new SSD. Enjoy the enhanced speed and performance that the SSD brings to your laptop, making your computing experience more efficient and enjoyable.
Formatting the New SSD
After installing a new SSD in your laptop, you may need to format it before you can start using it. Formatting involves preparing the SSD by creating a file system that the operating system can recognize and use. Here’s how to format your new SSD:
1. Open Disk Management: On Windows, right-click on the Start button and select “Disk Management” from the context menu. On macOS, go to “Applications,” then “Utilities,” and open “Disk Utility.”
2. Identify the New SSD: In Disk Management or Disk Utility, locate the new SSD among the listed drives. Ensure that it is the correct drive by checking the capacity or the model number.
3. Initialize the SSD: In Disk Management (Windows), right-click on the new SSD and select “Initialize Disk.” On Disk Utility (macOS), select the new SSD and click on the “Erase” or “Partition” tab.
4. Select Partition Style and Format: Follow the prompts to choose the partition style (such as MBR or GPT) and the file system format (such as NTFS for Windows or APFS for macOS) for the new SSD.
5. Assign a Drive Letter (Windows Only): If you’re formatting the SSD on Windows, you’ll be prompted to assign a drive letter. Choose an available letter or accept the default assignment.
6. Confirm the Formatting: Review the formatting settings and click “OK” or “Apply” to start the formatting process. Understand that formatting will erase all data on the SSD, so make sure you have a backup if necessary.
7. Wait for the Formatting to Complete: The formatting process may take a few minutes, depending on the size of the SSD. Avoid interrupting the process or powering off your laptop during this time.
8. Verify the Formatted SSD: Once the formatting is complete, the new SSD should appear as a formatted drive in Disk Management (Windows) or Disk Utility (macOS). It’s now ready for use.
Formatting the new SSD prepares it for use by creating a file system that your operating system can work with. By following these steps, you can successfully format your new SSD and start using it to store and access your files and applications.
Transferring Data to the New SSD
Once you have installed and formatted your new SSD, it’s time to transfer your data from the old storage drive to the new SSD. Here are some methods you can use to transfer your data:
1. Manual File Transfer: The simplest method is manually transferring files and folders from the old storage drive to the new SSD. Connect both drives to your laptop simultaneously (using an external hard drive dock or USB to SATA adapter) and copy and paste the files from the old drive to the new SSD.
2. Disk Cloning Software: Disk cloning software, such as Clonezilla or Macrium Reflect, allows you to create an exact replica of your old storage drive on the new SSD. This method is suitable when you want to transfer everything, including the operating system and installed software.
3. Cloud Storage Transfer: If you have cloud storage accounts like Google Drive, Dropbox, or OneDrive, you can upload your important files and folders to these services and then sync them to your new SSD. This method is particularly useful for smaller files and limited storage capacities.
4. Time Machine (macOS) or File History (Windows): If you had been using Time Machine (macOS) or File History (Windows) to back up your data, you can restore your files and settings to the new SSD directly from these backup systems. Follow the respective instructions for your operating system to perform the restore.
5. Reinstalling Applications: To ensure optimal performance and compatibility, it is recommended to reinstall your applications directly onto the new SSD. This way, your applications will be properly configured to take advantage of the SSD’s speed.
6. Organize and Clean Up: As you transfer data to the new SSD, take the opportunity to review and organize your files. Remove any unnecessary or outdated files to free up space on the SSD and optimize storage efficiency.
7. Verify Data Integrity: After the data transfer is complete, double-check that all your important files and folders are successfully transferred and accessible on the new SSD. Open a few files and folders to ensure they open without any issues.
By using these methods, you can efficiently transfer your data to the new SSD, ensuring that all your important files, folders, and applications are easily accessible. Take your time and prioritize your most critical data for transfer first to ensure a smooth transition to the new SSD.
Troubleshooting if SSD is not Detected
If your new SSD is not being detected by your laptop, don’t panic. Here are some troubleshooting steps you can take to resolve the issue:
1. Check SSD Connections: Ensure that the SSD is properly connected to the SATA data cable as well as the power cable. Double-check both ends of the cables and make sure they are securely attached.
2. Verify Power Supply: Make sure that the laptop is receiving adequate power and the power cable is working properly. Try plugging your laptop into a different power outlet or using a different power cable if available.
3. Reboot Your Laptop: Sometimes a simple reboot can resolve detection issues. Power down your laptop completely and then power it back on to see if the SSD is detected upon startup.
4. Update BIOS/UEFI Settings: Access the BIOS/UEFI settings and ensure that the SATA mode is set correctly (usually AHCI mode) to allow detection of the SSD. Consider updating your BIOS/UEFI firmware to the latest version from the manufacturer’s website.
5. Use a Different SATA Port and Cable: If your laptop has multiple SATA ports, try connecting the SSD to a different port. Additionally, if possible, try using a different SATA cable to rule out any issues with the current cable.
6. Verify SSD Compatibility: Confirm that the SSD is indeed compatible with your laptop. Review the manufacturer’s specifications and compatibility guidelines to ensure that the SSD meets the required form factor, interface, and capacity for your laptop.
7. Test the SSD on Another System: Try connecting the SSD to another computer or laptop to see if it is detected. If it works on another system, the issue may lie with your laptop’s configuration or settings.
8. Contact Manufacturer Support: If none of the above steps resolve the issue, reach out to the SSD manufacturer’s customer support for further assistance. They may be able to provide specific troubleshooting steps or determine if there is a defect with the SSD.
Remember, troubleshooting the detection issue may involve technical steps, so approach the process with caution and refer to your laptop’s documentation or seek professional help if necessary.
Extend SSD Lifespan with Regular Maintenance
To ensure longevity and optimal performance, it’s important to maintain your SSD with regular maintenance. Here are some practices to help extend the lifespan of your SSD:
1. Enable TRIM: TRIM is a command that helps your SSD to efficiently manage and maintain performance over time. Check if TRIM is enabled on your operating system, as it can greatly improve the longevity and overall performance of your SSD.
2. Update Firmware: Keep your SSD firmware up to date by checking the manufacturer’s website for any available updates. Firmware updates often include performance optimizations, bug fixes, and enhancements for better SSD performance and reliability.
3. Avoid Extreme Temperatures: SSDs are sensitive to high temperatures, which can affect their lifespan. Ensure your laptop operates within the recommended temperature range, and avoid exposing your laptop to extreme heat or cold for prolonged periods.
4. Don’t Fill to Capacity: To maintain performance and prevent unnecessary wear on your SSD, avoid filling it to its maximum capacity. Leaving a portion of the SSD space unoccupied allows the SSD to function more efficiently and can help prolong its lifespan.
5. Minimize Write Operations: Excessive write operations can contribute to SSD wear. Minimize unnecessary write operations by regularly cleaning up temporary files, reducing download activity, and avoiding constant heavy data transfers.
6. Regularly Backup Data: Despite their reliability, SSDs can still experience failures. Regularly backup your important data to an external storage device or cloud storage to ensure that your data is protected and recoverable in case of any issues with the SSD.
7. Properly Shut Down Your Laptop: Avoid abrupt shutdowns or power outages, as they can potentially corrupt data or cause issues with the SSD. Properly shut down your laptop or use the recommended sleep/hibernation modes to minimize any risks.
8. Perform Periodic Disk Checks: Occasionally, run disk checks or diagnostic tools provided by your operating system or SSD manufacturer to identify any potential issues or errors with the SSD. These tools can help detect and resolve issues early on.
By following these maintenance practices, you can help extend the lifespan and maintain the performance of your SSD. Regularly evaluating and optimizing your SSD’s health will ensure that it continues to serve you reliably for an extended period.