
Prerequisites for Controlling TP-Link Outlet with Amazon Echo
Controlling your TP-Link outlet with Amazon Echo is a convenient way to automate your home and make your life easier. Before you get started, there are a few things you need to have in place. Make sure you have the following prerequisites before proceeding with the setup process.
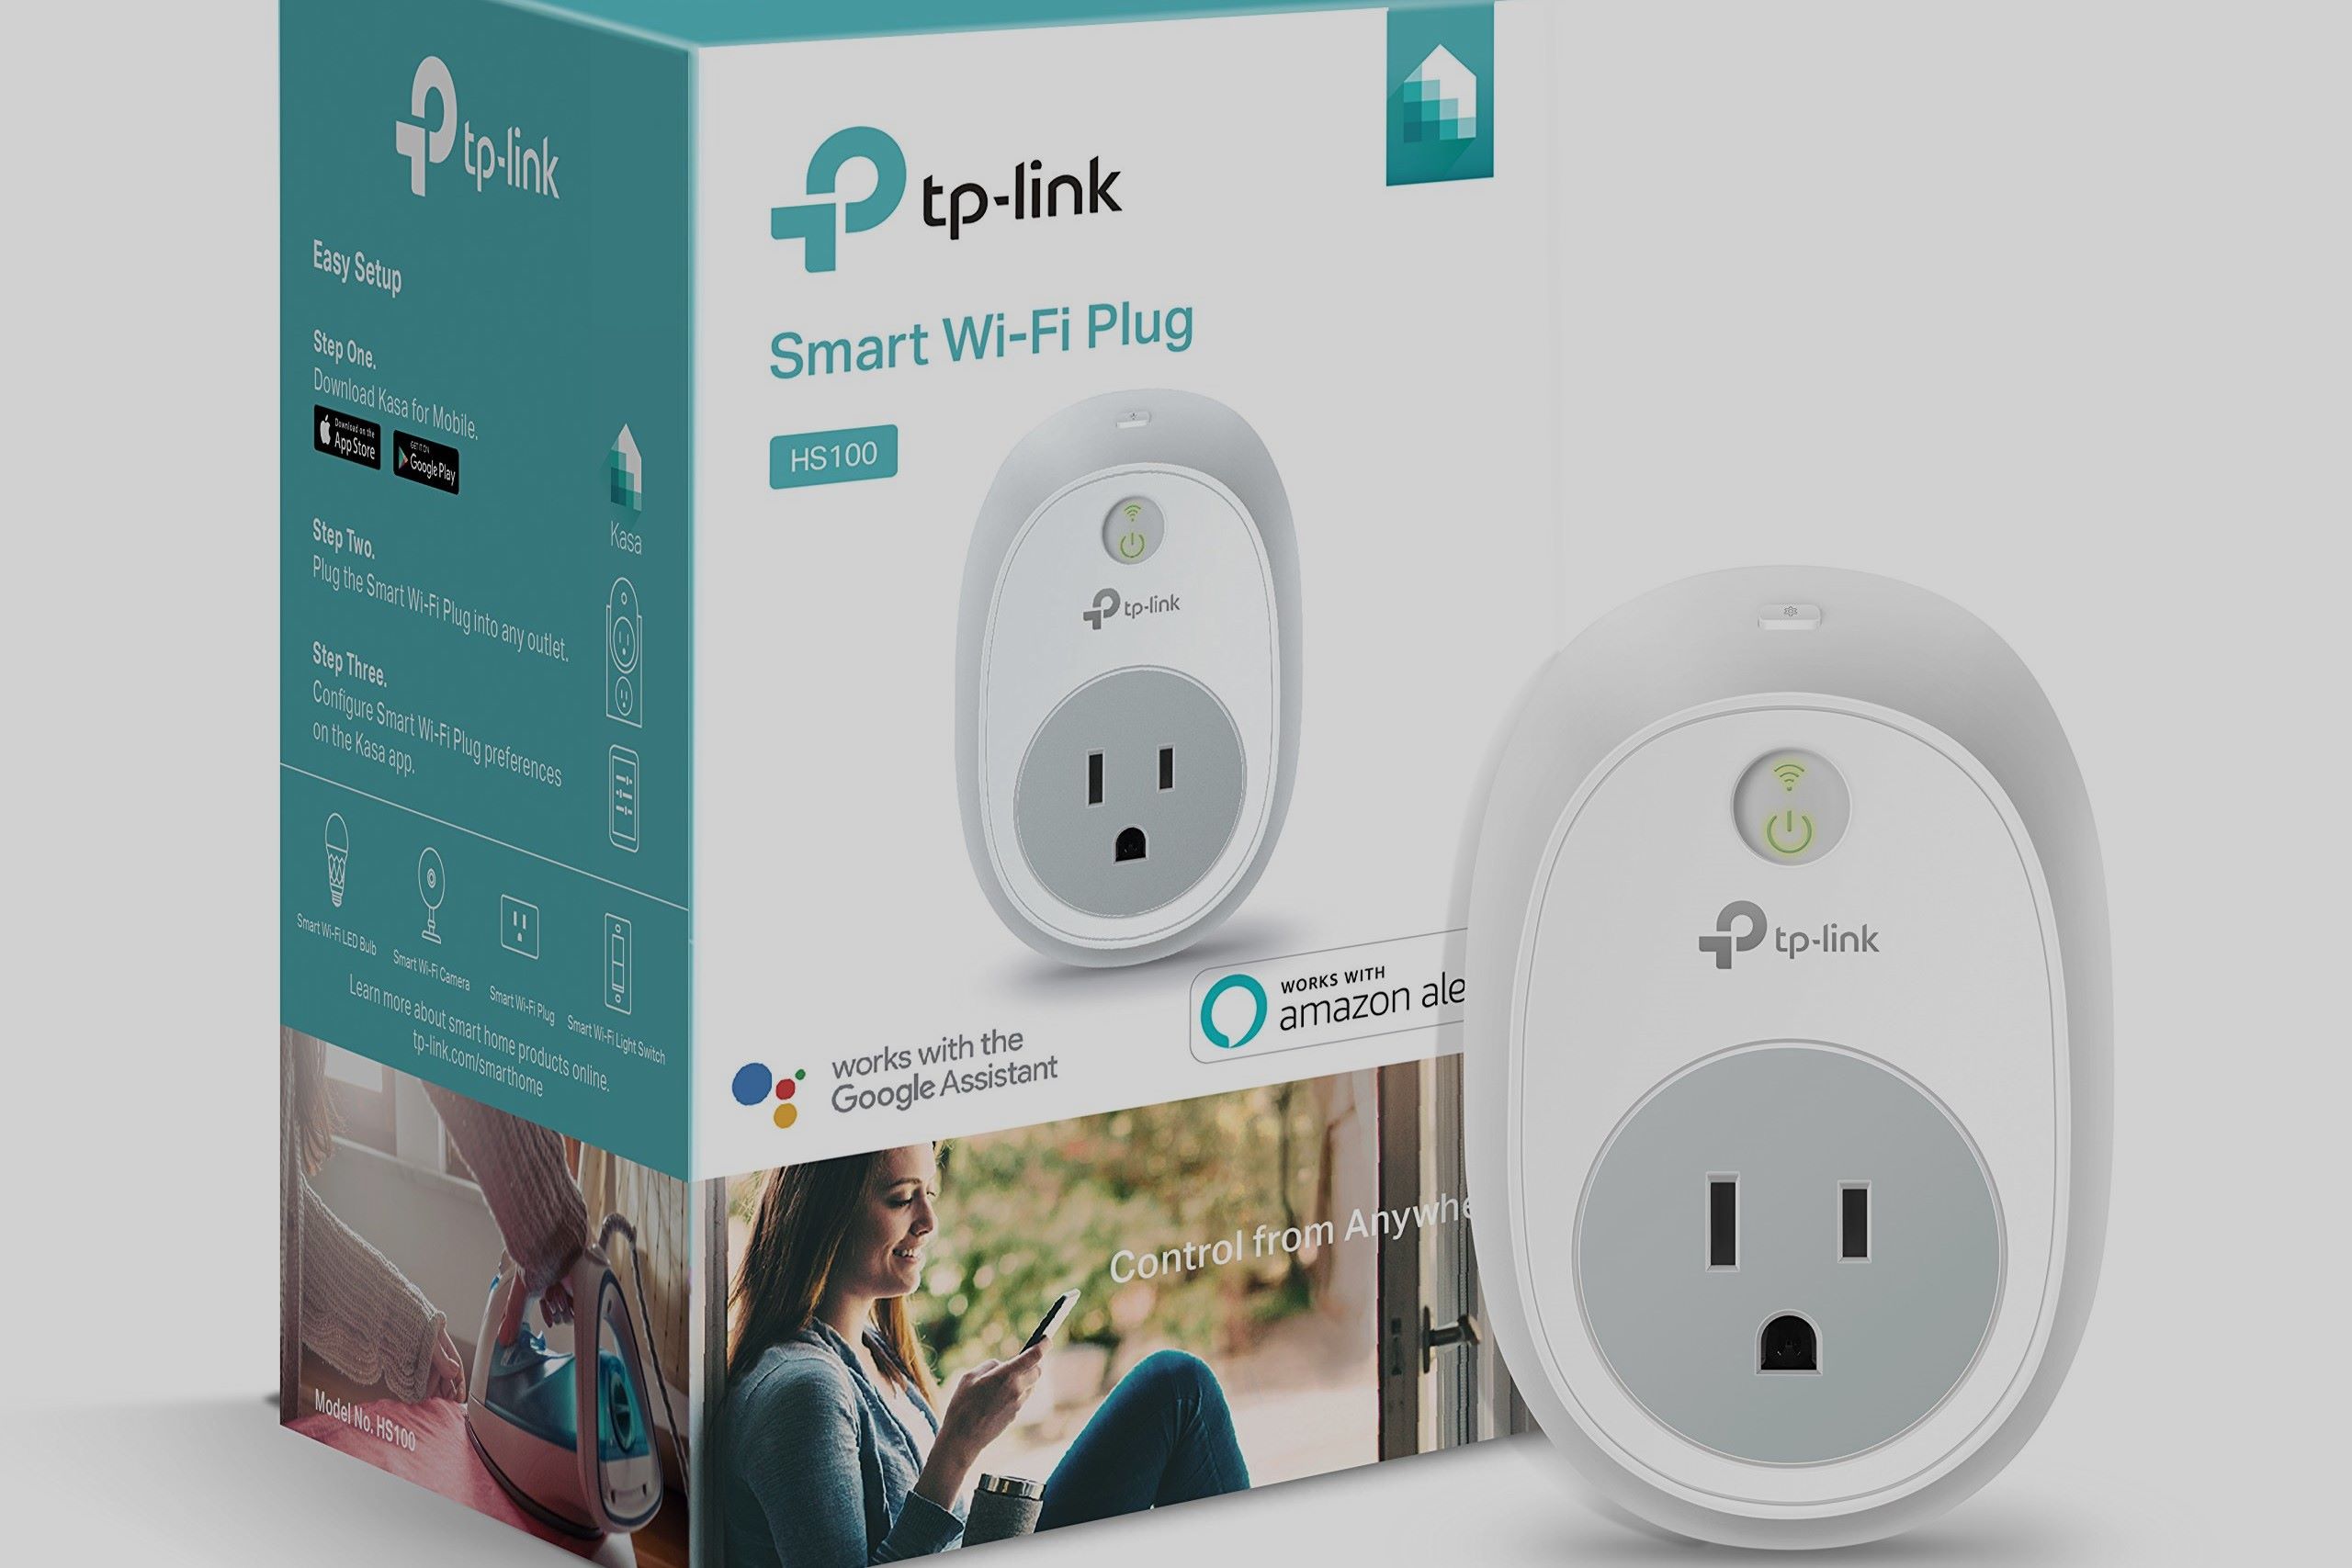
1. A TP-Link Outlet: You will need a TP-Link outlet, such as the TP-Link Kasa Smart Plug. This device allows you to control the power to any connected device, such as lamps, appliances, or electronics, with a simple voice command.
2. An Amazon Echo Device: To control the TP-Link outlet, you will need an Amazon Echo device, such as the Echo Dot, Echo, or Echo Show. These devices come equipped with the voice-controlled personal assistant Alexa, which allows you to control various smart home devices with just your voice.
3. A Wi-Fi Network: Both the TP-Link outlet and the Amazon Echo device need to be connected to a Wi-Fi network for them to communicate with each other. Ensure that you have a stable and reliable Wi-Fi connection in your home.
4. The TP-Link Kasa App: Before setting up the TP-Link outlet, make sure you have downloaded and installed the TP-Link Kasa app on your smartphone or tablet. This app is essential for the initial setup and configuration of your TP-Link outlet.
5. The Amazon Alexa App: To enable the TP-Link skill and control your TP-Link outlet with Amazon Echo, you need to have the Amazon Alexa app installed on your smartphone or tablet. This app acts as a control center, allowing you to manage your connected devices, set up routines, and customize your voice commands.
Having these prerequisites in place ensures a smooth setup process and seamless integration between your TP-Link outlet and Amazon Echo. Once you have everything ready, you can proceed to the next steps to set up and control your TP-Link outlet with Amazon Echo.
Step 1: Set up the TP-Link Outlet
Setting up the TP-Link outlet is the first step in controlling it with Amazon Echo. Follow these instructions to get your TP-Link outlet up and running.
- Plug in the TP-Link Outlet: Find a suitable location for the TP-Link outlet near the device you want to control. Plug the TP-Link outlet into a wall socket and ensure it is within range of your Wi-Fi network.
- Download and Open the TP-Link Kasa App: On your smartphone or tablet, download the TP-Link Kasa app from the App Store or Google Play Store. Open the app and sign in or create a TP-Link account if prompted.
- Add the TP-Link Outlet: In the Kasa app, tap the “+” icon to add a new device. Select the “Smart Plug” option and follow the on-screen instructions to connect the TP-Link outlet to your Wi-Fi network. Make sure to enter the correct Wi-Fi credentials when prompted.
- Test the Outlet: Once the TP-Link outlet is successfully connected to your Wi-Fi network, you can test it by turning it on and off using the Kasa app. This step ensures that the outlet is functioning correctly before integrating it with Amazon Echo.
By completing these steps, you have successfully set up the TP-Link outlet and ensured its proper functioning. Now, you are ready to proceed with connecting your Amazon Echo device to control the TP-Link outlet.
Step 2: Connect Amazon Echo to Wi-Fi
To control your TP-Link outlet with Amazon Echo, you need to connect your Amazon Echo device to your Wi-Fi network. Follow these steps to ensure a seamless Wi-Fi connection.
- Power on your Amazon Echo: Plug in your Amazon Echo device and wait for it to power on. The light ring on the device will turn blue and then orange, indicating that it is in setup mode.
- Open the Amazon Alexa App: On your smartphone or tablet, open the Amazon Alexa app. If you haven’t already, download the app from the App Store or Google Play Store and sign in with your Amazon account.
- Add a New Device: In the Amazon Alexa app, tap the menu icon in the top left corner and select “Add Device.” Choose the type of device you are setting up, which in this case is an Amazon Echo device.
- Follow the On-Screen Instructions: The Alexa app will guide you through the setup process. Select your Amazon Echo device from the list, and ensure that the Wi-Fi network displayed on the app matches your home network.
- Enter Wi-Fi Password: When prompted, enter the password for your Wi-Fi network. This step is crucial to ensure a secure and stable connection between your Amazon Echo device and your home network.
- Wait for Connection Confirmation: The Alexa app will attempt to connect your Amazon Echo device to your Wi-Fi network. Once the connection is established, you will receive a confirmation message on the app.
By following these steps, you have successfully connected your Amazon Echo device to your Wi-Fi network. This connection is vital for communication between your Amazon Echo device and the TP-Link outlet, allowing you to control the outlet using voice commands through Alexa.
Step 3: Install the Amazon Echo App
Before you can control your TP-Link outlet with Amazon Echo, you need to install the Amazon Echo app on your smartphone or tablet. This app serves as a control center for your Amazon Echo device and allows you to manage its settings, skills, and connected devices. Follow these steps to install the Amazon Echo app.
- Open the App Store or Google Play Store: Depending on your device, open either the App Store (iOS) or Google Play Store (Android) on your smartphone or tablet.
- Search for the Amazon Alexa App: In the App Store or Google Play Store, search for “Amazon Alexa” in the search bar.
- Select and Install the App: From the search results, choose the official Amazon Alexa app and tap on it. Then, tap on the “Install” or “Get” button to start the installation process.
- Wait for the App to Install: The app will begin downloading and installing on your device. Wait for the process to complete.
- Open the Amazon Echo App: Once the installation is complete, locate the Amazon Alexa app on your device’s home screen or in the app drawer, and tap on it to launch the app.
- Sign in with your Amazon Account: If you already have an Amazon account, sign in with your credentials. If not, create a new account by following the on-screen instructions.
By following these steps, you have successfully installed the Amazon Echo app on your smartphone or tablet. This app is essential for managing your Amazon Echo device and its integration with the TP-Link outlet. Now you are ready to proceed with the next steps to enable the TP-Link skill and control your outlet with Amazon Echo.
Step 4: Enable the TP-Link Skill in the Amazon App
To enable the integration between your TP-Link outlet and Amazon Echo, you need to enable the TP-Link skill in the Amazon app. The skill acts as a bridge, allowing Alexa to control the TP-Link outlet. Follow these steps to enable the TP-Link skill in the Amazon app.
- Open the Amazon Alexa App: On your smartphone or tablet, open the Amazon Alexa app if you haven’t done so already.
- Tap on the Menu Icon: Look for the menu icon (three parallel lines) in the top left corner of the app and tap on it.
- Select “Skills & Games”: From the menu, select “Skills & Games” to access the list of available skills.
- Search for the TP-Link Skill: In the search bar at the top, type “TP-Link” and tap on the search icon.
- Choose the TP-Link Kasa Skill: From the search results, identify the TP-Link Kasa skill and tap on it to open the skill details.
- Tap on “Enable” Skill: On the skill details page, tap on the “Enable” button to enable the TP-Link skill.
- Sign in to Your TP-Link Account: If prompted, sign in to your TP-Link account using your TP-Link account credentials. This step is necessary to link your TP-Link devices with the Amazon Echo.
- Authorize the TP-Link Skill: Follow the on-screen instructions to authorize the TP-Link skill to access and control your TP-Link outlet. This step establishes the connection between Amazon Echo and your TP-Link devices.
By following these steps, you have successfully enabled the TP-Link skill in the Amazon app. This integration allows you to control your TP-Link outlet with voice commands through Amazon Echo. Now you’re ready to move on to the next step and discover your TP-Link outlet in the Amazon app.
Step 5: Discover Your TP-Link Outlet
Once you have enabled the TP-Link skill in the Amazon app, the next step is to discover your TP-Link outlet. This process allows Amazon Echo to recognize and control your TP-Link device. Follow these steps to discover your TP-Link outlet in the Amazon app.
- Open the Amazon Alexa App: Launch the Amazon Alexa app on your smartphone or tablet.
- Tap on the Menu Icon: Look for the menu icon (three parallel lines) in the top left corner of the app and tap on it.
- Select “Smart Home”: From the menu, choose “Smart Home” to access the smart home settings.
- Tap on “Devices”: On the Smart Home screen, tap on “Devices” to view your connected devices.
- Tap on “Discover Devices”: In the Devices section, tap on “Discover Devices” to initiate the device discovery process.
- Wait for the Discovery to Complete: The Amazon app will now search for connected devices on your network, including the TP-Link outlet. Allow some time for the app to complete the discovery process.
- Review Discovered Devices: Once the discovery process is finished, the app will display a list of discovered devices. Check to make sure your TP-Link outlet is listed.
By following these steps, you have successfully discovered your TP-Link outlet in the Amazon app. This means that Amazon Echo can now recognize and control your TP-Link device. Now you can move on to the next step and create a friendly name for your TP-Link outlet.
Step 6: Create a Friendly Name for Your TP-Link Outlet
Creating a friendly name for your TP-Link outlet is a helpful step to ensure easy and accurate voice control with Amazon Echo. It allows you to use a specific name or nickname that is easier to remember and pronounce. Follow these steps to create a friendly name for your TP-Link outlet in the Amazon app.
- Open the Amazon Alexa App: Launch the Amazon Alexa app on your smartphone or tablet.
- Tap on the Menu Icon: Look for the menu icon (three parallel lines) in the top left corner of the app and tap on it.
- Select “Smart Home”: From the menu, choose “Smart Home” to access the smart home settings.
- Tap on “Devices”: On the Smart Home screen, tap on “Devices” to view your connected devices.
- Find Your TP-Link Outlet: In the Devices section, locate your TP-Link outlet from the list of discovered devices.
- Tap on the TP-Link Outlet: Tap on your TP-Link outlet to access its settings.
- Select “Edit Name”: In the outlet settings, look for the option to edit the name and tap on it.
- Choose a Friendly Name: Enter a new name for your TP-Link outlet that is easy for you to remember and pronounce. It could be something like “Living Room Lamp” or “Kitchen Appliances.”
- Save the New Name: Once you have entered the friendly name, save the changes to finalize the new name for your TP-Link outlet.
By following these steps, you have successfully created a friendly name for your TP-Link outlet in the Amazon app. This allows you to refer to the outlet using the friendly name when giving voice commands to Amazon Echo. Now you are ready to move on to the final step and start controlling your TP-Link outlet with Amazon Echo.
Step 7: Control Your TP-Link Outlet with Amazon Echo
Now that you have completed the setup process, it’s time to start controlling your TP-Link outlet with Amazon Echo. With just your voice, you can easily turn on or off the connected devices. Follow these steps to begin controlling your TP-Link outlet with Amazon Echo.
- Activate Amazon Echo: Say the wake word “Alexa” or “Echo” to activate your Amazon Echo device.
- Give a Voice Command: Once your Amazon Echo device is activated, give a voice command to control the TP-Link outlet. For example, say “Alexa, turn on the [friendly name of your TP-Link outlet]” to turn on the connected device.
- Enjoy Hands-Free Control: Amazon Echo will send the command to the TP-Link outlet, and the connected device will respond accordingly. You can use voice commands to turn on or off the outlet, control the brightness or power levels, and more.
With Amazon Echo’s voice control capabilities, you can easily manage your TP-Link outlet and the devices connected to it. Whether you want to turn on the lights, control appliances, or manage other electronics, Amazon Echo gives you the convenience and ease of hands-free control. Enjoy the benefits of a smart home by utilizing the power of voice commands with your TP-Link outlet and Amazon Echo.
Troubleshooting: Common Issues and Solutions
While setting up and using your TP-Link outlet with Amazon Echo, you may encounter some common issues. Here are a few troubleshooting tips to help you resolve them.
-
Issue: TP-Link outlet is not connecting to Wi-Fi.
Solution: Ensure that you have entered the correct Wi-Fi credentials during the setup process. Check your Wi-Fi network settings and try connecting the outlet again. If the issue persists, try restarting your router and the TP-Link outlet. -
Issue: Amazon Echo device is not discovering the TP-Link outlet.
Solution: Make sure that the TP-Link Kasa skill is enabled in the Amazon app. Check that the TP-Link outlet and the Amazon Echo device are connected to the same Wi-Fi network. Restart both the TP-Link outlet and the Amazon Echo device, then initiate the discovery process again. -
Issue: Voice commands are not working with the TP-Link outlet.
Solution: Ensure that you are using the correct friendly name for the TP-Link outlet when giving voice commands. Double-check the device name in the Amazon app’s device settings. If the issue persists, try re-discovering the TP-Link outlet and make sure it shows up as a connected device in the app. -
Issue: TP-Link outlet is unresponsive.
Solution: Check if the Wi-Fi connection to the TP-Link outlet is stable. Try restarting the TP-Link outlet and make sure it is properly plugged in and powered. If the problem persists, contact TP-Link support for further assistance. -
Issue: TP-Link outlet is not controlling devices as expected.
Solution: Make sure that the devices you are trying to control with the TP-Link outlet are compatible and properly connected. Check if the firmware for both the TP-Link outlet and the devices is up to date. Also, ensure that the outlet is set up correctly and that you are using the correct voice commands.
If the above solutions do not resolve your issue, refer to the user manuals and support documentation provided by TP-Link and Amazon for further guidance. Remember, troubleshooting can vary depending on your specific setup and configuration, so don’t hesitate to reach out to customer support if needed.