
Assessing the Damage
Before attempting any method to get rid of scratches on your phone, it’s important to assess the damage and understand the severity of the scratches. This will help you determine which method to use and how effective it may be in repairing the scratches. Here are a few steps to follow when assessing the damage:
- Examine the scratches: Take a close look at the scratches on your phone’s screen. Are they superficial or deep? Do they cover a small area or are they spread out? Understanding the nature of the scratches will give you a better idea of how much effort it will take to remove them.
- Consider the material: Different types of screens may require different approaches to remove scratches. For example, smartphones with glass screens might respond differently than those with plastic screens. Take note of the material your phone is made of, as this will inform the methods you can safely use.
- Assess your comfort level: Some methods may involve using abrasive materials or liquids that could potentially damage your phone further if not used carefully. Assess your comfort level and confidence in performing the method you choose. If you’re unsure, it’s always best to seek professional help.
- Consider the warranty: If your phone is still under warranty, it’s important to check if attempting any repairs on your own could void the warranty. In such cases, it’s advisable to consult the manufacturer or an authorized service center for guidance.
By carefully assessing the damage, you’ll be able to make an informed decision on the best method to use in removing the scratches from your phone. Remember to proceed with caution and avoid using methods that may cause further damage or void the warranty, if applicable.
Using Toothpaste
If you’re looking for a simple and cost-effective solution to remove minor scratches from your phone, toothpaste might just do the trick. Here’s how you can use toothpaste to potentially minimize the appearance of scratches:
- Select the right toothpaste: Not all toothpaste types are suitable for this purpose. It is recommended to choose a non-gel, non-abrasive toothpaste. Avoid toothpaste with harsh whitening agents, as they may cause further damage to the phone’s screen.
- Clean your phone: Before applying toothpaste, ensure that your phone’s screen is clean and free from any dirt or dust. Use a microfiber cloth and a gentle screen cleaner to wipe the screen gently.
- Apply toothpaste: Squeeze a small amount of toothpaste onto a soft, clean cloth or cotton swab. Gently rub the toothpaste onto the scratched surface of your phone in a circular motion. Be careful not to press too hard as this could potentially damage the screen further.
- Wipe off excess toothpaste: After rubbing the toothpaste on the scratches, use a clean microfiber cloth to wipe off any excess toothpaste from the screen.
- Repeat if necessary: Depending on the depth of the scratches, you may need to repeat the process a few times. Minor scratches may start to fade or become less noticeable after the first attempt, while deeper scratches may require multiple applications.
- Buff and clean: Once you’re satisfied with the results, use a microfiber cloth to gently buff the screen in a circular motion. This will help remove any residue and leave your screen looking clean and polished.
It’s important to note that using toothpaste is not a foolproof method, and results may vary depending on the severity of the scratches and the type of phone screen. If you’re uncertain or uncomfortable trying this method, it’s always best to seek professional help or explore alternative solutions.
Applying Baking Soda
If you’re dealing with slightly deeper scratches on your phone’s screen, you can try using baking soda to potentially reduce their visibility. Here’s a step-by-step guide on how to use baking soda to remove scratches:
- Create a paste: In a small bowl, mix a teaspoon of baking soda with a few drops of water. Stir the mixture until it forms a thick paste.
- Prepare your phone: Clean your phone’s screen using a microfiber cloth and a gentle screen cleaner. Ensure that it is free from dirt and dust before proceeding.
- Apply the paste: Use a clean cloth or cotton swab to apply the baking soda paste onto the scratched area of your phone’s screen. Gently rub the paste in a circular motion for a few minutes.
- Wipe it clean: After applying the paste, use a clean microfiber cloth to wipe away the excess baking soda. Make sure to be gentle and avoid applying too much pressure.
- Inspect the results: Take a close look at the screen to determine if the scratches have improved. If they are still visible, you may need to repeat the process a few more times.
- Polish the screen: Once you are satisfied with the results, use a clean microfiber cloth to gently buff the screen in circular motions. This will help remove any residue and leave your screen looking polished.
It’s important to note that baking soda may not be effective for deep scratches or for all types of phone screens. Additionally, excessive rubbing or using too much force may cause further damage. If you are unsure or uncomfortable trying this method, it’s best to seek professional assistance.
Trying Sandpaper
If you have scratches on your phone that are more severe and noticeable, you can consider using sandpaper as a potential solution. It’s important to note that this method should only be used as a last resort and with caution. Here’s how you can try using sandpaper to remove scratches from your phone:
- Select the right sandpaper: Choose a fine-grit sandpaper with a grit level of around 1200 to 2000. Avoid using coarse sandpaper, as it can cause further damage to your phone’s screen.
- Prepare your phone: Clean your phone’s screen using a microfiber cloth and a gentle screen cleaner. Make sure it is free from any dirt or dust particles before proceeding.
- Wet the sandpaper: Soak the sandpaper in water for a few minutes to make it wet. Wet sanding can help prevent excess friction and reduce the risk of further damage to your phone’s screen.
- Gently sand the scratches: Using light pressure, gently rub the wet sandpaper on the scratched area of your phone’s screen. Make sure to move the sandpaper in a circular motion. Keep in mind that you should only focus on the scratched area and avoid rubbing other parts of the screen.
- Check your progress: After sanding for a short duration, wipe away any debris and inspect the screen. If the scratches have improved but are still visible, you can continue with the process. However, if the scratches appear to worsen or if the screen becomes damaged, stop immediately.
- Polish the screen: Once you are satisfied with the results, use a microfiber cloth to polish the screen. This will help remove any residue left by the sandpaper and restore shine to your phone’s screen.
It’s crucial to exercise extreme caution when using sandpaper, as excessive force or improper technique can lead to irreversible damage to your phone’s screen. If you are unsure or uncomfortable attempting this method, it is recommended to seek professional assistance or consider other alternatives.
Utilizing Baby Powder
If you’re looking for a gentle and safe solution to reduce the visibility of light scratches on your phone’s screen, consider utilizing baby powder. Here’s how you can use baby powder to potentially improve the appearance of scratches:
- Clean your phone: Before applying baby powder, ensure that your phone’s screen is clean and free from any dust or dirt. Use a microfiber cloth and a gentle screen cleaner to wipe the screen gently.
- Apply a small amount of baby powder: Sprinkle a small amount of baby powder onto a soft, clean cloth or directly onto the scratches on your phone’s screen. Make sure to distribute it evenly across the affected area.
- Gently rub the baby powder: Using the cloth or your finger, rub the baby powder into the scratches in a circular motion. Apply gentle pressure and continue rubbing for a few minutes.
- Remove excess powder: After rubbing the baby powder onto the screen, use a clean microfiber cloth to wipe away any excess powder. Make sure to remove all visible traces of the powder.
- Inspect the results: Take a close look at your phone’s screen to see if the scratches have become less noticeable. Repeat the process if needed, focusing on the areas with more prominent scratches.
- Buff and clean the screen: Once you are satisfied with the results, use a clean microfiber cloth to gently buff the screen. This will help remove any remaining powder residue and leave your screen looking clean and polished.
Keep in mind that utilizing baby powder is not a guaranteed fix for all types of scratches, especially deeper ones. Results may vary, and it is important to manage your expectations. If you aren’t comfortable trying this method or if the scratches persist, consider seeking professional help or exploring alternative solutions.
Applying Vegetable Oil
If you’re looking for a simple, household item to potentially reduce the appearance of minor scratches on your phone’s screen, vegetable oil may be worth a try. Here’s how you can apply vegetable oil to your phone:
- Clean your phone: Before applying vegetable oil, make sure your phone’s screen is clean and free from any dust or dirt. Use a microfiber cloth and a gentle screen cleaner to wipe the screen gently.
- Apply a small amount of vegetable oil: Dab a tiny amount of vegetable oil onto a clean cloth or cotton swab. Be conservative with the amount of oil you use to avoid excessive greasiness.
- Gently rub the oil onto the scratches: With the cloth or cotton swab, gently rub the vegetable oil onto the scratched areas of your phone’s screen. Use a circular motion and apply light pressure while doing so.
- Allow the oil to sit: After rubbing the oil into the scratches, allow it to sit on the screen for a few minutes. This will give the oil a chance to work its magic and potentially minimize the appearance of the scratches.
- Wipe away excess oil: Using a clean microfiber cloth, gently wipe away any excess oil from the screen. Be thorough in removing the oil to prevent it from attracting dust or dirt.
- Assess the results: Take a close look at your phone’s screen to evaluate if the scratches have become less noticeable. If you’re unsatisfied with the results, you may repeat the process or consider alternative methods.
It’s important to note that vegetable oil is not a guaranteed solution for all types of scratches, especially deeper ones. This method may provide temporary cosmetic improvement, but it might not completely eliminate the scratches. If you have concerns or if the scratches persist, it’s best to seek professional assistance or explore other repair options.
Using a Magic Eraser
If you’re dealing with light scratches or scuff marks on your phone’s screen, using a magic eraser may help restore its appearance. Here’s a step-by-step guide on how to use a magic eraser to potentially remove scratches:
- Ensure compatibility: Check if your phone’s screen material is compatible with a magic eraser. Avoid using it on sensitive materials like plastic screens, as it may cause further damage.
- Clean your phone: Before using the magic eraser, clean your phone’s screen thoroughly to remove any dirt or debris. Use a microfiber cloth and a gentle screen cleaner to ensure a clean surface.
- Dampen the magic eraser: Moisten the magic eraser with water, squeezing out any excess moisture. It should be slightly damp but not dripping wet.
- Gently rub the scratched areas: Using light pressure, gently rub the damp magic eraser on the scratched areas of your phone’s screen. Use small circular motions and make sure to cover the entire scratched area.
- Monitor your progress: As you rub the magic eraser, periodically check the screen to see if the scratches are fading. Be careful not to apply too much pressure or spend an excessive amount of time in one spot.
- Wipe away residue: After treating the scratched areas, use a microfiber cloth to wipe away any residue left by the magic eraser. Ensure that the screen is clean and free from any debris or eraser particles.
- Inspect the results: Take a close look at your phone’s screen to assess if the scratches have been minimized or removed. Repeat the process if necessary, focusing on the areas with more prominent scratches.
While using a magic eraser can be effective for minor scratches, it’s important to be cautious. Avoid using excessive force, as it may damage the screen or remove protective coatings. In addition, it’s recommended to test the magic eraser on a small, inconspicuous area before using it on the entire screen. If you have any doubts or concerns, consider seeking professional assistance or exploring alternative solutions.
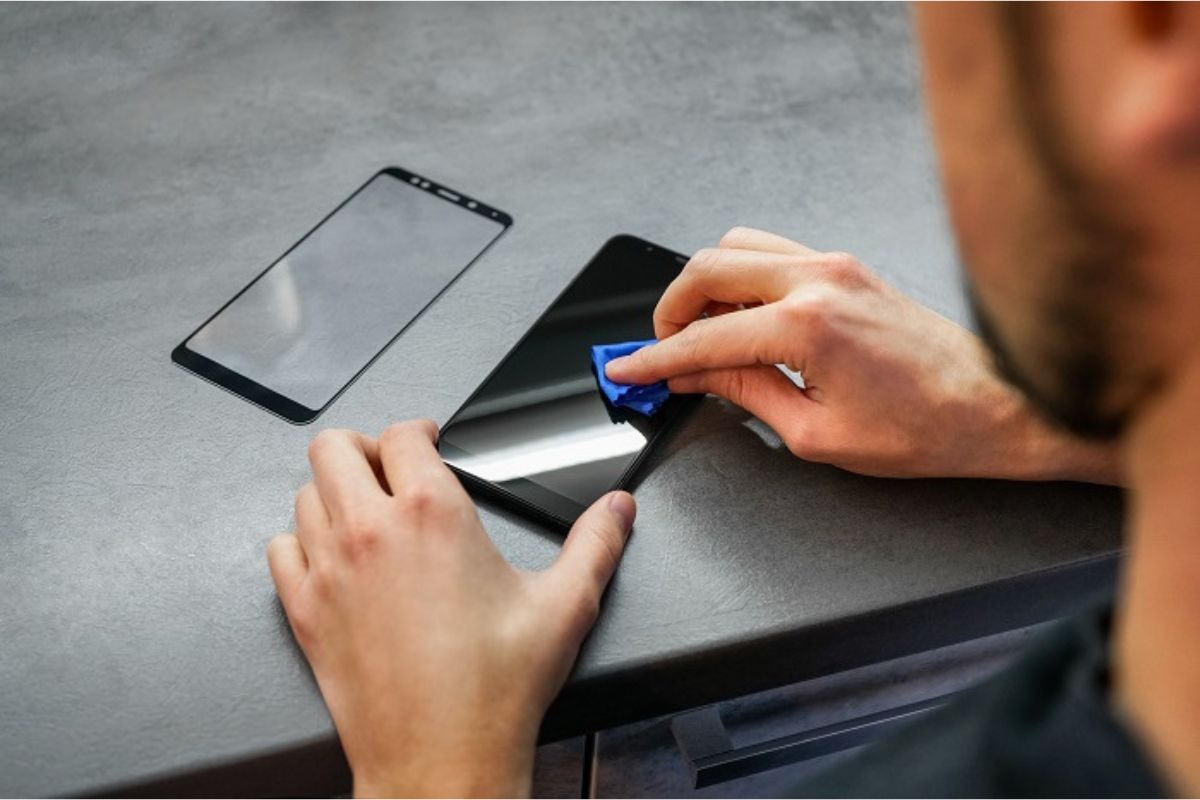
Trying a Screen Protector
If you want to prevent further scratches and protect your phone’s screen, trying a screen protector can be an effective solution. Here’s how you can use a screen protector to potentially minimize the appearance of existing scratches:
- Purchase a screen protector: Look for a high-quality screen protector that is specifically designed for your phone model. Ensure that it offers scratch-resistant properties and is easy to apply.
- Clean your phone: Before applying the screen protector, thoroughly clean your phone’s screen using a microfiber cloth and a gentle screen cleaner. Make sure there is no dust or debris on the surface.
- Follow the instructions: Read and follow the instructions provided with the screen protector carefully. Different protectors may have specific application methods, so it’s important to adhere to the manufacturer’s guidelines.
- Peel off the protective layer: Remove the protective layer from the adhesive side of the screen protector. Be cautious not to touch the adhesive surface with your fingers to avoid leaving any fingerprints or smudges.
- Align and apply the protector: Align the screen protector with the phone’s screen, ensuring that it covers the entire viewing area. Gently apply it, starting from one end and gradually pressing it down, using a soft cloth or card to smooth out any air bubbles as you go.
- Smooth out any bubbles: If you notice any air bubbles under the screen protector, use a card or your fingertips to gently push them towards the edges until they disappear.
- Inspect the results: Once the screen protector is applied, inspect the screen for any remaining scratches. In many cases, the screen protector can help minimize the appearance of existing scratches and prevent new ones from occurring.
Applying a screen protector is not a guaranteed method to remove deep scratches, but it can provide an additional layer of protection to prevent further damage. It’s important to choose a high-quality screen protector and make sure it is properly installed to achieve optimal results. If you have concerns or if the scratches persist, it’s best to seek professional assistance or explore other repair options.
Seeking Professional Help
If you have tried various DIY methods to remove scratches from your phone’s screen without success or if you’re uncomfortable attempting the repairs yourself, it may be time to seek professional help. Here are a few reasons why consulting a professional is a wise choice:
- Expertise and experience: Professionals who specialize in phone repairs have the knowledge and experience to assess the extent of the damage and provide appropriate solutions. They can determine the best course of action based on the type of phone screen, the severity of the scratches, and other factors.
- Specialized tools and equipment: Professional repair technicians have access to specialized tools and equipment that can effectively remove scratches without causing further damage. They have the necessary resources to ensure a safe and reliable repair process.
- Potential warranty coverage: If your phone is still under warranty, attempting repairs on your own or using unverified methods may void the warranty. By seeking professional help, you can ensure that the repairs are performed within the warranty guidelines, preserving your coverage if applicable.
- Customized solutions: Each phone and its scratches are unique. Professional technicians can provide customized solutions tailored to the specific needs of your device. They can assess the condition of your phone and recommend the most appropriate repair method.
- Additional repairs and maintenance: In addition to addressing the scratches on your phone’s screen, professional technicians can inspect other parts of your device for any potential issues. They can provide comprehensive repairs, replacements, or maintenance to keep your phone in optimal condition.
- Peace of mind: By entrusting your phone to a professional, you can have peace of mind knowing that the repairs are being done correctly and efficiently. You can rely on their expertise and ensure the best possible outcome for your phone.
When considering professional assistance, it is essential to research and choose a reputable repair service or contact the manufacturer’s authorized service center. Evaluate customer reviews, credentials, and warranty terms to make an informed decision. Seeking professional help can save you time, effort, and further damage, providing a reliable solution for your phone’s scratches.