
Overview of the Check Engine Light
The Check Engine Light is a warning indicator on the dashboard of your Toyota vehicle that illuminates when there is a potential issue with the engine or emissions system. It is designed to alert you to problems that may affect the performance, efficiency, or emissions of your vehicle.
When the Check Engine Light illuminates, it indicates that the onboard diagnostic system has detected a fault in one of the many components or systems of your Toyota. These faults are stored as trouble codes, which can provide valuable information about the nature of the problem.
Ignoring the Check Engine Light can have serious consequences for your vehicle’s performance and longevity. It is crucial to address the issue promptly, as it can lead to further damage if left unresolved. Plus, some states require that vehicles pass emissions tests to maintain legal compliance, and a lit Check Engine Light may result in a failed inspection.
The Check Engine Light is a comprehensive warning system that covers a wide range of potential issues. It can indicate problems with the engine, transmission, fuel system, emissions controls, ignition system, or other critical components. Familiarizing yourself with the Check Engine Light and its codes can help you diagnose and resolve issues before they become more severe.
Fortunately, there are ways to retrieve Check Engine Light codes without a scanner. This can save you time and money, as you can diagnose certain issues on your own. In the following sections, we will explore two common methods for retrieving Check Engine Light codes on Toyota vehicles – using OBD-I codes for older models and OBD-II codes for newer models.
Why it is important to know the Check Engine Light codes
The Check Engine Light is an essential feature that provides valuable information about the health of your Toyota vehicle’s engine and emissions system. Understanding the significance of these codes is crucial for several reasons.
Firstly, knowing the specific Check Engine Light codes allows you to identify the source of any potential issues quickly. The codes provide insights into the specific component or system that is malfunctioning, enabling you to pinpoint the problem more accurately. This knowledge can save you time and money by guiding you towards the appropriate repairs or maintenance.
Additionally, understanding the Check Engine Light codes empowers you to make informed decisions about your vehicle’s condition. It allows you to assess the urgency of the issue and prioritize repairs accordingly. Some codes may indicate minor problems that can be addressed during routine maintenance, while others may signify more severe issues requiring immediate attention. By knowing the codes, you can determine whether it is safe to continue driving or if professional assistance is necessary.
Furthermore, having knowledge of the Check Engine Light codes enables you to communicate effectively with mechanics or technicians when seeking professional help. Instead of relying solely on their assessment, you can provide them with the specific codes and any relevant symptoms you’ve noticed. This precise information can accelerate the diagnosis and repair process, leading to quicker resolution and potentially lower costs.
Another reason why understanding Check Engine Light codes is vital is that it can provide peace of mind for Toyota owners. When the Check Engine Light illuminates, it is natural to feel worried or uncertain about the severity of the issue. However, by accessing the codes and conducting some basic research, you can gain a better understanding of the potential problem and alleviate unnecessary anxiety.
Finally, being aware of the Check Engine Light codes can help you maintain the value and longevity of your Toyota. Timely identification and resolution of issues can prevent further damage to the engine and other components. By addressing problems promptly, you can minimize the risk of more expensive repairs down the line and ensure that your vehicle continues to operate at its best.
Method 1: Using the OBD-I Codes for Older Toyota Vehicles
If you own an older Toyota vehicle manufactured before 1996, chances are it is equipped with an On-Board Diagnostic (OBD) system known as OBD-I. Retrieving Check Engine Light codes for these vehicles requires a different method compared to newer models.
Here’s how you can obtain OBD-I codes on your older Toyota:
- Locate the diagnostic connector: The OBD-I diagnostic connector is typically located under the dashboard on the driver’s side. It is a rectangular-shaped connector with a series of pins.
- Prepare the jumper wire: Take a small solid wire or a paperclip and bend it to create a U-shape. This jumper wire will be used to bridge two pins in the diagnostic connector.
- Insert the jumper wire: Insert one end of the jumper wire into the TE1 (Test E) pin and the other end into the E1 (Ground) pin of the diagnostic connector.
- Turn on the ignition: Turn the ignition key to the “ON” position without starting the engine. This will power up the OBD-I system.
- Count the flashes: Watch the Check Engine Light and count the flashes. The Check Engine Light will usually blink in a pattern to indicate a two-digit code. For example, two blinks followed by a pause and then four blinks indicate Code 24.
- Refer to the trouble code chart: Consult the vehicle’s manual or search online for a trouble code chart specific to your Toyota model. The chart will provide a list of the corresponding codes and their meanings.
It’s important to note that OBD-I codes can vary slightly depending on the year and model of your Toyota. Therefore, it is crucial to use the correct code chart for accurate interpretation.
By utilizing this method, you can retrieve OBD-I codes without the need for an expensive scanner. However, it’s important to keep in mind that OBD-I systems provide more limited information compared to OBD-II systems used in newer Toyota vehicles. If the Check Engine Light persists or you require a more detailed diagnosis, it is recommended to consult a professional mechanic or invest in a scanner that is compatible with OBD-I systems.
Method 2: Using the OBD-II Codes for Newer Toyota Vehicles
If you own a newer Toyota vehicle manufactured after 1996, it is equipped with the standardized On-Board Diagnostic (OBD) system known as OBD-II. Retrieving Check Engine Light codes for these vehicles is relatively straightforward and can be done without the need for specialized tools.
Here’s how you can obtain OBD-II codes on your newer Toyota:
- Locate the diagnostic port: The OBD-II diagnostic port is typically located under the dashboard on the driver’s side. It is a rectangular-shaped connector with multiple pins.
- Turn on the ignition: Turn the ignition key to the “ON” position without starting the engine. This will power up the OBD-II system.
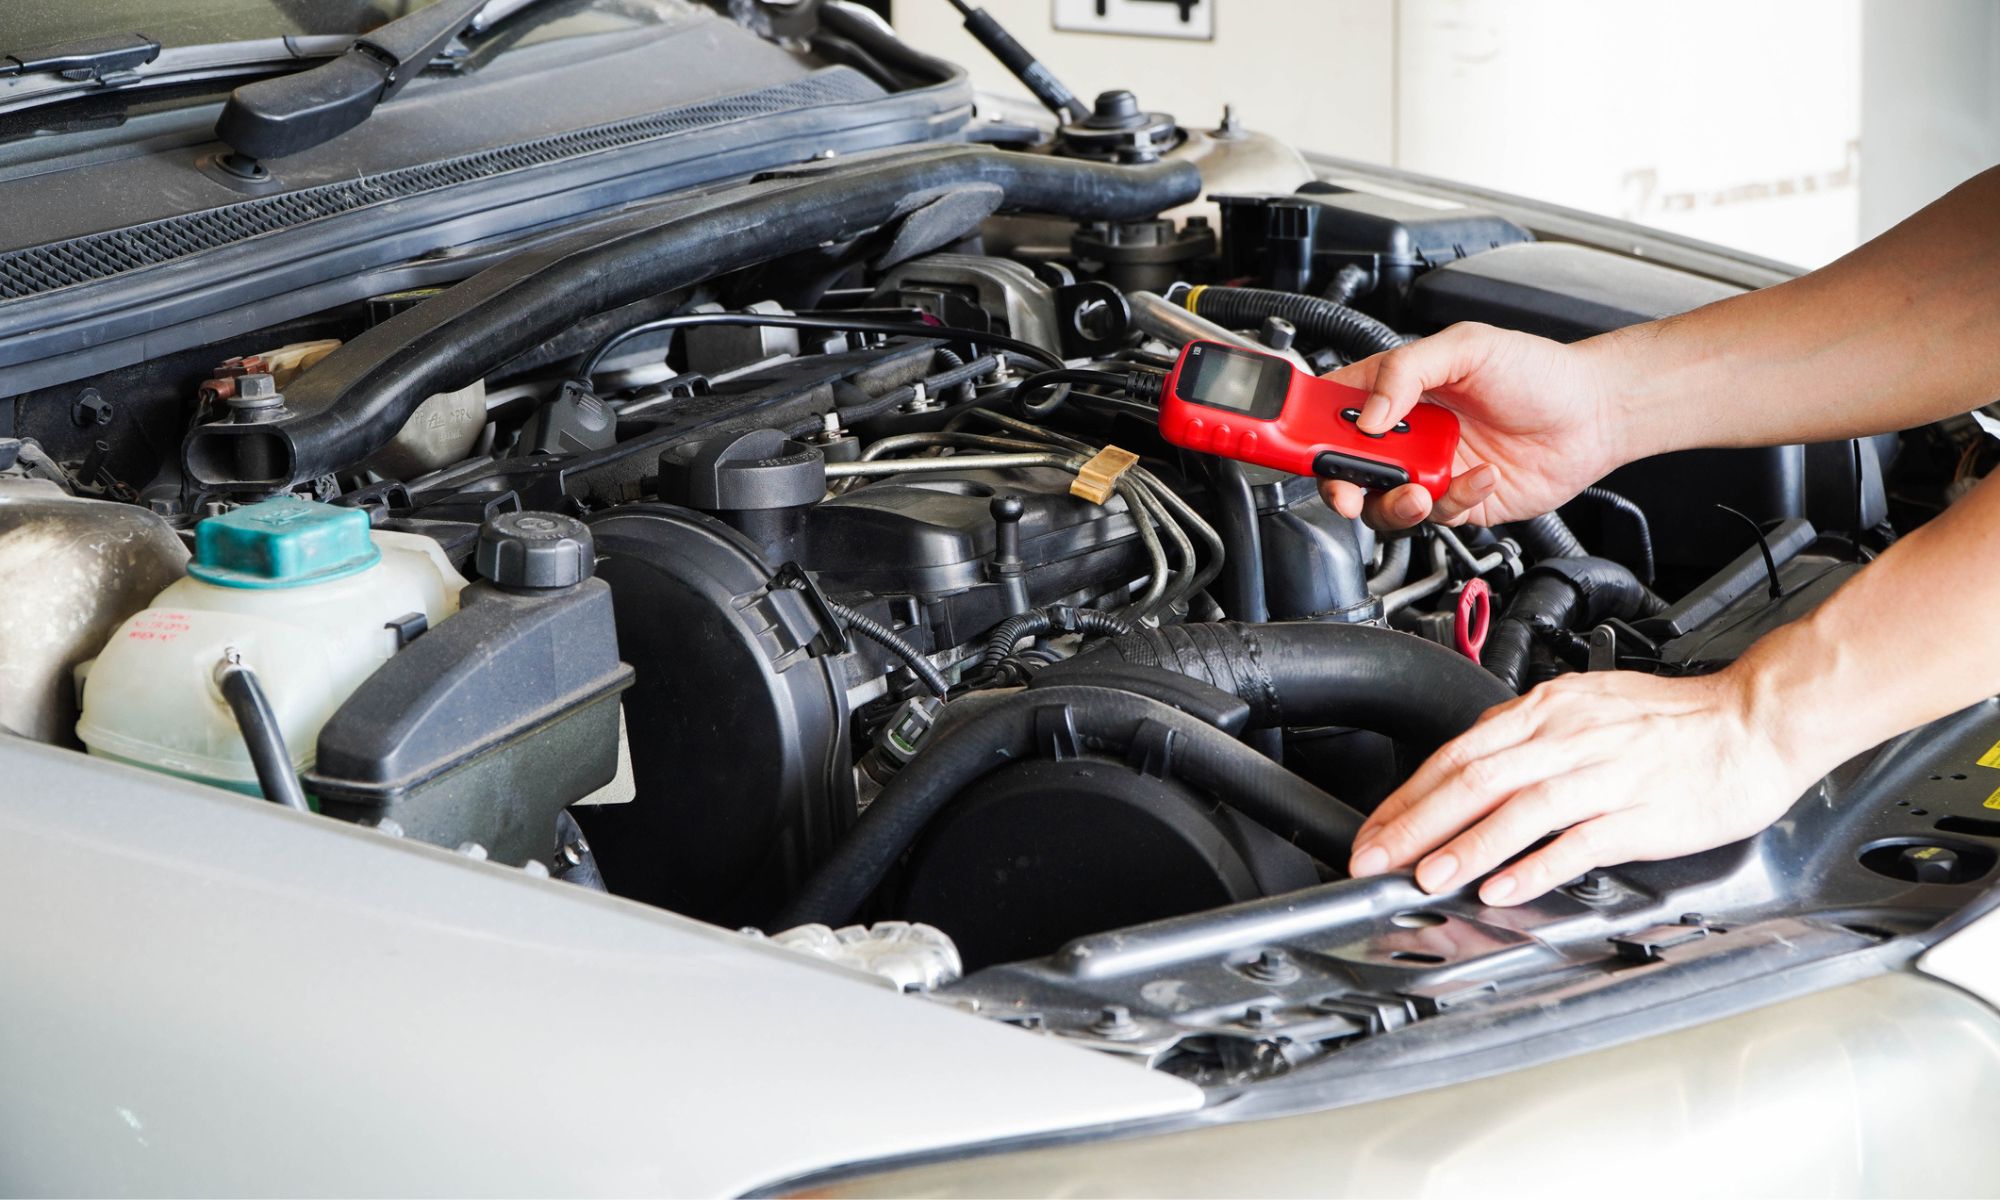
- Connect the code reader: Connect an OBD-II code reader to the diagnostic port. These code readers are readily available online or at automotive stores and are designed to interface with your vehicle’s OBD-II system.
- Read the codes: Follow the instructions provided with your specific code reader to initiate the scanning process. The code reader will communicate with the OBD-II system and retrieve the Check Engine Light codes.
- Interpret the codes: Once the code reader has retrieved the codes, they will be displayed on the screen. Each code consists of a letter followed by four numeric digits. For example, P0420 signifies a catalytic converter efficiency below threshold.
- Refer to the code interpretation resources: Consult the code reader’s user manual or search online for code interpretation resources specific to Toyota. These resources will provide detailed descriptions of the codes and their corresponding meanings.
Using an OBD-II code reader allows you to access comprehensive diagnostic information about your Toyota’s engine and emissions system. It provides valuable insights into the specific issues affecting your vehicle, enabling you to make informed decisions regarding repairs and maintenance.
If you do not have access to an OBD-II code reader, you may be able to retrieve the codes using a smartphone app or by visiting an auto parts store. Many stores offer free code reading services, allowing you to retrieve the codes without purchasing your own code reader.
By utilizing the OBD-II system, you can easily retrieve Check Engine Light codes on your newer Toyota vehicle. This method provides accurate and detailed information, ensuring that you can address any potential issues promptly and effectively.
Step-by-step guide to retrieving OBD-II codes without a scanner
If you don’t have access to an OBD-II scanner, there are alternative methods you can use to retrieve the Check Engine Light codes on your Toyota vehicle. Follow this step-by-step guide to retrieve OBD-II codes without a scanner:
- Turn on the ignition: Insert the key into the ignition and turn it to the “ON” position. This will power up the vehicle’s electrical system without starting the engine.
- Locate the OBD-II port: The OBD-II port is usually located under the dashboard on the driver’s side. It is a rectangular-shaped connector with multiple pins. You may need to use a flashlight to locate it.
- Identify the appropriate pins: Within the OBD-II port, locate pins 4 and 5. These are the ground and signal pins, respectively.
- Create a makeshift jumper: Take a thin wire or a paperclip and bend it to create a U-shape. Insert one end into pin 4 and the other end into pin 5 in the OBD-II port.
- Count the Check Engine Light flashes: Look at the Check Engine Light on your dashboard and count the number of times it blinks. Each blink represents a digit in the trouble code.
- Decode the trouble code: Consult a reliable resource such as a Toyota service manual or search online for a list of OBD-II trouble codes specific to your model. Match the number of blinks to the corresponding code to identify the issue.
- Note the trouble code and fix the issue: Once you’ve determined the trouble code, make a note of it for future reference. You can then proceed to address the specific problem indicated by the code. Depending on the code, it may be something you can fix yourself or something that requires the expertise of a professional mechanic.
While this method allows you to retrieve OBD-II codes without a scanner, it is important to note that it may not provide as precise or comprehensive information as a dedicated OBD-II scanner. If you encounter any difficulty in interpreting the codes or the Check Engine Light remains illuminated despite your attempts to resolve the issue, it is recommended to consult a professional mechanic.
Remember, retrieving and understanding OBD-II codes is just the first step in diagnosing and resolving any issues with your Toyota vehicle. Properly addressing the underlying problem identified by the codes is essential for maintaining the performance, efficiency, and longevity of your vehicle.
Step-by-step guide to retrieving OBD-I codes without a scanner
If you own an older Toyota vehicle with an OBD-I system, you can still retrieve Check Engine Light codes without the use of a specialized scanner. Follow this step-by-step guide to retrieve OBD-I codes without a scanner:
- Locate the diagnostic connector: The OBD-I diagnostic connector is typically located under the dashboard on the driver’s side. It is a rectangular-shaped connector with a series of pins.
- Prepare the jumper wire: Take a small solid wire or a paperclip and bend it to create a U-shape. This jumper wire will be used to bridge two pins in the diagnostic connector.
- Distinguish the diagnostic connector types: There are two common diagnostic connector types for OBD-I systems – the rectangular-shaped Toyota connector and the round-shaped connector. Determine the type of connector your vehicle has, as the pin locations and procedures may vary.
- Bridge the diagnostic connector pins: Insert one end of the jumper wire into the TE1 (Test E) pin and the other end into the E1 (Ground) pin of the diagnostic connector. Ensure a secure connection.
- Turn on the ignition: Turn the ignition key to the “ON” position without starting the engine. This will power up the OBD-I system.
- Observe the Check Engine Light flashes: Look at the Check Engine Light on your dashboard and count the number of times it blinks. Each blink represents a digit in the trouble code.
- Decode the trouble code: Consult a Toyota service manual or search online for a list of OBD-I trouble codes specific to your model. Match the number of blinks to the corresponding code to identify the issue.
- Note the trouble code and address the issue: Once you’ve determined the trouble code, make a note of it for future reference. You can then proceed to address the specific problem indicated by the code. Depending on the code, it may be something you can fix yourself or something that requires the attention of a professional mechanic.
While retrieving OBD-I codes without a scanner is a cost-effective method, it is important to note that the information retrieved may be more limited compared to using a scanner. If you encounter any difficulty in interpreting the codes or if the Check Engine Light remains illuminated despite your attempts to resolve the issue, it is recommended to seek the expertise of a professional mechanic.
Remember, the ability to retrieve and understand OBD-I codes is the first step in diagnosing any issues with your Toyota vehicle. Taking appropriate action to address the underlying problem identified by the codes is crucial for maintaining the performance and reliability of your vehicle.
Common Check Engine Light codes and their meanings
The Check Engine Light is accompanied by specific trouble codes that provide insight into the nature of the problem affecting your Toyota vehicle. Understanding common Check Engine Light codes and their meanings can help you diagnose issues and determine the necessary course of action. Here are some common Check Engine Light codes and their corresponding meanings:
- P0300: Indicates random/multiple cylinder misfire. This code indicates that the engine is misfiring, potentially caused by issues such as spark plug problems, fuel delivery issues, or vacuum leaks.
- P0420: Indicates catalyst system efficiency below threshold. This code suggests a potential issue with the catalytic converter, indicating that it may not be functioning optimally and may require inspection or replacement.
- P0171: Indicates system too lean (Bank 1). This code points to a problem with the air-fuel mixture, potentially caused by a vacuum leak, faulty oxygen sensor, or fuel delivery issue.
- P0174: Indicates system too lean (Bank 2). Similar to P0171, this code points to a problem with the air-fuel mixture on the other bank of the engine.
- P0442: Indicates small evaporative emission system leak. This code suggests a possible leak in the evaporative emission control system, which helps reduce fuel vapor emissions into the atmosphere.
- P0500: Indicates vehicle speed sensor malfunction. This code indicates a problem with the sensor that provides the vehicle’s speed information, which can impact the vehicle’s speedometer and transmission operation.
- P0420: Indicates oxygen sensor circuit malfunction (Bank 1 or single sensor). This code suggests an issue with the oxygen sensor located in Bank 1 of the engine, potentially caused by a faulty sensor or wiring problem.
- P0430: Indicates catalyst system efficiency below threshold (Bank 2). Similar to P0420, this code specifically indicates a potential issue with the catalytic converter in Bank 2 of the engine.
- P0301-P0312: Indicates cylinder-specific misfire. These codes identify the specific cylinder(s) experiencing misfires, which can help pinpoint the cause, such as faulty spark plugs, ignition coils, or fuel injectors.
It’s important to note that these are just a few examples of common Check Engine Light codes. There are many other codes that can occur, and it’s essential to consult an official Toyota manual or reliable online resources specific to your model to accurately interpret the codes for your particular vehicle.
When encountering any Check Engine Light code, it’s recommended to address the issue promptly. Depending on the severity and nature of the problem, you may choose to perform simple troubleshooting measures yourself or seek assistance from a qualified technician to diagnose and repair the underlying issue.
Troubleshooting common Check Engine Light issues
The Check Engine Light can be triggered by various issues, ranging from minor to more significant problems. While it’s important to consult a professional mechanic for a thorough diagnosis and repair, there are some troubleshooting measures you can take for common Check Engine Light issues. Here are some steps you can follow:
- Check your gas cap: A loose or improperly sealed gas cap is one of the most common triggers for a Check Engine Light. Ensure that your gas cap is tightened securely to prevent fuel vapor leakage.
- Inspect spark plugs and ignition system: Worn or fouled spark plugs can cause misfires and trigger the Check Engine Light. Inspect your spark plugs for signs of wear or deposits and replace them if necessary. Additionally, check the ignition system components such as ignition coils, wires, and distributor (if applicable) for any issues.
- Inspect and clean the mass airflow sensor (MAF): The MAF sensor measures the amount of air entering the engine, and a dirty or damaged sensor can affect engine performance and trigger the Check Engine Light. Clean the MAF sensor using approved MAF cleaner to remove any dirt or debris.
- Check oxygen sensors (O2 sensors): Faulty oxygen sensors can affect the air-fuel mixture and catalytic converter operation, leading to a Check Engine Light. Inspect the oxygen sensors for any signs of damage or contamination and replace them if necessary.
- Verify the integrity of the exhaust system: A leaking or damaged exhaust system, including the catalytic converter, can trigger the Check Engine Light. Inspect the exhaust system for leaks, cracks, or physical damage and repair or replace affected parts as needed.
- Inspect the EVAP system: The evaporative emissions control (EVAP) system prevents the release of fuel vapor into the atmosphere. A Check Engine Light may be triggered by a faulty gas cap or issues with the EVAP system. Inspect the system for leaks, damaged hoses, or faulty valves and address any necessary repairs.
- Check the battery and charging system: A weak or faulty battery, as well as a malfunctioning alternator or charging system, can cause various electrical issues and trigger the Check Engine Light. Inspect the battery terminals and connections and have the battery and charging system tested if necessary.
Keep in mind that these troubleshooting measures may not apply to all Check Engine Light issues, and some problems may require more extensive diagnosis and repair. If the Check Engine Light persists or if you are unsure about the underlying cause, it’s recommended to consult a qualified mechanic who can use diagnostic tools to identify and resolve the issue accurately.
Remember, addressing Check Engine Light issues promptly can help prevent further damage to your Toyota vehicle and ensure its optimal performance and longevity.
Tips for using alternative methods to retrieve Check Engine Light codes
When using alternative methods to retrieve Check Engine Light codes without a scanner, there are some tips you can follow to ensure accurate results and a smoother process. Here are some helpful tips for using alternative methods:
- Be cautious and patient: Retrieving Check Engine Light codes without a scanner requires a bit of manual work and observation. Take your time, follow the steps carefully, and pay attention to the details.
- Refer to reliable resources: Make use of official Toyota service manuals or reputable online resources when decoding the trouble codes. These resources provide accurate information, ensuring that you interpret the codes correctly.
- Double-check connections and wiring: Ensure that all connections, especially jumper wires or makeshift tools used, are secure and properly inserted. Loose connections can affect the accuracy of code retrieval.
- Know your specific model and year: OBD-I and OBD-II systems can vary depending on the model and year of your Toyota vehicle. Familiarize yourself with the specific diagnostic connector type, pin locations, and code interpretation methods for your particular vehicle.
- Keep a record of the trouble codes: Make a note of the retrieved trouble codes for future reference. This information can be valuable when discussing the issue with a mechanic or searching for more detailed troubleshooting steps.
- Research common issues and solutions: Take the time to research common problems associated with the retrieved trouble codes. There may be known issues with certain codes and specific solutions that can guide you in addressing the problem.
- Consider supplemental tools or apps: If you have difficulty retrieving codes using alternative methods, consider investing in supplemental tools such as Bluetooth code readers or smartphone apps that can communicate with your Toyota’s OBD system.
- Consult with professionals if necessary: If you are unsure about the interpretation of the trouble codes or if the Check Engine Light remains illuminated despite your troubleshooting attempts, it is advisable to consult with a professional mechanic who can provide accurate diagnostic services and recommend appropriate repairs.
By following these tips, you can maximize the effectiveness of alternative methods for retrieving Check Engine Light codes on your Toyota vehicle. Remember, while these alternative methods can provide valuable information, investing in a reliable OBD scanner is the most accurate and efficient way to retrieve and interpret codes.
Addressing Check Engine Light codes promptly and accurately can help maintain the performance, efficiency, and longevity of your Toyota. Regular maintenance, proper repairs, and professional guidance are essential to keeping your vehicle in optimal condition.
Importance of addressing Check Engine Light codes promptly
The Check Engine Light serves as a crucial warning system in your Toyota vehicle, notifying you of potential issues with the engine or emissions system. Promptly addressing Check Engine Light codes is essential for several reasons:
Potential damage prevention: Ignoring Check Engine Light codes can lead to further damage to your vehicle’s engine or emissions system. What might start as a minor issue can escalate into a more severe problem if left unresolved. By addressing the codes promptly, you can prevent additional damage and potentially save on costly repairs.
Improved safety: Some Check Engine Light codes can be indicative of safety-related issues, such as engine misfires or problems with the braking or traction control systems. Resolving these issues promptly ensures that your Toyota remains safe to drive and reduces the risk of accidents or breakdowns on the road.
Preventive maintenance: Addressing Check Engine Light codes allows you to identify and resolve underlying problems before they escalate. By taking care of minor issues early on, you can avoid major breakdowns and ensure that your vehicle remains in good working condition.
Passing emissions tests: In many regions, vehicles are required to pass emissions tests to meet regulatory standards. A lit Check Engine Light often leads to an automatic test failure. By addressing Check Engine Light codes promptly, you can rectify issues that might cause a failed emissions test and ensure that your vehicle remains compliant with local regulations.
Maximizing fuel efficiency: Some Check Engine Light codes are related to fuel system malfunctions or inefficient engine performance. Ignoring these codes can lead to decreased fuel efficiency, resulting in higher fuel consumption and increased expenses. Addressing the codes promptly can help to optimize fuel efficiency and reduce your overall fuel costs.
Preserving vehicle value: Addressing Check Engine Light codes promptly helps to maintain the value of your Toyota vehicle. Potential buyers may be wary of purchasing a vehicle with unresolved engine issues. By promptly addressing Check Engine Light codes and maintaining a well-documented service history, you can preserve the value of your vehicle should you decide to sell or trade it in the future.
Remember, addressing Check Engine Light codes requires proper diagnosis and repair. While it may be tempting to try to fix the issue yourself, it is recommended to consult a professional mechanic who can accurately diagnose the problem and provide appropriate solutions. Prompt attention to Check Engine Light codes ensures the continued reliability, safety, and performance of your Toyota vehicle.