Common Reasons for Notifications Not Showing up on Android
Notifications play a crucial role in keeping us alerted and informed on our Android devices. However, there may be instances where notifications fail to appear, causing frustration and inconvenience. If you’re experiencing this issue, it’s essential to understand the common reasons behind it. By identifying the root cause, you can take the necessary steps to fix notifications not showing up on your Android device.
Let’s explore some of the most common reasons why notifications may not be appearing on your Android device:
1. Notification Settings: The first thing to check is your notification settings. Ensure they are properly configured for the app in question. Sometimes, notifications may be disabled for specific apps, or the settings may have been inadvertently changed.
2. Permission Settings: Android requires apps to have the necessary permissions to send notifications. If the app doesn’t have the permission to do so, notifications will not show up. Verify that the app has the necessary permission to send notifications by going to the app settings.
3. Do Not Disturb Mode: Do Not Disturb mode can suppress notifications on your Android device. Check if this mode is activated and disabling notifications. You can find Do Not Disturb settings in the sound and notification settings or quick settings panel.
4. Battery Optimization: Some Android devices come with battery optimization settings that may restrict app activities, including notifications. Check if the app in question is optimized for battery usage. If it is, consider exempting it from battery optimization to allow notifications to come through.
5. App Cache and Data: Over time, app cache and data can accumulate, leading to performance issues, including problems with notifications. Clearing the cache and data of the app in question can help resolve this issue. Go to the app settings and look for the options to clear cache and data.
6. Device Reboot: Sometimes, a simple reboot can fix various glitches and restore normal functionality. Restart your Android device and check if the notifications start appearing as usual.
7. App and System Updates: Outdated apps or an outdated Android system can often cause notification issues. Ensure that both the app in question and your Android system are up to date. Check the respective app stores for updates and install them as necessary.
8. App-Specific Issues: Certain apps may have their own notification settings or issues that prevent notifications from showing up. Go to the app settings and explore any specific notification options or troubleshooting guides provided by the app developer.
9. Factory Reset: As a last resort, if all else fails, you may consider performing a factory reset on your Android device. This will reset your device to its original state and erase all data. However, it should only be considered if no other solution works, as it is a drastic measure.
Understanding these common reasons for notifications not showing up on Android will help you diagnose and resolve the issue effectively. By checking and adjusting notification settings, ensuring app permissions, and addressing other potential issues, you can regain the functionality of notifications on your Android device.
Check and Adjust Notification Settings
One of the common reasons why notifications may not show up on your Android device is incorrect or misconfigured notification settings. It’s essential to check and adjust these settings to ensure your notifications are set up correctly. Here’s how you can do it:
1. Open Settings: Start by opening the Settings app on your Android device. You can usually find it in the app drawer or by swiping down on the notification shade and tapping the gear icon.
2. Go to Apps & Notifications: Scroll down and look for “Apps & Notifications” or similar options in the Settings menu. The naming may vary slightly depending on your Android device.
3. Select the App: In the Apps & Notifications menu, locate and tap on the app for which you want to check the notification settings. This will open the app settings page.
4. Check notification settings: Within the app settings, look for the “Notifications” or “Notification settings” option. Tap on it to access the notification settings specific to the app.
5. Enable Notifications: Make sure that the “Allow Notifications” or similar toggle switch is turned on. If it’s already enabled, try toggling it off and on again to refresh the settings.
6. Adjust Importance Level: Some apps offer various notification importance levels, such as “High,” “Medium,” or “Low.” Ensure that the importance level is set according to your preference. Setting it to “High” will prioritize the notifications and display them prominently.
7. Configure Notification Channels: Certain apps provide notification channels, which allow you to customize specific types of notifications within the app. Explore the notification channels available for the app and ensure they are configured appropriately.
8. Check Sound and Vibration Settings: Verify that the sound and vibration settings for the app are enabled. If you want to receive audible notifications, make sure the sound option is turned on and that the volume is up. Similarly, check if the vibration option is enabled if you want to receive notification alerts through vibrations.
9. Review Other Settings: Some apps may have additional notification-related settings, such as LED notifications, lock screen visibility, or notification badges. Check these options in the app settings and adjust them according to your preferences.
By following these steps and checking and adjusting the notification settings for the specific app, you can ensure that notifications appear as intended on your Android device. Remember that different apps may have slightly different settings, so it’s important to go through these steps for each app that is not displaying notifications correctly.
Ensure the App has Permission to Send Notifications
If notifications are not showing up on your Android device, it’s crucial to ensure that the app in question has the necessary permission to send notifications. Android requires apps to have explicit permission to display notifications to users. Here’s how you can check and grant notification permissions to an app:
1. Open Settings: Begin by opening the Settings app on your Android device. You can usually find it in the app drawer or by swiping down on the notification shade and tapping the gear icon.
2. Navigate to Apps & Notifications: Scroll through the settings menu and look for “Apps & Notifications” or a similar option. The naming may vary slightly depending on your device.
3. Select the App: In the Apps & Notifications menu, locate and tap on the app for which you want to check the notification permissions. This will open the app settings page.
4. Access App Info: Within the app settings, look for the “App info” or “Details” option. Tap on it to access the detailed information about the app.
5. Check Notification Permissions: In the app information page, search for the “App permissions” or “Permissions” section. Tap on it to view the available permissions for the app.
6. Grant Notification Permission: Look for the “Notifications” or “Notification access” option and ensure that it is enabled for the app. If it is disabled, toggle the switch to grant the app permission to send notifications.
7. Adjust Additional Permission Settings: Some apps may have additional notification-related permissions, such as “Display over other apps” or “Modify system settings.” Ensure that these permissions are also granted if required by the app.
8. Test Notifications: After granting the necessary notification permissions, open the app and test if the notifications start appearing on your device. If they still do not show up, continue with the troubleshooting process.
By reviewing and granting notification permissions to the app, you give it the necessary authorization to send notifications to your Android device. Remember that some apps may have different names for the notification permissions or may require additional permissions to function correctly. Make sure to explore all the available permission options in the app settings to ensure a hassle-free notification experience.
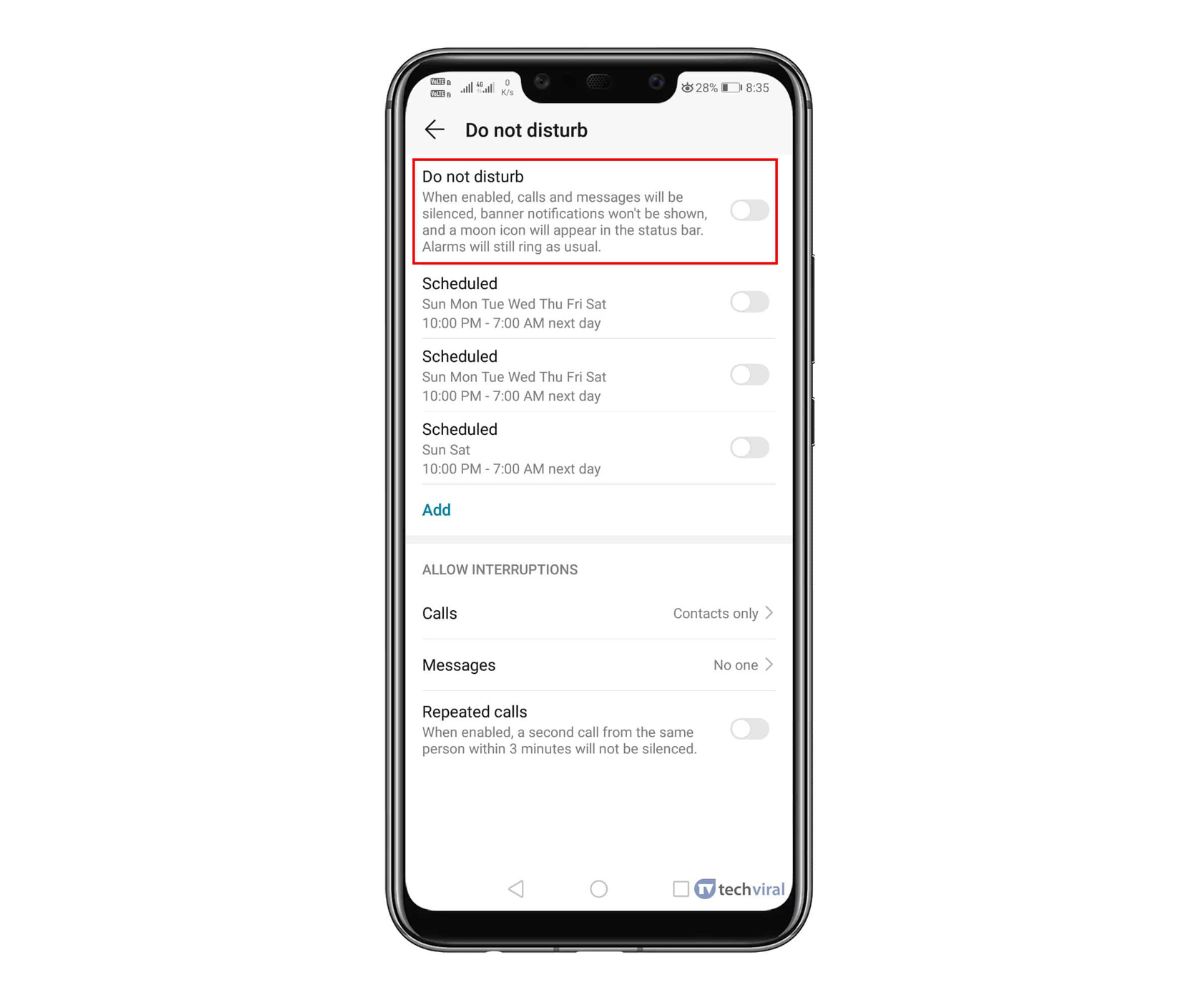
Disable Do Not Disturb Mode
One possible reason why notifications may not be showing up on your Android device is if the Do Not Disturb mode is enabled. This feature allows you to silence incoming notifications and calls during specific periods or when certain conditions are met. To ensure that notifications come through, you should disable Do Not Disturb mode. Here’s how you can do it:
1. Swipe down and access Quick Settings: Start by swiping down from the top of your screen to access the notification shade. Look for the Quick Settings tiles, which are usually located at the top of the shade.
2. Locate Do Not Disturb icon: In the Quick Settings tiles, look for the Do Not Disturb icon. It typically resembles a star or a circle with a line through it. Tap on the icon to access the Do Not Disturb settings.
3. Disable Do Not Disturb: Once you’re in the Do Not Disturb settings, toggle off the Do Not Disturb mode. This will disable the automatic silence mode and allow notifications to come through.
4. Customize Do Not Disturb settings: If you want to further customize the Do Not Disturb settings, you can tap on the gear icon or the “Settings” option within the Do Not Disturb settings. Here, you can specify specific times, conditions, or exceptions for the mode.
5. Test Notifications: After disabling Do Not Disturb, test if notifications start appearing on your device. You should now receive incoming notifications as expected.
Pro Tip: On some Android devices, you can access Do Not Disturb mode directly from the Settings app instead of the notification shade. Simply open the Settings app, search for “Sound & notification,” and look for the Do Not Disturb option.
By turning off Do Not Disturb mode, you allow notifications to come through and ensure that you receive important alerts on your Android device. Just remember to review and customize the Do Not Disturb settings according to your preferences to strike the right balance between peace and staying informed.
Check Battery Optimization Settings
Battery optimization settings on your Android device can sometimes interfere with app activities, including the display of notifications. If notifications are not showing up, it’s essential to check the battery optimization settings to ensure that the app in question is not being restricted. Here’s how you can do it:
1. Open Settings: Start by opening the Settings app on your Android device. You can usually find it in the app drawer or by swiping down on the notification shade and tapping the gear icon.
2. Navigate to Battery: Scroll through the settings menu and look for “Battery” or “Battery & performance.” Tap on it to access the battery settings and optimization options.
3. Select Battery Optimization: In the Battery settings, locate and tap on “Battery optimization” or a similar option. This will open the list of apps optimized for battery usage.
4. Choose the App: Scroll through the list of apps and find the app for which you want to check the battery optimization settings. Tap on it to access its battery optimization preferences.
5. Check Optimization Status: In the app’s battery optimization settings, you’ll find the optimization status. Make sure it is not set to “Optimize” or “Maximize battery life.” If it is, switch it to “Don’t optimize” or “Allow” to ensure that the app can function normally, including displaying notifications.
6. Repeat for Other Apps: If you have multiple apps that are not showing notifications, repeat the above steps for each relevant app. Check the battery optimization settings and ensure that they are not being restricted.
Pro Tip: Some Android devices may have additional options within the battery settings, such as “Adaptive battery” or “Battery saver mode.” Consider reviewing these options and disabling them temporarily to see if it resolves the notification issue.
Test Notifications: After adjusting the battery optimization settings, open the app and test if notifications start appearing on your device. If they still do not show up, continue with the troubleshooting process.
By reviewing and adjusting the battery optimization settings, you can ensure that the app is not being restricted from sending notifications. This allows for a smoother user experience and helps you stay updated with important alerts on your Android device.
Clear App Cache and Data
If notifications are not showing up on your Android device, clearing the app cache and data can help resolve the issue. Over time, app cache and data can accumulate and cause performance issues, including problems with notifications. Clearing the cache and data of the app in question can refresh its settings and potentially fix the notification problem. Here’s how you can do it:
1. Open Settings: Start by opening the Settings app on your Android device. You can usually find it in the app drawer or by swiping down on the notification shade and tapping the gear icon.
2. Navigate to Apps & Notifications: Scroll through the settings menu and look for “Apps & Notifications” or a similar option. The naming may vary slightly depending on your device.
3. Select the App: In the Apps & Notifications menu, locate and tap on the app for which you want to clear the cache and data. This will open the app settings page.
4. Access Storage: Within the app settings, look for the “Storage” or “Storage & cache” option. It may be listed under different headings, such as “Storage & memory” or “Storage usage.” Tap on it to access the storage settings of the app.
5. Clear Cache: In the storage settings, you’ll find the option to clear the cache. Tap on “Clear cache” to remove the temporary files stored by the app.
6. Clear Data (optional): If clearing the cache doesn’t resolve the issue, you can also consider clearing the app data. This will remove all the app’s settings and personal data, so use this option with caution. Tap on “Clear data” or “Clear storage” to proceed.
7. Confirm the Action: After tapping on Clear Cache or Clear Data, a confirmation prompt will appear. Review the information and confirm the action. Note that clearing the data will reset the app to its initial state, so any personalized settings or logged-in accounts may be lost.
8. Test Notifications: After clearing the app cache and data, open the app and test if notifications start appearing on your device. If they still do not show up, continue with the troubleshooting process.
By clearing the app cache and data, you can eliminate any corrupt or outdated files that may be causing issues with notifications. This process essentially gives the app a fresh start, allowing it to function optimally and display notifications as intended on your Android device.
Reboot the Device
When you’re facing issues with notifications not showing up on your Android device, a simple yet effective troubleshooting step is to reboot or restart your device. Restarting the device can help resolve various glitches and restore normal functionality. Here’s how you can reboot your Android device:
1. Press and hold the Power button: Locate the Power button on your device, usually located on the side or top. Press and hold the button until the power menu appears on the screen.
2. Tap on Restart: In the power menu, you’ll see options like Power Off, Restart, or Reboot. Tap on the option that says Restart or Reboot.
3. Confirm the Action: A confirmation prompt will appear on the screen, asking if you want to restart your device. Confirm the action by tapping on Restart or OK.
4. Wait for the Device to Restart: Your device will now begin the reboot process. It may take a few moments for the device to fully shut down and restart. Be patient and wait for the reboot to complete.
5. Test Notifications: Once your device has restarted, test if notifications start appearing on your device. Check if the apps are now delivering the notifications as expected.
Pro Tip: If the regular restart doesn’t solve the issue, you can also try a force restart. This involves pressing and holding the Power button and the Volume Down button (or Volume Up button on some devices) simultaneously for about 10-15 seconds until the device restarts.
Rebooting your Android device is a simple and effective way to address various software-related issues, including problems with notifications. It refreshes the device’s system and can help resolve glitches that may be preventing notifications from showing up. Make it a habit to restart your device regularly to maintain optimal performance.
Update the App and Android System
If notifications are not showing up on your Android device, it’s essential to ensure that both the app in question and your Android system are up to date. Outdated apps or an outdated Android system can often cause notification issues. Here’s how you can update the app and Android system:
Update the App:
1. Open Play Store: Start by opening the Google Play Store app on your Android device. You can find it in the app drawer or on your home screen.
2. Search for the App: In the Play Store, use the search bar at the top to search for the app that is not showing notifications. Tap on its listing in the search results to access the app page.
3. Check for Updates: On the app page, look for the “Update” button. If the button is labeled as “Open,” it means the app is already up to date. If an update is available, tap on “Update” to download and install the latest version.
4. Automatic Updates: To ensure that your apps stay up to date automatically, you can enable automatic updates in the Play Store settings. Open the Play Store, tap on the Menu icon (three horizontal lines) in the top-left corner, go to “Settings,” and then select “Auto-update apps.” Choose the desired option, such as “Over Wi-Fi only” or “Over any network.”
Update the Android System:
1. Open Settings: Open the Settings app on your Android device.
2. Scroll to System Updates: Scroll down and look for “System” or “About phone.” Tap on it to access the system settings.
3. Check for Updates: In the system settings, look for “System updates,” “Software updates,” or a similar option. Tap on it to check for available updates for your Android system.
4. Download and Install Updates: If an update is available, your device will prompt you to download and install it. Make sure you have a stable internet connection, as the update files can be large.
Pro Tip: It’s a good practice to keep the app and Android system updated regularly. You can set up automatic updates for the Android system as well by going to the System updates settings and selecting “Automatic system updates.”
By updating the app and Android system, you ensure that you have the latest software versions, which often include bug fixes and performance improvements. These updates can potentially resolve notification issues and ensure the smooth functioning of your Android device.
Check for App-Specific Issues
When notifications are not showing up on your Android device, it’s important to consider the possibility of app-specific issues. Certain apps may have their own notification settings or issues that prevent notifications from appearing. Here are some steps you can take to check for app-specific issues:
1. Open the App Settings:
Start by opening the Settings app on your Android device. You can usually find it in the app drawer or by swiping down on the notification shade and tapping the gear icon.
2. Navigate to the App Settings:
In the Settings menu, look for “Apps” or “Applications” and tap on it. This will display a list of all the installed apps on your device.
3. Select the App:
Scroll through the list of apps and find the app that is not displaying notifications. Tap on it to access its app settings.
4. Check Notification Settings:
Within the app settings, look for an option related to notifications. It may be called “Notifications,” “Notification settings,” or something similar. Tap on it to access the notification settings specific to that app.
5. Review and Adjust Notification Settings:
Once you’re in the notification settings for the app, review the available options. Check if notifications are enabled for the app and if there are any additional settings or preferences that could be affecting the display of notifications. Make sure the necessary settings are configured according to your preferences.
6. Troubleshooting Guides:
Some apps may have specific troubleshooting guides or support resources available. Look for a “Help” or “Support” section within the app settings or visit the app developer’s website for any relevant documentation or troubleshooting steps. These resources can provide insights into any known issues with notifications and offer potential solutions.
7. Update the App:
If an update is available for the app, make sure to install it. App updates often include bug fixes and improvements that can resolve any issues, including problems with notifications.
8. Test Notifications:
After checking and adjusting the app-specific notification settings, open the app and test if notifications start appearing on your device. If the issue persists, try restarting your device and testing again. If necessary, move on to the next troubleshooting step.
By exploring the app-specific notification settings and resources, you can identify any app-related issues that might be causing the lack of notifications on your Android device. Adjusting settings, updating the app, and following any troubleshooting guides provided by the app developer can help resolve these issues and restore the proper functioning of notifications.
Perform a Factory Reset (as a last resort)
If all other troubleshooting steps have failed to resolve the issue of notifications not showing up on your Android device, you may consider performing a factory reset as a last resort. A factory reset will restore your device to its original state, erasing all data and settings. It should only be used when all other options have been exhausted and with caution, as it is a drastic measure. Here’s how you can perform a factory reset:
Important Note: Performing a factory reset will delete all data on your device, including apps, photos, messages, and accounts. It is crucial to back up your important data before proceeding with the reset.
1. Backup Your Data:
Start by backing up your data to ensure that you don’t lose any essential information. You can back up your data to a cloud storage service, such as Google Drive, or to an external storage device.
2. Open Settings:
Open the Settings app on your Android device. You can usually find it in the app drawer or by swiping down on the notification shade and tapping the gear icon.
3. Navigate to System:
In the Settings menu, scroll down and look for “System” or “System & updates.” Tap on it to access the system settings.
4. Factory Reset:
In the system settings, look for an option like “Reset,” “Backup & reset,” or “System reset.” Tap on it to access the reset options.
5. Select Factory Reset:
Within the reset options, look for “Factory data reset” or a similar option. Tap on it to initiate the factory reset process.
6. Confirm the Reset:
A warning screen will appear, informing you that all data will be erased. Read the information carefully and double-check that you have backed up your important data. If you’re ready to proceed, confirm the factory reset.
7. Wait for the Reset:
Your device will now begin the factory reset process. It may take a few minutes for the reset to complete. Follow the on-screen instructions, if any, to set up your device after the reset.
Pro Tip: After performing the factory reset, make sure to install the essential apps, update the Android system, and adjust settings as needed. Consider installing apps gradually and monitoring their impact on notifications to identify any potential issues.
A factory reset should only be used as a last resort when all other troubleshooting methods have failed. It provides a fresh start and can often resolve persistent issues, including problems with notifications. However, due to the data loss involved, it is crucial to proceed with caution and ensure that you have backed up your important data beforehand.