
Check the Power Source
One of the first steps you should take when troubleshooting a black screen issue on your Lenovo laptop is to check the power source. Often, a seemingly black screen can be attributed to a drained battery or a faulty power connection. Here are a few things you can do to ensure that the power source is not the issue:
- Check the power cord: Make sure that the power cord is securely plugged into both the laptop and the power outlet. Sometimes, the connection might be loose, leading to power fluctuations or a complete loss of power. If the power cord appears to be damaged or worn out, consider replacing it with a new one.
- Verify the battery status: If your Lenovo laptop has a removable battery, try removing it and then reinserting it. This can help reset any electrical issues that might be causing the black screen. Additionally, check the battery’s charge level. If the battery is completely drained, connect the laptop to a power source and let it charge for a while before attempting to turn it on again.
- Attempt a different power outlet: In some cases, the power outlet itself might be the problem. Plug your laptop into a different outlet and see if it powers up. If it does, then the original power outlet may be faulty or not providing sufficient power. Consider using a surge protector or a different outlet to ensure a stable power supply.
- Try a different power adapter: If you have access to another power adapter that is compatible with your Lenovo laptop, try using it instead. This can help determine whether the original power adapter is causing the issue.
By checking the power source, you can rule out any potential power-related problems that might be causing the black screen on your Lenovo laptop. If the issue persists after verifying the power source, it’s time to move on to the next troubleshooting steps.
Perform a Hard Reset
If you’re facing a black screen issue on your Lenovo laptop, performing a hard reset can sometimes resolve the problem. A hard reset essentially clears all temporary files and refreshes the system, helping to eliminate any software-related issues that might be causing the black screen. Follow these steps to perform a hard reset:
- Power off the laptop: Press and hold the power button on your Lenovo laptop until it shuts down completely. Disconnect any external devices, such as USB drives or external monitors.
- Remove the battery and power cord: If your laptop has a removable battery, carefully remove it. Then, unplug the power cord from both the laptop and the power outlet. Ensure that the laptop is completely disconnected from any power sources.
- Press and hold the power button: While the laptop is disconnected from power, press and hold the power button for at least 15-20 seconds. This helps drain any residual power from the system.
- Reconnect the power cord and battery: Plug the power cord back into the laptop and the power outlet. If you removed the battery, reinsert it into the laptop. Make sure everything is securely connected.
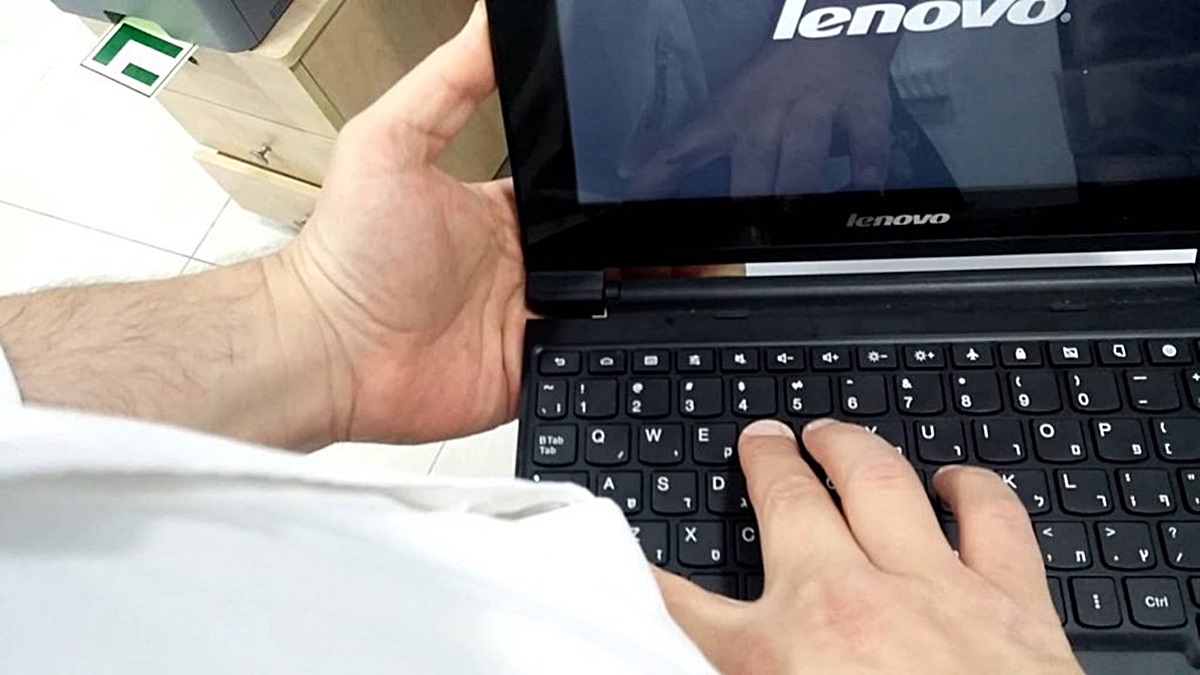
- Power on the laptop: Press the power button to turn on your Lenovo laptop. The system should start up normally, and you should see the Lenovo logo or the Windows startup screen.
If performing a hard reset resolves the black screen issue, it was likely caused by a temporary software glitch. However, if the problem persists, there may be other underlying causes that require further troubleshooting.
Please note that performing a hard reset may vary slightly depending on the model and specific configuration of your Lenovo laptop. Refer to your device’s user manual or the Lenovo website for detailed instructions applicable to your specific model.
Try an External Monitor
If you’re dealing with a black screen on your Lenovo laptop, connecting an external monitor can help determine whether the issue is related to the laptop’s display or the graphics card. Here’s how to try an external monitor:
- Connect the external monitor: Locate the VGA, DVI, or HDMI port on your Lenovo laptop. Plug one end of the appropriate video cable into the external monitor and the other end into the laptop’s video port. If necessary, use an adapter to connect the two devices.
- Turn on the external monitor: Power on the external monitor and set it to the correct input mode (e.g., HDMI, VGA, DVI). Ensure that the monitor is properly connected to a power source as well.
- Switch display mode: On your Lenovo laptop, press the appropriate key combination (usually Fn + one of the Function keys, labeled with a monitor icon) to switch the display output to the external monitor. Alternatively, you may need to access the display settings in your operating system to enable the external monitor as an extended display.
- Observe the external monitor: If the external monitor displays the laptop’s screen without any issues, then the problem may be related to the laptop’s built-in display or its associated hardware components. This could be caused by a faulty display cable, a loose connection, or a malfunctioning display panel.
- Check the laptop’s display settings: If the external monitor works fine but the laptop’s built-in display remains black, check the display settings on your Lenovo laptop. Make sure the brightness is turned up, and the display is not set to an extended display mode or turned off.
If the external monitor also shows a black screen or no signal, the problem may lie with the graphics card or other hardware components. In such cases, it’s recommended to update your graphics drivers, as outdated or incompatible drivers can sometimes cause display issues.
By trying an external monitor, you can determine whether the black screen problem is specific to your Lenovo laptop’s built-in display or a more widespread issue. This information can help guide your troubleshooting process and facilitate an appropriate solution.
Update Graphics Drivers
If you’re experiencing a black screen issue on your Lenovo laptop, outdated or incompatible graphics drivers could be the culprit. Graphics drivers are responsible for rendering images and videos on your screen, and outdated drivers can result in display-related problems. Here’s how you can update your graphics drivers:
- Identify your graphics card: Determine the make and model of your graphics card on your Lenovo laptop. You can find this information in the Device Manager or by visiting the manufacturer’s website.
- Visit the manufacturer’s website: Go to the website of the graphics card manufacturer, such as NVIDIA, AMD, or Intel. Navigate to the drivers or support section of the website.
- Download the latest drivers: Search for the appropriate graphics drivers for your specific graphics card model and operating system. Download the latest version of the drivers from the manufacturer’s website.
- Install the updated drivers: Once the drivers are downloaded, run the installer and follow the on-screen instructions to install the updated drivers on your Lenovo laptop. Restart your laptop after the installation is complete.
- Verify the driver installation: After restarting your laptop, confirm that the new graphics drivers have been successfully installed. You can do this by checking the Device Manager and ensuring that the graphics card is listed without any warning symbols or error messages.
Updating your graphics drivers can not only fix black screen issues but also improve overall system performance and enable compatibility with the latest software and games. It’s a crucial step in maintaining a stable and visually satisfying computing experience on your Lenovo laptop.
If updating the graphics driver doesn’t resolve the black screen problem, there may be other underlying factors contributing to the issue. Trying other troubleshooting methods, such as using Safe Mode or repairing startup files, might be necessary to pinpoint and resolve the root cause.
Note that graphics drivers may vary depending on the make and model of your graphics card. It’s important to refer to the manufacturer’s instructions and download the correct drivers compatible with your Lenovo laptop’s hardware configuration.
Use Safe Mode
Safe Mode is a diagnostic mode in your Lenovo laptop’s operating system that loads only essential system files and drivers. By booting into Safe Mode, you can isolate and troubleshoot any software-related issues that may be causing the black screen problem. Here’s how to access Safe Mode:
- Restart your Lenovo laptop: If your laptop is already turned on, save any open files and restart it. If it’s off, turn it on and wait until the Lenovo logo appears.
- Access the Windows Advanced Options Menu: As soon as the Lenovo logo appears, press the F8 key repeatedly until the Windows Advanced Options Menu is displayed. If the menu doesn’t appear, restart the laptop and try again.
- Select Safe Mode: Use the arrow keys on your keyboard to navigate to the “Safe Mode” option in the Windows Advanced Options Menu. Press Enter to select it.
- Log in to Safe Mode: Wait for Windows to load the necessary files and display the login screen. Log in using your credentials.
- Investigate the black screen issue: Once you’re in Safe Mode, observe if the black screen issue persists. If the screen functions normally, it suggests that a third-party program or driver is causing the problem. You can then proceed with troubleshooting by uninstalling recently installed software or rolling back drivers.
- Perform system maintenance: While in Safe Mode, you can also run antivirus scans, perform system maintenance tasks, and update drivers to ensure your Lenovo laptop is in optimal condition.
If your Lenovo laptop operates normally in Safe Mode and the black screen problem disappears, it indicates that a software conflict or an incompatible driver is likely causing the issue. By identifying and resolving the problematic software or driver, you can restore normal functionality to your laptop.
If the black screen issue persists even in Safe Mode, there may be hardware-related problems or deeper system issues that require further investigation or professional assistance. In such cases, it’s advisable to contact Lenovo support or a qualified technician for further guidance.
Remember that Safe Mode offers limited functionality, so certain features and programs may not be available while in this mode. Once you have resolved the black screen issue, you can exit Safe Mode by restarting your laptop normally.
Repair Startup Files
If your Lenovo laptop is experiencing a black screen issue during startup, it’s possible that corrupted or missing startup files are causing the problem. Repairing the startup files can help resolve this issue and allow your laptop to boot up properly. Here’s how to repair startup files:
- Access the Windows Advanced Options Menu: Start or restart your Lenovo laptop and repeatedly press the F8 key until you see the Windows Advanced Options Menu. If the menu doesn’t appear, restart the laptop and try again.
- Select “Repair Your Computer”: Use the arrow keys on your keyboard to navigate to the “Repair Your Computer” option in the Windows Advanced Options Menu. Press Enter to select it.
- Choose the operating system: If you have multiple operating systems installed on your laptop, select the one that you’re having trouble with and click “Next.”
- Choose “Startup Repair”: In the System Recovery Options, select “Startup Repair” and let the process run. Windows will attempt to fix any issues with the startup files.
- Follow the on-screen instructions: Windows may prompt you to restart your laptop during the repair process. Follow the on-screen instructions and allow the repair process to complete.
- Test startup: Once the repair process is finished, restart your Lenovo laptop to see if the black screen issue is resolved. If the problem persists, you can try other troubleshooting methods or move on to more advanced options, such as performing a system restore.
Repairing the startup files can often fix startup-related issues, including black screen problems. This method works by correcting any errors or inconsistencies in the system files that are necessary for a successful boot. However, if the black screen issue continues after attempting to repair the startup files, there may be other factors contributing to the problem.
In such cases, it’s advisable to explore further troubleshooting options or seek professional assistance. Lenovo support or a qualified technician can provide guidance and assistance in diagnosing and resolving the underlying cause of the black screen issue on your laptop.
Remember to back up your important data regularly to protect against potential data loss during the repair or troubleshooting process.
Perform a System Restore
If you’re encountering a black screen issue on your Lenovo laptop and suspect that recent changes in the system settings or installed software may be the cause, performing a system restore can help revert your laptop back to a previous working state. System restore allows you to roll back your Lenovo laptop to a previous restore point, undoing any changes that may be contributing to the black screen problem. Here’s how to perform a system restore:
- Access the System Restore feature: Press the Windows key on your keyboard or click the “Start” button, and search for “System Restore.” Open the System Restore application from the search results.
- Choose a restore point: In the System Restore window, select the option to “Choose a different restore point” and click “Next.” This will display a list of available restore points.
- Select a restore point: Review the list of restore points and choose a date and time when your Lenovo laptop was functioning properly. Ensure that you select a restore point before the black screen issue started occurring.
- Start the system restore: Once you’ve selected a restore point, click “Next” and then “Finish” to begin the system restore process. Windows will then restart your laptop and begin restoring the system files to the selected restore point.
- Wait for the process to complete: Allow the system restore process to run its course. It may take some time, and your laptop may restart multiple times during the process. Do not interrupt the process to avoid further complications.
- Check if the black screen issue is resolved: After the system restore is complete and your laptop restarts, check if the black screen problem has been resolved. If the issue persists, it may be necessary to explore other troubleshooting methods or consider seeking professional assistance.
Performing a system restore can be a valuable tool in resolving software-related issues, as it allows you to revert your Lenovo laptop back to a stable state. Keep in mind that a system restore will undo any changes made to system files, settings, and installed software after the selected restore point. Therefore, it’s important to back up any important data and consider the potential impact on recent changes before proceeding with a system restore.
If the black screen problem continues even after performing a system restore, it’s recommended to try other troubleshooting methods or seek assistance from Lenovo support or a professional technician to diagnose and address the underlying cause of the issue.
Check for Viruses or Malware
A black screen issue on your Lenovo laptop could potentially be caused by viruses or malware that have infected your system. These malicious programs can interfere with normal system operations and lead to various issues, including a black screen. Here’s how you can check for viruses or malware:
- Update your antivirus software: Ensure that your antivirus software is up to date with the latest virus definitions. This will ensure that it can effectively detect and remove any potential threats.
- Perform a full system scan: Open your antivirus software and initiate a full system scan. This scan will examine all the files and folders on your Lenovo laptop for any signs of viruses or malware.
- Follow recommended actions: If the antivirus software detects any viruses or malware, follow the recommended actions to quarantine or remove them. Depending on the severity of the infection, these actions may vary, but it’s essential to follow the antivirus software’s instructions closely.
- Consider using anti-malware software: In addition to your regular antivirus software, consider using reputable anti-malware software to provide an extra layer of protection. Some malware may go undetected by traditional antivirus software, so using an anti-malware program can help identify and remove any additional threats.
- Regularly update and scan your system: To keep your Lenovo laptop safe from viruses and malware, ensure that you regularly update your antivirus and anti-malware software. Also, perform scheduled system scans to detect any new threats that may have emerged since your last scan.
Checking for viruses or malware is an important step in troubleshooting a black screen issue. These malicious programs can disrupt normal system operations and potentially cause various problems. By ensuring that your Lenovo laptop is free from viruses and malware, you can eliminate this potential cause of the black screen problem.
If the black screen issue persists even after scanning and removing any detected viruses or malware, it may be necessary to explore other troubleshooting options or seek assistance from Lenovo support or a professional technician.
Remember to practice safe browsing habits and exercise caution when downloading files or visiting websites to minimize the risk of encountering viruses or malware in the future.
Reset BIOS Settings
If you’re experiencing a black screen issue on your Lenovo laptop, resetting the BIOS settings can help resolve any potential hardware-related conflicts that may be causing the problem. The BIOS (Basic Input/Output System) is responsible for managing the hardware settings of your laptop. By resetting the BIOS settings, you can restore them to their default configuration. Here’s how to reset the BIOS settings:
- Shut down your Lenovo laptop: Ensure that your laptop is turned off completely before proceeding with the BIOS reset.
- Access the BIOS: Turn on your laptop and quickly press the appropriate key or combination of keys to access the BIOS. This key or combination of keys varies depending on the laptop model and manufacturer. Common keys include F2, F10, Delete, or Escape.
- Navigate to the “Reset to Defaults” option: Use the arrow keys on your keyboard to navigate through the BIOS menu. Look for an option like “Reset to Defaults,” “Load Setup Defaults,” or something similar.
- Confirm the reset: Select the “Reset to Defaults” option and follow the on-screen instructions to confirm the reset. Some BIOS setups may ask for confirmation multiple times to ensure that you want to proceed with the reset. Read the instructions carefully and proceed accordingly.
- Save and exit the BIOS: Once the reset is complete, navigate to the “Save Changes and Exit” option in the BIOS menu. Select this option to save the changes and exit the BIOS.
- Restart your laptop: Allow your Lenovo laptop to restart and boot up normally. Check if the black screen problem has been resolved.
Resetting the BIOS settings can help resolve hardware conflicts that may be causing the black screen issue. It clears any custom configurations and reverts the settings to their default values. However, keep in mind that resetting the BIOS settings should be done with caution, as it may affect other aspects of your laptop’s functionality.
If the black screen issue persists even after resetting the BIOS settings, it’s advisable to explore other troubleshooting methods or contact Lenovo support or a professional technician for further assistance.
Always make a note of any custom BIOS settings before performing a reset, as you may need to reconfigure them after resolving the black screen issue to ensure optimal performance of your Lenovo laptop.
Contact Lenovo Support
If you have tried the aforementioned troubleshooting steps and are still experiencing a black screen issue on your Lenovo laptop, it may be time to reach out to Lenovo support for further assistance. Lenovo’s customer support team is equipped to provide guidance and solutions to resolve technical issues. Here’s how you can contact Lenovo support:
- Visit the Lenovo website: Go to the official Lenovo website and navigate to the support section. Look for the “Support” or “Contact Us” page.
- Choose your region and product: Select your country or region from the available options, and then specify the product category and model of your Lenovo laptop.
- Explore your support options: Lenovo offers various support avenues, including phone support, online chat, and email support. Choose the option that suits you best, keeping in mind factors such as availability and convenience.
- Contact Lenovo support: Once you have determined your preferred support method, follow the provided instructions to contact Lenovo support. Be prepared to provide relevant details about your laptop model, operating system, and a clear description of the black screen issue you are facing.
- Follow the guidance provided: Lenovo’s support team will guide you through troubleshooting steps or gather additional information to better understand and address your black screen problem. Follow their instructions carefully in order to reach a resolution.
- Consider warranty or repair options: If your Lenovo laptop is still covered by a warranty, the support team may provide repair or replacement options for your black screen issue. In some cases, you may need to send your laptop to a service center for diagnosis and repair. They will provide you with the necessary instructions and support throughout the process.
Lenovo support is dedicated to assisting customers with technical issues and finding appropriate solutions. They have the expertise and resources to address a wide range of problems, including black screen issues on Lenovo laptops. By contacting Lenovo support, you can receive individualized assistance tailored to your specific situation.
Remember to provide as much relevant information as possible to Lenovo support, including any troubleshooting steps you have already attempted. This will help accelerate the support process and enable them to provide more accurate guidance.
If your Lenovo laptop is no longer under warranty, consider seeking assistance from a professional technician who specializes in laptop repairs.