
Gathering the Necessary Tools and Materials
Before you begin fixing your electric scooter, it’s important to gather all the necessary tools and materials. This will ensure that you have everything at hand and can complete the repairs efficiently.
Here is a list of tools and materials you may need:
- Screwdriver set: A set of screwdrivers with different sizes and types will be useful for removing screws and opening compartments.
- Wrench set: Having a set of wrenches will allow you to tighten or loosen bolts and nuts as needed.
- Wire cutters: Wire cutters are essential for cutting and stripping wires when necessary.
- Electrical tape: This will come in handy for insulation and securing loose wires or connections.
- Multi-meter: A multi-meter is a crucial tool for testing the electrical components and circuits of your electric scooter.
- Replacement parts: Depending on the nature of the issue, you might need to have replacement parts on hand. This could include items like batteries, fuses, controllers, motors, or brake components.
- Cleaning materials: It’s important to have some cleaning materials such as a cloth, contact cleaner, and mild detergent to clean any dirt or debris that may be causing issues.
- Lubricants: A small can of lubricating oil or grease can be useful for maintaining the scooter’s moving parts.
Make sure to have these tools and materials readily available before you begin the repairs. Having everything on hand will save you time and prevent any unnecessary delays during the process.
Now that you have gathered all the necessary tools and materials, it’s time to move on to the next steps of troubleshooting and repairing your electric scooter.
Checking and Replacing the Battery
The battery is a crucial component of your electric scooter, as it provides the power needed to run the motor. If your scooter is not turning on or has significantly reduced power, the battery might be the culprit. Here’s how you can check and replace the battery:
1. Locate the battery: Depending on the model of your electric scooter, the battery is usually located under the scooter deck or in a removable compartment. Refer to the scooter’s manual or manufacturer’s instructions to find the battery.
2. Inspect the battery: Examine the battery for any signs of damage, such as leaks or swollen casing. If you notice any damage, it’s best to replace the battery entirely. If the battery looks intact, move on to the next step.
3. Check the battery voltage: Use a multi-meter set to DC voltage to measure the battery’s voltage. Compare the reading to the manufacturer’s recommended voltage. If the voltage is significantly lower than the recommended level, the battery might need to be replaced.
4. Remove the old battery: If the battery needs to be replaced, disconnect the battery cables carefully. Take note of the positive (+) and negative (-) terminals and their corresponding positions, as you’ll need to connect the new battery correctly.
5. Install the new battery: Insert the new battery into its designated compartment and connect the battery cables to the appropriate terminals. Ensure a secure connection by tightening the battery cables properly.
6. Test the scooter: After replacing the battery, turn on the electric scooter and test its functionality. If the scooter powers up and runs smoothly, then the battery replacement was successful. If not, you may need to further investigate other potential issues.
Remember to dispose of the old battery properly. Check local regulations or contact a local recycling center for guidelines on safe battery disposal.
By following these steps, you can check the battery’s condition and replace it if necessary. A healthy battery will ensure optimal performance and extend the lifespan of your electric scooter.
Inspecting and Replacing the Fuse
The fuse is a small component in your electric scooter’s electrical system that protects against electrical overloads. If your scooter suddenly stops working or the lights and other electrical components fail, there may be a blown fuse. Here’s how you can inspect and replace the fuse:
1. Locate the fuse: The fuse is typically located in the scooter’s control unit or battery compartment. Refer to the scooter’s manual or manufacturer’s instructions to find the exact location of the fuse.
2. Inspect the fuse: Carefully remove the fuse from its holder and examine it for any signs of damage. A blown fuse may have a visibly broken wire inside or a blackened appearance. If the fuse is damaged, it needs to be replaced.
3. Select the correct replacement fuse: Determine the appropriate fuse rating by checking the scooter’s manual or the blown fuse itself. The fuse rating is usually indicated by an amperage value. It’s essential to replace the blown fuse with the same rating to prevent electrical issues or damage to other components.
4. Replace the fuse: Take the new fuse and carefully insert it into the fuse holder, ensuring a secure fit. Make sure that the new fuse has the correct orientation, aligning the positive (+) and negative (-) markings if applicable.
5. Reassemble the scooter: Once the new fuse is in place, reassemble any components or covers that were removed to access the fuse.
6. Test the scooter: Turn on the electric scooter and check if the malfunction has been resolved. If the scooter is functioning properly and the electrical components are working, then the fuse replacement was successful. If the issue persists, further investigation may be required.
It’s important to note that if a fuse blows repeatedly, it could indicate an underlying electrical problem. In such cases, it may be necessary to seek professional assistance to diagnose and repair the issue.
By following these steps, you can inspect and replace the fuse in your electric scooter. A functional fuse will ensure the proper functioning of the electrical system and prevent any potential electrical damage.
Cleaning and Tightening the Connections
Over time, the connections in your electric scooter can become dirty or loose, leading to poor performance or even a complete electrical failure. Cleaning and tightening these connections is a simple yet effective way to ensure optimal functionality. Here’s how you can clean and tighten the connections:
1. Disconnect the power source: Before you start working on the connections, make sure the electric scooter is turned off and the power source is disconnected. This will ensure your safety and prevent any accidental electrical shocks.
2. Inspect the connections: Remove any protective covers or panels to gain access to the connections. Inspect them for signs of corrosion, dirt, or loose wires. Pay specific attention to the battery terminals, motor connections, and controller connectors.
3. Clean the connections: Use a wire brush or a small brush dipped in a mixture of baking soda and water to gently scrub away any corrosion or dirt on the connections. Be careful not to use excessive force to avoid damaging the wires or connectors.
4. Tighten the connections: After cleaning, use a screwdriver or a wrench to tighten any loose connectors or screws. Make sure to achieve a secure fit without over-tightening, as this could damage the connectors or wires.
5. Reassemble the scooter: Once the connections are clean and tight, reassemble any removed covers or panels to protect the connections from dust and moisture.
6. Test the scooter: Turn on the electric scooter and test its functionality. Check if the lights, motors, and other electrical components are working properly. If everything is functioning as expected, then the cleaning and tightening of the connections were successful. If issues persist, further investigation may be necessary.
Regularly cleaning and tightening the connections will help maintain the electrical integrity of your electric scooter and prevent potential performance issues. Aim to inspect and clean the connections at least once every few months or whenever you notice signs of corrosion.
By following these steps, you can ensure that the connections in your electric scooter are clean and properly tightened, promoting optimal performance and reliability.
Testing and Replacing the Controller
The controller is a vital component of your electric scooter’s electrical system. It regulates the power flow from the battery to the motor, allowing for speed control and overall scooter performance. If you’re experiencing issues with acceleration, speed, or overall functionality, testing and potentially replacing the controller may be necessary. Here’s how you can perform these tasks:
1. Locate the controller: The controller is typically housed in a compartment near the scooter’s battery or motor. Refer to the scooter’s manual or manufacturer’s instructions to find the exact location of the controller.
2. Inspect the controller: Check the controller for any signs of physical damage, such as broken wires, burnt components, or melted connectors. If you notice any visible damage, it’s likely that the controller needs to be replaced.
3. Testing the controller: Use a multi-meter set to the appropriate voltage range, typically DC, to test the input and output voltage of the controller. Compare the readings to the manufacturer’s specifications to determine if the controller is functioning correctly. If the readings are significantly off or no voltage is detected, the controller may need to be replaced.
4. Replacing the controller: If testing confirms that the controller is faulty, disconnect the wires connected to the controller and carefully remove it from its mounting location. Replace it with a new controller that matches the specifications of your electric scooter. Follow the manufacturer’s instructions for proper installation.
5. Test the scooter: After replacing the controller, reconnect the wires and cables, ensuring a secure connection. Turn on the electric scooter and test its functionality by accelerating and observing the speed control. If the scooter responds appropriately and runs smoothly, then the controller replacement was successful. If not, further investigation may be required.
It’s worth noting that replacing the controller may require advanced electrical knowledge or professional assistance. If you’re unsure or uncomfortable with the process, it’s recommended to seek help from a qualified technician.
By following these steps, you can test and potentially replace the controller in your electric scooter. A properly functioning controller is essential for reliable speed control and overall scooter performance.
Checking and Replacing the Motor
The motor is the core component of your electric scooter, responsible for propelling you forward. If you’re experiencing issues with power, acceleration, or strange noises coming from the motor, it may be necessary to check and potentially replace it. Here’s how you can perform these tasks:
1. Locate the motor: The motor is typically located near the rear wheel or within the scooter’s frame. Refer to the scooter’s manual or manufacturer’s instructions to find the exact location of the motor.
2. Inspect the motor: Carefully examine the motor for any signs of damage, such as visible cracks, burnt smell, or excessive wear. Check the motor wires and connectors for any loose or frayed connections. If you notice significant damage or suspect a motor malfunction, it may need to be replaced.
3. Test the motor: Use a multi-meter to test the continuity of the motor’s wiring. With the resistance setting on the multi-meter, test the connections between the motor wires. If you receive a reading of infinite resistance or zero resistance, this indicates a problem with the motor and it should be replaced.
4. Replacing the motor: If testing confirms that the motor is faulty, carefully disconnect the motor wires and remove the motor from its mounting location. Replace it with a new motor that matches the specifications of your electric scooter. Follow the manufacturer’s instructions for proper installation.
5. Test the scooter: After replacing the motor, reconnect the motor wires and cables, ensuring a secure connection. Turn on the electric scooter and test its functionality by gently accelerating and observing the motor’s performance. If the scooter responds appropriately and runs smoothly, then the motor replacement was successful. If not, further investigation may be required.
Replacing the motor may require advanced technical skills or professional assistance. If you’re unsure or uncomfortable with the process, it’s recommended to seek help from a qualified technician for motor replacement.
By following these steps, you can check and potentially replace the motor in your electric scooter. A well-functioning motor is crucial for optimal power and performance.
Inspecting and Fixing the Brake System
The brake system is a critical safety component of your electric scooter that ensures you can stop safely and quickly when needed. If you notice any issues with your scooter’s braking performance, it’s important to inspect and address them promptly. Here’s how you can inspect and fix the brake system:
1. Visual inspection: Start by visually inspecting the brake system components. Check the brake pads or shoes for wear and tear, ensuring they are of sufficient thickness. Examine the brake cables, levers, and calipers for any damage or signs of looseness. Look for any visible leaks of fluid if you have a hydraulic brake system.
2. Brake pad/shoe replacement: If the brake pads or shoes are worn down below the recommended thickness or show signs of significant wear, they need to be replaced. Remove the old brake pads or shoes and install new ones according to the manufacturer’s instructions.
3. Brake cable adjustment: Inspect the brake cables for any slack. If the cables are loose, tighten them by adjusting the cable tension using the barrel adjusters or the brake lever adjustment screws. Ensure that the brakes engage smoothly and evenly when the brake lever is pressed.
4. Brake fluid check: If your electric scooter has a hydraulic brake system, check the brake fluid level and its condition. Ensure that the fluid is at the appropriate level and not contaminated or discolored. If necessary, top up the brake fluid or seek professional help for fluid replacement.
5. Caliper alignment: Make sure that the brake calipers are aligned properly. Adjust the calipers using the appropriate screws or bolts to ensure even contact between the brake pads and the braking surface. This will maximize the braking efficiency and reduce any squeaking or rubbing sounds.
6. Test the brakes: After inspecting and fixing the brake system, test the brakes in a safe and controlled environment. Gradually apply the brakes to check for responsiveness and effectiveness. Make sure that the scooter comes to a complete stop smoothly and without any unusual noises or vibrations.
If you’re unsure about inspecting or fixing the brake system, it’s highly recommended to seek the assistance of a professional technician. They can ensure that the brakes are in optimal condition and will provide reliable stopping power when needed.
By following these steps, you can inspect and address any issues with your electric scooter’s brake system. A well-maintained and properly functioning brake system is crucial for your safety while riding.
Troubleshooting and Repairing the Throttle
The throttle is an essential component that allows you to control the speed and acceleration of your electric scooter. If you’re experiencing issues with the throttle, such as unresponsive or erratic behavior, it’s important to troubleshoot and repair it promptly. Here’s how you can troubleshoot and fix throttle problems:
1. Check the connections: Start by examining the connections between the throttle and the controller. Ensure that the connectors are securely plugged in and that there are no loose or damaged wires. Reconnect any loose connections and check if this resolves the issue.
2. Clean the throttle: Over time, dirt or debris can accumulate in the throttle mechanism, affecting its performance. Use a cloth or a cleaning solution suitable for electrical components to gently clean the throttle. Be careful not to apply excessive moisture that could damage the internal electronics.
3. Test the throttle voltage: Use a multi-meter set to voltage mode to check the throttle’s output. Follow the manufacturer’s instructions on how to perform this test. Compare the voltage readings to the specified range. If the readings are outside the range, it may indicate a faulty throttle that needs to be replaced.
4. Inspect the throttle mechanism: Remove any covers or panels that may be obstructing access to the throttle mechanism. Look for any physical damage, such as broken or stuck components. If you see any issues, it may be necessary to replace the throttle assembly.
5. Replace the throttle: If testing and inspection indicate a faulty throttle, you’ll need to replace it with a compatible part. Refer to the scooter’s manual or manufacturer’s instructions for guidance on the replacement procedure. Ensure that you install the new throttle correctly and securely.
6. Test the scooter: After replacing the throttle, turn on the electric scooter and test the throttle’s functionality. Gradually increase the throttle to check if the acceleration is smooth and responsive. Ensure that the scooter’s speed can be controlled effectively. If the throttle is working as expected, then the repair was successful. If not, further troubleshooting or professional assistance may be required.
If you’re unsure about diagnosing or repairing the throttle, it’s recommended to seek help from a qualified technician. They can offer expert guidance and ensure a proper fix for the throttle issues.
By following these steps, you can troubleshoot and repair problems with the throttle of your electric scooter. A functional and responsive throttle is crucial for safe and enjoyable riding experiences.
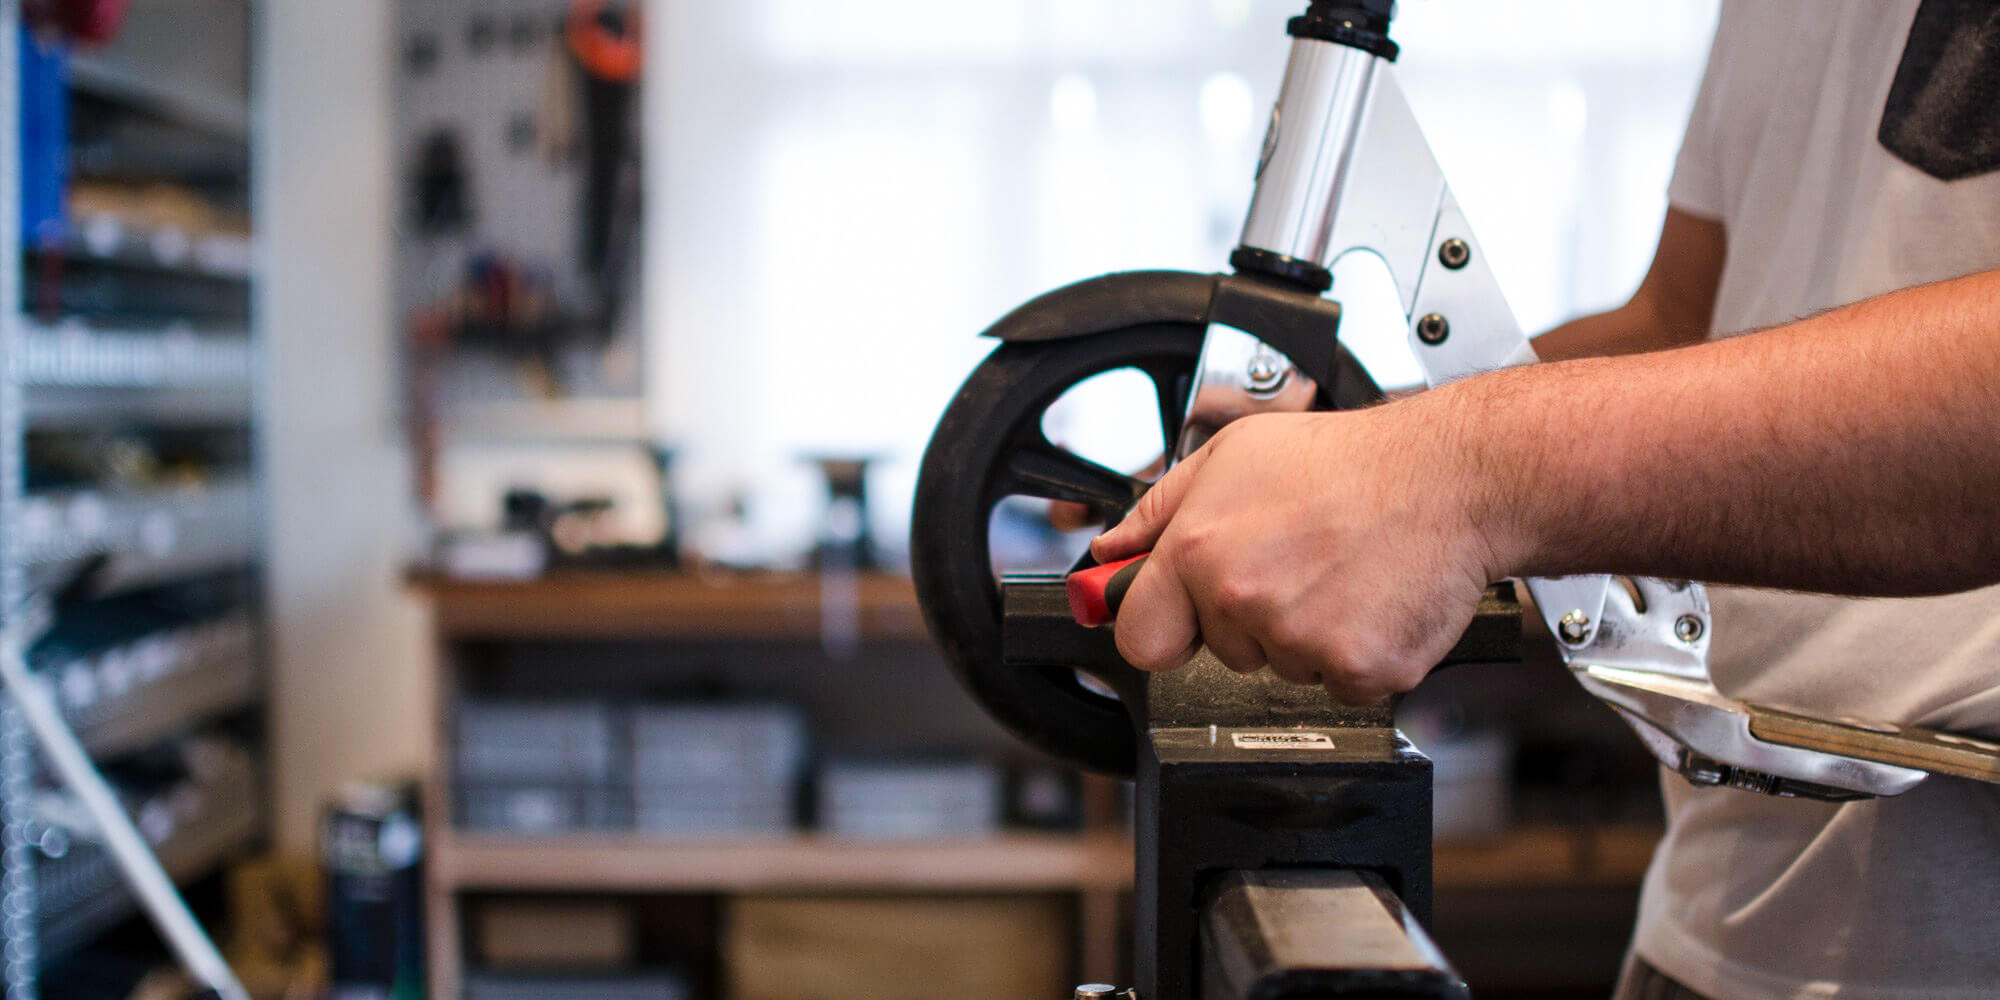
Inspecting and Replacing the Wheels and Tires
The wheels and tires of your electric scooter play a crucial role in maintaining stability, traction, and overall ride quality. If you notice signs of wear and tear, damage, or decreased performance, it’s important to inspect and potentially replace them. Here’s how you can inspect and replace the wheels and tires:
1. Inspect the wheels: Carefully examine the wheels for any visible signs of damage, such as cracks, dents, or loose spokes. Check if the wheels spin freely without any wobbling or dragging. Inspect the axle, bearings, and hub for any signs of wear or excessive play.
2. Inspect the tires: Check the tires for wear indicators or tread patterns. If the tread is significantly worn down or there are visible cracks, it’s time to replace the tires. Ensure that the tires are properly inflated as per the manufacturer’s recommended pressure.
3. Measure the wheel diameter and width: Use a measuring tape or calipers to determine the diameter and width of the wheels. This information is crucial when selecting replacement wheels and tires to ensure a proper fit.
4. Purchase appropriate replacement wheels and tires: Look for wheels and tires that match the measurements and specifications of your electric scooter. Consider factors such as the tire type (solid or pneumatic) and the desired tread pattern for the intended usage.
5. Replace the wheels and tires: Remove the old wheels and tires by loosening any bolts or axle nuts. Carefully install the new wheels and tires, ensuring they are aligned properly. Tighten the bolts or axle nuts to secure them in place, but avoid overtightening.
6. Test the scooter: After replacing the wheels and tires, test the scooter by taking it for a short ride. Pay attention to the stability, smoothness, and grip provided by the new wheels and tires. Ensure that there are no unusual vibrations or abnormal noises.
Regularly inspecting and maintaining your electric scooter’s wheels and tires is essential for a safe and enjoyable riding experience. It’s recommended to check the wheels and tires periodically, especially if you frequently ride in demanding conditions or encounter rough terrain.
If you’re uncertain about replacing the wheels and tires or need assistance, it’s advisable to consult a professional technician. They can provide expert guidance and ensure proper installation.
By following these steps, you can effectively inspect and replace the wheels and tires of your electric scooter, ensuring optimal performance and safety on the road.
Maintaining and Lubricating the Scooter
Proper maintenance and lubrication of your electric scooter are essential for prolonging its lifespan and ensuring smooth and efficient performance. By following these maintenance tips, you can keep your scooter in top shape. Here’s how you can maintain and lubricate your electric scooter:
1. Clean regularly: Clean your scooter regularly to remove dirt, dust, and debris that can accumulate and affect its performance. Use a damp cloth or sponge to wipe down the scooter’s surfaces, including the frame, handlebars, and any other exposed parts.
2. Check for loose or damaged parts: Regularly inspect the scooter for any loose or damaged parts, such as bolts, screws, or wires. Tighten any loose components, and replace any damaged parts as necessary to ensure the scooter’s stability and functionality.
3. Lubricate moving parts: Apply a suitable lubricant to the scooter’s moving parts, such as the folding mechanism, hinges, and wheel axles. Use a lubricant specifically designed for use on electric scooters or consult the scooter’s manual for recommended lubrication points and products.
4. Check tire pressure: Regularly check the tire pressure and ensure that it is within the manufacturer’s recommended range. Underinflated or overinflated tires can affect the scooter’s stability and performance. Use a tire pressure gauge and an air pump to adjust the tire pressure as needed.
5. Inspect and maintain the battery: Keep the scooter’s battery in good condition by following the manufacturer’s instructions for maintenance and charging. Check the battery connections regularly to ensure they are secure and clean. Follow proper charging procedures and avoid overcharging or completely draining the battery.
6. Store it properly: When not in use, store the electric scooter in a cool and dry place to prevent exposure to extreme temperatures and moisture. If storing for an extended period, partially charge the battery to prevent it from fully discharging.
7. Follow recommended service intervals: Refer to the scooter’s manual for recommended service intervals. It may include tasks such as replacing brake pads, inspecting electrical connections, or performing more in-depth maintenance. Following these intervals will help identify potential issues and keep your scooter in optimal condition.
Maintaining and lubricating your electric scooter is an ongoing process that requires regular attention. By dedicating time to these maintenance practices, you can ensure that your scooter performs reliably and safely for years to come.
If you’re unsure about any specific maintenance tasks or need assistance, consider reaching out to a professional technician for guidance. They can provide expert advice and service to keep your electric scooter in excellent shape.
By following these steps, you can effectively maintain and lubricate your electric scooter, ensuring a smooth, efficient, and safe riding experience.