
Assess the Damage
If you find yourself with a broken charger, the first step is to assess the extent of the damage. This will help you determine the best course of action to fix the issue. Here are a few things to consider when assessing the damage:
- Physical Damage: Inspect the charger for any visible signs of physical damage, such as bent pins, frayed wires, or a cracked casing. If you notice any of these problems, it’s likely that the charger needs repair or replacement.
- Functionality: Test the charger by plugging it into a power outlet and connecting it to a device. Check if the device charges properly or if there are any connectivity issues. If the charger fails to charge the device or shows inconsistent charging, there may be a problem with the charger.
- Warranty: Determine if your charger is still under warranty. If it is, contact the manufacturer or retailer to inquire about repair or replacement options. It’s important to note that attempting to fix a charger on your own might void any existing warranty.
By thoroughly assessing the damage, you’ll be able to make an informed decision on how to proceed with fixing your broken charger. Whether it requires a simple repair or a replacement, taking the time to evaluate the situation will save you time and hassle down the road.
Check the Power Outlet
When your charger stops working, one of the first things to check is the power outlet. A faulty power outlet could be the culprit behind the charging issues. Here’s what you can do to check the power outlet:
- Try a Different Outlet: Plug your charger into a different power outlet to see if the problem persists. Sometimes, a specific outlet may not be functioning correctly, and simply switching to another outlet can solve the issue.
- Ensure Proper Connection: Make sure your charger is securely plugged into the power outlet. Sometimes, a loose connection can prevent the charger from receiving proper power and charging your device. Gently wiggle the charger in the outlet to ensure a snug fit.
- Reset the Circuit Breaker: If you’re using a power outlet with a built-in circuit breaker, it’s possible that the circuit has tripped. Locate your circuit breaker panel and check if the circuit connected to the outlet has tripped. If so, reset the breaker and try plugging in your charger again.
- Test Other Devices: Plug in a different device, such as a lamp or a phone charger, into the same power outlet. If the other device works fine, it indicates that the power outlet is functioning correctly. In this case, the issue may be with your charger.
By checking the power outlet, you can eliminate any problems related to faulty electrical connections or power supply. If the outlet is working fine, it’s time to move on to the next step in fixing your broken charger.
Inspect the Charger Cable
When your charger stops working, the cable itself may be the culprit. Over time, cables can become damaged or worn out, leading to charging issues. Here’s how you can inspect the charger cable:
- Check for Physical Damage: Examine the entire length of the charger cable for any visible signs of physical damage. Look for frayed or exposed wires, kinks, or bends in the cable, or any other abnormalities. Such damage can prevent the proper flow of electricity and hinder charging.
- Flexibility Test: Gently flex the charger cable along its length, feeling for any stiff spots or areas that don’t bend easily. A cable that has become too rigid or has lost its flexibility may have internal damage or broken wires.
- Test the Cable with Another Device: Connect the charger cable to a different device and see if it charges properly. If it works fine with another device, the issue may be with your original device rather than the cable.
- Try Different Positions: While the charger is plugged into a device, try repositioning the cable and see if the charging starts or improves. Sometimes, a loose or faulty connection can be fixed by adjusting the position of the cable.
If you find any visible physical damage or notice problems with flexibility, it’s likely that the charger cable needs to be replaced. Damaged or worn-out cables can pose a risk of electrical shock or other hazards, so it’s important to address the issue promptly.
However, if the cable appears to be in good condition and performs well with another device, the problem may lie elsewhere, such as the charging port on your main device.
Fix Loose Connections
Loose connections are a common cause of charging issues with chargers. If you’ve identified that the problem lies in a loose connection, here are some steps you can take to fix it:
- Inspect the Charger Ports: Examine both the charging port on your device and the charging connector on your charger for any debris, dirt, or dust. Sometimes, foreign particles can build up and interfere with the connection. Use a soft cloth or a toothpick to carefully clean out any obstructions.
- Tighten the Connection: Ensure that the charging cable is plugged firmly into the device’s charging port. Gently push the connector in, making sure it is fully inserted and secure. Additionally, check the connection between the charging cable and the charger itself, ensuring that it is tightly connected.
- Test Different Angles: Experiment with different angles and positions of the charging cable while it’s plugged into the device. Sometimes, a slight adjustment in positioning can establish a better connection. Keep an eye on the device to see if it starts charging or if the connection becomes more stable.
- Consider a Charging Dock or Stand: If you’re consistently facing issues with loose connections, you may want to invest in a charging dock or stand. These accessories can securely hold your device and charger, providing a stable and reliable charging connection.
By addressing loose connections, you can improve the stability and efficiency of the charging process. However, if the issue persists or if you notice any physical damage to the charging ports or connectors, it’s advisable to seek professional help or consider replacing the charger.
Clean the Charging Port
A dirty or clogged charging port can interfere with the charging process and lead to charging issues. If you suspect that a dirty charging port is causing your charger to malfunction, here’s how you can clean it:
- Gather the Required Tools: You’ll need a few tools to effectively clean the charging port, such as a soft-bristled toothbrush, a wooden or plastic toothpick, and a can of compressed air (optional).
- Power Off the Device: Before you begin cleaning, make sure to power off your device to avoid any potential electrical mishaps or damage.
- Gently Brush the Port: Take the soft-bristled toothbrush and gently brush the inside of the charging port. Be careful not to be too harsh or use excessive force, as you don’t want to damage any delicate components. The bristles will help dislodge any dirt, dust, or debris that may be obstructing the charging connection.
- Use a Toothpick: If there are any stubborn particles that the brush couldn’t remove, use a wooden or plastic toothpick. Insert the toothpick into the port and gently scrape away the debris. Be cautious not to apply too much pressure or insert the toothpick too deeply to avoid damaging any internal components.
- Blow with Compressed Air (Optional): If you have a can of compressed air, you can use it to blow away any remaining particles from the charging port. Hold the can upright and direct short bursts of air into the port to dislodge and remove any stubborn debris.
- Inspect and Reconnect: After cleaning the charging port, take a moment to inspect it for any remaining dirt or damage. Once you’re satisfied with the cleanliness, reconnect the charger to the device and see if the charging issue has been resolved.
Regularly cleaning the charging port can help maintain a reliable connection and prevent future charging problems. It’s recommended to clean the port every few months or whenever you notice any charging irregularities due to dirt or debris accumulation.
Test with a Different Device
If your charger is not working properly, it’s essential to determine whether the issue lies with the charger itself or with the device you’re trying to charge. Testing the charger with a different device can help identify the source of the problem. Here’s how to test your charger with a different device:
- Select a Different Device: Choose another device that uses the same type of charger. It could be a phone, tablet, or any other compatible device.
- Confirm Charger Compatibility: Ensure that the charger you’re using is compatible with the second device. Check the charger’s specifications and the device’s charging requirements to verify compatibility.
- Connect the Charger: Plug the charger into the second device’s charging port. Make sure the connection is secure and snug.
- Monitor the Charging Process: Observe the charging process of the second device. Pay attention to any signs of charging, such as the battery icon or an LED indicator. If the device starts charging without any issues, it indicates that the charger is functioning correctly.
- Check for Charging Interruptions: Leave the charger connected to the second device for some time and monitor if it continues to charge consistently. Watch out for any interruptions or fluctuations in the charging process.
If the charger successfully charges the second device without any problems, it suggests that the issue lies with the original device rather than the charger. You can then concentrate your troubleshooting efforts on the device’s charging port, battery, or other possible causes. On the other hand, if the charger fails to charge the second device or exhibits the same issues, it’s likely that the charger itself is faulty.
By testing the charger with a different device, you can pinpoint whether the problem is with the charger or the original device. This knowledge will guide you in finding the most appropriate solution to fix the charger or resolve the charging issues on your device.
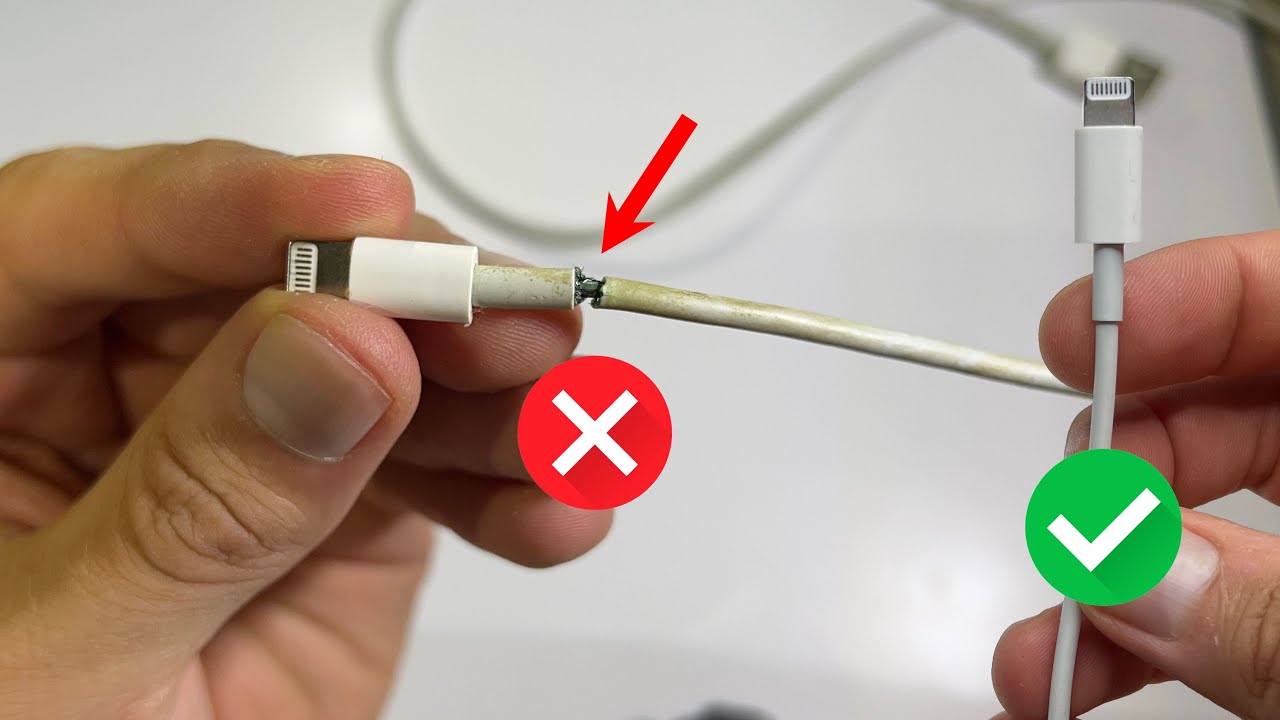
Check for Frayed Wires
Frayed wires can be a common problem that causes charging issues with chargers. If you suspect that frayed wires are the cause of your charging problems, follow these steps to check for and address any frayed wires:
- Unplug the Charger: Make sure the charger is unplugged from both the power outlet and the device you’re trying to charge. This will ensure your safety during the inspection process.
- Inspect the Charger Cable: Carefully examine the entire length of the charger cable. Look for any visible signs of fraying, such as exposed wires, outer insulation damage, or areas where the wires are coming loose from the connector or cable.
- Bend and Flex the Cable: Gently bend and flex the cable along its length, paying attention to areas where you suspect frayed wires. If there are any weak spots or areas where the cable feels excessively soft or flimsy, it’s an indication of internal wire damage.
- Avoid Charging with Frayed Wires: If you notice frayed wires, it’s crucial to avoid using the charger until the issue is resolved. Charging with damaged wires not only poses a risk to your device but also puts you at risk of electrical shock or other hazards.
- Repairing Frayed Wires: If the fraying is minimal and near the connector or charger end, you may be able to fix it with electrical tape. Carefully wrap electrical tape around the damaged section, ensuring it is tightly secured and covers the exposed wires. However, this is only a temporary solution, and it’s recommended to replace the charger as soon as possible.
- Consider Professional Repair or Replacement: In the case of extensive wire damage or if the charger continues to exhibit charging issues even after temporary repair, it’s best to seek professional repair or replace the charger altogether.
Checking for frayed wires is vital to ensure the safe and efficient operation of your charger. If you notice any signs of fraying or internal wire damage, it’s crucial to address the issue promptly to avoid further complications.
Use Electrical Tape as a Temporary Fix
When your charger cable has frayed wires or exposed conductors, using electrical tape can be a temporary solution to prevent further damage and maintain functional charging. Here’s how you can use electrical tape as a temporary fix for your charger:
- Gather the Required Materials: You’ll need electrical tape and a pair of sharp scissors or a utility knife to cut the tape.
- Identify the Frayed Area: Locate the frayed section of the charger cable. Look for any exposed wires or damage in the outer insulation.
- Trim the Frayed Ends (if necessary): If the frayed ends are long or uneven, use the scissors or utility knife to carefully trim them. This will create a neater surface for applying the electrical tape.
- Secure the Frayed Area: Take a length of electrical tape and wrap it around the frayed section of the charger cable. Start a few centimeters above the damaged area and continue wrapping the tape until a few centimeters beyond it. Ensure that the tape is tightly secured and covers the damaged part completely.
- Smooth Out Any Bumps or Lumps: After wrapping the tape, use your fingers to smooth out any bumps or lumps. This will improve the aesthetics and ensure a secure hold of the electrical tape on the cable.
- Test the Charger: Plug the charger into a power outlet and connect it to the device. Check if the charger is functioning correctly and charging your device without any issues. Monitor the charging process for a while to ensure stability.
It’s important to note that using electrical tape is a temporary solution and should not be considered a permanent fix. While it can provide a temporary fix for frayed wires, it’s essential to replace the charger as soon as possible to ensure safe and reliable charging in the long run.
Using electrical tape as a temporary fix can help prevent further damage and extend the usability of your charger until you can obtain a replacement. However, remember that this should only be a short-term solution, and investing in a new charger is the best course of action for long-term charging reliability.
Replace Damaged Parts
If you’ve identified specific damaged parts in your charger, such as a frayed cable, broken connector, or other components, replacing those parts is often the best solution. Here’s how you can go about replacing damaged parts in your charger:
- Identify the Damaged Part: Determine which part of the charger is damaged and needs replacement. It could be the charger cable, connector, power adapter, or any other component.
- Order Replacement Parts: Find a reputable supplier or contact the manufacturer to order the specific replacement parts you need. Make sure to provide accurate details about the charger model and the damaged part.
- Follow Disassembly Instructions: Depending on the charger model, you may need to disassemble it to access and replace the damaged parts. Refer to the manufacturer’s instructions or search online for disassembly guides specific to your charger model.
- Replace the Damaged Part: Once you have the replacement part, carefully remove the damaged part from the charger and replace it with the new one. Make sure to follow the instructions and guidelines provided by the manufacturer.
- Reassemble the Charger: If you had to disassemble the charger, carefully reassemble it according to the instructions. Ensure that all the parts are properly aligned and secured.
- Test the Charger: Plug the charger into a power outlet and connect it to a device to test its functionality. Check if the charger charges the device properly and if there are no further issues.
Replacing damaged parts in your charger can help restore its functionality and extend its lifespan. However, it’s important to note that not all chargers are designed to be easily repairable, and some may have sealed or non-replaceable components. In such cases, it may be more practical to replace the entire charger instead of individual parts.
If you’re unsure about the process of replacing specific parts or if you don’t have the necessary tools or expertise, it’s advisable to seek professional help or consult with the charger’s manufacturer for guidance. They can provide the necessary guidance and ensure that the replacement is done correctly.
Remember, safety is paramount when working with electrical components. Always handle chargers and replacement parts with caution, and if you’re unsure, it’s best to consult a professional to avoid any risks or hazards.
Purchase a New Charger
If your charger is beyond repair or if you’re experiencing persistent charging issues that cannot be resolved, it may be time to purchase a new charger. Here are some considerations to keep in mind when buying a new charger:
- Compatibility: Ensure that the new charger is compatible with your device. Check the specifications of your device and look for a charger that matches the required voltage, amperage, and connector type.
- Quality: Invest in a charger from a reputable brand or manufacturer. Cheap or counterfeit chargers may be lower in price, but they can compromise the safety and performance of your device. Opt for chargers that are certified and meet safety standards.
- Read Reviews: Before making a purchase, read reviews and feedback from other customers. This will give you insight into the quality, durability, and performance of the charger you’re considering.
- Consider Fast Charging: If your device supports fast charging, look for a charger that offers this feature. Fast charging can significantly reduce the time it takes to charge your device fully.
- Long Cable Length: Choose a charger with a cable length that suits your needs. If you often use your device while it’s charging, a longer cable can provide more flexibility and convenience.
- Warranty: Check if the charger comes with a warranty. A warranty can offer peace of mind and protection against any manufacturing defects or malfunctions.
- Price: While it’s essential to consider your budget, prioritize quality and reliability over the price alone. Investing in a good charger can save you money in the long run by preventing damage to your device and ensuring efficient charging.
When purchasing a new charger, consider buying from reputable retailers, either online or in-store, to ensure product authenticity and customer support. Take your time to research and compare different options to find the best charger that meets your needs and requirements.
Remember to dispose of your old charger responsibly. Many electronics retailers offer recycling programs for old chargers and other electronic devices, which helps reduce environmental impact.
By purchasing a new charger that meets the necessary requirements and quality standards, you can ensure safe and reliable charging for your device, providing peace of mind and optimal performance.